April 3, 2023
Pitch A Perfect Layout With This Camping Scrapbook Idea
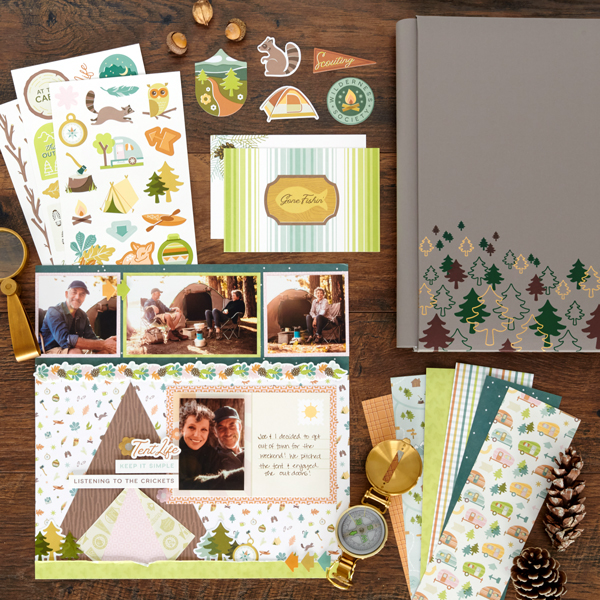
We’re embracing the great outdoors, RV road trips, kayaking down a river, fishing with family, bonfires with s’mores and camping and staying in cabins, tents or cottages, because today is all about the Set Up Camp collection launch! And to pitch it all up, enjoy this camping scrapbooking layout with a tent decorative element that you can make in a snap!
To create this layout you will need:
- Set Up Camp Paper Pack or (Shop Canada | Shop Australia)
- Set Up Camp Stickers or (Shop Canada | Shop Australia)
- Set Up Camp Embellishments or (Shop Canada | Shop Australia)
- Set Up Camp Variety Mat Pack or (Shop Canada | Shop Australia)
- 12-inch Trimmer or (Shop Canada | Shop Australia)
- Tape Runner or (Shop Canada | Shop Australia)
- Repositionable Tape Runner or (Shop Canada | Shop Australia)
- Foam Squares or (Shop Canada | Shop Australia)
- CM Zero-Centering Ruler or (Shop Canada | Shop Australia)
- Pencil
Check out the Set Up Camp collection in the video below.

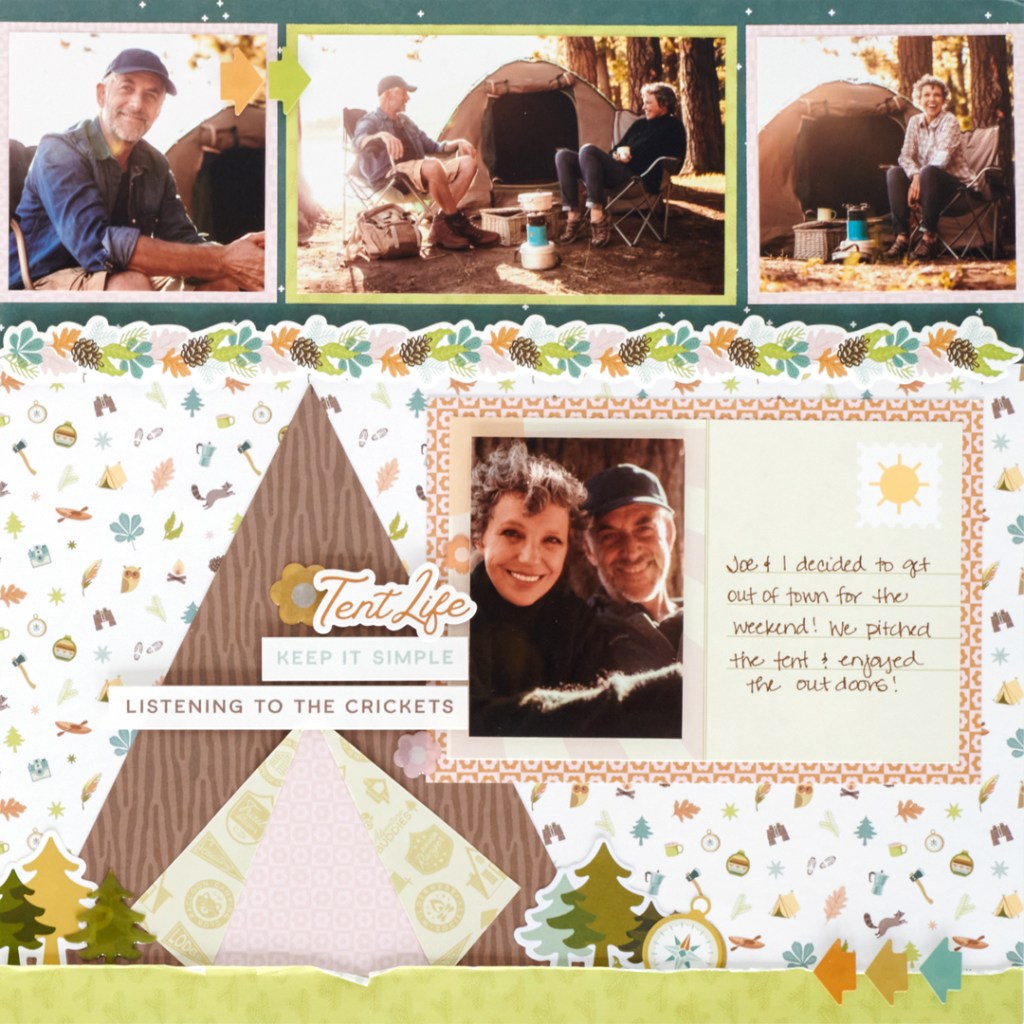
Step 1: Use the dark green night sky paper as the base for the layout.
Step 2: Cut a piece of the camping icons paper to measure 12” x 8”. Adhere to the layout.
Step 3: Cut a piece of woodgrain paper to measure 7” x 7”. Along the top edge, mark with a pencil at 3-1/2”. Using the 12-inch Trimmer, cut from this pencil marking out to each of the bottom corners to create the triangle (“tent”).
Step 4: Using the 12-inch Trimmer, cut from the bottom-middle up about 3-1/4″. Fold the sides back from the slit to create the tent “opening”.
Step 5: Cut a piece of pink flower checkers paper to measure 3-1/2” x 3-1/2”. Adhere behind the tent opening.
Step 6: Adhere the tent to the layout, about 1/2” from the bottom edge on the left side.
Step 7: Cut a piece of olive green pine needles paper to measure 12” x 3/4”. Adhere to the bottom edge of the layout, overlapping the tent slightly. Run your fingernail under the edge of the green paper to give it a distressed look.
Step 8: Layer and adhere a large and small mat to the right of the tent.
Step 9: Cut a photo to measure 2-1/2” x 3-1/2”. Adhere to the mat using Foam Squares.
Step 10: Cut two photo mats from pink flower checkers paper to measure 3-1/4” x 3-1/4”.
Step 11: Cut a photo mat from olive green pine needles paper to measure 5-1/4” x 3-1/4”.
Step 12: Adhere the photo mats to the top of the layout.
Step 13: Adhere photos that measure (2) 3” x 3” and (1) 5” x 3”.
Step 14: Adhere stickers and embellishments, adhering Foam Squares on some for added dimension.
Step 15: Journal as desired.
Where are your go-to camping spots or your most beloved camping vacation? Will you be pitching together this camping scrapbook layout to commemorate your outdoorsy escapades?
P.S. Are YOU a member of the Virtual Crop Facebook Group? It’s your go-to place for MONTHLY Virtual Crops, MONTHLY Completed Album Challenges, WEEKLY LIVE STREAMING of Fast & Fun Projects with Noreen, LIVE QUARTERLY Secret Box Openings with project tutorials and so much more! We hope you’ll join our community of more than 31,000 fellow memory-keeping enthusiasts — you’ll feel right at home!

I love the way you put a picture on one side of the photo mat and journaled on the other. Cute layout!
Se of the photo mats come already flatter like that.
Love, love, love, LOVE that tent! Thanks for this one!
So fabulous Melissa . Can’t wait to get this product to scrabook our camping memories