May 2, 2023
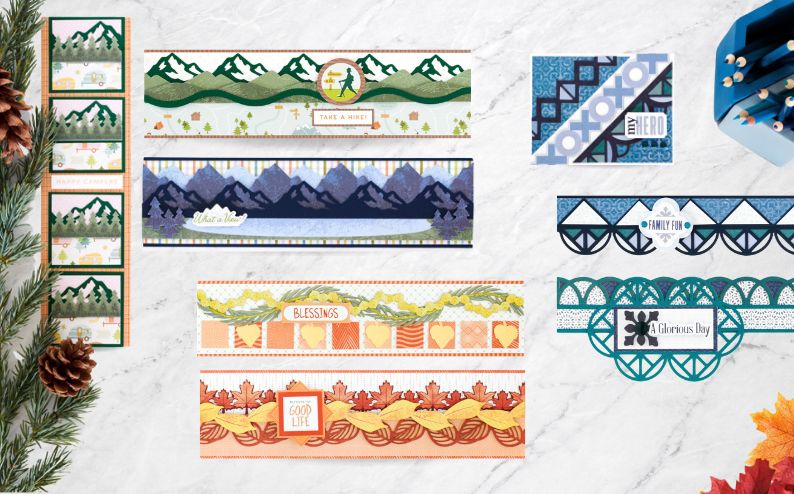
Embellishments Buffet: Scrapbook Borders and DIY Cards
For a limited time, you can purchase limited-edition embellishments packs AND have the opportunity to earn exclusive Vivid Melodies Heart Sticker Packs and Mauve & Violet Metallic Dot Tip Pens FREE! You’ll love these limited-edition embellishments packs for ALL sorts of projects — from camping trips and hiking memories to visiting art museums, autumnal adventures, everyday moments and so much more!
PLUS, when you purchase 6+ limited-edition embellishments packs, you’ll enjoy the freebies as the perfect complement to your layouts of anniversaries, birthdays, kids, pets and more — the limits are endless for the pristine projects you can create using products from the Embellishments Buffet! Looking for somewhere to start? Let these scrapbook borders and DIY cards inspire you!
For more details, visit: US | CA | AU

To create the Mountain Views borders you will need:
- Mountain Views Layered Borders or (Shop Canada | Shop Australia) — limited-edition embellishments pack that qualifies for the Embellishments Buffet
- Set Up Camp Paper Pack or (Shop Canada | Shop Australia)
- Set Up Camp Stickers or (Shop Canada | Shop Australia)
- Navy & Dark Green Solid Cardstocks or (Shop Canada | Shop Australia)
- 12-inch Trimmer or (Shop Canada | Shop Australia)
- 12-inch Decorative Trimmer or (Shop Canada | Shop Australia)
- Circle Punch or (Shop Canada | Shop Australia)
- Alpine Mountains Border Punch — previously sold
- Repositionable Tape Runner or (Shop Canada | Shop Australia)
- Foam Squares or (Shop Canada | Shop Australia)
What A View Border

Step 1: Cut Navy Solid Cardstock to 12” x 3-1/4”.
Step 2: Cut plaid paper to 12” x 3”. Adhere to the navy strip.
Step 3: Use the Alpine Mountains Border Punch to punch a border from Navy Solid Cardstock. Cut the cardstock at 2-1/4”. Adhere to the mountains layered border.
Step 4: Adhere the lake/trees layered border to the mountain border.
Step 5: Use Foam Squares on the bottom of the mountain border and Repositionable Tape on the top of the border to adhere the piece to the middle of the plaid strip.
Step 6: Add a title with Foam Squares.
Take A Hike Border
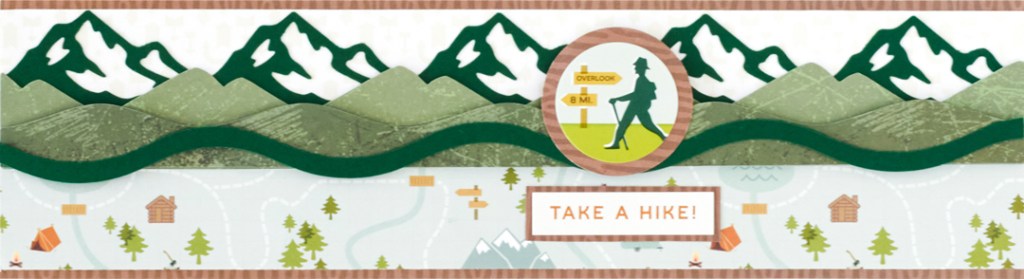
Step 1: Cut woodgrain paper to 12” x 3-1/4”.
Step 2: Cut 12” x 1-1/2” strips from map paper and trail map paper. Adhere both pieces to the woodgrain strip.
Step 3: Use the Alpine Mountains Border Punch to punch a border from Dark Green Solid Cardstock. Cut the cardstock at 1-1/2”. Adhere to the top portion of the border.
Step 4: Adhere the layered mountains laser border to the middle of the border.
Step 5: Use the 12-inch Decorative Trimmer to cut a 12” x 1/4” wavy strip. Adhere to the bottom of the layered mountains piece.
Step 6: Punch a circle from woodgrain paper using the Circle Punch. Adhere stickers and adhere to the border.
Step 7: Mat a title sticker with woodgrain paper and adhere to the border.
Happy Camper Border

Step 1: Cut rust plaid paper to 3-1/4” x 12”.
Step 2: Cut four 2-3/4” x 2-3/4” squares from Dark Green Cardstock.
Step 3: Cut four 2-1/2” x 1-1/4” pieces from pink blooms paper. Cut four 2-1/2” x 1-1/4” pieces from the camper paper. Align the pieces in the middle and adhere to the dark green squares.
Step 4: Use the Alpine Mountains Border Punch to punch a border from Dark Green Solid Cardstock. Cut off the cardstock at 1-1/2”. Cut the border into four 2-1/2” segments. Adhere the segments to the upper part of the square pieces.
Step 5: Cut the pine trees laser border into four 2-1/2” segments. Align and adhere to the middle of the squares.
Step 6: Add a title sticker with Foam Squares.

To create the Stained Glass borders and card you will need:
- Stained Glass Laser Cut Borders or (Shop Canada | Shop Australia) — limited-edition borders pack that qualifies for the Embellishments Buffet
- Cue the Blue Paper Pack or (Shop Canada | Shop Australia)
- Cue the Blue Embellishments or (Shop Canada | Shop Australia)
- Navy & Dark Sea Green Solid Cardstocks or (Shop Canada | Shop Australia)
- Blank Card Kit or (Shop Canada | Shop Australia)
- 12-inch Trimmer or (Shop Canada | Shop Australia)
- Geometric Frame Punch or (Shop Canada | Shop Australia)
- Circle Punch or (Shop Canada | Shop Australia)
- All-Purpose Scissors or (Shop Canada | Shop Australia)
- Repositionable Tape Runner or (Shop Canada | Shop Australia)
- Foam Squares or (Shop Canada | Shop Australia)
Family Fun Border

Step 1: Use the Geometric Frame Punch to punch a border from Navy Solid Cardstock. Cut off the cardstock at 2-1/4”.
Step 2: Cut a 12” x 1” strip from the blue ornate tiles paper and adhere to the border an 1/8” down from the top edge.
Step 3: Cut three 1-3/8” x 1-3/8” squares from Navy Solid Cardstock. Cut squares in half on the diagonal and adhere the triangles to the border.
Step 4: Cut three 1-1/4” x 1-1/4” squares from the light foliage paper. Cut squares in half on the diagonal and adhere the triangles to the navy triangles.
Step 5: Adhere the triangles stained glass laser border as shown.
Step 6: Add embellishment with Foam Squares.
A Glorious Day Border

Step 1: Use the Circle Punch to punch six circles from the floral mosaic paper. Punch six circles from the geometric trellis paper.
Step 2: Adhere the circles underneath the scallop laser border.
Step 3: Cut a 12” x 1” strip from Dark Sea Green Solid Cardstock. Cut a 12” x 3/4” strip from the floral mosaic paper. Layer and adhere the strips to the top of the border.
Step 4: Use the Geometric Frame Punch to punch a frame from a 6” x 4” piece of Dark Sea Green Solid Cardstock. Adhere the frame to the border as shown.
Step 5: Cut the geometric trellis paper to 3-3/4” x 1-1/2”, and adhere it to the frame piece. Cut the white grid paper to 3-1/2” x 1-3/8” and adhere to the geometric trellis piece.
Step 6: Add embellishments using Foam Squares.
XOXO Card

Step 1: Cut the blue ornate tiles paper to 3-3/4” x 3-3/4” and cut it in half on the diagonal.
Step 2: Adhere the diamonds and solid scallop laser borders to the long edges of the triangles. Use the All-Purpose Scissors to cut off any overhang.
Step 3: Adhere the triangles to the corners of a blank card base leaving a 1/8” edge along the outside.
Step 4: Adhere the XO laser border to the middle of the card and use the All-Purpose Scissors to cut off the overhang.
Step 5: Add embellishments.

To create the Falling Leaves borders and card you will need:
- Falling Leaves Laser Cut Borders or (Shop Canada | Shop Australia) — limited-edition borders pack that qualifies for the Embellishments Buffet
- Totally Tonal Tangerine Paper Pack or (Shop Canada | Shop Australia)
- Totally Tonal Tangerine Stickers or (Shop Canada |Shop Australia)
- Canary Solid Cardstock or (Shop Canada | Shop Australia)
- Blank Card Kit or (Shop Canada | Shop Australia)
- 12-inch Trimmer or (Shop Canada | Shop Australia)
- Autumn Leaves Border Punch or (Shop Canada | Shop Australia)
- 2-Way Corner Rounder or (Shop Canada | Shop Australia)
- Micro-Tip Scissors or (Shop Canada | Shop Australia)
- Multi-Purpose Tool or (Shop Canada | Shop Australia)
- Repositionable Tape Runner or (Shop Canada | Shop Australia)
- Foam Squares or (Shop Canada | Shop Australia)
Good Life Border

Step 1: Cut the chevron paper to 12” x 3-1/4”.
Step 2: Cut the circle tile paper and cascading dots paper to 12” x 1-1/2”. Adhere strips to the middle of the chevron piece.
Step 3: Adhere the maple leaves and pear ovate leaves laser borders to the middle of the border as shown.
Step 4: Use Foam Squares to adhere the yellow chokecherry leaves laser border to the middle of the border.
Step 5: Add a sticker.
Blessings Border

Step 1: Cut the waves paper to 12” x 2-3/4”.
Step 2: Cut the crosshatch paper to 12” x 2-1/2” and adhere to the waves strip.
Step 3: Cut ten 1”x 1” squares from a variety of papers. Adhere to the border as shown.
Step 4: Use the Falling Leaves Border Punch to punch a border from Canary Solid Cardstock. Use Micro-Tip Scissors to cut apart the elm leaves. Adhere the single-leaf pieces to the squares as shown. Use the pointed end of the Multi-Purpose Tool to emboss lines onto the cardstock leaf pieces.
Step 5: Overlap and adhere the aspen leaves and willow branches laser borders as shown.
Step 6: Add a sticker with Foam Squares.
Life is a Beautiful Ride Card
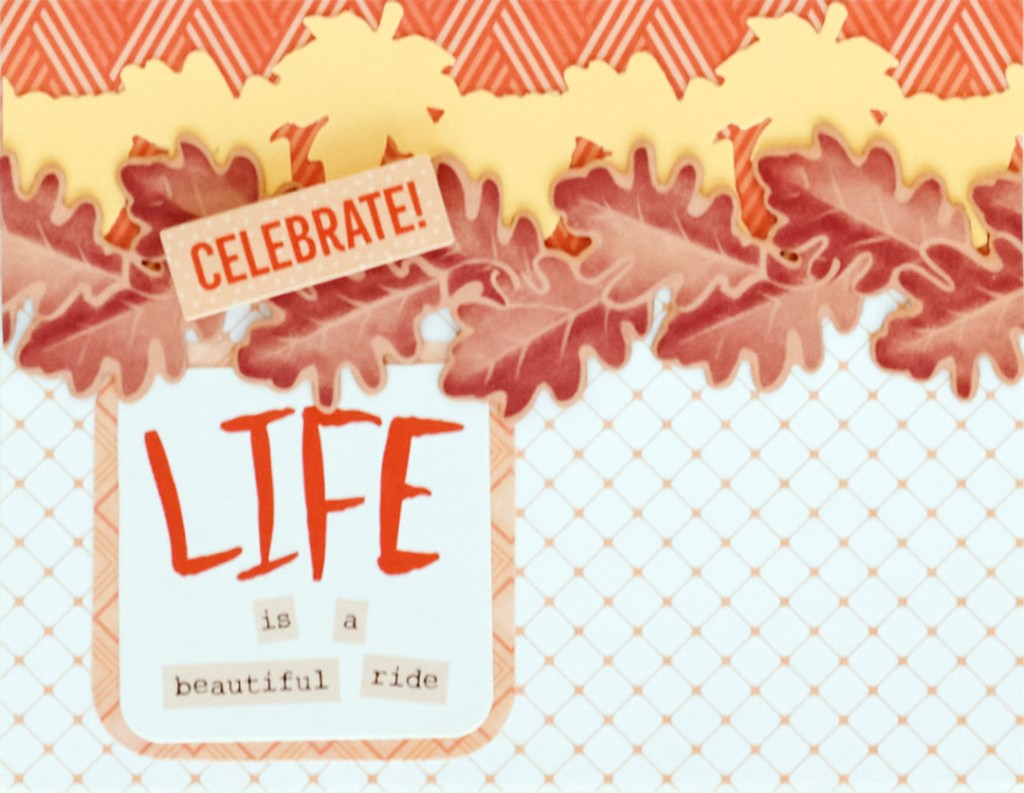
Step 1: Cut the crosshatch paper to 5-1/2” x 4-1/4” and adhere to a blank card base.
Step 2: Cut the chevron paper to 5-1/2” x 1-1/2” and adhere to the top of the card.
Step 3: Use the Falling Leaves Border Punch to punch a border from Canary Solid Cardstock. Cut the border to 5-1/2” in length and adhere to the top of the card.
Step 4: Cut a piece of the plaid paper to 2-1/4” x 2-1/4” and use 2-Way Corner Rounder to punch the corners. Adhere the title sticker to the square. Adhere to the card as shown.
Step 5: Adhere the oak leaves laser border to the card as shown.
Step 6: Add a title sticker with Foam Squares.
Which set of projects catches your eye — Mountain Views, Stained Glass or Falling Leaves? Or, maybe you’re loving all three (we know we sure are)! Have you ordered your limited-edition embellishments packs and gotten your FREE gifts yet?!
P.S. Are YOU a member of the Virtual Crop Facebook Group? It’s your go-to place for MONTHLY Virtual Crops, MONTHLY Completed Album Challenges, WEEKLY LIVE STREAMING of Fast & Fun Projects with Noreen, LIVE QUARTERLY Secret Box Openings with project tutorials and so much more! We hope you’ll join our community of more than 32,000 fellow memory-keeping enthusiasts — you’ll feel right at home!
