July 7, 2023
Crown Your Regal Memories: Princess Themed Scrapbook Ideas And DIY Card With Tiara Borders

Whether you’re three or 83, we’re all fit to be princesses and queens — a dash of elegance, a sprinkle of confidence, crowning beauty inside and out. Speaking of crowning, enthrone some really royal jewels (or designs!) to your happily ever afters of themed birthday parties, sleepovers, weddings and stylish balls with these princess themed scrapbook ideas and DIY card featuring tiara borders!
To create these borders you will need:
- Enchanted Princess Paper Pack or (Shop Canada | Shop Australia)
- Enchanted Princess Stickers or (Shop Canada | Shop Australia)
- Island Waters, Soft Pink, Purple Ice, Eggplant & White Solid Cardstocks or (Shop Canada | Shop Australia)
- Original Border Maker System with Tiara Chain Border Maker Cartridge or (Shop Canada | Shop Australia)
- Fireworks Punch
- Custom Cutting System with Circle Patterns or (Shop Canada | Shop Australia)
- 12-inch Trimmer with Straight, Scoring & Scallop Blades or (Shop Canada | Shop Australia)
- Micro-Tip Scissors or (Shop Canada | Shop Australia)
- Tape Runner or (Shop Canada | Shop Australia)
- Repositionable Tape Runner or (Shop Canada | Shop Australia)
- Foam Squares or (Shop Canada | Shop Australia)

Dream Come True Border

Step 1: Using the 12-inch Trimmer and the Scallop Blade, cut a 12” x 2-3/4” strip with magical unicorns paper for the base. Using the 12-inch Trimmer and the Straight Blade, cut a 12” x 2-3/8” strip with soft pink hearts paper and adhere on the base. Cut a 12” x 2” strip with Eggplant Solid Cardstock and mount on top.
Step 2: Using the Original Border Maker System and the Tiara Chain Border Maker Cartridge, punch a border with rainbow ombré paper (pink shade on top). Rotate the paper to the opposite side’s edge (blue-purple shade on top) and punch a second border. Adhere the tiara borders as shown on the border.
Step 3: Adhere stickers, popping the title up with Foam Squares for added dimension.
Princess Border

Step 1: Cut a 12” x 2-3/8” strip with baby blue dot stripes paper for the base. Cut an 11-1/2” x 1-7/8” strip with plaid paper and adhere on the base.
Step 2: Cut a 12” x 1-1/4” strip with White Solid Cardstock. Using the Original Border Maker System and the Tiara Chain Border Maker Cartridge, punch borders with Island Waters, Soft Pink and Purple Ice Solid Cardstocks. Adhere the island waters border on the white strip and trim the strip to 11”. Using scissors, cut out two soft pink and two purple ice tiaras. (Save the rest of the these strips for the “Wish Card” below.) Adhere over the island waters tiaras as shown. Adhere on the border.
Step 3: Add a title sticker using Foam Squares for added dimension.
Wish Card
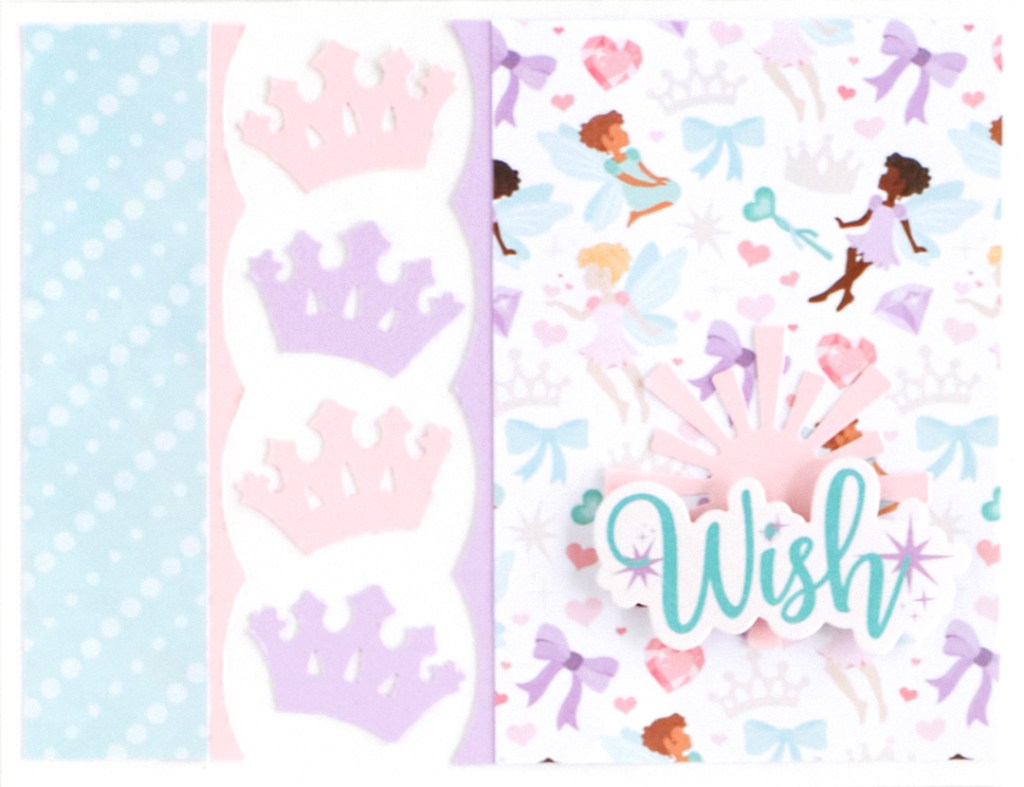
Step 1: Create the card base. Cut an 8-1/2” x 5-1/2” piece of White Solid Cardstock. Using the 12-inch Trimmer and the Scoring Blade, score along the long edge at 4-1/4” and fold in half.
Step 2: Cut a 1” x 4” strip with baby blue dot stripes paper and (lightly) adhere along the left edge of the card, leaving 1/8” around the edges. Cut a 2-3/4” x 4” piece with fairy princesses paper and (lightly) adhere along the right edge of the card, leaving 1/8” around the edges.
Step 3: Using the Original Border Maker System and the Tiara Chain Border Maker Cartridge, punch a border with each Purple Ice and Soft Pink Solid Cardstocks (or use the remains of the borders punched for the “Princess Border”). Using scissors, trim out two soft pink and two purple ice tiaras. Cut a 4” section from both the soft pink and purple ice borders. Pealing up the lightly adhered pieces on the card, tuck the sections behind them, leaving just the scallops showing. Adhere the tiaras, alternating hues, as shown.
Step 4: Using the Fireworks Punch, punch a fireworks shape with Soft Pink Solid Cardstock. Adhere on the card. Mount the title sticker on top using Foam Squares for added dimension.
Do you like the light, airy and dreamy hues of these princess themed scrapbook ideas? How would you integrate tiara borders into your next to-do project(s)? Share your ideas with us and other scrapbooking queens in the comments section!
P.S. Are YOU a member of the Virtual Crop Facebook Group? It’s your go-to place for MONTHLY Virtual Crops, MONTHLY Completed Album Challenges, WEEKLY LIVE STREAMING of Fast & Fun Projects with Noreen, LIVE QUARTERLY Secret Box Openings with project tutorials and so much more! We hope you’ll join our community of more than 33,000 fellow memory-keeping enthusiasts — you’ll feel right at home!
