January 19, 2024
Reach New Heights With These Mountain Borders (& Learn About 12-inch Trimmer Blades!)
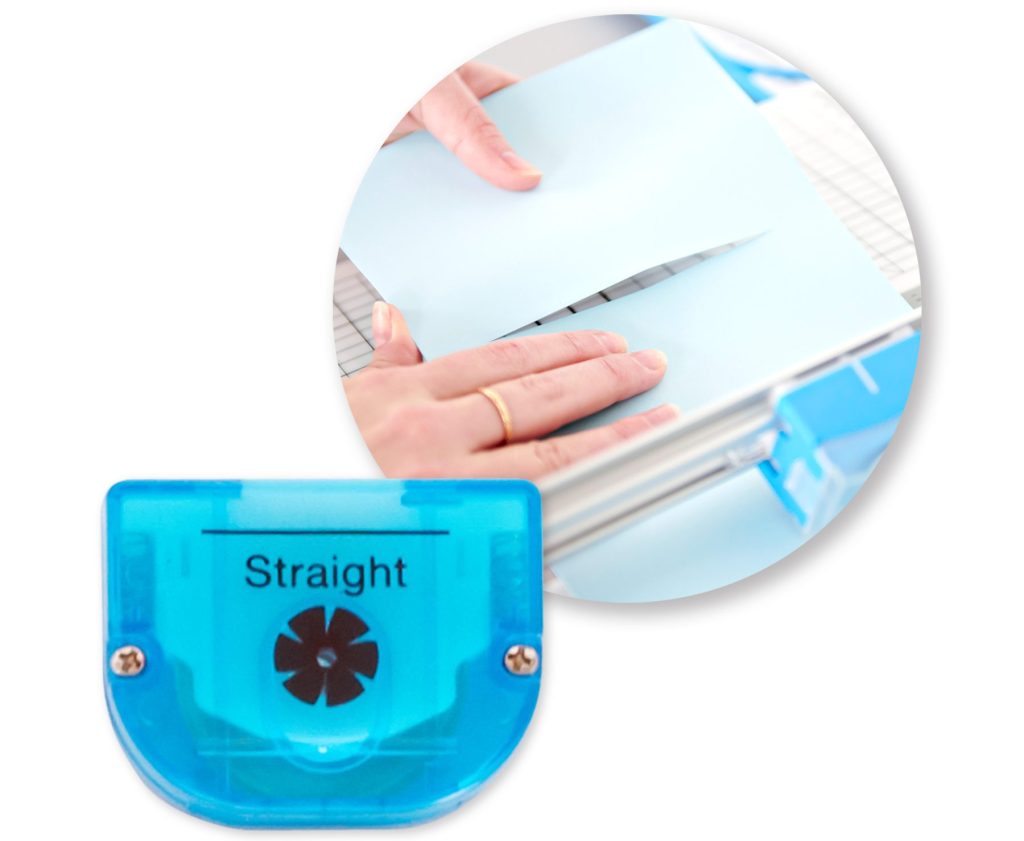
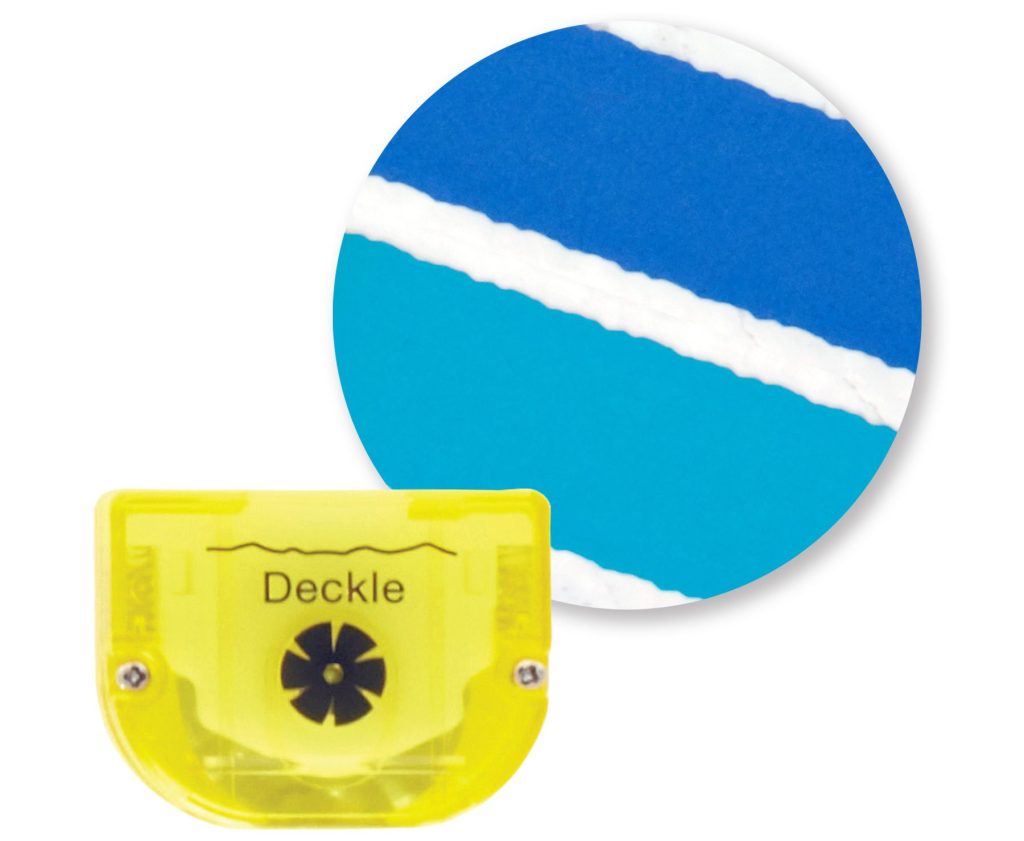
Create mountain borders that’ll rock your layouts AND get ready to play with three of the eight 12-inch Trimmer Blades we offer — the Straight Blade, Victorian Blade and Deckle Blade — with today’s projects!
Each 12-inch Trimmer Blade has a unique cutting pattern, making the decorative possibilities endless when using them with the best-selling 12-inch Trimmer! Curious to learn more about CM’s trimmer blades? Great! You can check out the bottom of this post!

To create these borders you will need:
- Nordic Winter Paper Pack or (Shop Canada | Shop Australia)
- Nordic Winter Embossed Embellishments or (Shop Canada | Shop Australia)
- Nordic Winter Stickers or (Shop Canada | Shop Australia)
- Snow Capped Mountains Border Punch or (Shop Canada | Shop Australia)
- White, Baby Blue & Hot Fudge Solid Cardstocks or (Shop Canada | Shop Australia)
- 12-inch Trimmer with Straight, Victorian & Deckle Blades or (Shop Canada | Shop Australia)
- Micro-Tip Scissors or (Shop Canada | Shop Australia)
- Tape Runner or (Shop Canada | Shop Australia)
- Repositionable Tape Runner or (Shop Canada | Shop Australia)
- Foam Squares Variety Pack or (Shop Canada | Shop Australia)


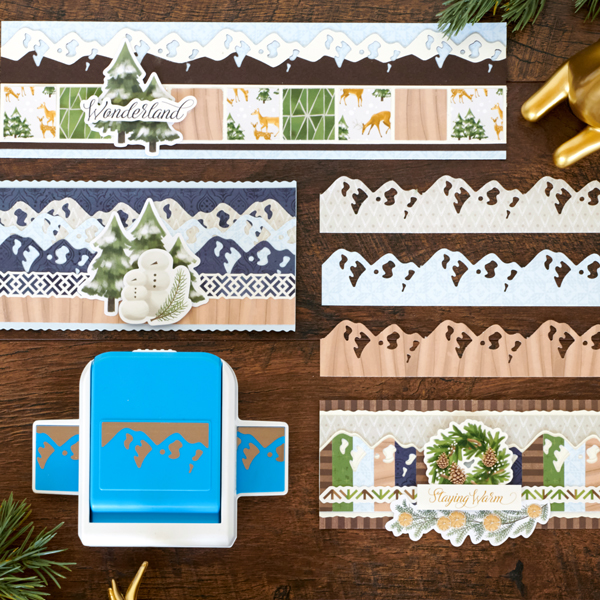
Mountain Range Border

Step 1: Using the 12-inch Trimmer and the Victorian Blade, cut a 12” x 3-1/2” strip with Baby Blue Solid Cardstock for the base. Using the Straight Blade, cut a 12” x 2” strip with navy trellis paper and adhere near the top of the base. Cut a 12” x 1-1/4” strip with woodgrain paper and adhere near the bottom of the base.

Step 2: Using the Snow Capped Mountains Border Punch, punch a border with beige V’s paper. Trim to 12” x 1-3/4” and adhere to the border. Position the reverse side of the light blue quilt paper in the middle of the punch (instead of at the black line on the front of the punch). Punch the strip, moving the strip as needed to punch the entire length. Trim to 12” x 1-1/2”, flip to the light blue quilt side and adhere just below the beige V’s mountains strip. Punch a border with navy trellis paper (aligned as usual at the black line on the front), trim to 12” x 1” and adhere just below the light blue quilt mountain strip.
Step 3: Place a geo border sticker just below the mountains. Adhere embellishments, popping the snowmen up with Foam Squares for dimension.
Wonderland Border

Step 1: Cut a 12” x 3-1/4” strip with light blue quilt paper for the base.
Step 2: Using the Snow Capped Mountains Border Punch, punch a border with Hot Fudge Solid Cardstock. Trim to 12” x 2-7/8” and adhere to the base. Punch a border with White Solid Cardstock. Using Micro-Tip Scissors, cut out “snow caps” and adhere on the hot fudge piece.
Step 3: Cut a 12” x 1-3/8” strip with White Solid Cardstock. Adhere on the border. Cut nine 1-1/4” squares with deer, green tiles and woodgrain papers (3 of each). Adhere on the white strip, alternating paper designs.
Step 4: Adhere the trees embellishment and the “Wonderland” sticker on top with Foam Squares.
Staying Warm Border

Step 1: Cut a 12” x 3” strip with brown stripes paper for the base. Using the 12-inch Trimmer and the Deckle Blade, cut a 12” x 2-1/2” strip with White Solid Cardstock and adhere to the base. Using the Straight Blade, cut a 12” x 2-1/4” strip with beige V’s paper and adhere on top.
Step 2: Using the Snow Capped Mountains Border Punch, punch a border with White Solid Cardstock. Trim to 12” x 1-15/16” and adhere to the border. Replace the white punched-out pieces back into the border to fill in the mountains.
Step 3: Cut a 12” x 2” strip with scrap paper. Apply ample Repositionable Tape Runner to this strip. Cut a variety of 1/2” x 2” strips with several tonal paper scraps. Lay the pieces side by side along the strip, alternating papers. Punch along one long edge using the Snow Capped Mountains Border Punch. Trim to 12” x 1-7/8” and mount on top of the white border so just the top white edge of the mountain shows.
Step 4: Adhere embellishments and stickers, popping some up with Foam Squares for dimension.
What are your thoughts on these borders? Have you used all of our 12-inch Trimmer Blades? If so, let us know your favorite in the comments! And if not…
A Few Fun Facts About the 12-inch Trimmer Blades
1) There are currently eight of them — mix and match them for unique cuts on your layouts!
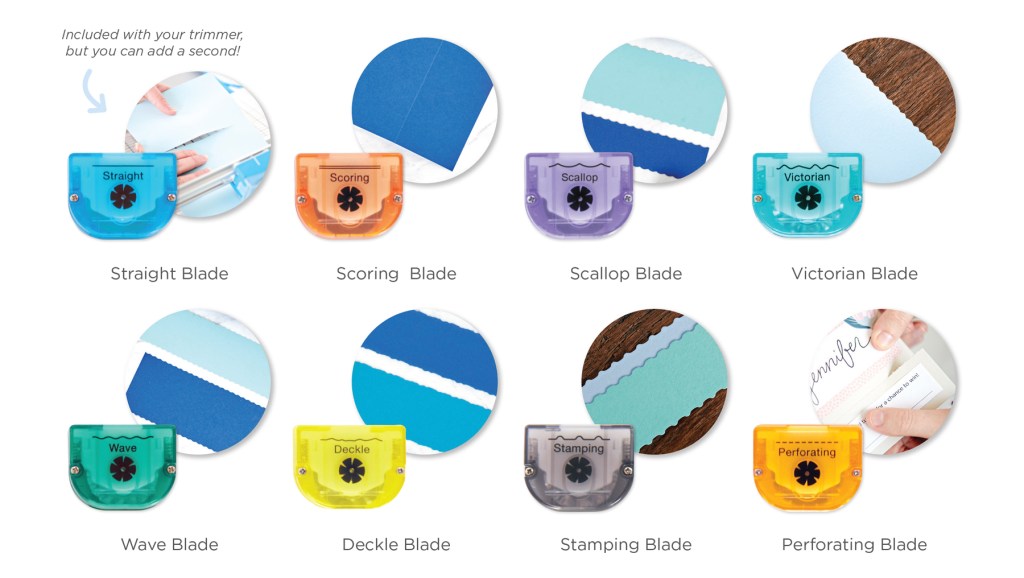
2) The blades are interchangeable AND you can store them underneath the 12-inch Trimmer! The trimmer stores up to 12 blades!

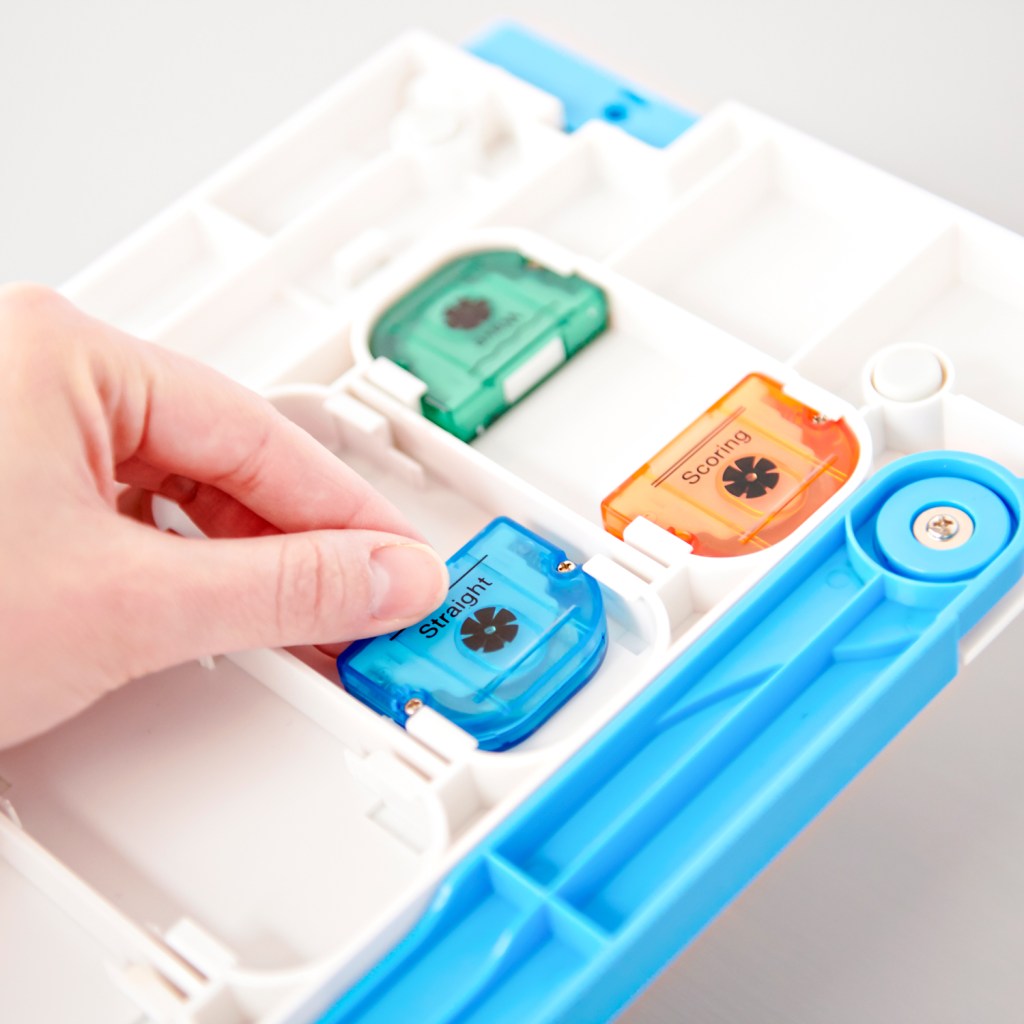
3) Safety casing ensures the blade is not exposed until it is placed into the blade housing and pressed down to initiate — how’s that for peace of mind for moms with small children in the house?!

4) They’re good for up to 1,500 cuts! Just THINK of all the beautiful layouts, cards and crafts you can make with each blade before needing a replacement!

P.S. Are YOU a member of the Virtual Crop Facebook Group? It’s your go-to place for MONTHLY Virtual Crops, MONTHLY Completed Album Challenges, WEEKLY LIVE STREAMING of Fast & Fun Projects with Noreen, LIVE QUARTERLY Secret Box Openings with project tutorials and so much more! We hope you’ll join our community of more than 37,000 fellow memory-keeping enthusiasts — you’ll feel right at home!
