May 14, 2024
Fresh And Floral Spring Scrapbooking Layout

Capture the magic of birds singing in this spring-themed layout, which uses materials from the Birds & Blossoms collection. Using the Custom Cutting System, you can create spots for your photos that look like they’re hanging amongst the flowers. Read on to see how you can create this cute layout!

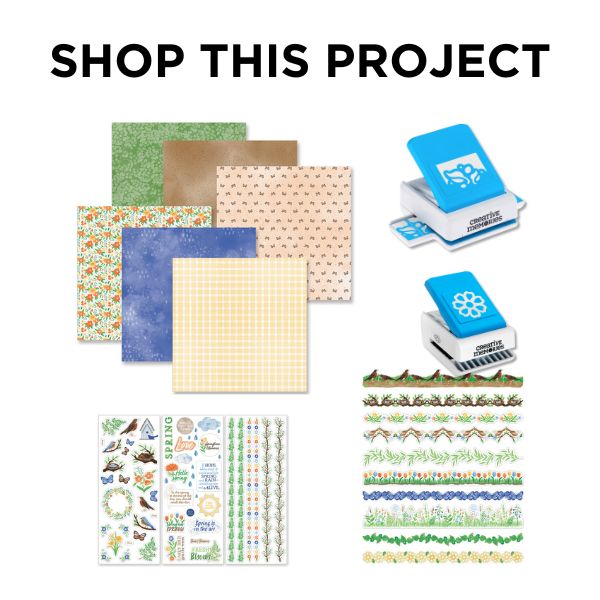
To create this layout you will need:
- Birds & Blossoms Paper Pack or (Shop Canada | Shop Australia)
- Birds & Blossoms Stickers or (Shop Canada | Shop Australia)
- Birds & Blossoms Laser Cut Borders or (Shop Canada | Shop Australia)
- Black & White Solid Cardstocks or (Shop Canada | Shop Australia)
- Write On! Stickers or (Shop Canada | Shop Australia)
- Fresh Flower Punch or (Shop Canada | Shop Australia)
- Spring Leaves Frame Punch or (Shop Canada | Shop Australia)
- 12-inch Trimmer or (Shop Canada | Shop Australia)
- All-Purpose Scissors or (Shop Canada | Shop Australia)
- Tape Runner or (Shop Canada | Shop Australia)
- Repositionable Tape Runner or (Shop Canada | Shop Australia)
- Foam Squares Variety Pack or (Shop Canada | Shop Australia)

Step 1: Use a piece of Black Solid Cardstock as the base of this layout. Cut canary plaid paper to measure 11-3/4? x 11-3/4? and add to the base.
Step 2: Cut greenery paper to measure 11-3/4? x 1/2? and add to the page. Use the Spring Leaves Frame Punch to punch a border from a piece of Black Solid Cardstock. Cut the border at 1-1/4? height. Adhere a piece of greenery paper to the back of the border and trim the excess. Adhere the border to the page.
Step 3: Cut four 1/8? wide strips from a piece of Black Solid Cardstock.
Step 4: Use the Fresh Flower Punch to punch six flower pieces from Black Solid Cardstock. Set aside the inner cutouts to use in Step 6. Using the inside edge of the small Custom Cutting System Circle Pattern and the Red Blade, cut three circles each from orange watercolor and rain papers. Adhere to the back of the black flower pieces and trim the excess with the scissors.
Step 5: Using the outside edge of the small Custom Cutting System Circle Pattern with the Blue Blade, cut three circles from Black Solid Cardstock. Using the outside edge of the small Custom Cutting System Pattern this time with the Green Blade, cut three circles from White Solid Cardstock and adhere to the black circles.
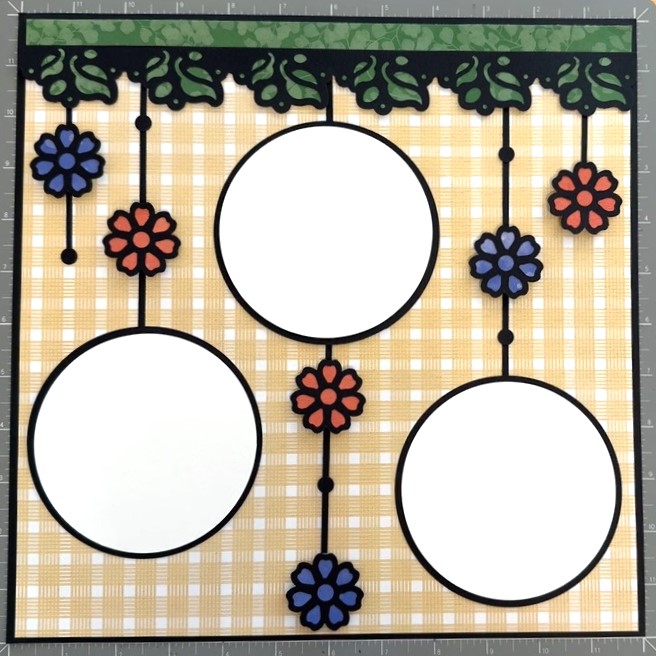
Step 6: Adhere the strips, circle mats, flower segments and small circle cutouts from Step 4 to the page.


Step 7: Adhere the stickers, embellishments and Write On! Stickers, using Foam Squares on some for added dimension.
What do you love most about the spring season? Will you be giving this fun floral page a try?
P.S. Are YOU a member of the Virtual Crop Facebook Group? It’s your go-to place for MONTHLY Virtual Crops, MONTHLY Completed Album Challenges, WEEKLY STREAMING of Fast & Fun Projects with Noreen, QUARTERLY Secret Box Openings with project tutorials and so much more! We hope you’ll join our community of more than 39,000 fellow memory-keeping enthusiasts — you’ll feel right at home!

This amazing ?
Love the black mixed in! Very effective and so pretty!
Thank you I want to scrapbook so bad. But we are getting ready to move so everything is be packed up. To make the big move to another town. I love the work that you ladies shares with us.
Stunning page! Thanks for sharing!