July 16, 2024
Journal On In Your Layouts!

You asked, we listened — the popular Write On! Stickers that previously sold out are now BACK in stock! They help you add extra details and spaces to write, and turn your photos into stories. Want some inspiration on how to use them to take your layouts up a notch? Read on to see how you can get the most out of these stickers!

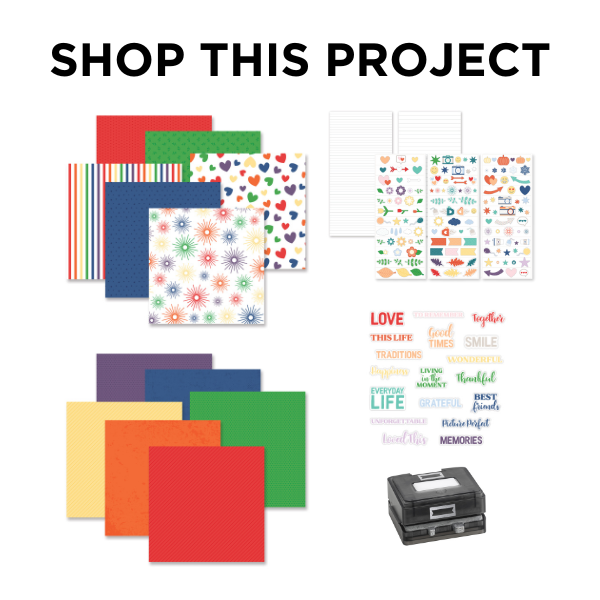
To create this layout you will need:
- Write On! Stickers or (Shop Canada | Shop Australia)
- This Life Paper Pack or (Shop Canada | Shop Australia)
- This Life Tone-on-Tone Paper Pack or (Shop Canada | Shop Australia)
- This Life Word Embellishments or (Shop Canada | Shop Australia)
- This Life Stickers or (Shop Canada | Shop Australia)
- White Solid Cardstock or (Shop Canada | Shop Australia)
- Circle Punch or (Shop Canada | Shop Australia)
- Custom Cutting System with Circle Patterns or (Shop Canada | Shop Australia)
- Original Border Maker System with Banner Cartridge or (Shop Canada | Shop Australia)
- 12-inch Trimmer or (Shop Canada | Shop Australia)
- Micro-Tip Scissors or (Shop Canada | Shop Australia)
- Tape Runner or (Shop Canada | Shop Australia)
- Repositionable Tape Runner or (Shop Canada | Shop Australia)
- Foam Squares Variety Pack or (Shop Canada | Shop Australia)
- Black Dual-Tip Pen or (Shop Canada | Shop Australia)

Step 1: Use a piece of White Solid Cardstock as the base for this layout. Cut a 3? x 12? strip with blue dots tone-on-tone paper and adhere on the left side of the layout.
Step 2: Cut a 9? x 8-3/4? piece with greenery paper and adhere on the middle of the right side of the layout. Cut two 12? x 3/8? strips with stripes paper and adhere above and below the greenery piece, as shown.
Step 3: Using the inside edge of the small Custom Cutting System Circle Pattern and the Red Blade, cut a circle from red stripes tone-on-tone paper, leaving space around it on all sides. Discard the small circle. Then, flipping the Circle Punch upside down (so you can see what you’re doing) align the punch around the piece with the hole in it and punch out a ring. Cut the ring in half. Repeat with pumpkin dots, canary stripes, kelly green dots, blue stripes and eggplant dots papers. Adhere in “ROYGBV” order along the top and bottom of the layout as shown, overlapping the half rings.
Step 4: Crop a photo to 5-3/4? x 4? and mount on a 6? x 4-1/4? piece of White Solid Cardstock. Cut a 6-1/2? x 4-5/8? piece with red dots tone-on-tone paper and mount all on the layout. Crop three photos to 3? x 3? and mount on three 3-1/4? x 3-1/4? pieces of White Solid Cardstock. Adhere on the layout as shown.

Step 5: Cut five 3? pieces from the 3/8? wide Write-On! Stickers. Adhere on the blue dots strip. Journal as desired. Using the Original Border Maker System with the Banner Cartridge, punch three banners with blue, canary and pumpkin papers. Cut three 1-1/4? pieces from 1/4? wide Write-On Stickers. Adhere on the banners, and tuck them behind the large photo as shown. Journal as desired.
Step 6: Adhere stickers and embellishments, popping some up with Foam Squares for dimension.
How excited are you that the Write On! Stickers are back?!
P.S. Are YOU a member of the Virtual Crop Facebook Group? It’s your go-to place for MONTHLY Virtual Crops, MONTHLY Completed Album Challenges, QUARTERLY Secret Box Openings with project tutorials and so much more! We hope you’ll join our community of more than 40,000 fellow memory-keeping enthusiasts — you’ll feel right at home!
