July 26, 2024
Share Your Life With This Rainbow Kraft Layout

Show off your life in full color! This layout takes a rainbow of colors from the This Life collection, so you can make a kaleidoscope out of different colored circles and gemstones, customized to your liking. It’s the perfect way to reminisce on your favorite moments in life. Keep reading to see how you can achieve this layout.

To create this layout you will need:
- This Life Krafted Rainbow Paper Pack or (Shop Canada | Shop Australia)
- This Life Stickers or (Shop Canada | Shop Australia)
- This Life Word Embellishments or (Shop Canada | Shop Australia)
- Red & White Solid Cardstock or (Shop Canada | Shop Australia)
- Custom Cutting System with Circle Patterns or (Shop Canada | Shop Australia)
- 12-inch Trimmer or (Shop Canada | Shop Australia)
- Personal Trimmer or (Shop Canada | Shop Australia)
- Tape Runner or (Shop Canada | Shop Australia)
- Repositionable Tape Runner or (Shop Canada | Shop Australia)
- Foam Squares Variety Pack or (Shop Canada | Shop Australia)
- Navy Dual-Tip Pen or (Shop Canada | Shop Australia)
- CM Zero-Centering Ruler or (Shop Canada | Shop Australia)


Step 1: Use a sheet of kraft grid designer paper as the base for this layout. (Tip: To save paper, create a frame by removing the inside 11? x 11? section of the paper using the 12-inch trimmer.) Cut a sheet of White Solid Cardstock to 11-1/2? x 11-1/2? and adhere on the base frame.
Step 2: Cut an 11-1/2? x 3/8? strip with each: purple ice grid, Kelly green dots and blue stripes papers. Adhere along the bottom of the layout as shown.
Step 3: Create a bubble wand. Using the inside edge of the small Circle Custom Cutting System Pattern and the Red Blade, cut a circle with Red Solid Cardstock and discard. Center the medium Circle Custom Cutting System Pattern on top of the hole. Using the Blue Blade on the inside edge, cut a ring. Using the inside of the small Circle Custom Cutting System Pattern and the Blue Blade, cut a circle from Red Solid Cardstock. Cut a 3-1/2? x 1/4? strip from Red Solid Cardstock. Assemble and adhere the bubble wand on the lower left side of the layout using the Repositionable Tape Runner.
Step 4: Create large bubbles. Using the inside edge of the medium Circle Custom Cutting System Pattern and the Blue Blade, cut a circle with soft pink dots paper. Without moving the pattern, switch to the Green Blade and cut a ring. Flip the ring to the reverse side and adhere behind the bubble wand. Adhere the pink dots circle inside the ring. Repeat with red stripes, canary stripes, dark sea green grid, baby blue dots and purple ice grid papers, adhering on the layout as shown.
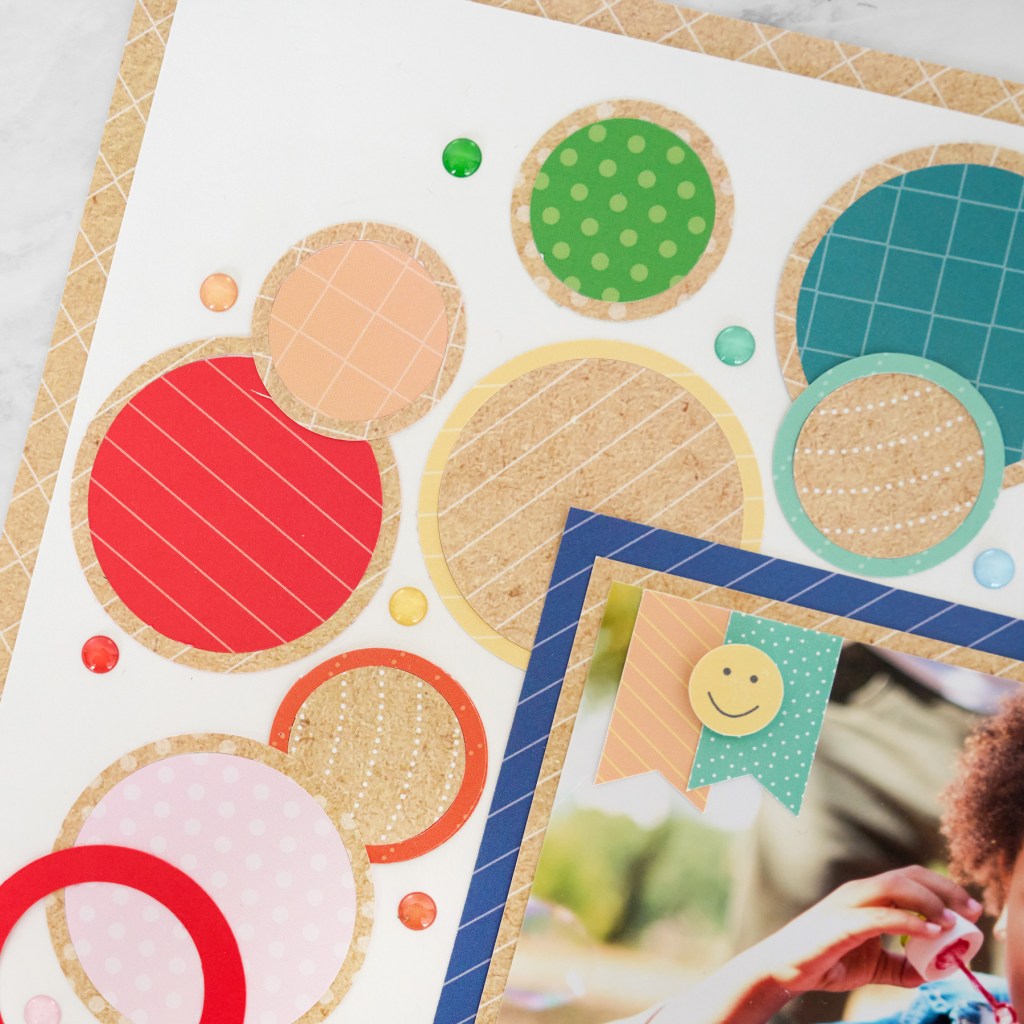

Step 5: Create small bubbles. Using the inside edge of the small Circle Custom Cutting System Pattern and the Green Blade, cut a circle with pumpkin waves paper. Without moving the pattern, switch to the Red Blade and cut a ring. Adhere the ring and circle on the layout. Repeat with tangerine grid, Kelly green dots, island waters waves, blue stripes and eggplant waves papers, adhering on the layout as shown.
Step 6: Cut a 6-1/2? x 4-1/2? mat with blue stripes paper. Cut a 6? x 4? mat with kraft stripes paper and adhere on top. Crop a photo to 5-3/4? x 3-3/4? and mount on top. Cut two 3-1/4? x 3-1/4? mats with baby blue dots paper. Crop two photos to 3? x 3? and mount on the mats. Adhere all photos on the layout.
Step 7: Add epoxy gems, stickers and embellishments, popping some up with Foam Squares for dimension.
Step 8: Draw journal lines and journal as desired.
How did your bubbles turn out?
P.S. Are YOU a member of the Virtual Crop Facebook Group? It’s your go-to place for MONTHLY Virtual Crops, MONTHLY Completed Album Challenges, QUARTERLY Secret Box Openings with project tutorials and so much more! We hope you’ll join our community of more than 40,000 fellow memory-keeping enthusiasts — you’ll feel right at home!

Krislyn this is an adorable page! Bubbles are just so much fun especially with the grandbaby. Thank you for sharing your designs. ????