August 2, 2024
Paw-Some Pet Palace Punch Projects

Show some love for man’s best friend with these Pet Palace Punch projects! These doggone cute borders make the perfect addition to photos of gotcha days, dogs playing fetch at the park and all canine adventures. Keep reading to learn how to make these dog house punch borders with the help of the Go Fetch! collection.

To create the borders you will need:
- Go Fetch Paper Pack or (Shop Canada | Shop Australia)
- Go Fetch Stickers or (Shop Canada | Shop Australia)
- Hot Fudge, Beige & White Solid Cardstock or (Shop Canada | Shop Australia)
- Pet Palace Punch or (Shop Canada | Shop Australia)
- Square Punch or (Shop Canada | Shop Australia)
- Circle Punch or (Shop Canada | Shop Australia)
- Custom Cutting System with Gemstone Patterns or (Shop Canada | Shop Australia)
- 12-inch Trimmer with Straight & Wave Blades or (Shop Canada | Shop Australia)
- All-Purpose Scissors or (Shop Canada | Shop Australia)
- Tape Runner or (Shop Canada | Shop Australia)
- Repositionable Tape Runner or (Shop Canada | Shop Australia)
- Foam Squares Variety Pack or (Shop Canada | Shop Australia)
- Precision Point Adhesive Pen or (Shop Canada | Shop Australia)


Not Spoiled, Loved Border:

Step 1: Cut a piece of the blue houndstooth paper to measure 12” x 2” for the base of the border.
Step 2: Cut a piece of Beige Solid Cardstock to measure 12” x 1-3/4”. Adhere to the top edge of the blue houndstooth paper strip.
Step 3: Using the Pet Palace Punch, punch five pieces from the red dog words paper, and five pieces from the pawprints & bones paper. Adhere to the outer edges of the Beige Solid Cardstock strip, starting with the pawprints & bones pieces, then offset the red dog words pieces over the top.
Step 4: Using the outside edge of the small heart pattern from the Gemstone Custom Cutting System Patterns, cut a heart from the blue houndstooth paper using the Green Blade.
Step 5: Using the outside edge of the small heart pattern from the Gemstone Custom Cutting System Patterns, cut a heart from the yellow tennis balls paper using the Red Blade.
Step 6: Adhere the hearts together. Then, adhere to the border in between the Pet Palace punched pieces.
Step 7: Using the punched dog bone pieces, adhere around the outer edge of the yellow tennis balls small heart.
Step 8: Adhere stickers, using Foam Squares for added dimension.
Good Dog Border:
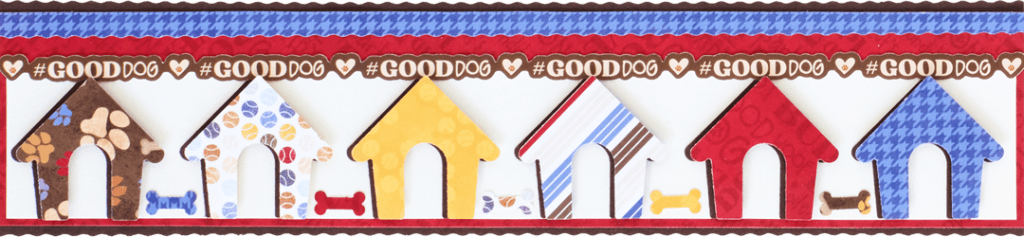
Step 1: Cut a piece of Hot Fudge Solid Cardstock to measure 12” x 2-3/4” using the 12-inch Trimmer with the Wave Blade. Use this as the base of the border.
Step 2: Cut a piece of red dog words paper to measure 12” x 2-1/2”. Adhere to the border.
Step 3: Using 12-inch Trimmer with the Wave Blade, cut a strip to measure 12” x 1/4”. Adhere along the top edge of the red dog words paper.
Step 4: Using Hot Fudge Solid Cardstock, punch six pieces using the Pet Palace Punch.
Step 5: Using a variety of papers, punch six pieces using the Pet Palace Punch.
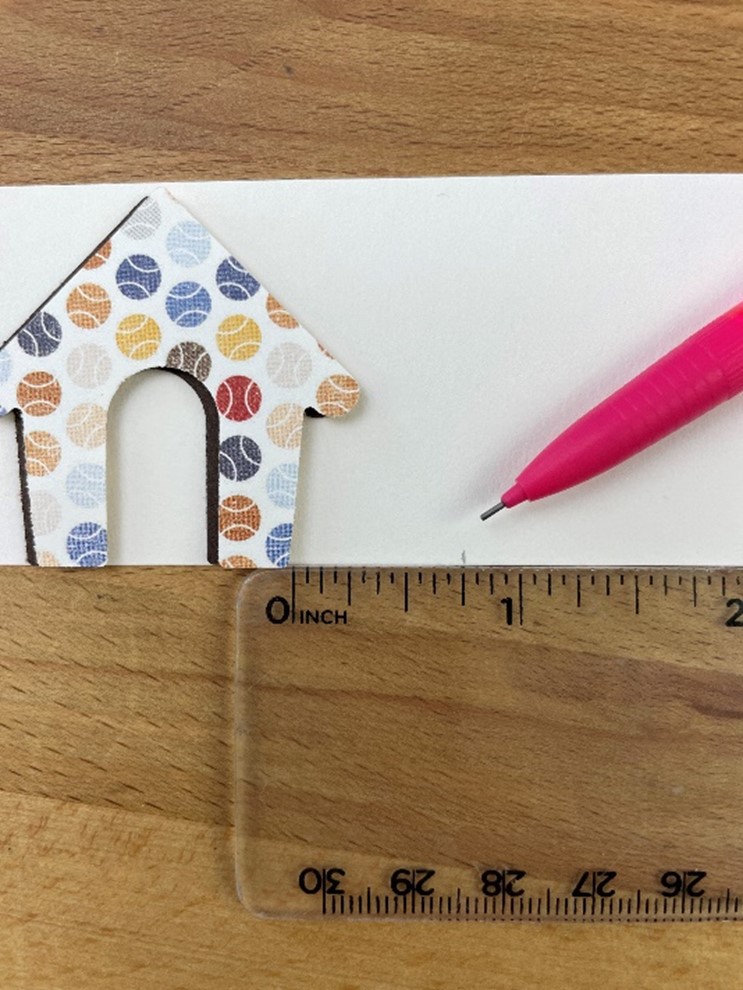

Step 6: Adhere the cardstock pieces and the paper pieces, so that they are offset, leaving 3/4” in between each piece.
Step 7: Adhere the “bone” pieces in between each of the “houses” using the Precision Point Adhesive Pen.
Step 8: Adhere the “good dog” sticker border to the top edge of the White Solid Cardstock strip.
Dog Life Border:
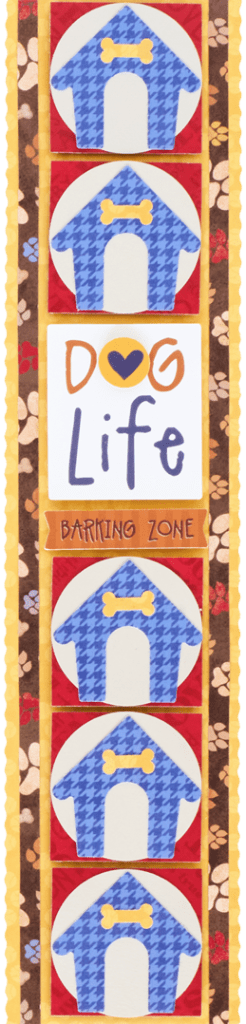
Step 1: Cut a piece of yellow tennis balls paper to measure 2-3/4” x 12” with the 12-inch Trimmer and Wave Blade. This is the base for the border.
Step 2: Cut two pieces of the pawprints & bones paper to measure 1/4” x 12”. Adhere to the outside edges of the border leaving approximately 1/8”.
Step 3: Using the Square Punch, punch five squares from the red dog words paper.
Step 4: Using the Circle Punch, punch five circles from Beige Solid Cardstock. Adhere the circles to the middle of the squares.
Step 5: Using the Pet Palace Punch, punch five pieces from the blue houndstooth paper and five pieces from the yellow tennis balls paper. Adhere the “doghouses” to the top of the circles, then the “bones” to the top of the “doghouses”.
Step 6: Adhere the squares to the border using Foam Squares. Adhere two to the top and three to the bottom leaving approximately 1/8” in between each square.
Step 9: Adhere the stickers to the open space on the border using Foam Squares.
Which border(s) had you wagging your tail?!
P.S. Are YOU a member of the Virtual Crop Facebook Group? It’s your go-to place for MONTHLY Virtual Crops, MONTHLY Completed Album Challenges, QUARTERLY Secret Box Openings with project tutorials and so much more! We hope you’ll join our community of more than 40,000 fellow memory-keeping enthusiasts — you’ll feel right at home!
