August 16, 2024
Send Off Spring With This Layout
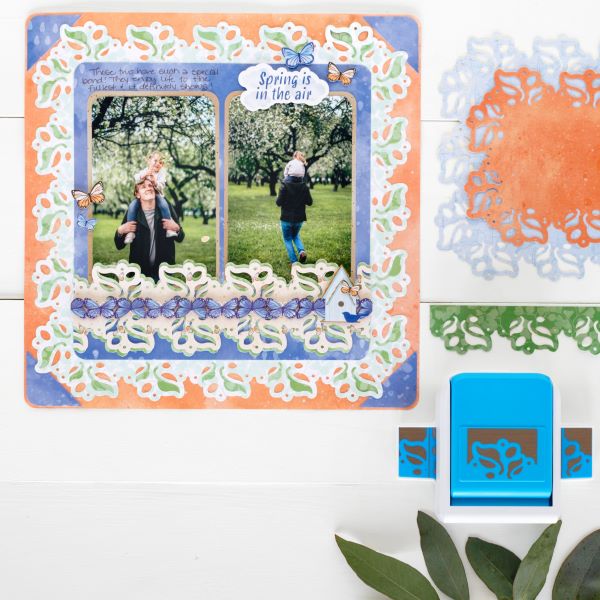
Let’s embrace the beauty of spring and summer leaves before they start turning gold for the season. This layout uses materials from the Birds & Blossoms collection and the Spring Leaves Frame Punch. The best thing about the Frame Punch? You can use it to create either a frame OR a border!

To create this layout you will need:
- Birds & Blossoms Paper Pack or (Shop Canada | Shop Australia)
- Birds & Blossoms Laser Cut Borders or (Shop Canada | Shop Australia)
- Birds & Blossoms Stickers or (Shop Canada | Shop Australia)
- Spring Leaves Frame Punch or (Shop Canada | Shop Australia)
- 12-inch Trimmer or (Shop Canada | Shop Australia)
- 2-Way Corner Rounder or (Shop Canada | Shop Australia)
- Foam Squares Variety Pack or (Shop Canada | Shop Australia)
- Tape Runner or (Shop Canada | Shop Australia)
- Repositionable Tape Runner or (Shop Canada | Shop Australia)


Step 1: Use orange watercolor paper as the base for the layout.
Step 2: Using the Spring Leaves Frame Punch, punch around the white greenery 12? x 12? paper. Adhere to the base of the layout.
Step 3: Using the Spring Leaves Frame Punch, punch several punches from the greenery paper. Adhere the greenery small leaves punchouts to the cutouts of the white greenery ones on the layout using Precision Point Adhesive.
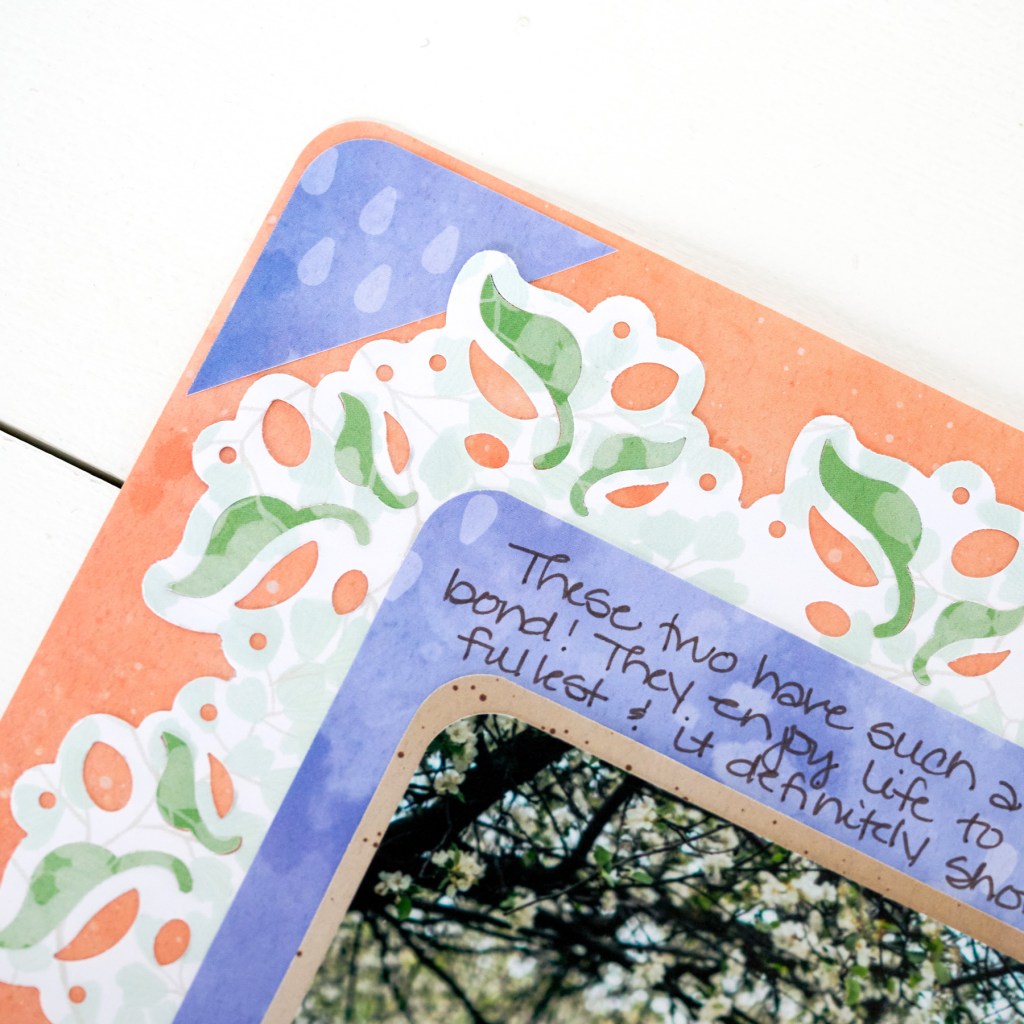
Step 4: Cut a piece of rain paper to measure 9? x 9?. Round the corners with the 2-Way Corner Rounder. Adhere to the middle of the frame.
Step 5: Using the greenery paper, cut to measure 9? x 3-3/4?. Punch along each 9? edge of the paper with the Spring Leaves Frame Punch.
Step 6: Using the monarchs paper, cut to measure 9? x 3-1/4?. Punch along each 9? edge of the paper with the Spring Leaves Frame Punch. Adhere the monarchs paper to the top of the greenery paper, so that there is a “shadow”. Adhere to the rain paper, along the bottom.
Step 7: Cut two pieces of speckled paper to measure 4? x 6?. Round the corners using the 2-Way Corner Rounder. Adhere to the layout.
Step 8: Cut two photos to measure 3-3/4? x 5-3/4?. Round the corners using the 2-Way Corner Rounder. Adhere to the speckled papers.
Step 9: Cut two pieces of rain paper to measure 1-3/4? x 1-3/4?. Cut from corner to corner to create triangle pieces. Use the 2-Way Corner Rounder to round one corner of the triangle piece, then adhere to the corners of the layout.
Step 10: Use 2-Way Corner Rounder to round all four corners of the layout.
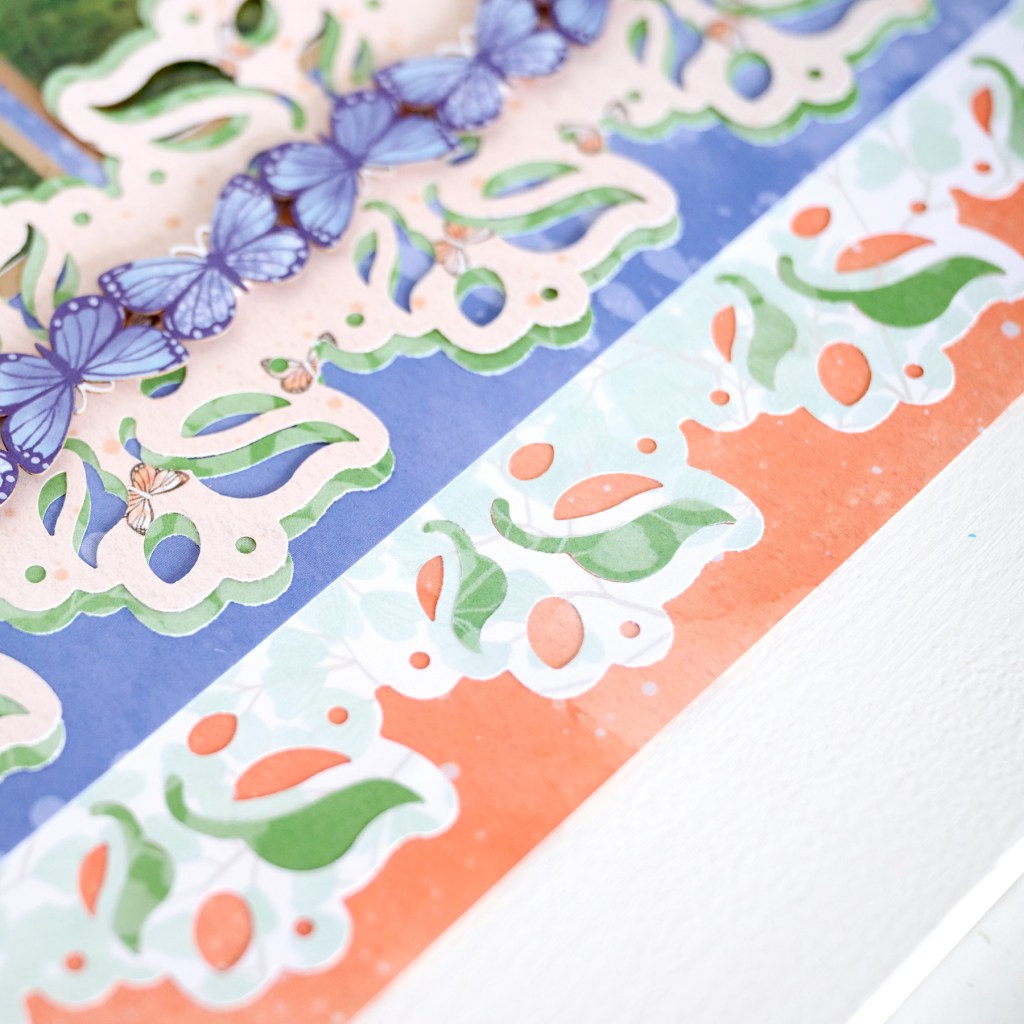
Step 11: Adhere stickers and embellishments to the layout using Foam Squares on some for added dimension.
Step 12: Journal as desired.
Do you prefer the Spring Leaves Frame Punch for borders, frames or both?
P.S. Are YOU a member of the Virtual Crop Facebook Group? It’s your go-to place for MONTHLY Virtual Crops, MONTHLY Completed Album Challenges, QUARTERLY Secret Box Openings with project tutorials and so much more! We hope you’ll join our community of more than 40,000 fellow memory-keeping enthusiasts — you’ll feel right at home!

I love the border. Yet, I can’t find the picture easily. Just too busy for me and I wonder where the journaling could be. Sorry!
Got this last week. Always do mult’picture L/Os.