September 18, 2024
Chart a Course for Creativity
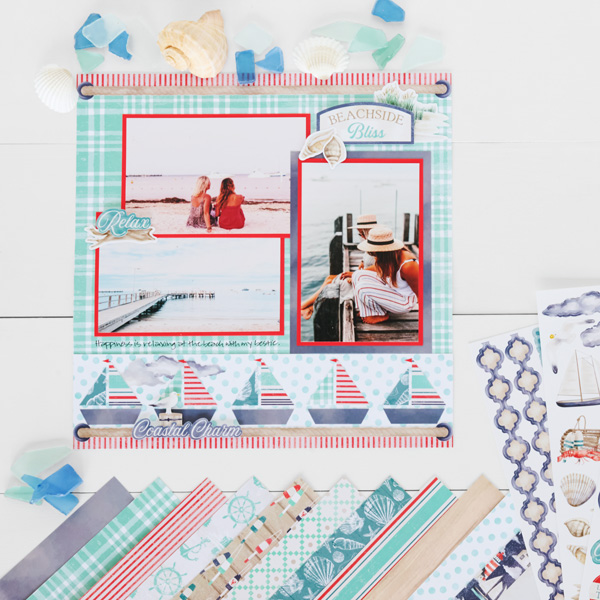
Get ready to set sail and scrapbook! This seaside layout features sailboats created with the Coastal Shore Paper Pack. While you can follow the guide, it’s easily customizable so you can make any style of boat you like! Keep reading to see how you can make your own seaworthy spread.
To create this layout you will need:
- Coastal Shore Paper Pack or (Shop Canada | Shop Australia)
- Coastal Shore Stickers or (Shop Canada | Shop Australia)
- Red Solid Cardstock or (Shop Canada | Shop Australia)
- 12-inch Trimmer or (Shop Canada | Shop Australia)
- Personal Trimmer or (Shop Canada | Shop Australia)
- Micro-Tip Scissors or (Shop Canada | Shop Australia)
- Tape Runner or (Shop Canada | Shop Australia)
- Repositionable Tape Runner or (Shop Canada | Shop Australia)
- Foam Squares Variety Pack or (Shop Canada | Shop Australia)
- Precision Point Adhesive Pen or (Shop Canada | Shop Australia)
- Black Dual-Tip Pen or (Shop Canada | Shop Australia)

Step 1: Use a sheet of green plaid designer paper as the base for this layout.
Step 2: Cut two 12” x 1/2″ strips with stripes paper and adhere one on the top and one on the bottom of the layout. Cut a 12” x 2-1/2” strip with dots paper and adhere above the stripes strip on the bottom of the layout. Adhere rope border stickers on the seams, as shown.
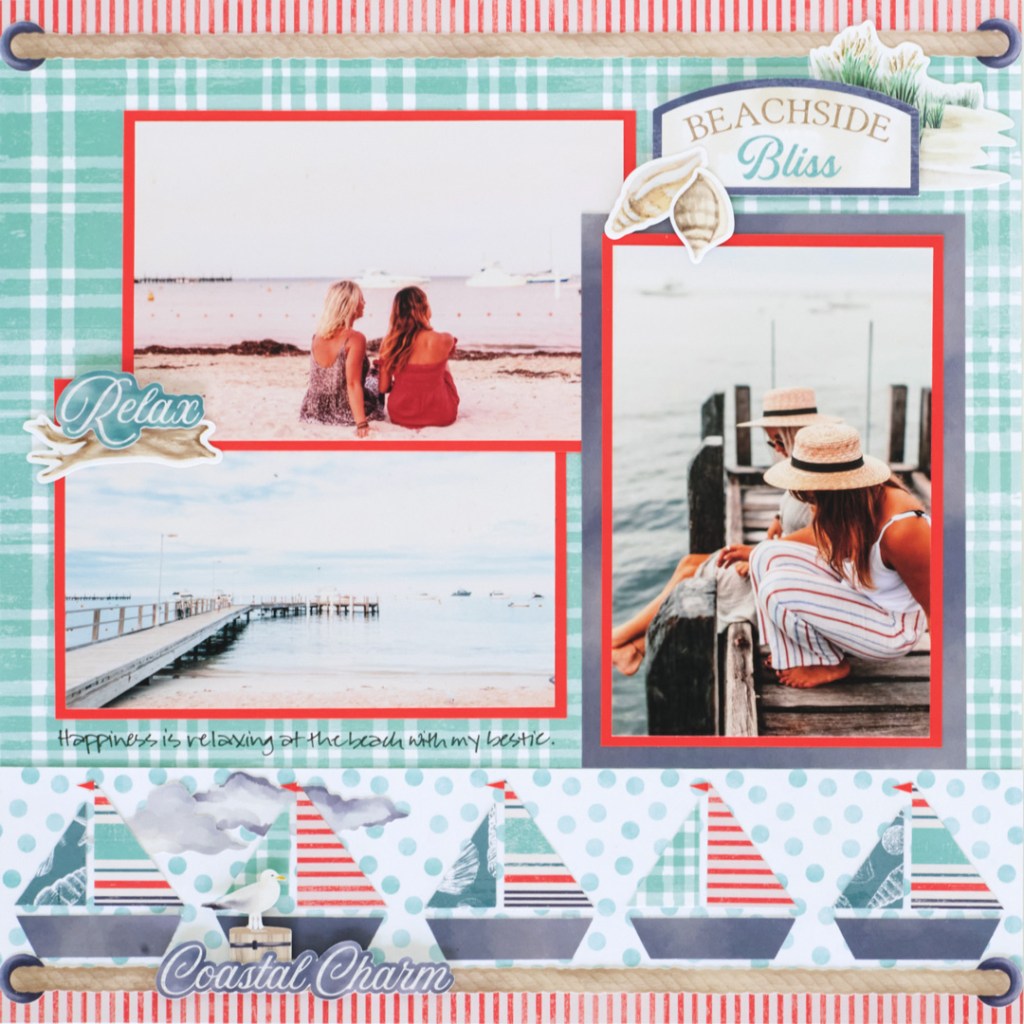
Step 3: Make the sailboats. Cut three 1-1/2” squares with scraps of striped papers. Cut each in half diagonally. Place one square on the 12-inch trimmer so that the long edge is facing to the right, the top corner is on the cutting line and the bottom right corner is near the 3/8” line. Cut a sliver off of the triangle. Repeat with four more triangles to complete the right sailboat masts. Cut three 1-1/4” squares with scraps of striped papers. Cut each in half diagonally. Place one square on the 12-inch trimmer so that the long edge is facing to the right, the top corner is on the cutting line and the bottom right corner is near the 3/8” line (see photo for reference). Cut a sliver off of the triangle. Repeat with four more triangles to complete the left sailboat masts. Cut five 2” x 1/2″ strips with cloudy sky paper. Using scissors, cut a wedge off of each short end to create the boats. Adhere as shown on the dots strip. Cut five small triangles with red cardstock and adhere using precision point adhesive on top of the sailboats as flags.
Step 4: Crop a photo to 3-3/4” x 5-3/4” and mount on a 4” x 6” piece of red cardstock. Cut a 4-1/2” x 6-1/2” piece with cloudy sky paper and mount the matted photo on top. Adhere on the right side of the layout. Crop two photos to 5-3/4” x 3-3/4” and mat on two 6” x 4” pieces of red cardstock. Layer and adhere on the layout as shown.
Step 5: Adhere stickers, popping some up with foam squares for dimension.
Step 6: Journal as desired.
How cute were those sailboats?! How did yours turn out?
P.S. Are YOU a member of the Virtual Crop Facebook Group? It’s your go-to place for MONTHLY Virtual Crops, MONTHLY Completed Album Challenges, QUARTERLY Secret Box Openings with project tutorials and so much more! We hope you’ll join our community of more than 40,000 fellow memory-keeping enthusiasts — you’ll feel right at home!
