October 16, 2024
A Naturally Inspired Layout
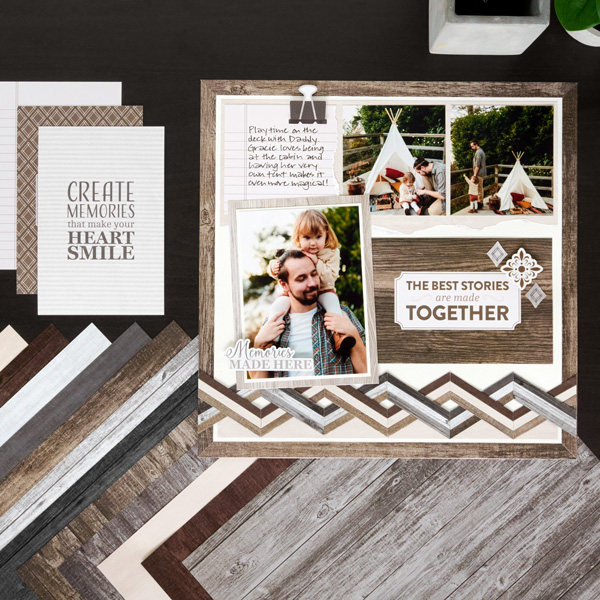
Immortalize your favorites memories with this everyday scrapbook layout filled with natural and woodsy vibes. The Wonderful Day Woodgrain Paper Pack and 13×13 Custom Cutting System Mat are perfect for making a unique, custom border, which you can recreate with different papers for other layouts. Keep reading to see how you can make one of your own.

To create this layout you will need:
- Wonderful Day Woodgrain Paper Pack or (Shop Canada | Shop Australia)
- Wonderful Day Variety Mat Pack or (Shop Canada | Shop Australia)
- Wonderful Day Stickers or (Shop Canada | Shop Australia)
- White & Hot Fudge Solid Cardstock or (Shop Canada | Shop Australia)
- 13×13 Custom Cutting System Mat or (Shop Canada | Shop Australia)
- 12-inch Trimmer or (Shop Canada | Shop Australia)
- Personal Trimmer or (Shop Canada | Shop Australia)
- Tape Runner or (Shop Canada | Shop Australia)
- Repositionable Tape Runner or (Shop Canada | Shop Australia)
- Foam Squares Variety Pack or (Shop Canada | Shop Australia)
- Black Dual-Tip Pen or (Shop Canada | Shop Australia)
- Ruler and pencil

Step 1: Use a sheet of white cardstock as the base for this layout. Cut four 1/2” x 12” strips with brown woodgrain paper. Adhere strips on the top and bottom of the layout. Using the 45-degree line on the 12-inch trimmer, miter the corners of the remaining two strips (turning the strips to the reverse side before mitering the bottoms). Adhere mitered strips on the left and right sides of the layout.
Step 2: Cut a 10-3/4” x 4-1/2” strip with white woodgrain paper. Tear the bottom edge and adhere on the top of the layout. Cut a 10-3/4” x 3/4″ strip with white woodgrain paper and adhere on the bottom of the layout.
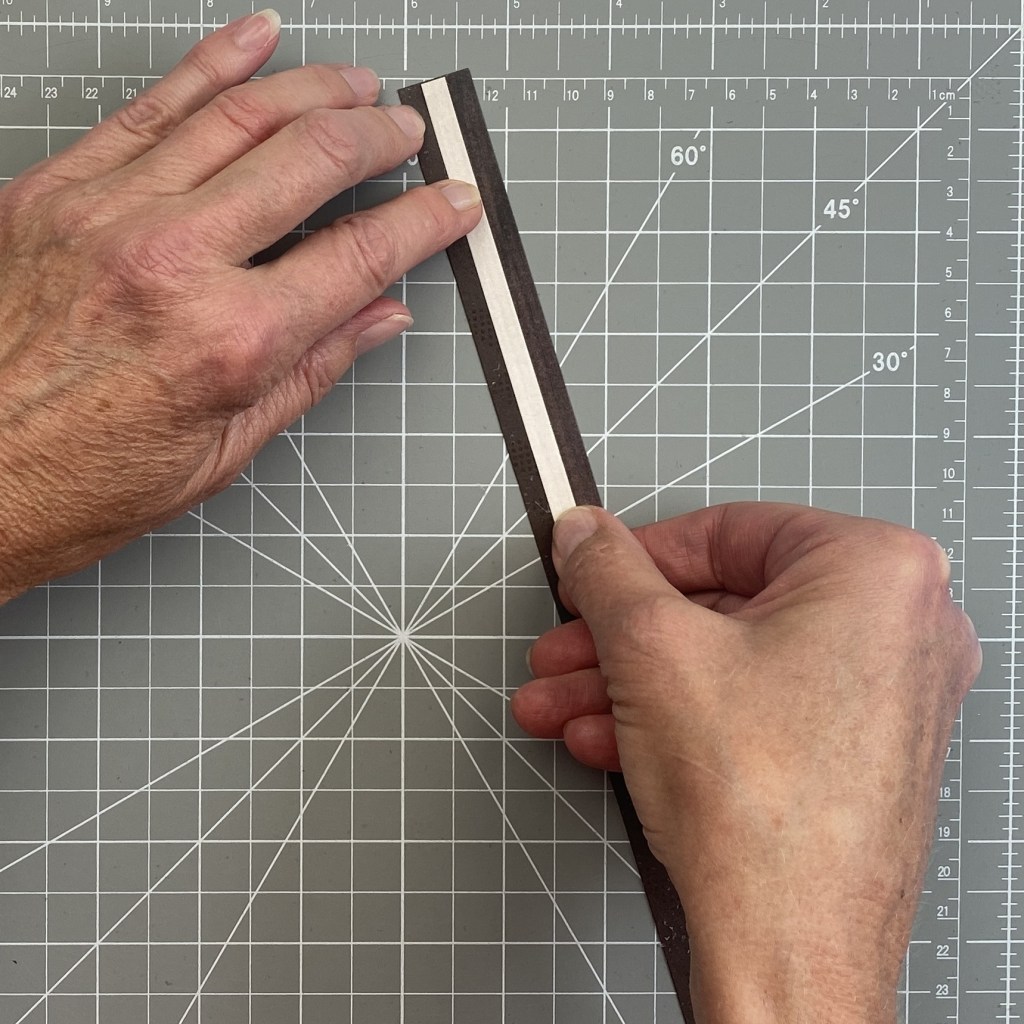
Step 3: Make the border. Cut a 3/4″ x 12” strip with hot fudge cardstock. Cut 1/4” x 12” strips with various woodgrain scraps. Adhere three strips side by side on the cardstock strip. Place the long edge of the strip on the 30-degree line on the 13-inch cutting mat. With a ruler and pencil, draw a line near the end of the strip where the perpendicular line instersects (see photo). Using the 12-inch trimmer, cut along the pencil line. Move the strip so the cut edge is on the 2” line and cut. Repeat the length of the strip (you should get 4-5 pieces from each strip). Repeat with the same three 1/4″paper strip arrangement, only this time flip the strip to the back side before making a line and cutting on the line.
Step 4: Repeat Step 3 with a different arrangement of strips. You will want six 2” pieces of one color scheme and six of another, half of them angled one direction and half angled the opposite direction. Arrange the strips with one set of patterns forming one zigzag and the other set forming another. Layer the strips as shown and adhere them on the bottom of the layout using repositionable tape runner.


Step 5: Crop two photos to 3-1/4” x 3-1/2” and adhere on the top of the layout. Cut a ruled variety mat to 4” x 3-1/2”, then tear the right edge to fit. Adhere on the layout as shown.
Step 6: Cut a large variety mat to 4-1/2” x 6”. Cut a 4” x 5-1/2” piece with white cardstock and adhere on the mat. Crop a photo to 3-3/4” x 5-1/4” and mount on top. Adhere on the layout, tucking “The Best Stories…” 6” x 4” variety mat just behind, as shown.
Step 7: Adhere stickers, popping some up with foam squares for dimension.
Step 8: Journal as desired.
Do you think you’ll make this border for other projects in the future?
P.S. Are YOU a member of the Virtual Crop Facebook Group? It’s your go-to place for MONTHLY Virtual Crops, MONTHLY Completed Album Challenges, QUARTERLY Secret Box Openings with project tutorials and so much more! We hope you’ll join our community of more than 40,000 fellow memory-keeping enthusiasts — you’ll feel right at home!

Love this