July 31, 2025
Scrap Your Summer Road Trip Memories
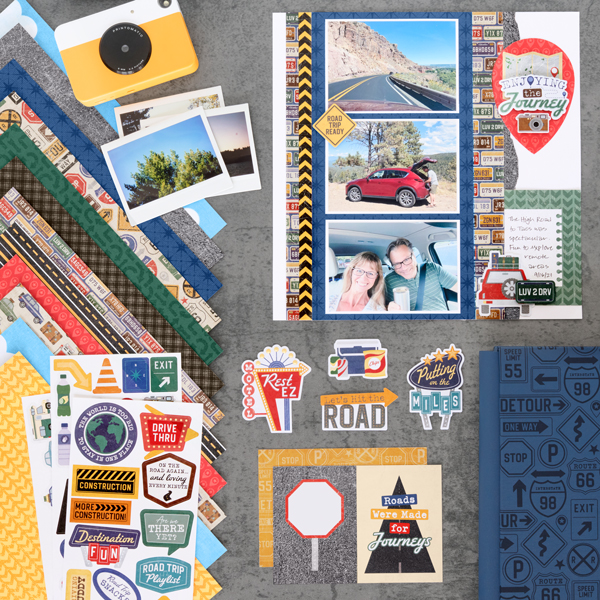
Whether you’re documenting a cross-country adventure or a quick weekend getaway, this road trip-inspired layout is the perfect way to showcase your travel memories! With bold license plate patterns, pops of color and fun construction-themed accents, this design brings motion and excitement to the page. Featuring three photo spots and playful embellishments, it’s ideal for capturing snapshots from the open road and all the stops along the way.
To create this layout you will need:
- Hit the Road Paper Pack or (Shop Canada | Shop Australia)
- Hit the Road Stickers or (Shop Canada | Shop Australia)
- Hit the Road Embossed Embellishments or (Shop Canada | Shop Australia)
- Hit the Road Mat Pack or (Shop Canada | Shop Australia)
- Bright White Solid Cardstock or (Shop Canada | Shop Australia)
- Custom Cutting System or (Shop Canada | Shop Australia)
- Gemstone CCS Patterns or (Shop Canada | Shop Australia)
- Photo Trimmer or (Shop Canada | Shop Australia)
- Tape Runner or (Shop Canada | Shop Australia)
- Repositionable Tape Runner or (Shop Canada | Shop Australia)
- Foam Squares or (Shop Canada | Shop Australia)
- Dual-Tip Black Pen or (Shop Canada | Shop Australia)
- 12-inch Trimmer
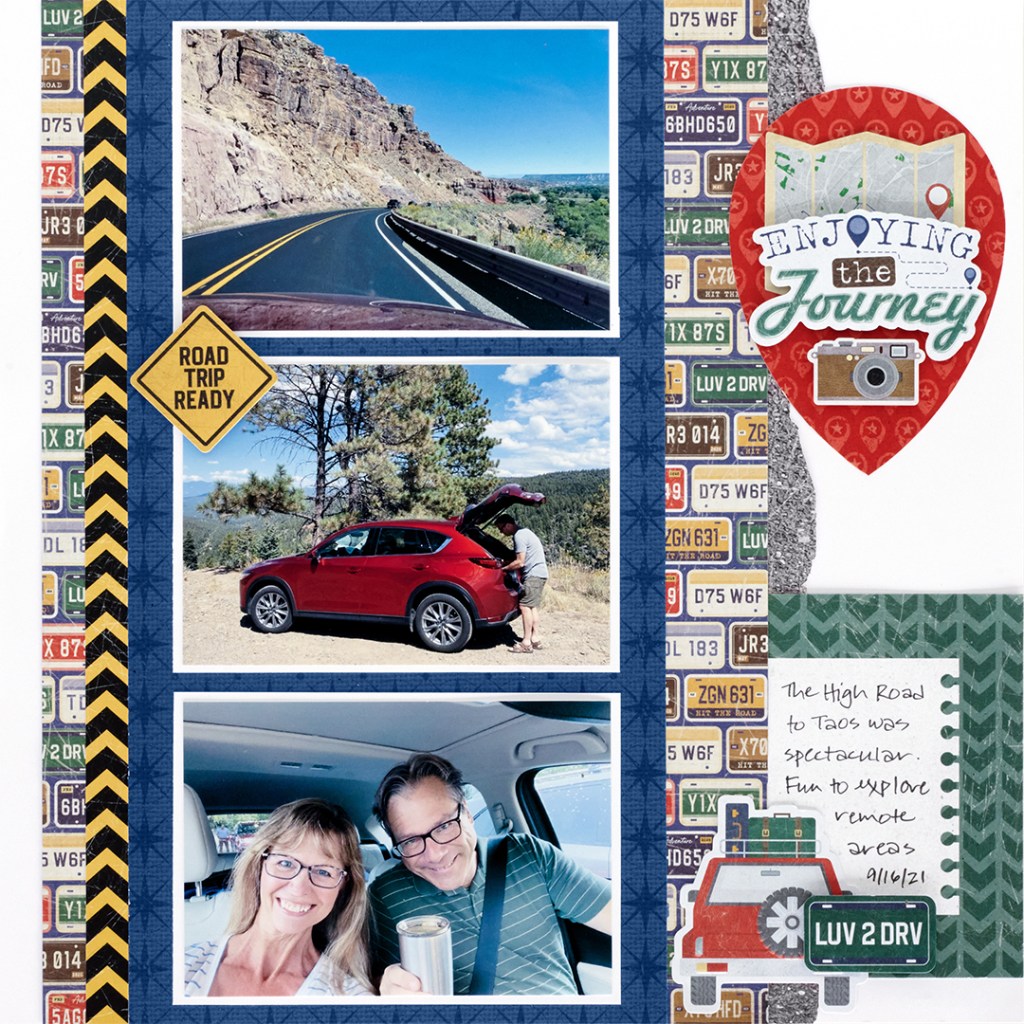

Step 1: Use a sheet of Bright White Solid Cardstock as the base for this layout. Cut an 8-1/2? x 12? piece with the license plates designer paper and adhere 1/2? from the left edge of the base. Tear a 1/2? x 12? strip of the asphalt designer paper and tuck behind the right edge of the license plates designer paper.
Step 2: Cut a 6-1/4? x 12? strip with the blue stars designer paper and adhere 1-1/2? from the left edge of the layout. Adhere a construction border sticker just to the left of the blue stars designer paper. Crop three photos to 5? x 3-1/2? and mount them on three pieces of Bright White Solid Cardstock cut to 5-1/4? x 3-3/4?. Adhere on the blue stars designer paper.
Step 3: Using the outside of the CCS large heart pattern with the red blade, cut a half-heart shape with red marker pin designer paper. Move the pattern over and cut the other half to create a large 3-1/4? x 4-1/2? marker pin. Adhere embellishments and stickers on top.
Step 4: Tuck and adhere a 6-1/2? x 4-1/2? green variety mat behind the license plates designer paper piece on the lower right side of the layout as shown. Adhere embellishments, popping some up with foam squares.
Step 5: Journal as desired.
Ready to scrapbook your next adventure? This layout is a great way to highlight every mile of the journey. Grab your favorite road trip pictures, gather your supplies and hit the creative highway — your album is about to get a serious upgrade!
P.S. Are YOU a member of the Virtual Crop Group? It’s your go-to place for MONTHLY Virtual Crops, MONTHLY Completed Album Challenges, QUARTERLY Secret Box Openings with project tutorials and so much more! We hope you’ll join our community of more than 47,000 fellow memory-keeping enthusiasts — you’ll feel right at home!

tesfsdf
test