September 9, 2026
Bring the Colors of Fall to Your Pages
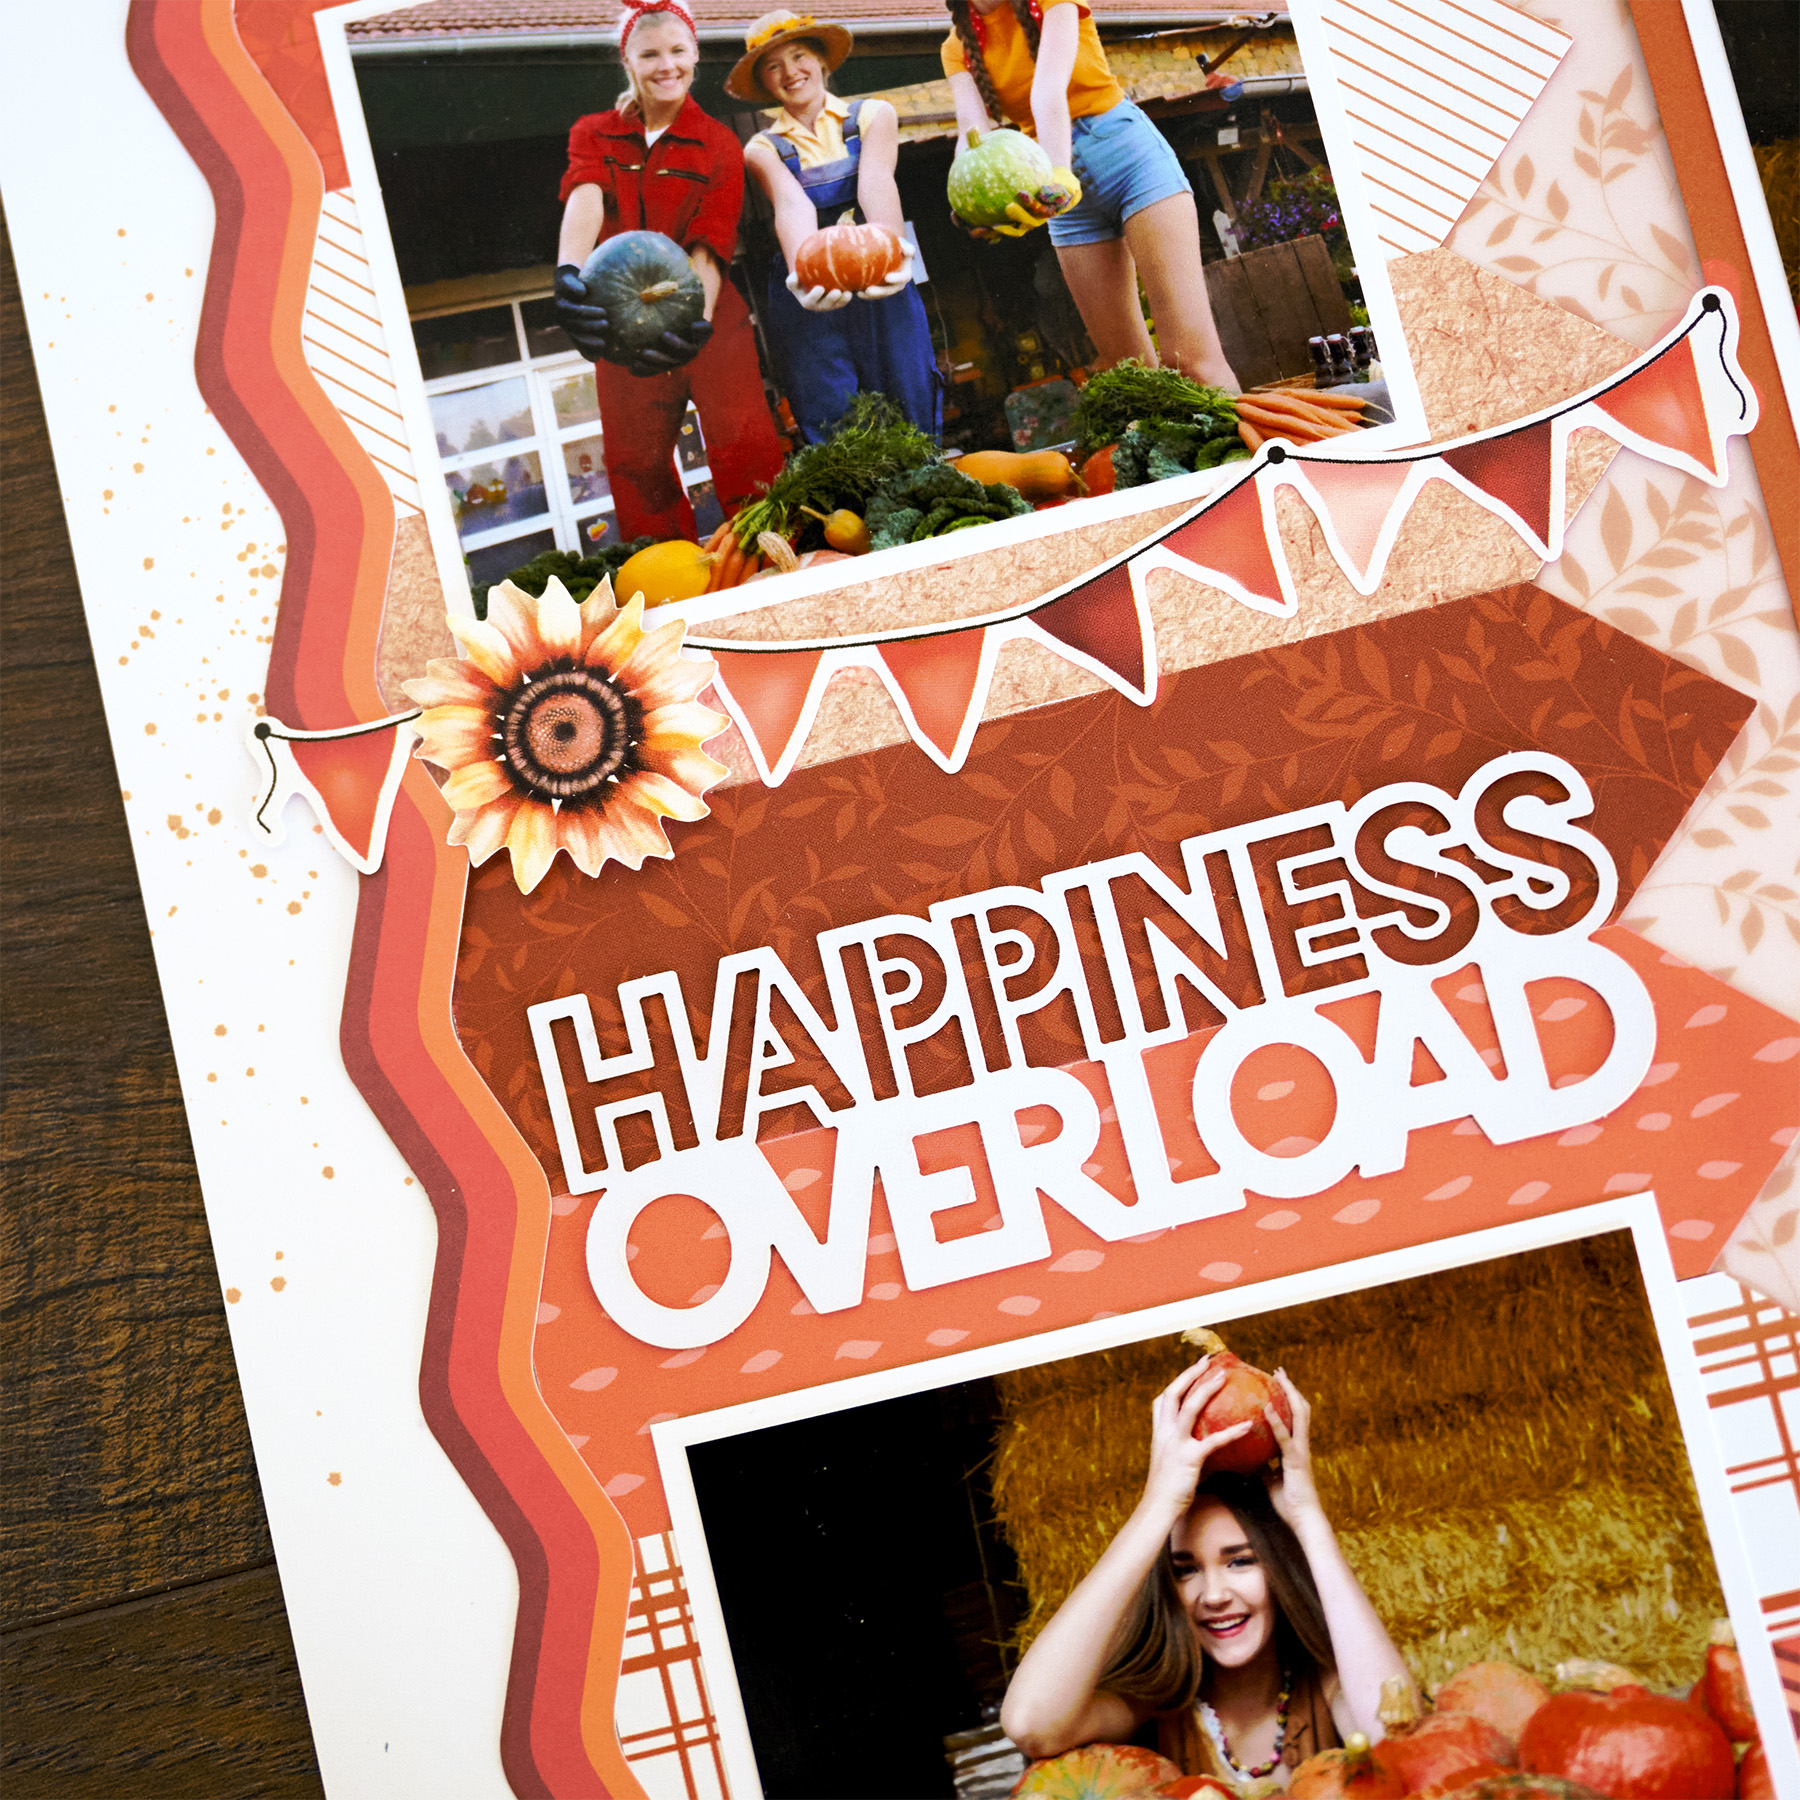
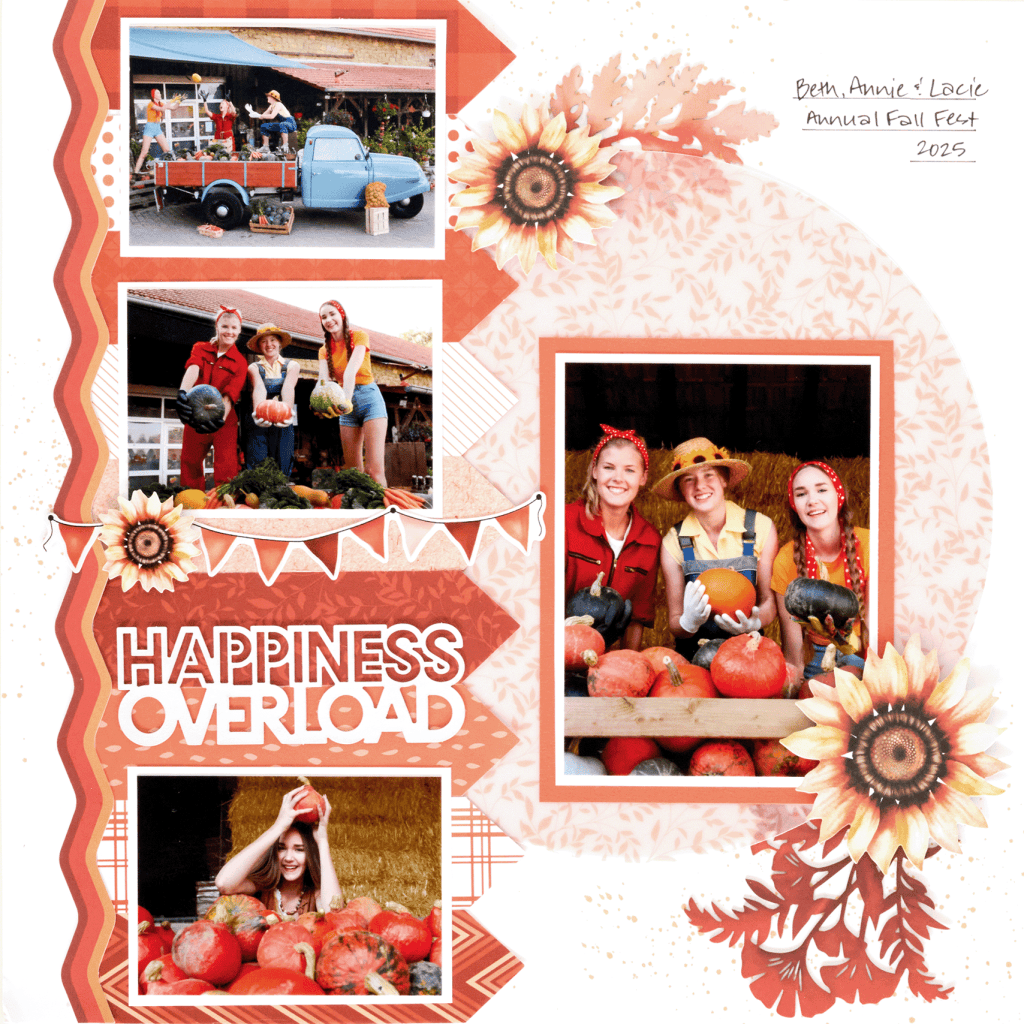
Fall photos deserve a collection that feels just as warm as the memories. The Vivid Melodies 2 Pumpkin collection brings rich orange tones, coordinating papers and embellishments together, making it easy to create a cohesive look for your fall photos. Whether you’re scrapping this season or finally getting around to photos from past autumns, this layout is a perfect place to start.
To create this layout, you will need:
- Vivid Melodies 2 Paper Pack – Pumpkin
- Vivid Melodies 2 Embellishments – Pumpkin
- Vivid Melodies 2 Stickers – Pumpkin
- Vellum Paper Pack – Cranberry & Pumpkin
- Bright White Solid Cardstock
- Pumpkin Solid Cardstock
- Banner Flag Punch
- Custom Cutting System with Jumbo Circle Pattern
- 12-inch Trimmer
- Photo Trimmer
- Micro-Tip Scissors
- Repositionable Tape Runner
- Vellum Tape Runner
- Foam Squares
- Dual-Tip Black Pen
- Optional: Pumpkin Ink Pad, spray bottle with water and small paint brush

Love this layout?

Love this layout?

Step 1: Use a sheet of Bright White Solid Cardstock as the base for this layout. If desired, splatter ink on a few areas of the base paper as shown.
Step 2: Using the leaves vellum paper cut a circle using the inside of the jumbo circle pattern, using the blue blade. Adhere the circle to the right side of the layout using a Vellum Tape Runner.
Step 3: Cut nine 5″ x 1-5/16″ strips with a variety of pumpkin designer papers. Open the Banner Flag Punch and hold it upside down. Instead of feeding the paper through the usual opening, insert one end of the strip directly into the punch mechanism from the opposite side, pulling it through the center of the punch until the end fills the pointed area. Hold the strip in place and punch to create a long, pointed end. Repeat the process with the remaining strips. Alternatively, fussy cut the pointed ends with Micro-Tip Scissors.
Step 4: Adhere the strips 1-1/8″ from the left edge of the layout, with the points facing toward the middle. Adhere a zigzag border embellishment along the left edge.
Step 5: Cut three 3-3/4″ x 2-3/4″ mats with Bright White Solid Cardstock. Crop three photos to 3-1/2″ x 2-1/2″. Layer and adhere the photos and mats on the strips as shown.
Step 6: Cut a 4-1/4″ x 5-1/2″ mat from Pumpkin Solid Cardstock and a 3-3/4″ x 5″ mat from Bright White Solid Cardstock. Crop a photo to measure 3-1/2″ x 4-3/4″. Layer and adhere the photo and mats on the circle vellum shape.
Step 7: Adhere embellishments and stickers, tucking the leaves behind the vellum circle as shown.
Step 8: Draw journaling lines in the upper-right corner of the layout. Add journaling as desired.

Want to recreate this layout?
We’ve gathered all the products featured in this project in one place, making it easy to find the papers, embellishments, tools and more.
P.S. Are YOU a member of the Virtual Crop Group? It’s your go-to place for MONTHLY Virtual Crops, MONTHLY Completed Album Challenges, QUARTERLY Secret Box Openings with project tutorials and so much more! We hope you’ll join our community of more than 53,000 fellow memory-keeping enthusiasts — you’ll feel right at home!

