December 5, 2015
12 Days of Christmas Ideas: Day 5 -Tips for using Punches in Layouts Part I
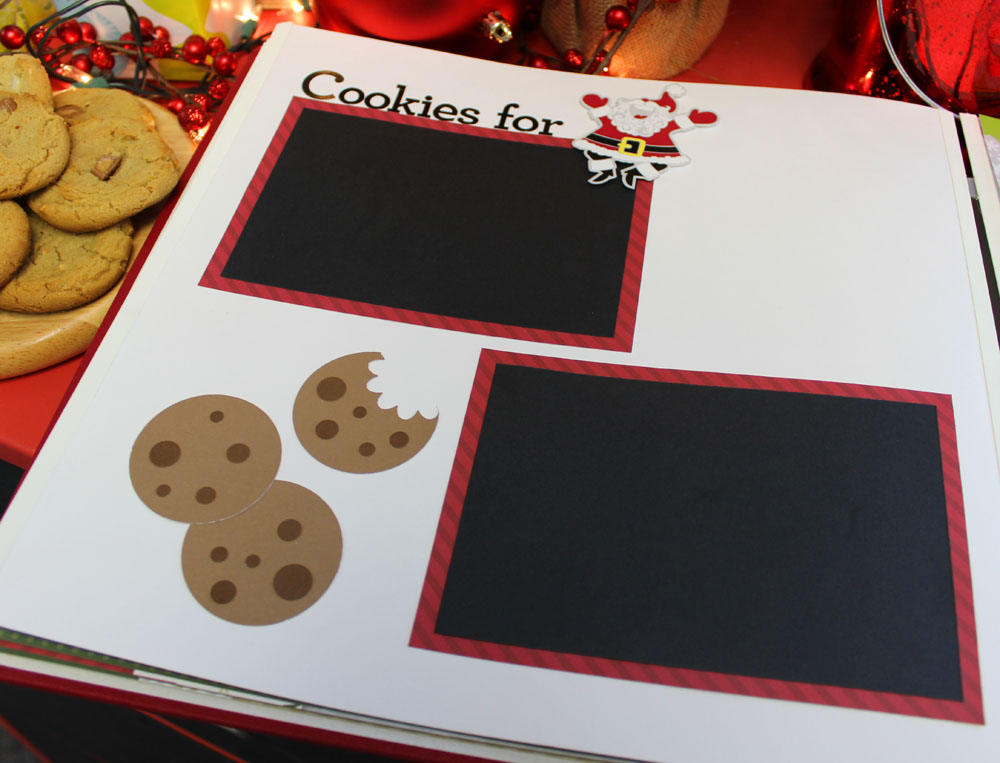
Today’s layout is a simple, fun way to showcase the classic holiday photos of the plate of cookies left out for Santa! Over the next 3 days, we’ll be sharing fun layouts featuring tips for using all those fun punches you’ve got in your collection. Stop back tomorrow for the second in the series. Happy creating!
Here’s what you’ll need to create this layout:
- White Page
- Red patterned paper from Christmas Joy Paper Pack
- Cardstock – tan and brown
- Shape Maker with Circle Cartridge
- Border Maker with Bubbles Cartridge
- Blossom Place ‘n Punch
- Black ABC/123 Stickers
- Paper Trimmer
- Multi-Purpose Tool
- Tape Runner with Mini Tape Runner Refill
- Foam Squares
To create cookies:
Step 1: Punch circles from tan cardstock using Shape Maker with Circle Cartridge.
Step 2: Remove top half of Blossom punch, then place one circle onto punch base as shown:
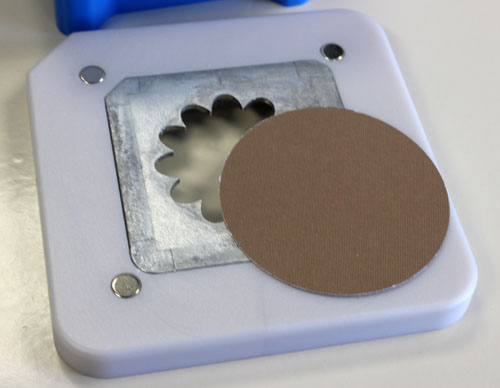
Step 3: Place top of punch over circle, then press down to take “bite” from circle, then remove top of punch.

To create chocolate chips:
Using Border Maker with Bubbles Cartridge, punch 3 – 4 times along the edge of brown cardstock to create tiny circles. Randomly adhere them to cookies using Mini Tape Runner.
To finish page:
Step 1: Cut two pieces of red patterned paper to measure 6.5″ x 4.5″. Adhere directly to page. NOTE: black cardstock has been placed where photos would go on layout.
Step 2: Adhere page title over photo mat as shown.
Step 3: Adhere Santa sticker to layout using Foam Squares.
Step 4: Adhere cookies to layout as shown.
Step 5: Add journaling as desired to finish.
