March 16, 2016
Fab Fun on Scrapbook Pages with Circles
There are so many fun ways to use circles on your scrapbook pages, but have you ever tried to cut out a circle by hand? I have and it wasn’t pretty! Fortunately, Creative Memories has some fantastic tools that will help you make perfect circles!
First up: The Shape Maker System and Circle Cartridge. This system is so easy to use and punches out circles in a snap. I used the Shape Maker System to make the fun borders on the top & bottom of the page layout shown below.

I got a head start on this page by using a Fast2Fab predesigned page from the Strut Your Stuff collection. These pages are good to go right out of the package or are a great starting point if you want to add your own personal touch.

I jazzed the page up a bit by adding a couple of quick borders made with circles punched from the Strut Your Stuff paper pack. I cut the circles in half and then placed a thin strip of paper at the top & bottom of the page to finish off the design. Added a few photos and this page is ready for the scrapbook!

Next up: The Custom Cutting System (CCS) and Circle Patterns!
I think the CCS is one of the best tools in the scrapbook industry. And just when you thought it couldn’t get any better – CM improved the blades! They swivel – making it even easier to cut perfect circles in so many sizes! If you haven’t upgraded to the swivel blades yet treat yourself & order a set!
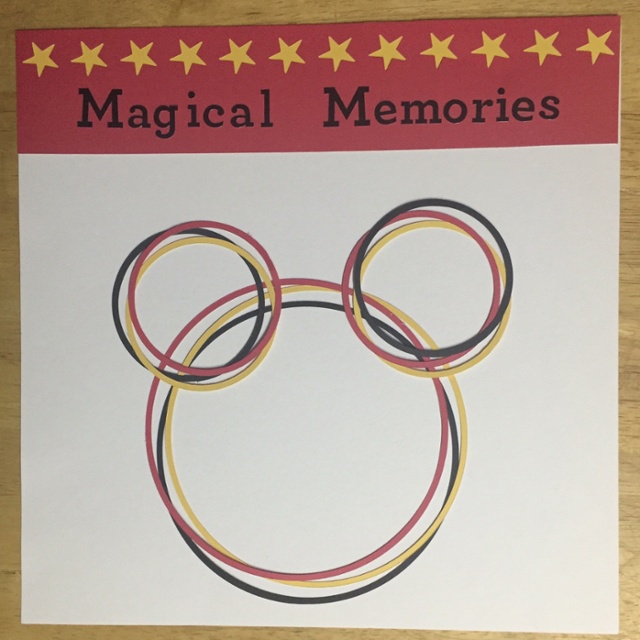
I cut this familiar looking mouse head pretty big – you could use it on a title page or as part of a background for a layout. With the Custom Cutting System and Oval patterns you can cut 18 different sized circles so if you want to make other sized mouse heads you have lots to choose from!
When making rings with the CCS, cut furthest away from the pattern first then without moving the paper or CCS pattern, make the cut that is closer to the pattern.
For the mouse head rings shown above I used the largest circle pattern and cut on the outside track using the green blade then again with the red blade. For the ears, I also used the largest circle, cutting on the inside track first using the blue blade then the red blade. Head – 3OG & 3OR Ears – 3IB & 3IR – see below.
Labeling Your CCS Circles & Ovals
This method saves a lot of time and effort when following directions for a project. By using this system you can easily know exactly what size oval or circle to cut when following instructions at a class, workshop or online. It also makes sharing instructions a breeze!
Here is how to label your templates:
Using a permanent marker, label the sizing chart and patterns 1 through 7 using the following system:
Circles (1-3) – 1 is the smallest circle, 3 is the largest
Ovals (4-7) – 4 is the smallest oval, 7 is the largest
While you’re at it – you might want to label your patterns & cutting guides with your initials, too. Lots of people have the same tools & labeling them with your name or initials makes it a snap to see what is yours when cleaning up at a crop.

The following abbreviations are used in projects:
I = Inside Track O = Outside Track
R =Red Blade G = Green Blade B = Blue Blade
If a layout calls for the following: 1 I R (2) then you would use the smallest circle pattern (#1), cut on the Inside of the pattern with the Red blade and cut 2 circles.
Let’s give it a whirl!
More CCS Fun!

Cut circles using the circle CCS patterns and adhere as shown above. Cut the circle into 8 pieces. Round the tips of each piece of candy corn and add detail with the fine point of a Black Dual Tip Pen.
I made the following cuts to make the candy corn shown above:
3IR orange
3IB yellow
1IR white
I hope you can use some of these ideas! What is your favorite way to use circles in you scrapbook layouts?

If you would like more information about labeling your tools you can find it on my blog at http://www.LisasWorkshop.blogspot.com