August 4, 2016
Winter Wonderland Scrapbook Layout Ideas

Winter is such a beautiful, peaceful time of the year.
We watch the snowflakes fall from the sky in amazement.
So many of us love to enjoy the outdoors during this time of the year. And, we take a lot of photos of these times spent in the winter wonderland.
Creative Memories has many scrapbooking collections that invite us to use them on these winter themed scrapbook layouts.
Some examples that our Content Contributors have shared are using the A Year To Remember Collection, Natural Elegance Collection, and Cool Serenity Collection.
Created by Krislyn Mattei-US:
Ingredients:
- A Year to Remember Paper Packs 1 and 2
- A Year to Remember Stickers Parts 1 and 2
- Hello Baby Cardstock
- Travel Cardstock
- Navy ABC Stickers
- Border Maker System with Evergreen and Ocean Waves Cartridges
Directions:
Step 1: With Evergreen cartridge, punch a border using Green cardstock (Travel); with Ocean Waves cartridge, punch 2 borders using Blue cardstock (Hello Baby). Trim all 3 borders to .75” x 12”.
Step 2: Cut 2 strips of Navy Polka Dot paper (AY2R1), .75” x 12” and 1.5” x 12”. Cut 1 strip of Green cardstock .5” x 12”.
Step 3: Adhere top and bottom borders as shown.
Step 4: Trim Argyle paper (AY2R2) to 4” x 8”. Adhere to page along with photos.
Step 5: Add title and AY2R stickers as desired.
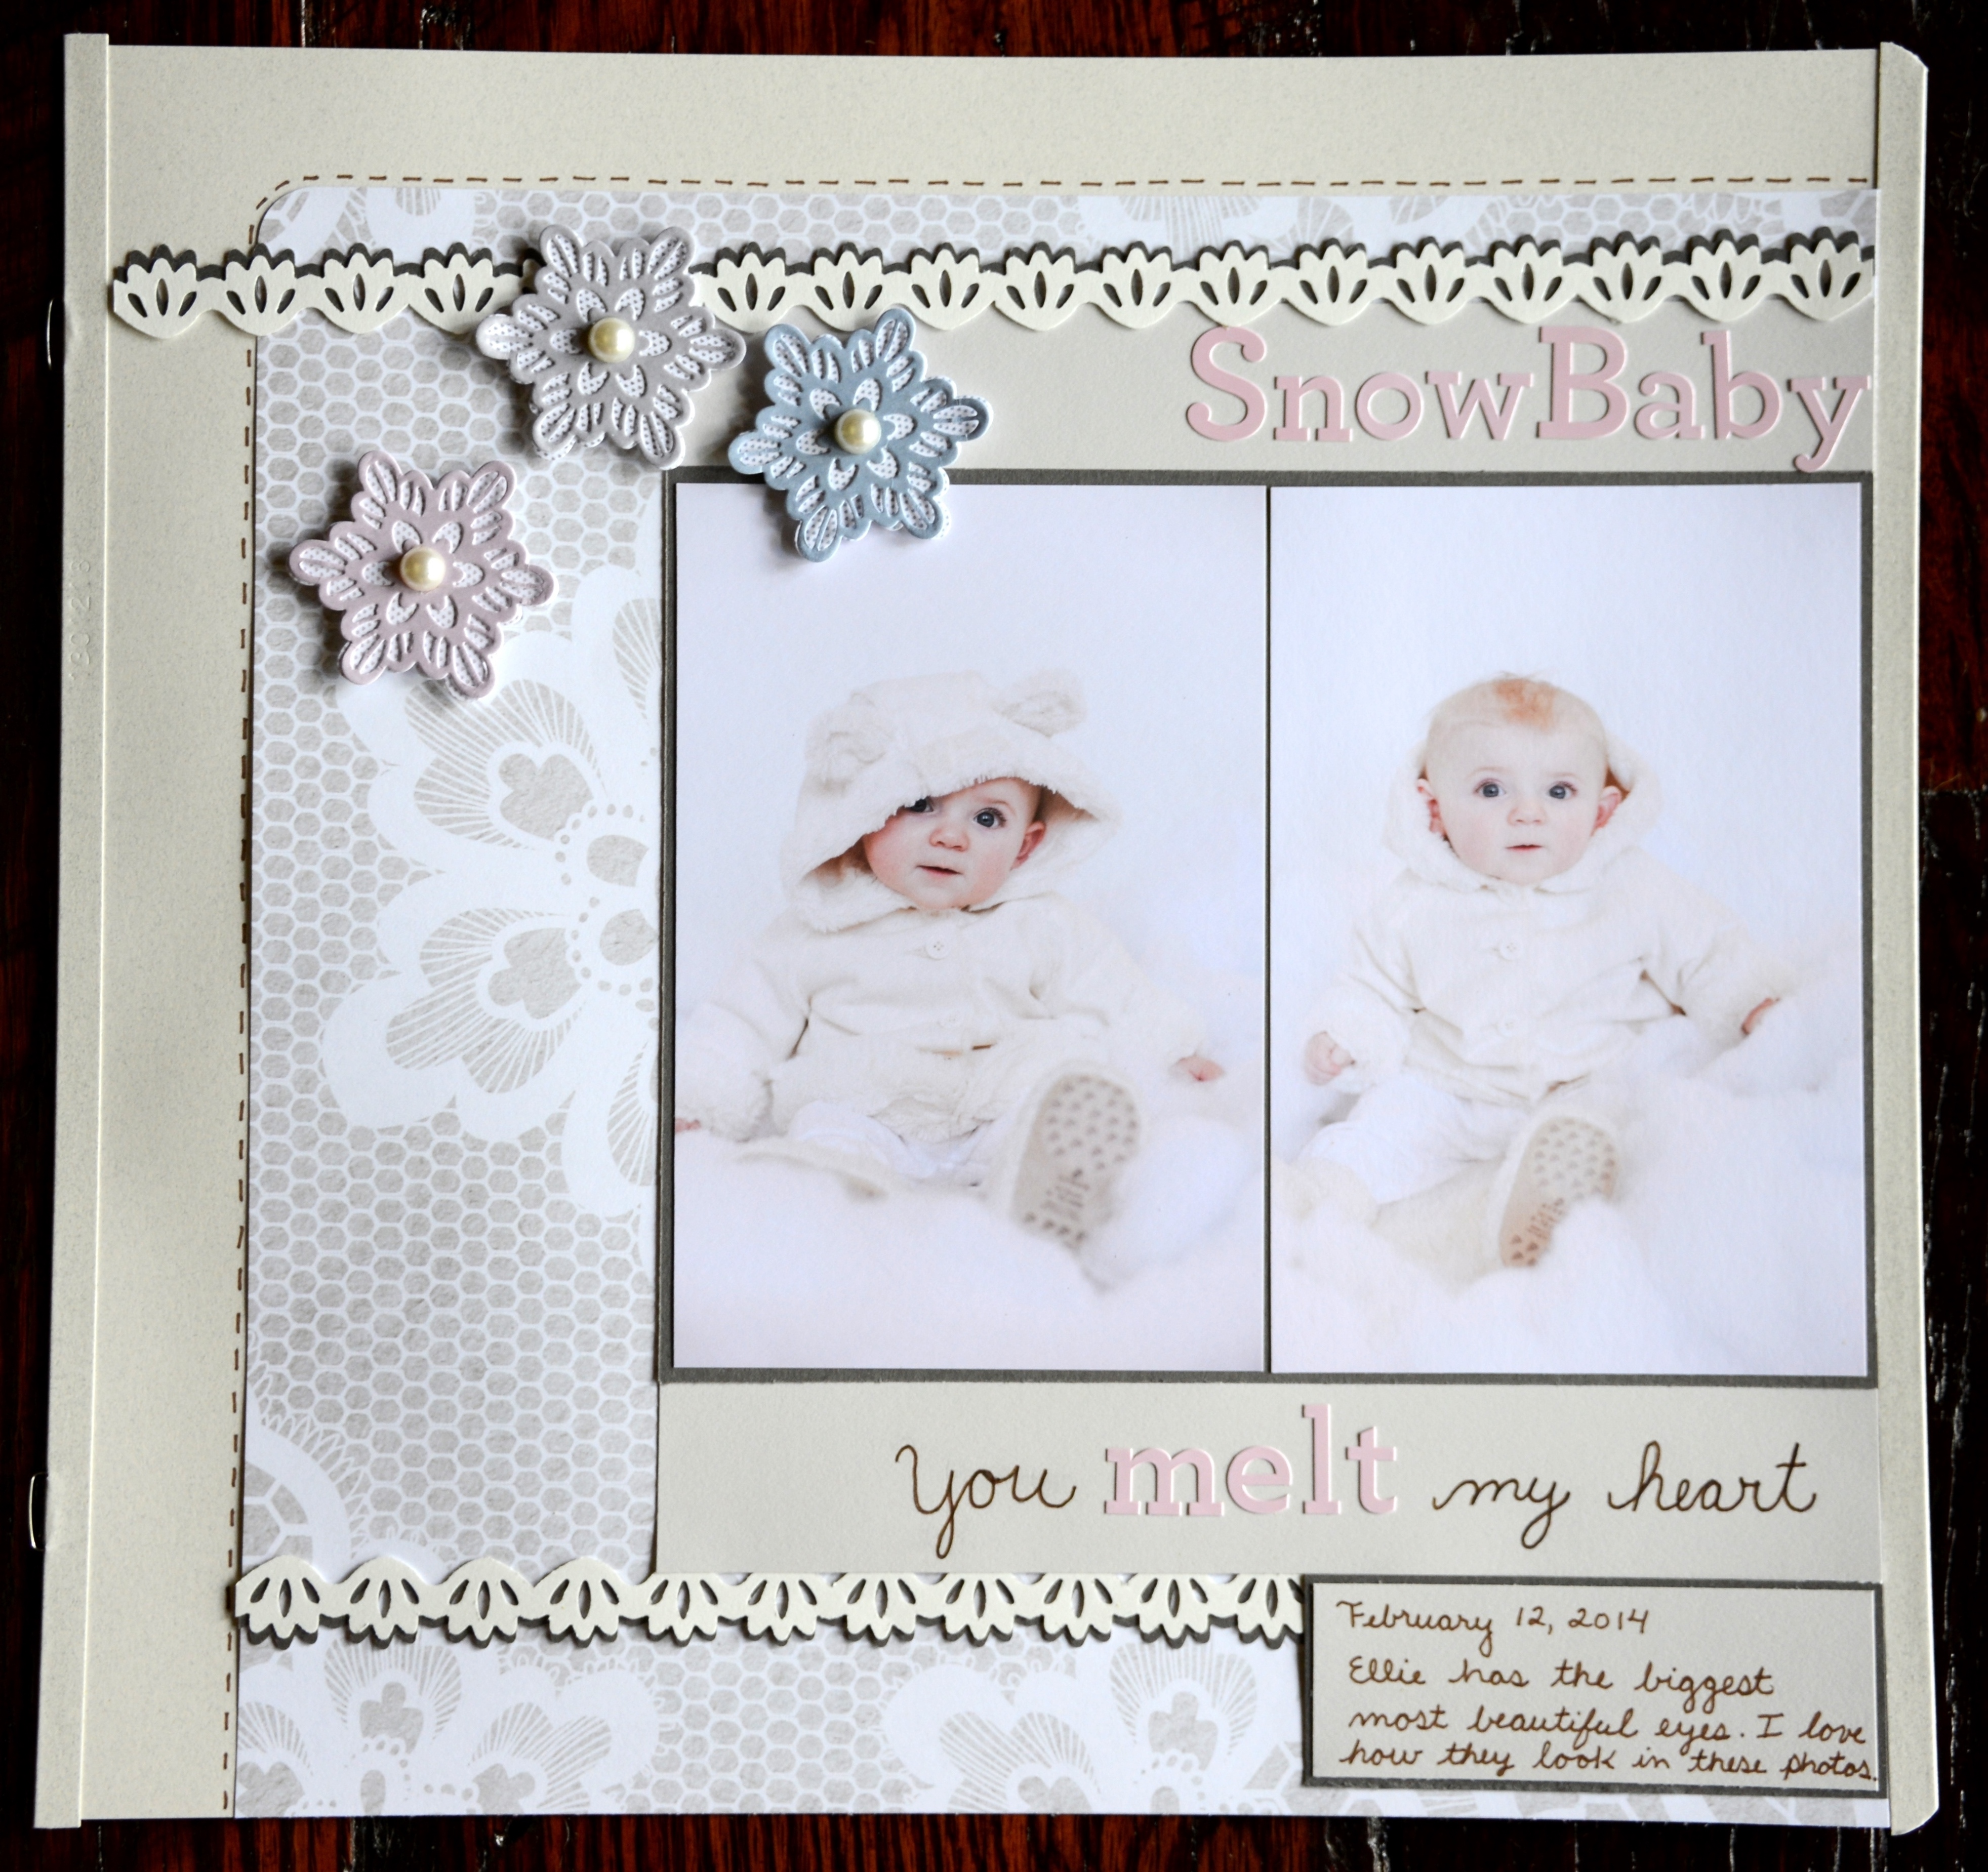
Created by Karyn McDermaid-Rolf-US:
Ingredients:
- 12×12 Spargo Page
- Natural Elegance Paper Pack
- Natural Elegance Embellishments
- Travel Solid 12×12 Cardstock Paper Pack (Dark Grey Cardstock)
- Hello Baby Solid 12×12 Cardstock Paper Pack (Warm Grey Cardstock)
- White Solid 12×12 Cardstock Paper Pack
- Pastel Pink ABC/123 Stickers
- Original Border Maker System with Lace Scallop Border Maker Cartridge
- 12-Inch Straight Trimmer
- Tape Runner
- Mini Tape Runner
- Foam Squares
- Brown Dual-Tip Pen
Step 1: Cut designer paper to 11” x 11” and round the top left corner. Adhere to page as shown and add brown pen stitching.
Step 2: Cut an 8.25” x 6.25” photo mat from the dark grey cardstock and mount photos on it.
Step 3: From the warm grey cardstock, cut two 1.25” high by 8.25” wide pieces. Add title and subtitle to the pieces.
Step 4: Punch two lace scallop borders from the white cardstock and two from the dark grey cardstock.
Step 5: Cut a 3.75” x 1.25” journal box from the warm grey cardstock and mat it with the dark grey cardstock. Add journaling.
Step 6: Assemble page as shown using mini tape runner to adhere the lace scallop borders and foam squares to adhere the snowflake embellishments.

Created by Susan Dorrington-AUS:
- Cool Serenity Paper Pack
- White Cardstock
- Black Cardstock
- Mint ABC Sticker Pack
- Watercolor Green ABC Sticker Pack
- 12″ Trimmer
- Border Maker System with Evergreen, Lace Flower Chain & Ocean Waves cartridges
- Tape Runner
- All-Purpose Scissors

Love love love Karyn’s Snow Baby page!! Sue V
Sent from my iPhone
>
Thanks, Sue! So glad that you like my page!
Wow! Wow! and Wow! I love them all! Susan’s “punch art” snowflakes and the title really rock!
Amazing the “mileage” you have gotten out of the ocean wave punch!! And the use of punch “parts” is great!!!
Beautiful Creations! Thanks for sharing these ideas!
[…] and made the borders with our Border Maker System and new Lace Scallop Cartridge. Please see our CM Blog for complete instructions on how to make this […]