September 24, 2016
Virtual Crop: Challenge 3-A Day In My Life
How are you all doing? We love seeing all the projects that you are posting on the Facebook event page! Keep them coming!
Have you ever taken the time to document YOUR life? We spend a lot of time making sure our children’s, pets, grandparents’ lives are all documented, but rarely do we ever think about documenting our own.
So, take a few minutes, and think about what you do each and every day, and how you want your family and friends to see you “at a glance”.
Challenge #3: Create a layout about a “Day in the Life”—of YOU! When you have your layout completed, make sure to take a photo and submit it on the Facebook event page to qualify for the door prizes.
Here are a few examples that our Content Contributors have shared with us, about a day in their lives!

Layout created by Melissa Ullmann-Home Office
To create this layout, you will need:
- A Year to Remember Paper Pack US CAN
- Denim Blue Paper Pack US CAN
- White Cardstock US CAN
- Study Buddies Paper Pack US CAN
- Study Buddies Embellishments US CAN
- A Year to Remember Stickers US CAN
- 12″ Straight Trimmer US CAN
- Foam Squares US CAN
- Tape Runner US CAN
- Black Pen US CAN
Use the red patterned paper as the base for this layout.
Cut a piece from the dark denim paper to measure 5″ x 12″. Adhere to the left side of the layout.
Cut a piece from the navy word patterned paper to measure 1″ x 12″. Adhere to the far left side of the layout.
Cut a piece of the multi striped paper to measure 1/2″ x 12″. Adhere along the left edge of the denim paper.
Cut a piece of the word patterned paper to measure 2″ x 12″. Adhere to the far left edge of the layout.
Cut 3 photo mats to measure 4-1/2″ x 6-1/2″. Layer, and tuck under the denim paper. Adhere photo.
Cut 3 pieces from White Cardstock to measure 3-1/2″ x 3-1/2″. Adhere at angles on the far right side. Add photos.
Adhere embellishments and rhinestones.
Journal using Black Pen.

Layouts created by Noreen Smith- CAN
To create these layouts, you will need:
- A Year to Remember Paper Pack US CAN
- A Year to Remember (Part 1 and 2) Stickers and Embellishment Packs US CAN
- White Cardstock US CAN
- Navy ABC/123 Stickers US CAN
- Tape Runner US CAN
- Black Dual-Tip Pen US CAN
- Multi-Pocket Pages US CAN
- 12” Straight Trimmer US CAN
- 2-Way Corner Rounder US CAN
- Exacto Knife
To create this “A Day in the Life” layout, I made an effort to record a few of the everyday moments that happened during a “regular day”. Since there were several photos, I knew that the Multi-Pocket Pages would be a great way to showcase them all. For each photo I wrote a brief caption on a ¼” strip of cardstock and placed it directly on the photo along with a few of the cute icon symbols and saying stickers. I used the 2-way Corner Rounder on each photo before I slipped them into their slots.
I created title and journaling boxes by cutting a 4 x 6 piece of Striped paper, rounding the corners and adhering a piece of 3-1/2” x 5-1/2” piece of white cardstock on top (also with rounded corners). I used the Navy ABC/123 Stickers for the title and number circles from the A Year to Remember Monthly Stickers to record the date. I added a few stickers and die-cut to the journal box and wrote my journaling with the Black Dual-Tip Pen.
To decorate the sides of the Multi-Pocket Pages, I trimmed two pieces of the Striped paper to ½” x 12” and trimmed two pieces of the Polka Dot paper to ¾” x 12”. I carefully cut a small slit at the top of each of the side “pockets” with the exacto knife and slid the decorative paper strips down into each one.
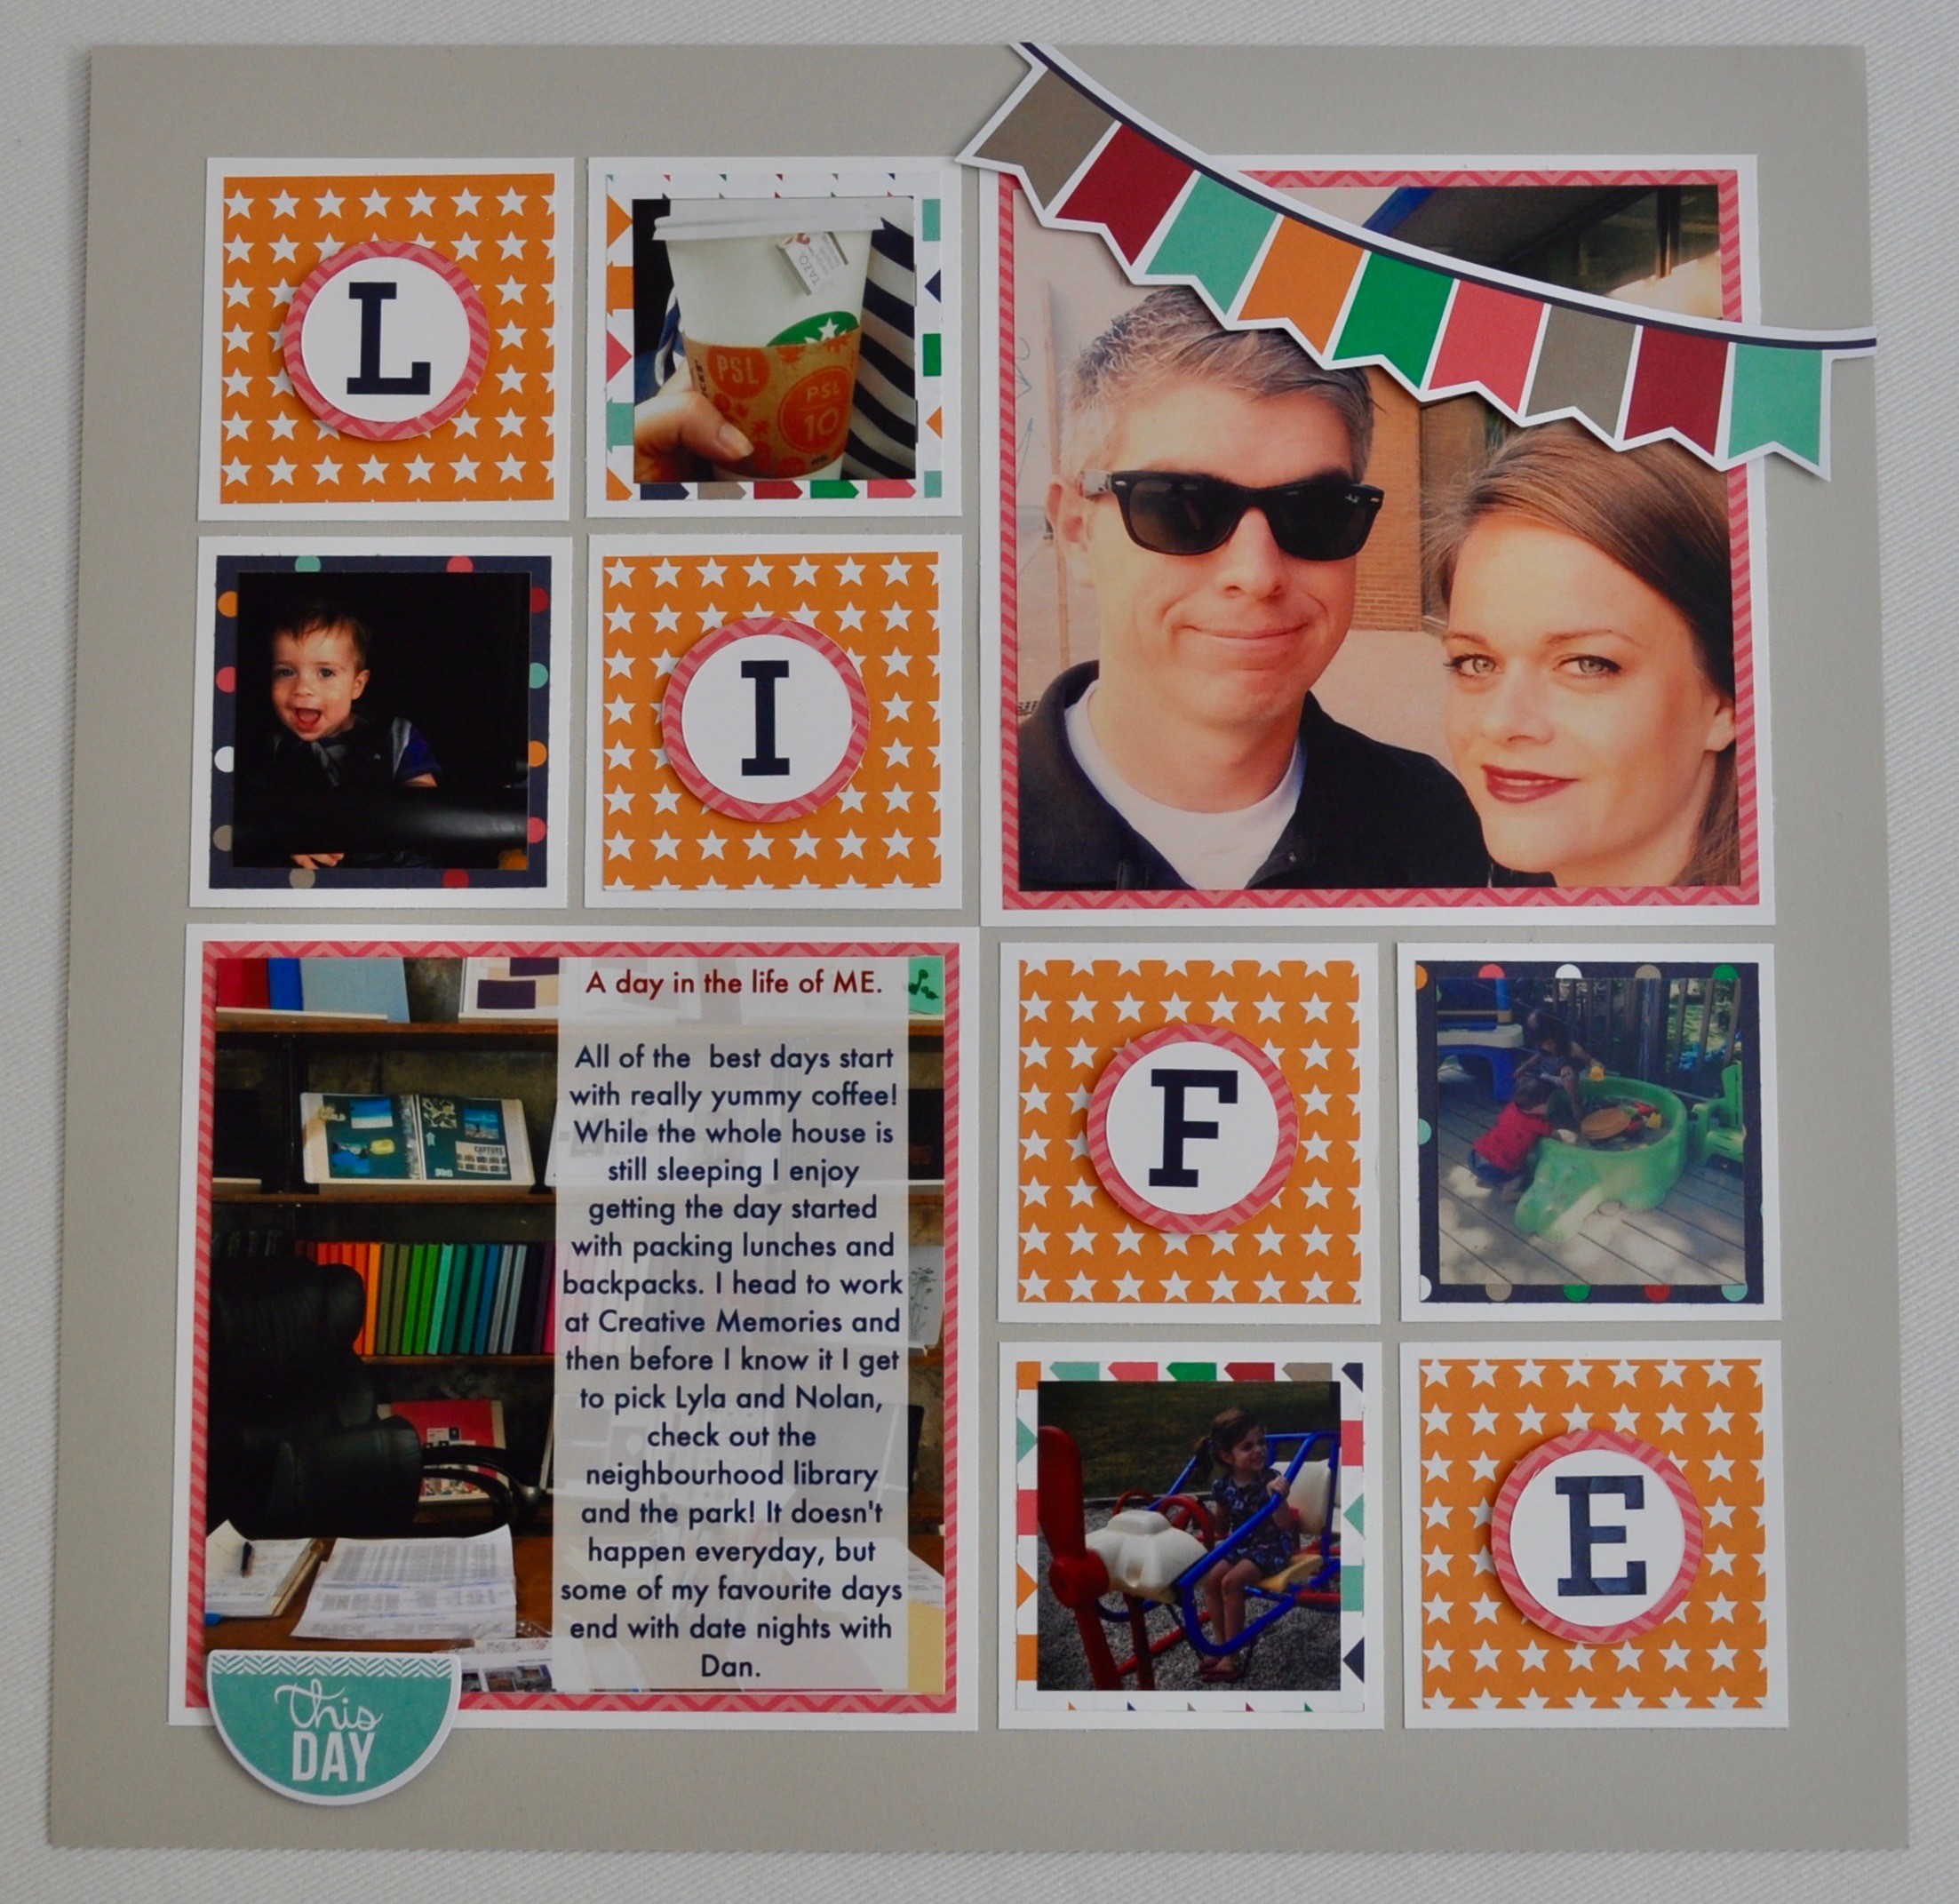
Layout created by Marja Deeth- Canada Home Office
To create this layout, you will need:
- A Year To Remember Paper Pack
- A Year To Remember Embellishments
- Navy ABC/123s
- White 12”X12” Cardstock
- Beige 12”X12” Cardstock
- Circle CSS Patterns
- Tape Runner
- Foam Squares
- Paper Trimmer


– Crop 4 photos down to 2” squares
– To create the “title” squares, use the Navy ABC/123s, stick a letter to the centre of one of the white circles and mat that with one of the A Year To Remember circles. Use a foam square to adhere that to the centre of one of the A Year To Remember squares and use a tape runner to mat that with the white square. Repeat until you have four that spell out “LIFE”.
– To create the photo squares simply adhere the photo square to the A Year To Remember square and then adhere to the white square. Repeat this until all four photos are matted.
– Cut 2 white squares measuring 5-1/4”
– Cut 2 squares out of the A Year To Remember Paper Pack measuring 5”
– Crop two photos down to 4-3/4” squares
– Adhere your photos to the A Year To Remember squares and then mat them onto the white squares.
– Leaving a 3/4” boarder around your layout, adhere your squares down to a beige 12” X 12” piece of cardstock.
– Add embellishments!
* Journalling is printed right onto the photo. Shown in two fonts to demonstrate how personalized you can make journalling even if you are printing it out :)

Layout created by Susan Dorrington-AUS
To create this layout, you will need:
- Natural Elegance Paper Pack US CAN
- Cool Serenity Paper Pack US CAN
- Uncharted Paper Pack US CAN
- Border Maker System US CAN
- Lace Scallop Border Maker Cartridge US CAN
- Dark Grey Cardstock from the Travel Pack US CAN
- Black Dual Tip Pen US CAN
- 12” Trimmer US CAN
- Tape Runner US CAN
Step 1 : Cut Pink hearts paper from the Natural Elegance paper pack to 1-1/2” wide.
Step 2: Roughly tear sepia floral paper at 7-1/2” wide. Using the tape runner, attach to your page with the Pink hearts paper tucked just underneath.
Step 3: Cut 12 squares from various designer papers to 2” x 2”. Attach to the right side of your page using tape runner.
Step 4: Cut 3 squares to 3” x 3” out of the stone look paper from the Cool Serenity paper pack. Attach with tape runner over the top of the designer paper squares. Using the Black dual-tip pen draw rough square outlines around your photo’s and the middle journaling box.
Step 5: Cut 2 photo mats to 4-1/2” x 6” from the stone look paper from the Cool Serentiy paper pack. Cut your photo to 4” x 5-1/2”. Attach to your page as shown, and draw square outlines around your photo with the Black dual-tip pen.
Step 6: Using the Border maker system and the Lace Scallop Border Cartridge cut a length using either Brown or Gray Cardstock. Cut each little scallop apart and place around the edges of your main page, drawing lines between each.
Step 7: Journal as desired.
Don’t Forget: If you place a $25 order today during the Virtual Crop (9am-6pm CST), you will get $10 off your purchase! So, if you have had a few things on your wish list, today is the day to fill the cart! Who doesn’t love a FREE $10? Happy Shopping! Make sure you use the code: SEPTCROP10
See you back here in a couple of hours!!
Happy Creating!

