October 12, 2017
Birthday Traditions
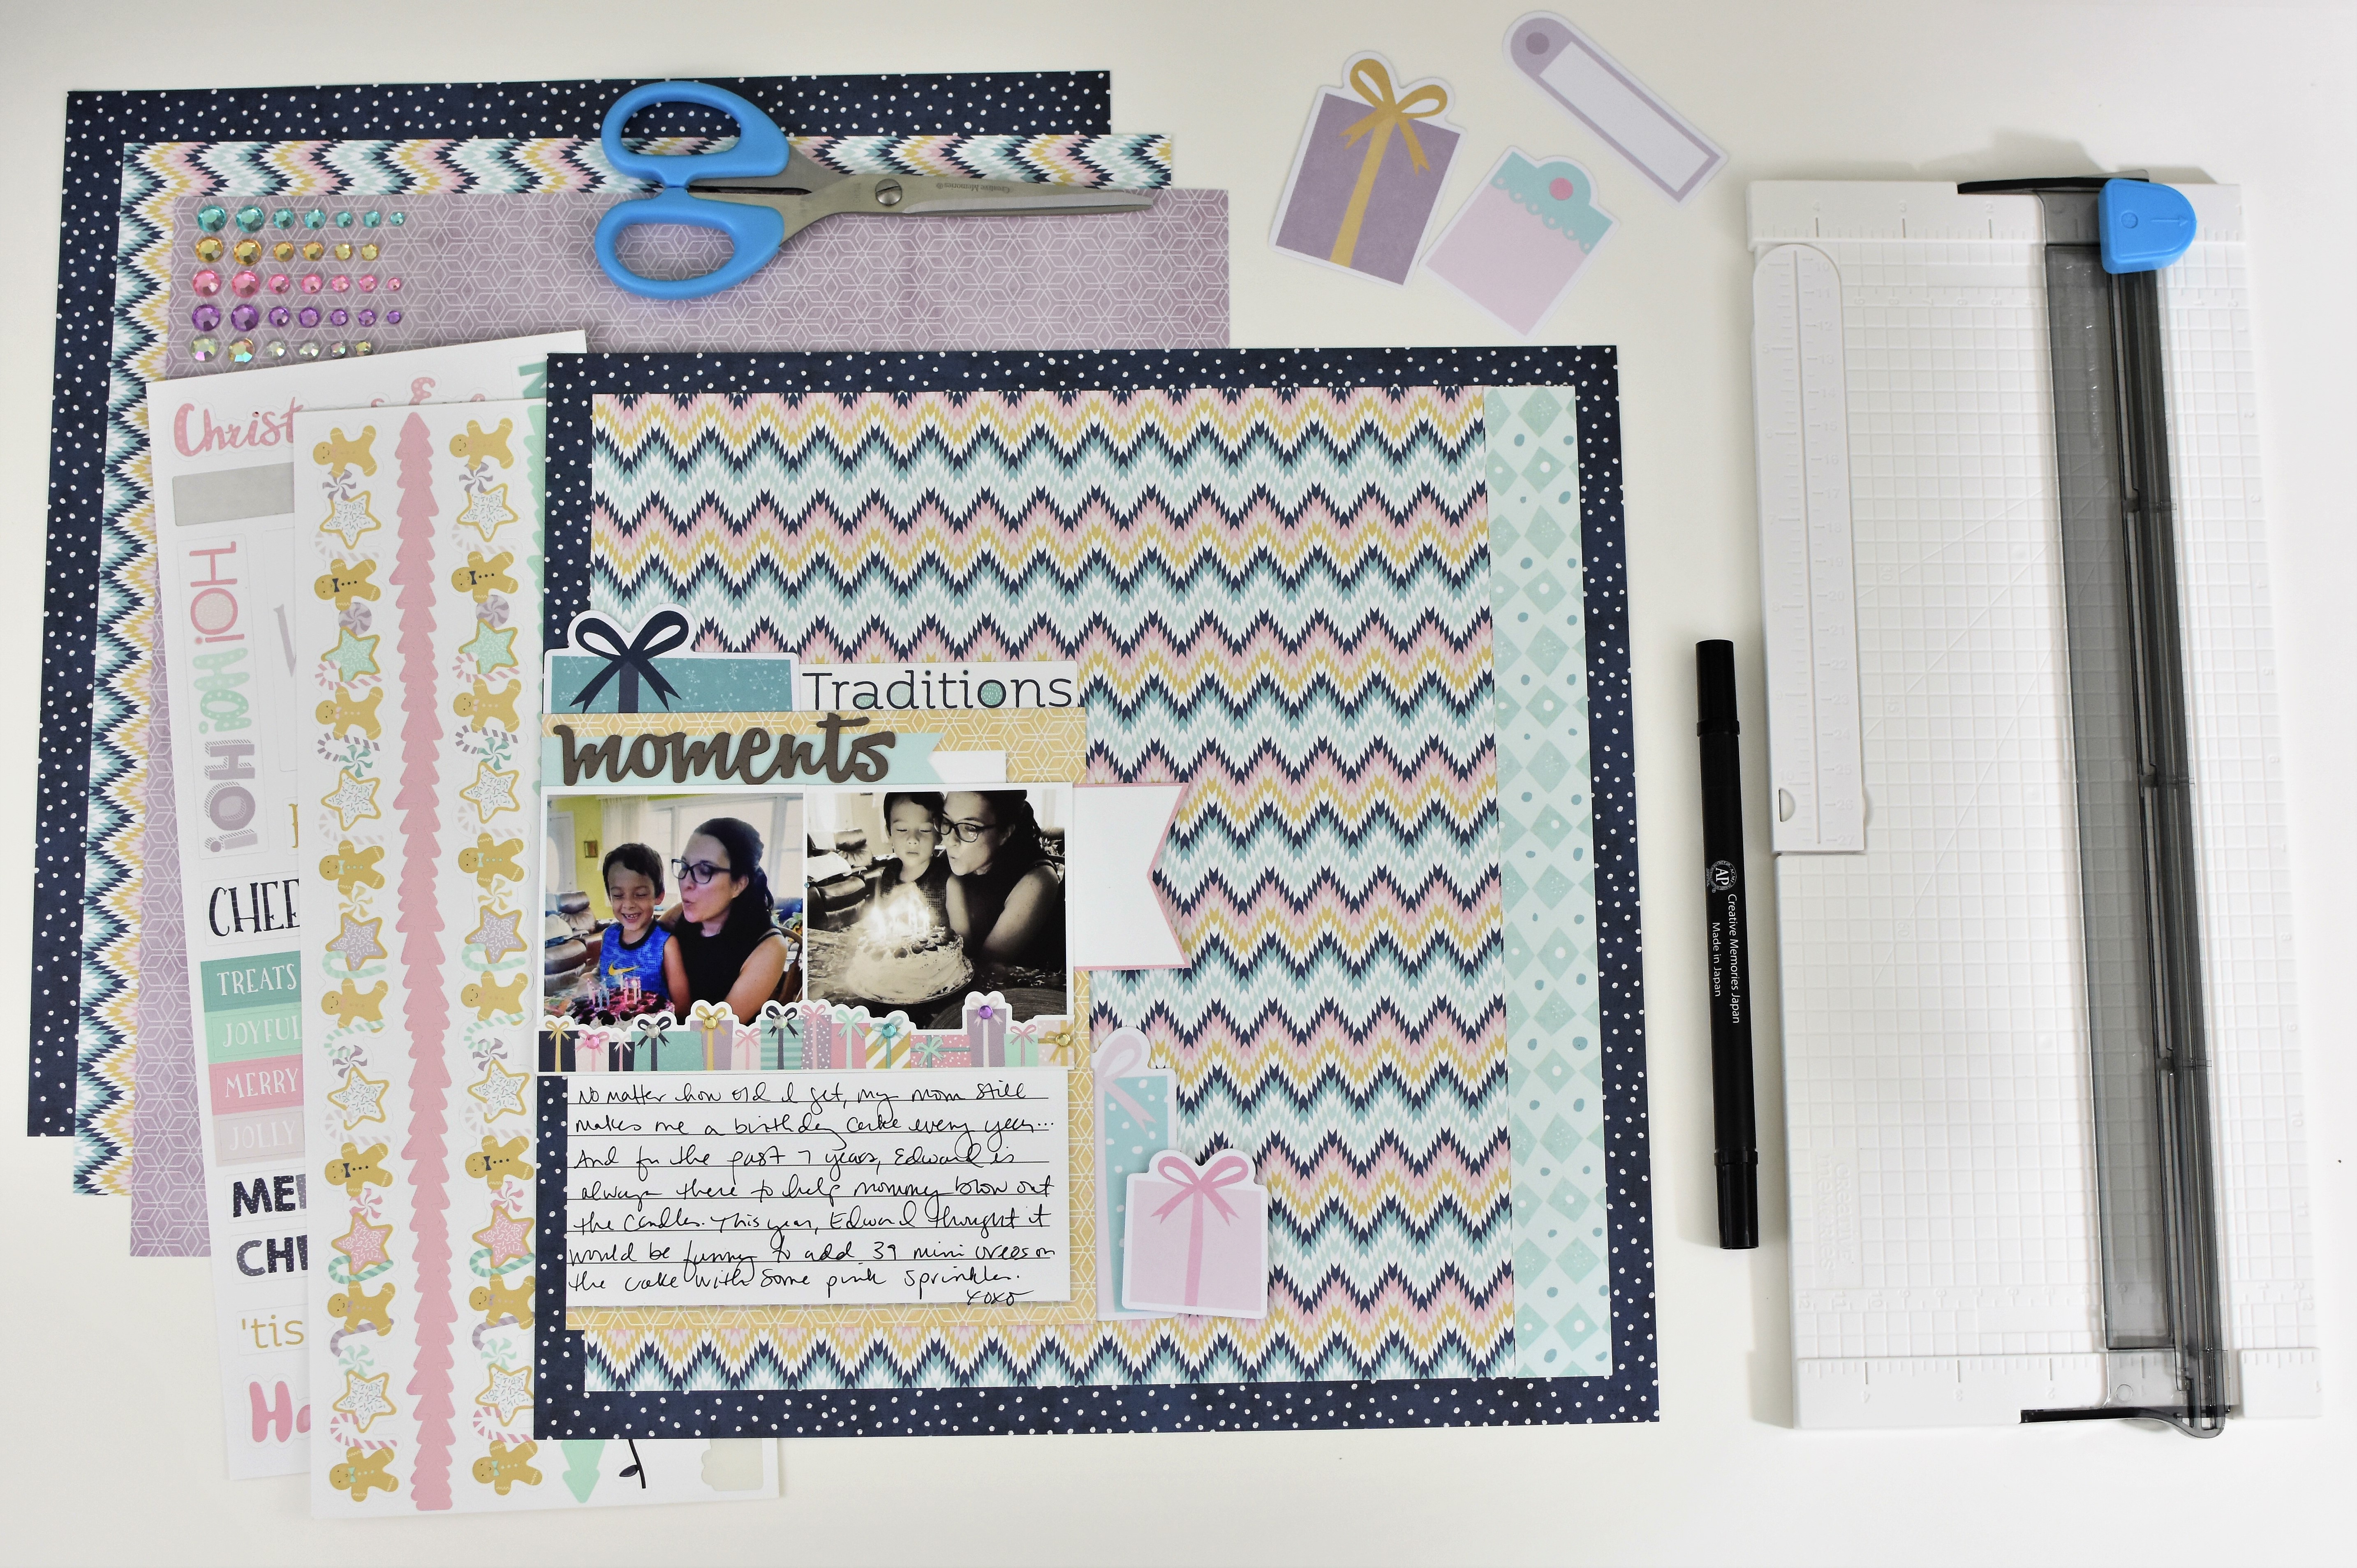
Hello creators! I am back with a birthday layout I created using the Sugarplum Designer Paper Pack, Designer Stickers, Variety Mat Pack, and Embellishments. Every year, no matter how old I get, my mommy makes me a birthday cake. Sometimes, we don’t get to celebrate my birthday with the family until the end of September, but that’s OK! I don’t know many people who would decline two birthday celebrations in one year. Do you? :)
Since Edward was a year old, he’s been helping me blow my birthday candles out. Mom has taken a picture of the two of us blowing out my birthday candles together for the past 7 years. I love this tradition… This year, Edward was really excited because he helped make the cake and he requested Oreos and pink sprinkles to decorate the cake with exactly 39 miniature Oreos.
To create this 12×12 layout, you will need:
- Sugarplum Paper Pack, Embellishments, Stickers, and Variety Mat Pack
- Everyday Sentiment Laser Cut Die Cut Embellishments
- 12-inch Straight Trimmer
- Black Dual-Tip Pen
- Tape Runner and Foam Squares
- All-Purpose Scissors
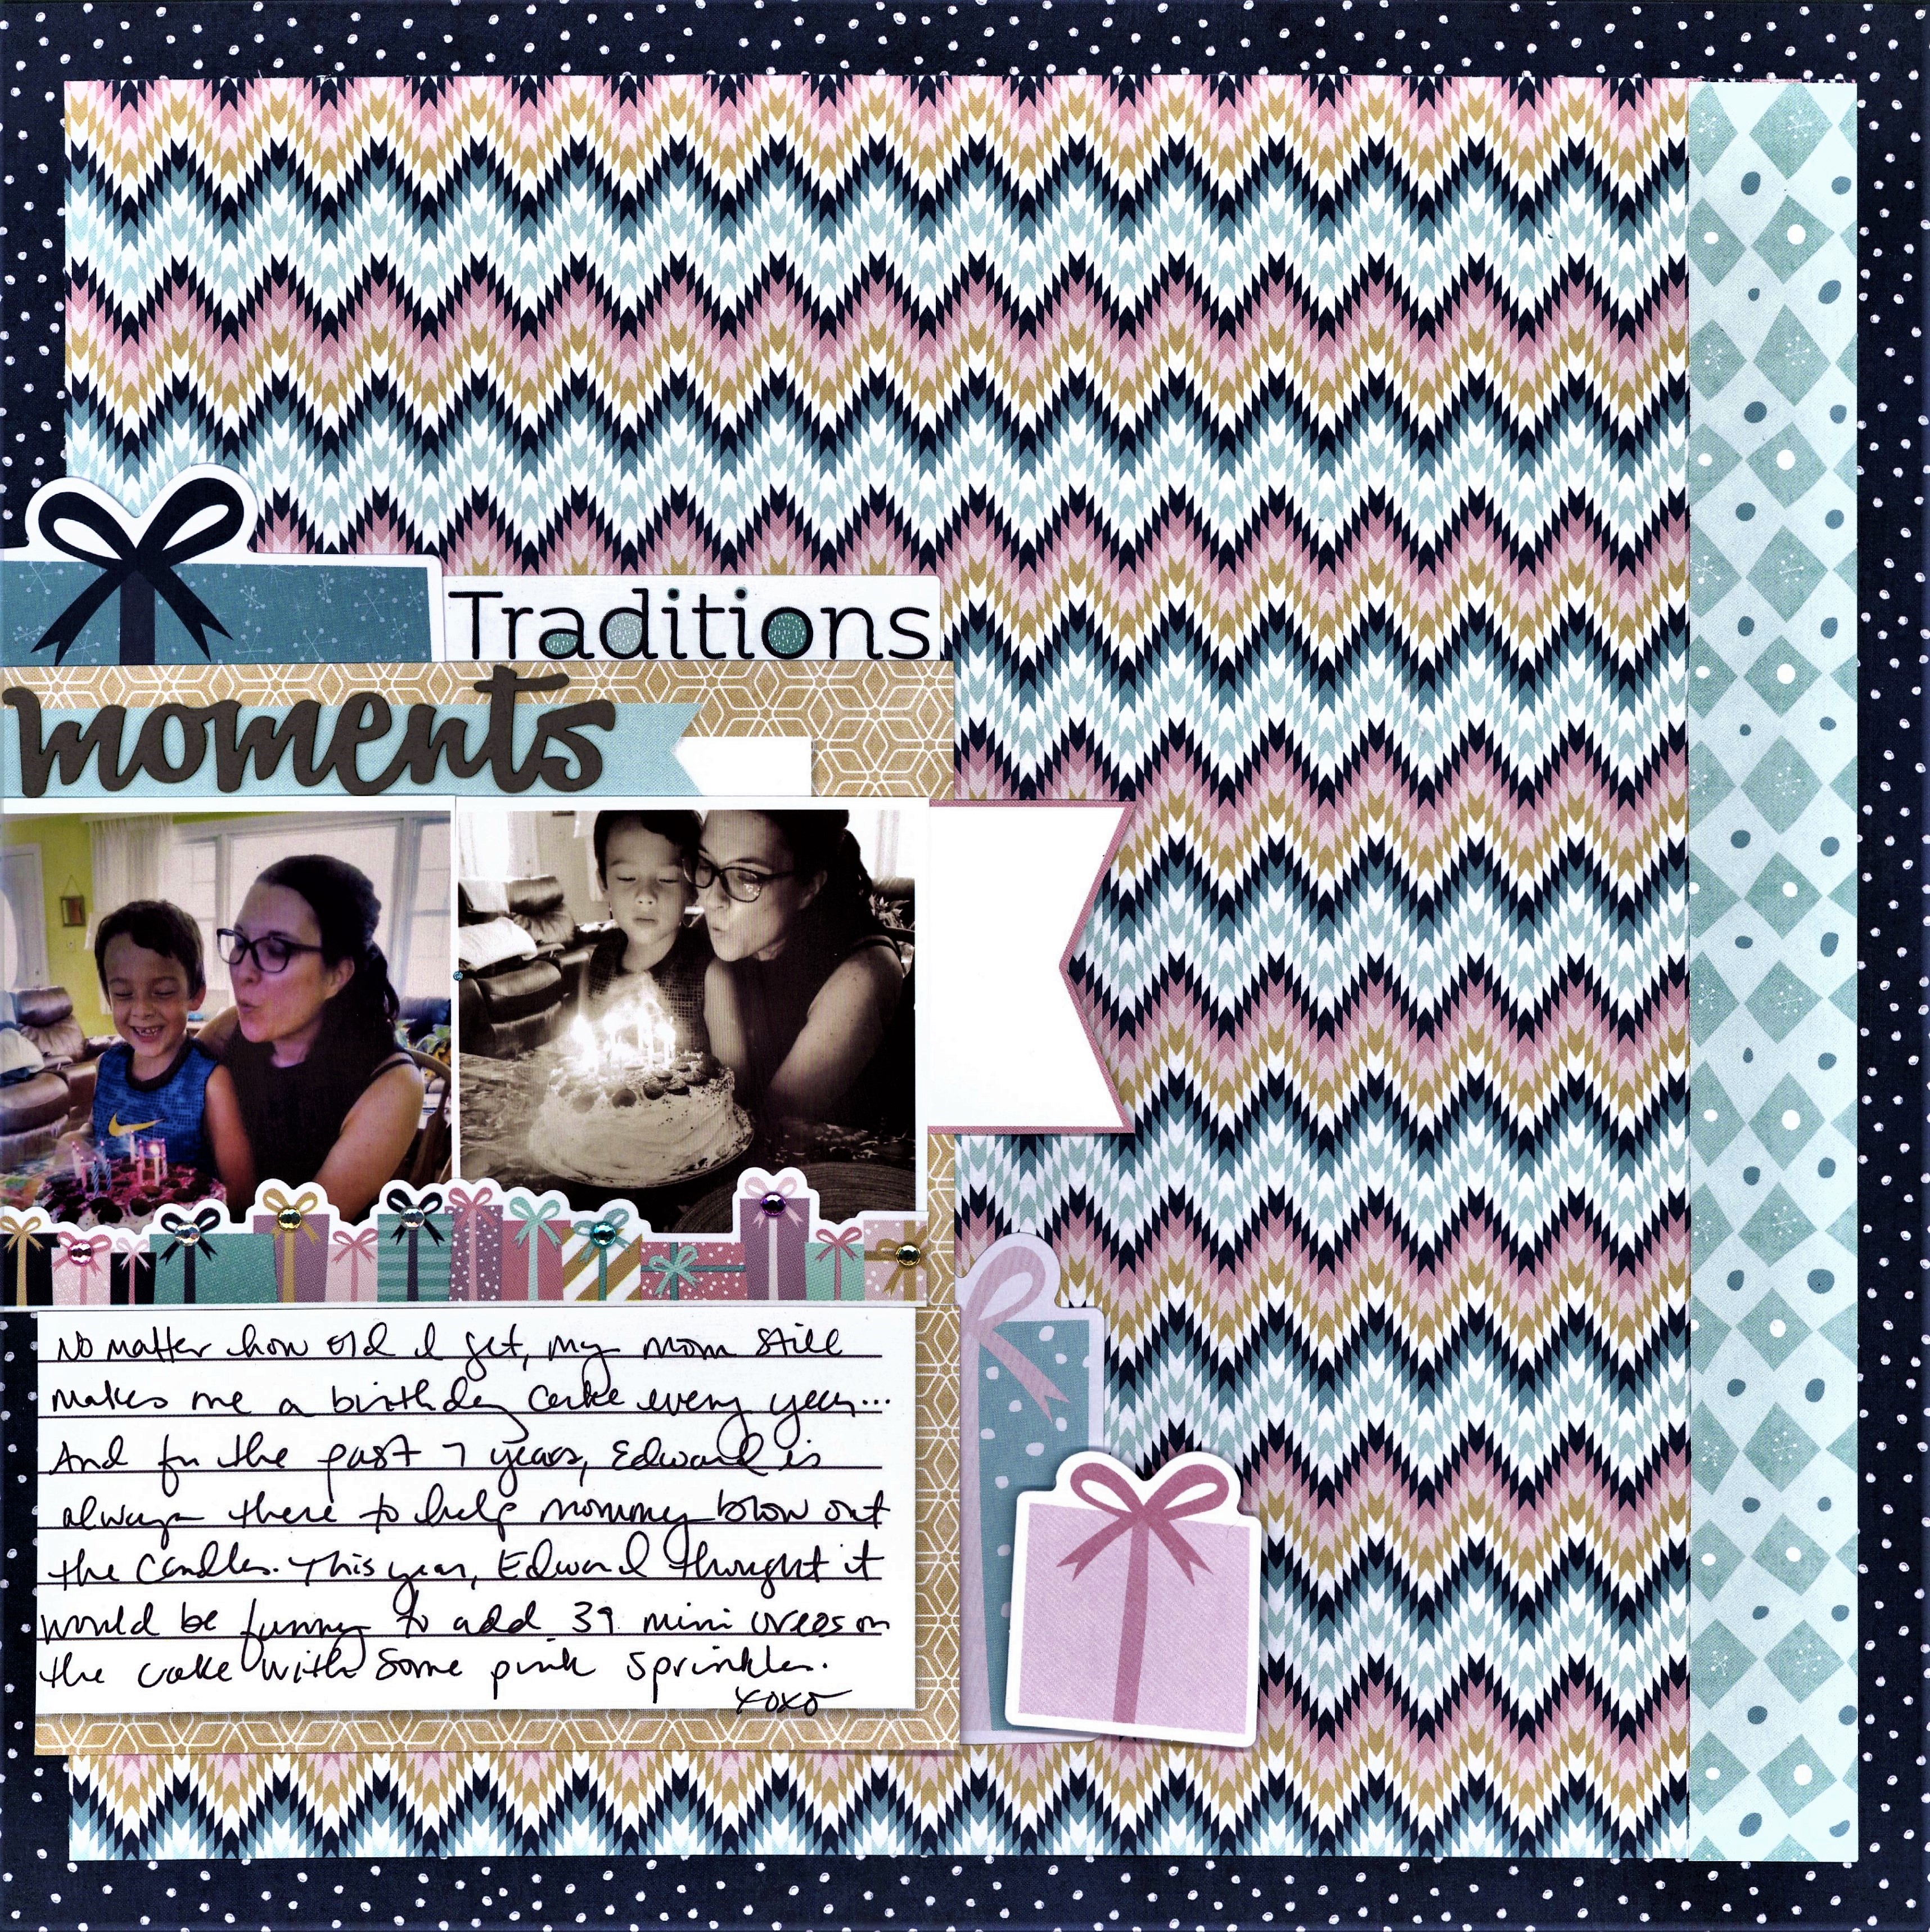
I used the dark blue and white polka dot patterned paper for the base. Then I cut the multi-color patterned paper down to 11×11 inch using my 12-inch straight trimmer and then I adhered it to the center of the base. I used the 12″x1″ scrap from the cut as a border on the right-hand side of the layout.
I adhered the beige and mint mat from the Sugarplum Variety Mat Pack as a frame by adhering it approximately 4″ from the top of the base and the far left-side of the layout. I used the All-Purpose Scissors to cut out the pink banner from another mat. Then I adhered it to the beige mat, allowing the pointy end to stick out a bit as shown.

I printed two 3″x3″ photos that I resized using PicMonkey’s photo collage program then adhered them to the mat as shown. Then I trimmed the presents border sticker down so that it would be the same length as the photos. I tucked the Present die cut at the top of the mat and added the “Traditions” sticker next to the die cut. I adhered the “Moments” Everyday Sentiment Laser Cut Embellishments above the collage of photos.

I cut the white and beige mat in half and adhered it below the photos to use as the journaling mat. Then I used a Black Dual-Tip Pen to hand- journal within the mat my story.

I tucked a few presents behind the mat using a Taper Runner and Foam Squares.

I completed the layout by adding a few jewels on the border sticker to make it pop.

I really love the colors in the Sugarplum Collection. It’s so pretty and I am already looking forward to scrapbooking either a wintery layout or a Christmas layout using this collection; maybe both!
Thanks for visiting today! I hope I was able to inspire you in some way today with this gorgeous collection.


A great way to show just how versatile Sugarplum really is! Thank you!