February 20, 2018
5 CM Collections You’ll Love to Use with the Textile Collection
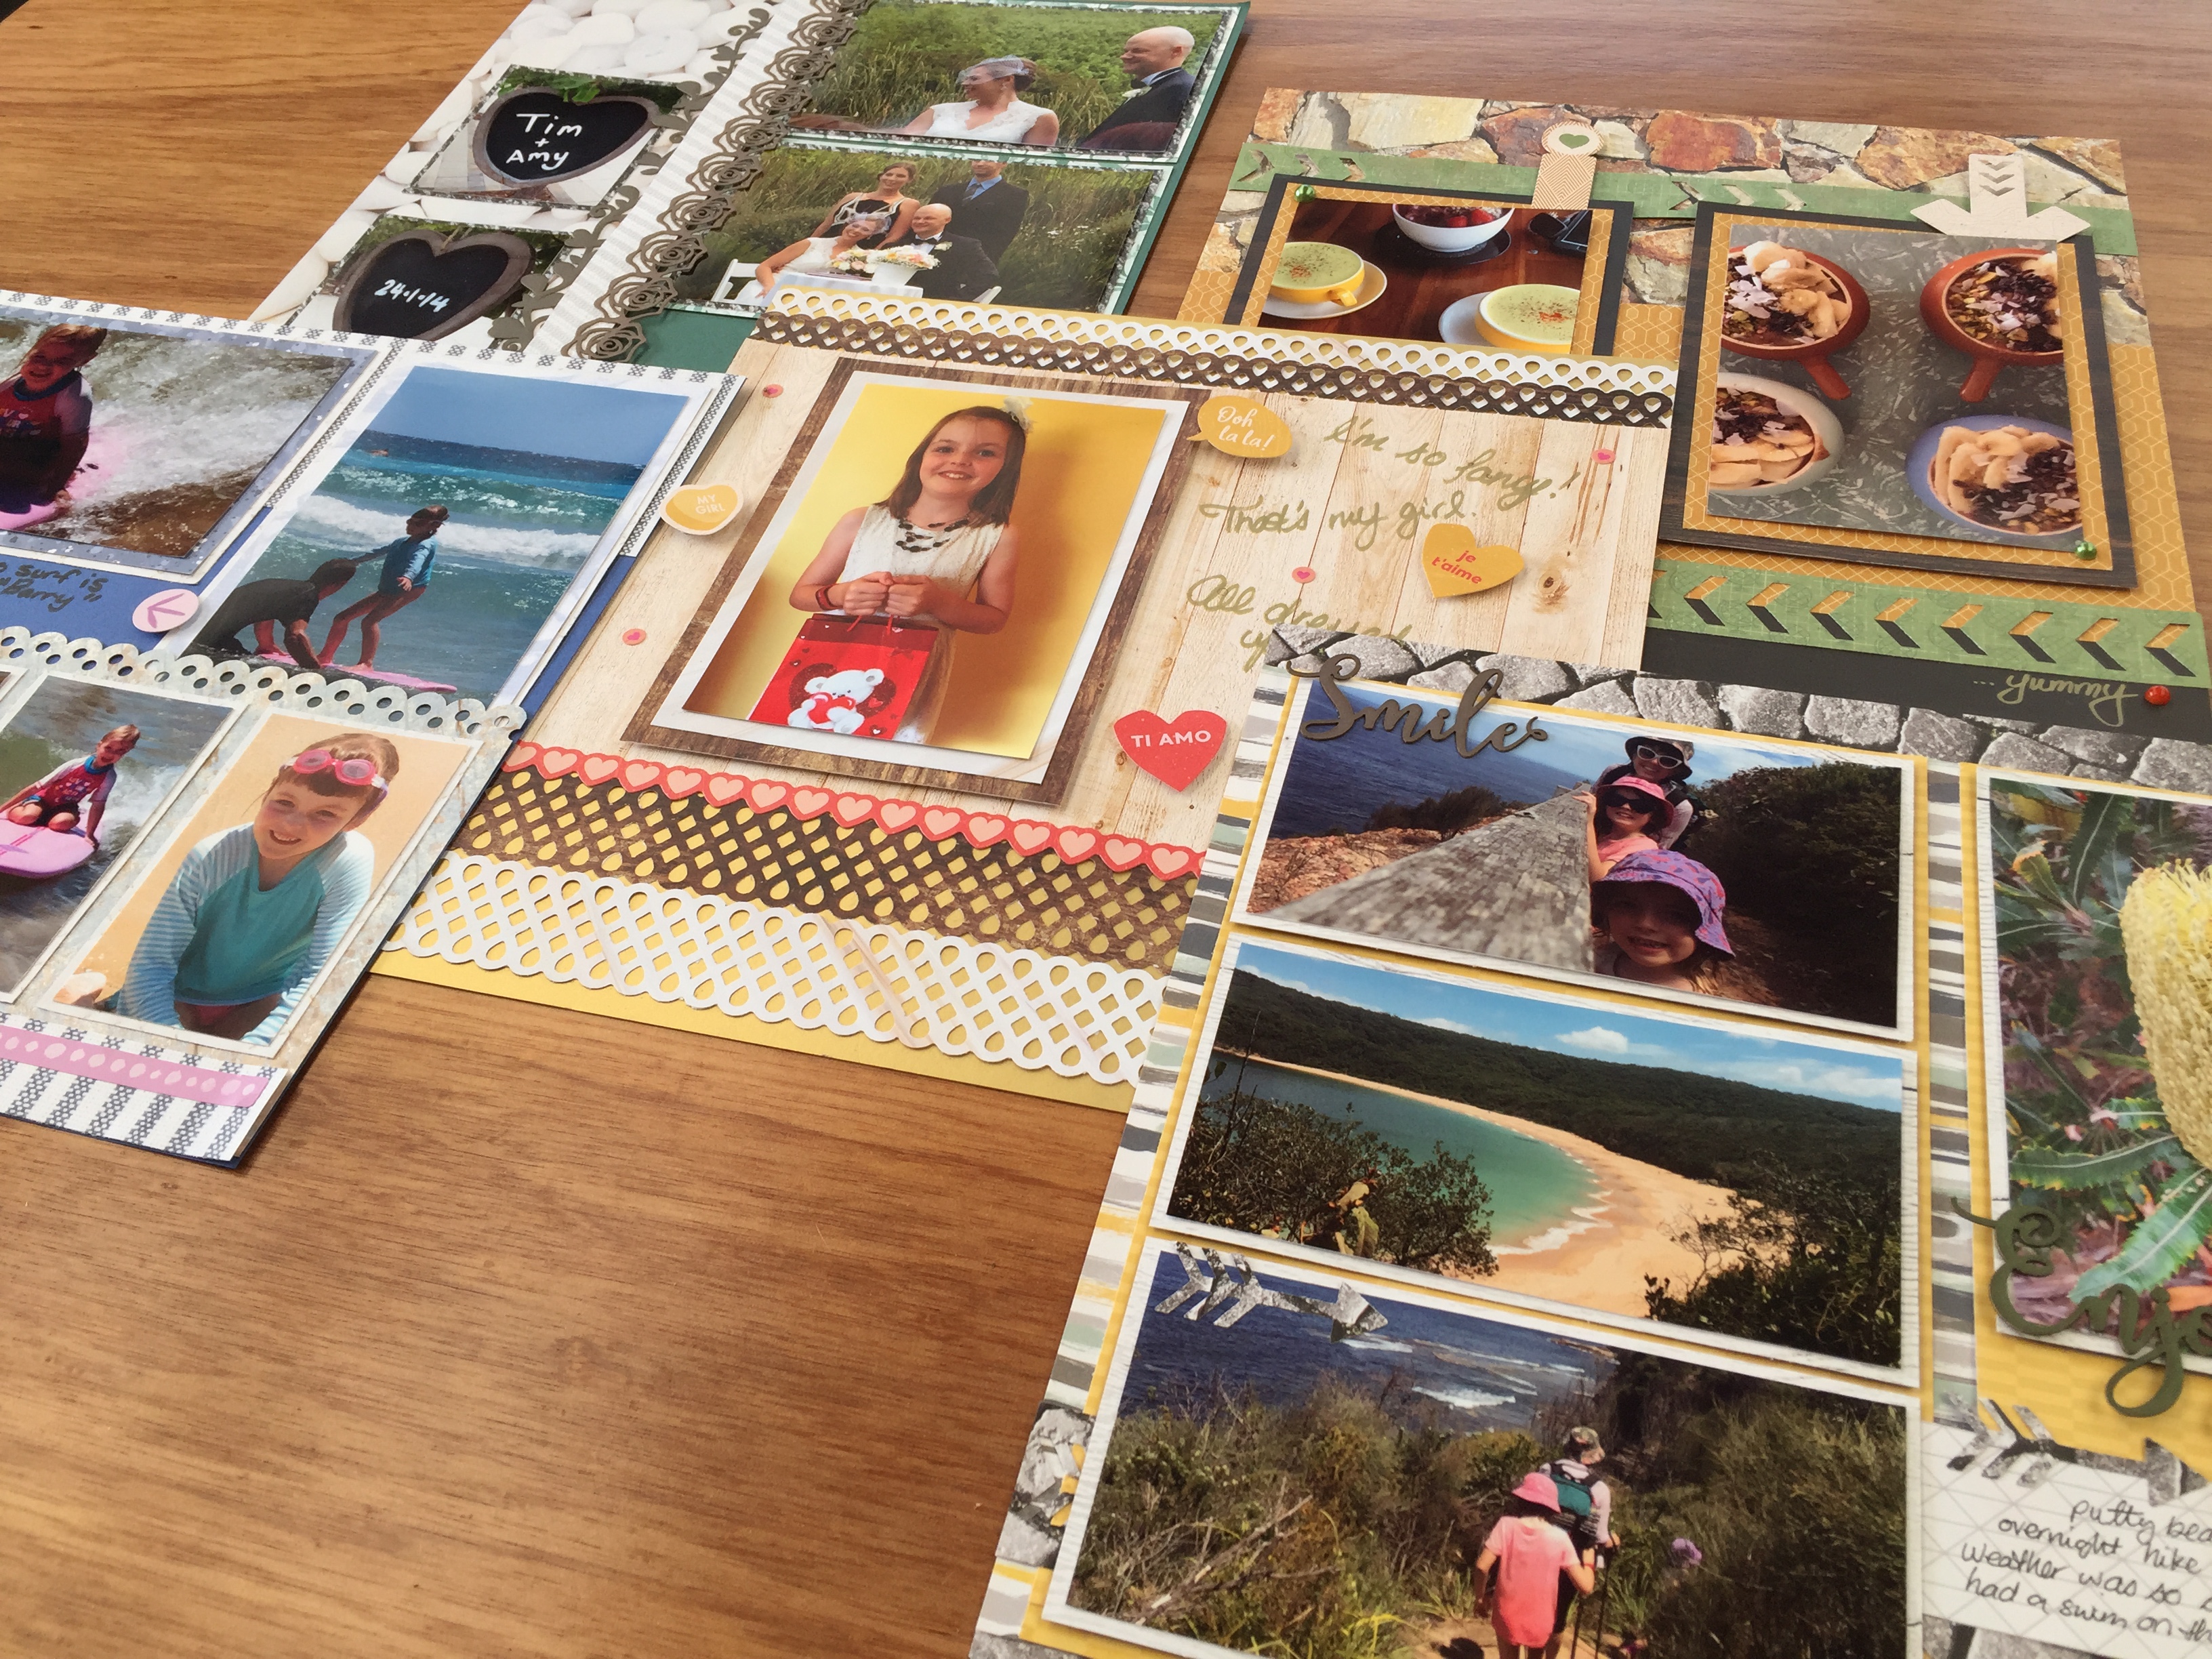
Yesterday, we launched the new Textile Timber, Stone and Cloth Paper Packs, and while they make stunning layouts by themselves, you’re not going to believe how awesome they work making stunning scrapbook layouts paired with other CM collections! We’ve compiled five of our favorites for you today. Intrigued?


#1 – Cloth + Timber + Full Bloom

What You’ll Need:
- Cloth Paper Pack
- Timber Paper Pack
- Full Bloom Variety Mat Pack
- Full Bloom Stickers
- Scallop Dot Border Maker Cartridge
- Royal Blue Cardstock
- Black Dual-Tip Pen

Instructions:
- Start with a full sheet of Royal Blue Cardstock. Adhere a 12″ x 3-1/2″ inch strip of “striped” Textile paper to the top of the cardstock.
- Mat two 6″ x 4″ photos with Full Bloom Mats and “quilt” Cloth paper trimmed to 4-3/4″ x 6-3/4″, adhere at the top of the layout.
- Cut a 12″ x 6″ strip of “blue” timber paper and punch along one edge with the Scallop Dot Border Maker Cartridge, adhere at the bottom of the layout (overlapping one photo.)
- Mat four 2-1/2″ x 4″ photos with “quilt” paper trimmed to 2-3/4″ x 4-1/4″, adhere photos evenly spaced across the bottom of the layout.
- Trim a 12″ x 1″ strip of “striped” paper and adhere across the bottom of the layout. Add stickers and journaling.

#2 – Cloth + Stone +Full Bloom + Archiver’s™
 What You’ll Need:
- Cloth Paper Pack
- Stone Paper Pack
- Full Bloom Variety Mat Pack
- Archiver’s ABC/123 Stickers
- Archiver’s Laser Cut Borders
- Evergreen Cardstock
- Black Dual-Tip Pen

Instructions:
- Start with a full sheet of Evergreen Cardstock. Adhere a 12″ x 5-1/4″ inch strip of “pebble” paper to the left of the cardstock.
- Mat two 6″ x 4″ photos with”dark wool” paper trimmed to 6-1/4″ x 4-1/4″ and Full Bloom Mats, adhere on the right side of the layout.
- Mat two 3″ x 3-1/2″ photos with “dark wool” paper trimmed to 3-1/4″ x 3-3/4″, adhere photos on the left side, approximately 1/2″ away from the left and bottom edge of the layout.
- Adhere a Laser Cut Border on the right side of the small photos with Repositionable Tape Runner.
- Trim a 12″ x 1″ strip of “diagonal striped” paper, adhere another Laser Cut Border, half-on-half-off this strip using Repositionable Tape.
- Add Foam Squares to the back of the 1″ strip and place it in line with the edge of the “pebble” paper. Add stickers and journaling.

#3 – Timber + Stone + Bee Mine

What You’ll Need:
- Timber Paper Pack
- Stone Paper Pack
- Bee Mine Stickers
- Teardrop Lattice Border Punch
- Gold Shimmer Cardstock
- Gold Dual-Tip Pen

Instructions:
- Start with a full sheet of Gold Shimmer Cardstock.
- Punch 2 “light marble” paper and “dark wood” paper Teardrop Lattice Borders.
- Using Repositionable Tape Runner, adhere 2 of the Teardrop Lattice Borders overlapped at the top of the page and 2 not overlapped at the bottom of the page.
- Trim a 12″ x 7-1/2″ strip of “light wood” paper and adhere overlapped with the top borders.
- Mat a 4″ x 6″ photo with “light marble” paper trimmed to 4-1/2″ x 6-1/2″ and “dark wood” paper trimmed to 5″ x 7″, adhere to the left side of the layout.
- Add stickers, some with Foam Squares (double-stacking some for extra height), some without and your journaling.

#4 – Timber + Stone + Fur Buddies + Countryside Comfort
 What You’ll Need:
- Timber Paper Pack
- Stone Paper Pack
- Fur Buddies Paper Pack
- Everyday Sentiments Laser Cut Embellishments
- Arrow Border Maker Cartridge
- Black Dual-Tip Pen

Instructions:
- Start with a full sheet of “striped” Fur Buddies paper. Trim two 12″ x 3/4″ strips of “cobblestone” Stone paper and adhere to the top and bottom of the layout.
- Trim a 6-1/2″-10-1/2″ strip and 4-1/2″ x 10-1/2″ strip of “yellow” Fur Buddies paper, adhere these onto the “striped” paper.
- Punch a border of “cobblestone” paper with the Arrow Border Maker Cartridge and trim the border to 1-1/4″, place this approximately 1-1/2″ from the bottom of the page.
- Mat two 6″ x 3″ photos with “white wood” paper trimmed to 6-1/4″ x 3-1/4″ and one 6″ x 3-1/4″ photos with “white wood” paper trimmed to 6-1/4″ x 3-1/2″, adhere to the left side of the layout with Foam Squares.
- Mat on 4″ x 6″ photo with “white wood” paper trimmed to 4-1/4″ x 6-1/4″ and adhere to the right side with Foam Squares.
- Trim a 5″ x 1-1/2″ strip of “grid” Fur Buddies paper and snip one end with scissors into a flag, place one end under the bottom left photo just above the arrow border.
- Finally, decorate with a few of the arrow shapes and Everyday Sentiments, then add your journaling.

#5 – Timber + Stone + Countryside Comfort + Gallivant
 What You’ll Need:
- Timber Paper Pack
- Stone Paper Pack
- Countryside Comfort Paper Pack
- Gallivant Paper Pack
- Gallivant Embellishments
- Chevron Border Maker Cartridge
- Gold Dual-Tip Pen

Instructions:
- Start with a full sheet of “sandstone” paper. Trim a 12″ x 1-1/2″ strip of “dark wood” paper and adhere to the bottom of the layout.
- Trim a 12″ x 5-1/2″ strip “yellow” Countryside Comfort paper, adhere just above the “dark wood” paper strip.
- Punch a border of “green” Gallivant paper with the Chevron Border Maker Cartridge and trim the border to 1-1/4″, place this overlapping the Timber and Countryside Comfort papers at the bottom of the page.
- Punch another border of “green” Gallivant paper with the Chevron Border Maker Cartridge, this time only punching in 2 places and trim the border to 1-1/4″. Adhere this approximately 1-1/4″ from the top of the page.
- Double-mat two 6″ x 4″ photos with “yellow” Countryside Comfort paper trimmed to 4-1/2″ x 6-1/6″ and “dark wood” paper trimmed to 5″ x 7″.
- Adhere the photos with Foam Squares in the center of the page, slightly overlapping the top green border.
- Add Gallivant Embellishments with Foam Squares and your journaling.

Basic Supplies needed to create all the layouts above:
- Tape Runner
- Repositionable Tape Runner Refill
- Foam Squares
- Border Maker System
- 12-inch Trimmer
- Personal Trimmer
- Scissors
So, that’s our list of 5 CM collections you can pair with the Textile collection… Comment below and tell us what products you plan to combine your Textures Paper Packs with!

Wow, I wasn’t even aware of the Stone and Cloth paper packs! They look so awesome. :-)
I love looking at the layout examples and thinking about the possibilities. <3
So many possibilities with this collection!
Are the cloth and stone papers a/f&l/f.
Yes, they are acid free and Lignin free. They are straight from CM!
Correct! They are both acid-free, lignin-free.
I love seeing some layouts with 4 photos. One of the comments I consistently hear from customers who subscribe to the Blog is there are too complicated layouts and not enough pictures. Could you post more for those who want something simple that enhances 4-6 photos per page? Do love these paper combinations, though!
Glad you like the ideas! We try to provide posts that accommodate a variety of skill levels, but we will take this feedback into consideration!
Nice! Love the new paper! But I agree, I’d rather see more simple layouts that don’t use up so much paper. I like to make my paper last longer. And yes, that show 4-6 photos per page!
Thanks for the feedback! We try to provide a variety of posts that will accommodate all of our audience.
some nice page possibilities for guy pages.
Definitely!
[…] Looking for more ideas for other collections that match the Textile Paper Packs? Check out 5 other collections that will pair nicely! […]