April 18, 2018
Hand Stitching Baby Scrapbook Layouts

Looking to mix up your baby scrapbook layouts? You have come to the right place! Today, we are going to show you how to use a needle and a thread on your scrapbook layout! Intrigued?
This fun little tutorial for you today uses the Little Lamb Boy collection. I think this is the cutest baby boy collection I have seen in awhile. I love the soft color palette and the adorable die cuts. I must admit, I do miss taking photos of babies!! My baby is 8 years old so I had to pull some of his baby pictures out and I loved looking back at them. He was such a cutie… bald head and all!

To complete this 12×12 layout, you’ll need:
- Little Lamb Boy Paper Pack
- Little Lamb Boy Embellishments
- Little Lamb Boy Variety Mat Pack
- 4-Way Hearts and Stars Corner and Hole Punch
- Black Dual-Tip Pen
- 12-inch Straight Trimmer
- All-Purpose Scissors
- Tape Runner
- Precision Point Adhesive Pen
- Foam Squares
- Needle and Thread
Whenever I receive a new collection, I like to look through the papers, embellishments and mat pack. This really gets the ideas flowing and I get so excited when I think of a neat technique to try. While I was looking through the mat pack, I spotted a cute mat with faux stitching and thought to myself, it would be a perfect template to use with real thread and a needle! So, that’s what I did.
I used a needle to poke holes at each point, straight down the card. Once the holes were complete, I fed the string through each of the hearts in a zig-zag line. Be sure to tie a knot at the end so the thread does not pull through the paper.


Step-by-Step Instructions:
- Use the chevron patterned paper as the base. Using a 12-inch Straight Trimmer, cut the blue circle patterned paper down to measure 11″ x 11″. Punch 4 hearts using the 4-Way Hearts and Stars Corner and Hole Punch to punch hearts in each corner of the paper. Apply the 11″ x 11″ square to base.
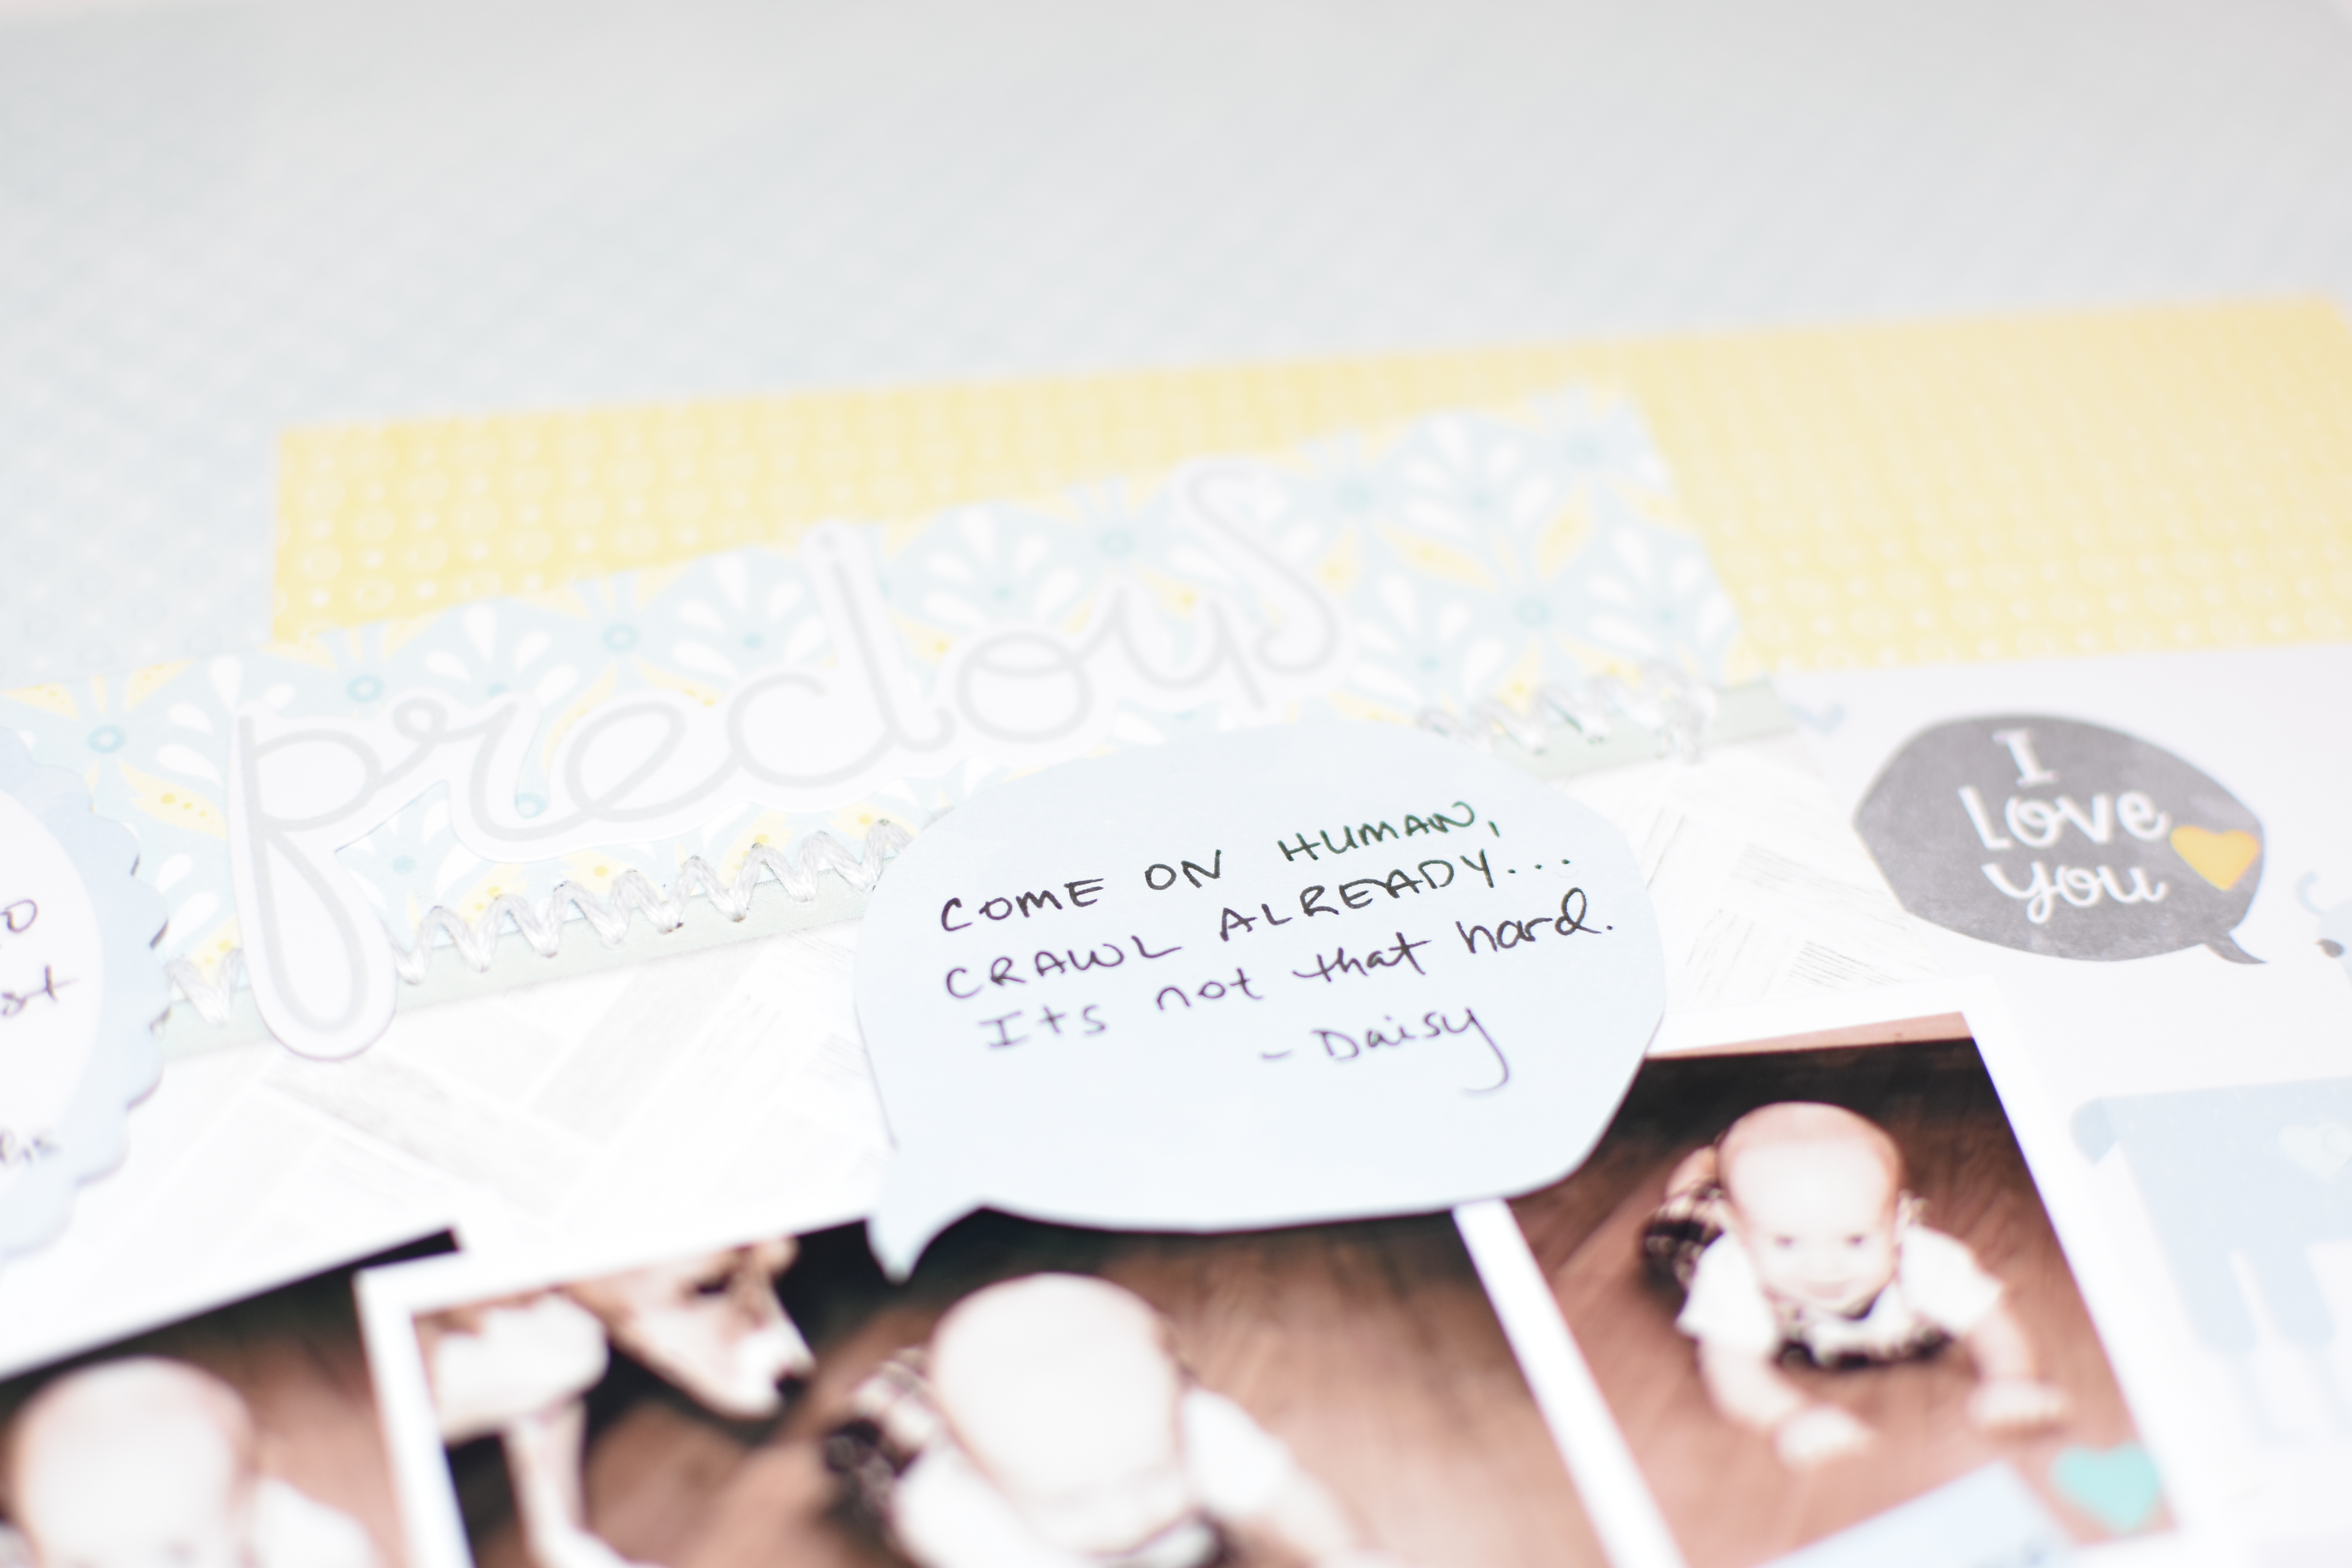
- Adhere the yellow and stitched mat to the center of the layout.
- Adhere three 3″ x 2″ photos at the bottom of the mat. Tuck the llama die cut card to the right side of the stitched mat. Use a Precision Point Adhesive Pen to adhere the tiny heart from the scraps from the corner punch. Using a pair of All-Purpose Scissors, cut the blue speech bubble from the die cut and use a Black Dual-Tip Pen to journal on the speech bubble. Adhere it above the photos using Foam Squares.
- Use a Black Dual-Tip Pen to journal on the circle die cut then adhere to layout as shown using Foam Squares.
- To complete the layout, add embellishments as shown.


What do you think? Are you ready to try stitching on your next project? It takes a little time, but the end result is totally worth it!
Comment below and tell us if you are ready to give it a try!

I have a new great grandson just two months old and I am so eager to try the sewing idea. Thanks for all your great ideas.
Congrats! Glad you like the ideas :)
I don’t even have the appropriate words for these layout. Awesome, amazing, unbelievable, gorgeous, just don’t seem to be good enough!!! These layouts are like blow you away!!! Wow!!! Thanks for sharing all of them with us!! I mean come on, astounding!!!?
Glad to hear it! We love how this one turned out :)
Thank you!! :)
Your baby layouts are really cute but I am having a hard time making out the pictures because they are made with the lighter colored paper.
Glad you like the baby layouts! It is hard to showcase how beautiful this collection is! Pastel colors are very hard to photograph.
OMG Nicolemartel.JUST WOW. I’m in total awe over it all. Your String Art is Magnificent. Every one of your layouts is Spectacular. I have never seen anything like this before and definitely, am inspired to do it!! Thanks so much for sharing this.