July 27, 2018
Create Beautiful Beach-Themed Scrapbook Borders with the Maritime Collection
Are you happiest with the water beneath you and a cold drink in your hand? Is your favorite sound in the world the crashing and splashing of waves? If so, you aren’t alone. Many people find their happy place on a boat or by the water, so it’s no wonder that the Maritime collection has become so popular! It comes with a wide variety of options for customizable borders that really bring the page to life, and blog contributor Krislyn will show you how to create beach scrapbook borders that make every page look like it came straight from the sea.
Krislyn’s Inspiration:
Don’t you just love the long, hot days of summer? Especially when you’re lucky enough to spend them at the beach? The new Maritime collection evokes a laid-back coastal vibe, and the misty ocean colors create the perfect backdrop for pictures of all kinds of outdoor events. I set out to create some borders that make the most of this beautiful collection while letting the photos stand out and tell the stories of sand, surf and sun!
To create these borders you’ll need:
- Maritime Paper Pack, Variety Mat Pack, Laser Cut Borders and Stickers
- White and Cloud Cardstock
- Original Border Maker System with Butterflies, Picket Fence, Double Chevron and Rolling Waves Cartridges
- Custom Cutting System with Circle Patterns
- 12-inch Straight Trimmer
- All-Purpose Scissors
- Tape Runner with Repositionable Tape Runner Refill
- Precision Point Adhesive Pen
- Foam Squares
Dreaming of the Sea Border

Using the Picket Fence Border Maker Cartridge, punch a border with aqua paper. Trim to 2-7/8″ x 12″ to create the base. Cut a 2-1/2″ x 12″ strip of wooden blinds paper and mount on top of the base.


Cut a 1-1/8″ x 12″ strip of navy paper and a 1/2″ x 12″ strip of aqua paper. To create the folds, wind the aqua strip around the navy strip at an angle, folding the edges and twisting until you’ve wound the whole strip as shown. Unwind the aqua strip from the navy strip. Fold the aqua strip again, apply adhesive to the back and mount on top of the navy strip. Trim the ends. Apply adhesive to the rope die cut, tuck through the aqua strip and adhere as shown.
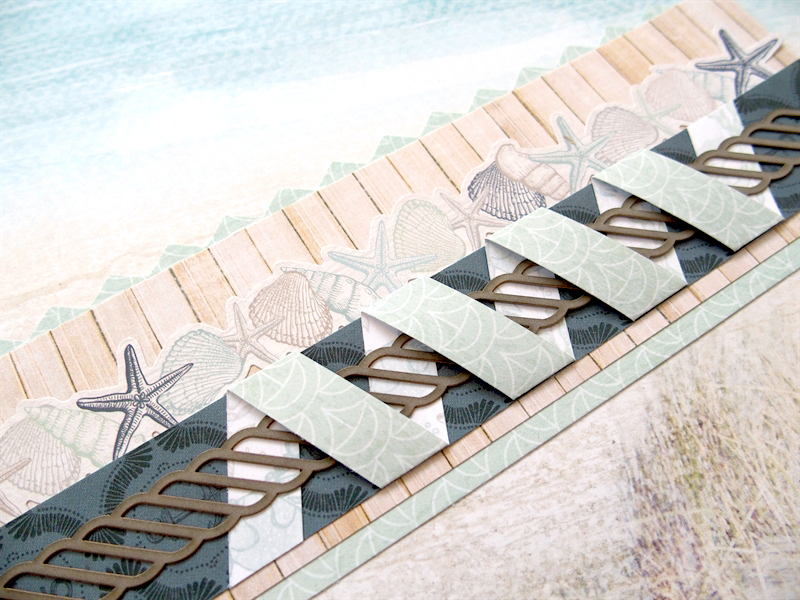
Adhere the seashell border sticker to the middle of the border and add the navy strip as shown.
To make the journal box: Apply seashell stickers and the “Dreaming of the Sea” sticker with Foam Squares to a mat.
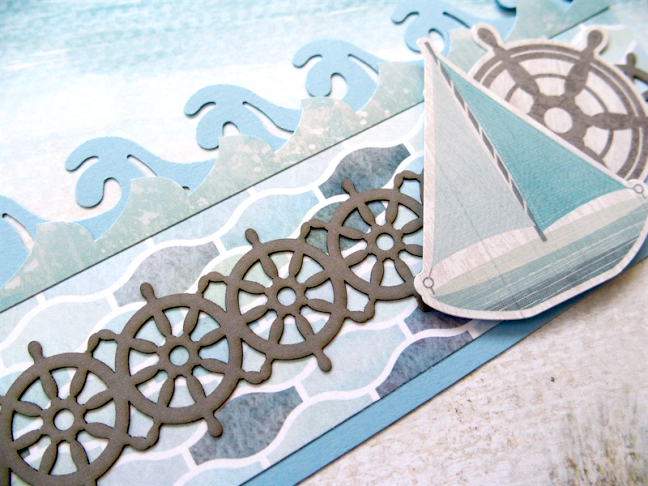
You Float my Boat Border

Using the Rolling Waves Border Maker Cartridge, punch a border with Cloud Cardstock. Trim to 3″ x 12″ to create the base. Cut a 2″ x 12″ strip of wave patterned paper and mount to the base as shown.
Add a wave border sticker to the top edge of the patterned paper. Adhere the wheel die cut border to the center and add the wheel and sailboat stickers with Foam Squares.
This border pairs well with the “You Float my Boat” mat!
Lazy Days Border
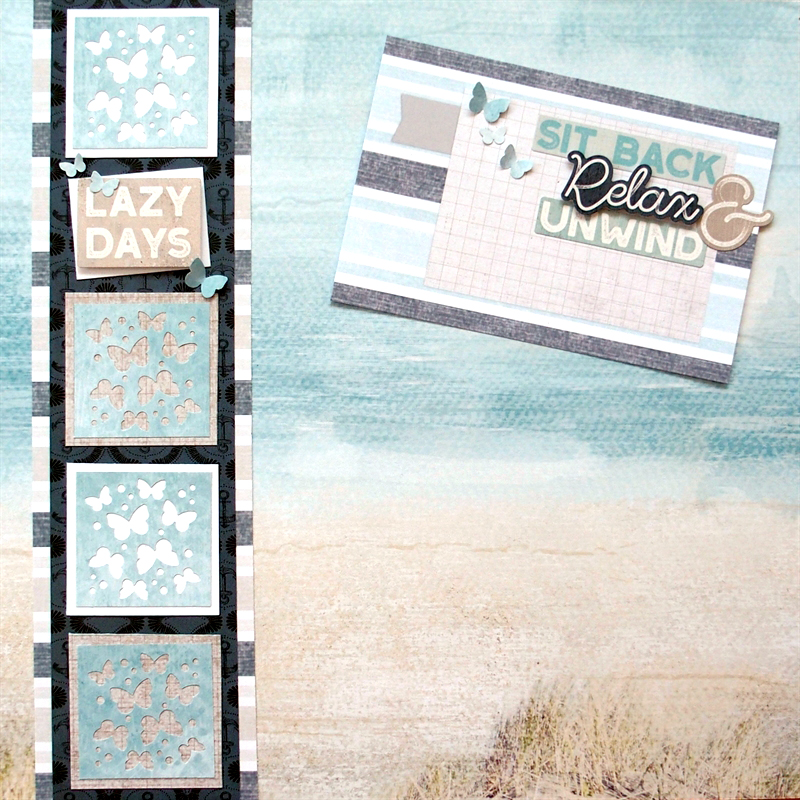
Cut a 3-1/2″ x 12″ strip of striped paper for the base. Cut a 2-3/4″ x 12″ strip of navy paper and mount on the base.
Cut two 2-1/4″ squares of White Cardstock and two of the taupe patterned paper. Set these aside.
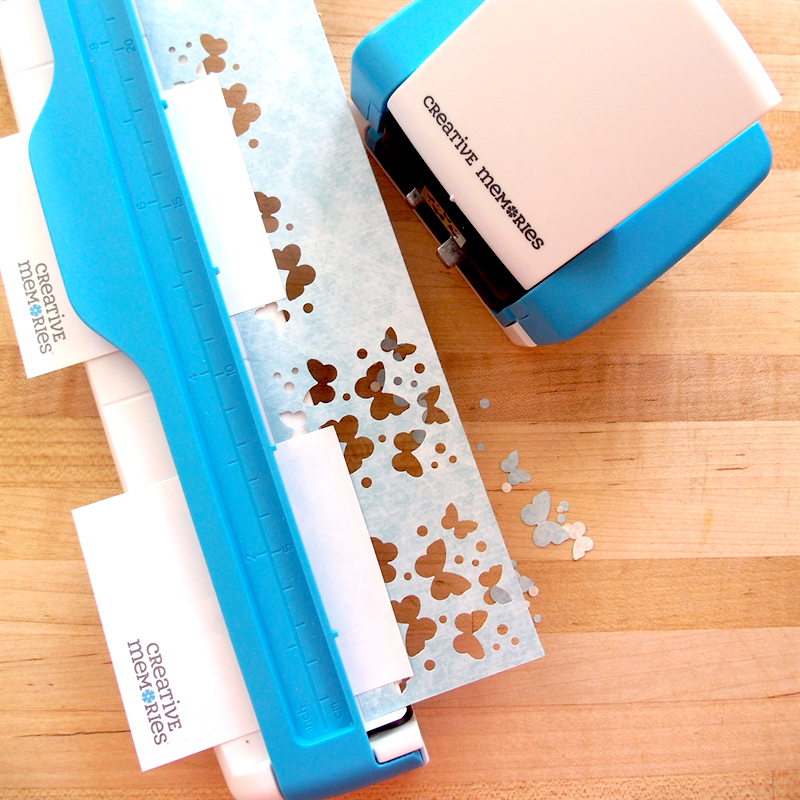
Using the Butterflies Border Maker Cartridge, punch a border with ocean blue paper. Trim to 2″ wide and punch the other side. Tip: To hold the narrow strip of paper on the Border maker System, tack on a few Post-it Notes to extend the width so you can cut the other side.
Trim the butterflies border into 2″ squares. Mount four of the squares onto the white and taupe squares. Adhere to the border as shown.
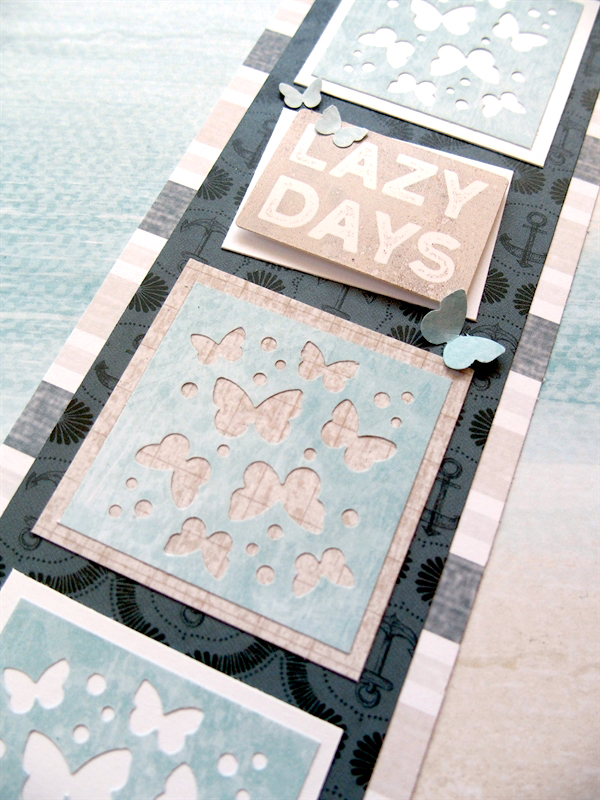
Cut a 2″ x 1-1/2″ piece of White Cardstock. Mount on the border at an angle and top with the “Lazy Days” sticker with Foam Squares. Add a few butterflies.
For the title box, adhere the “Sit Back, Relax & Unwind” stickers and add a few butterflies to a matching mat.
Beach House Border
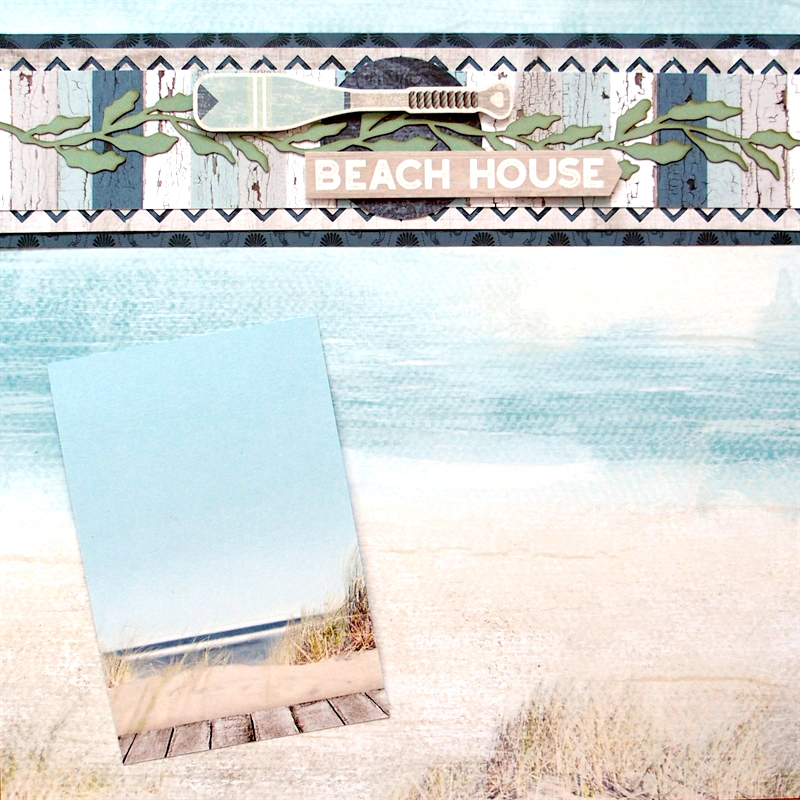
Cut a 3-1/8″ x 12″ strip of navy paper for the base.
Using the Double Chevron Border Maker Cartridge, punch two borders with taupe paper, trimming each out to about 1-1/4″ wide. Note: You’ll want to trim about 1/8″ off of the punched side first. Adhere to the base as shown.
Cut the striped wooden mat in half to make two 2″ x 6″ strips. Mount down the middle of the border so just the first chevron cutouts are visible.
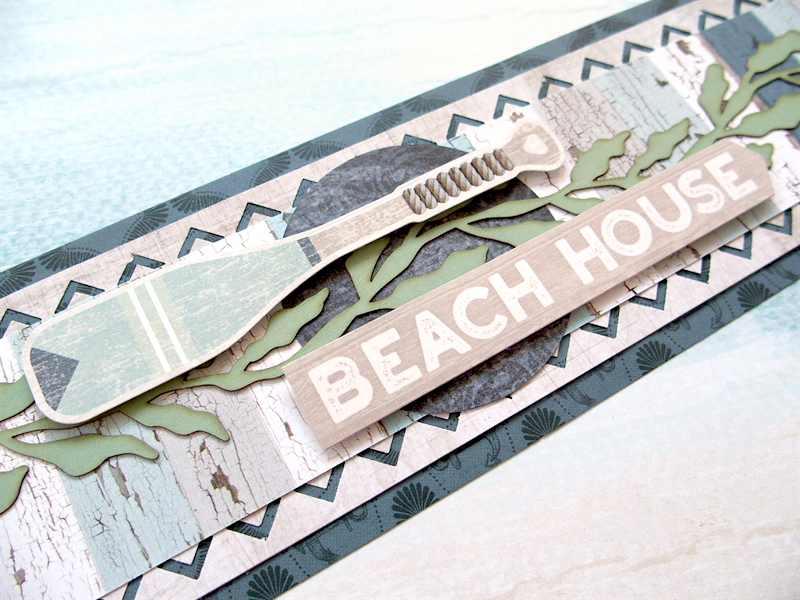
Using the inside of the medium circle pattern and the Red Blade, cut a circle with a navy mat. Adhere to the middle of the border. Top with the seaweed laser-cut border, the paddle and the “Beach House” sticker with Foam Squares.
I think the beach scene mat looks great with this border! What’s been your favorite combination with the Maritime collection? Which of these ideas for beach-themed scrapbook borders do you plan on trying out in your albums? Comment below!


Wow! All of these ideas are so inspiring and lovely! Can’t wait to try some of them out. I love that rolling wave. I may have to break down and purchase the punch :-D
Beautiful ideas!!! WOW!!! I love the butterfly idea..
Love the techniques used! Incorporation of even the small stickers to make a big impact
So lovely and some great techniques! Can’t wait to scraplift!
all good but partial to the dreaming of the sea border!! thanks…..
BEAUTIFUL