October 1, 2018
Create a Multi-Layered Scrapbook Layout using Season’s Greetings & the Peekaboo Pockets™
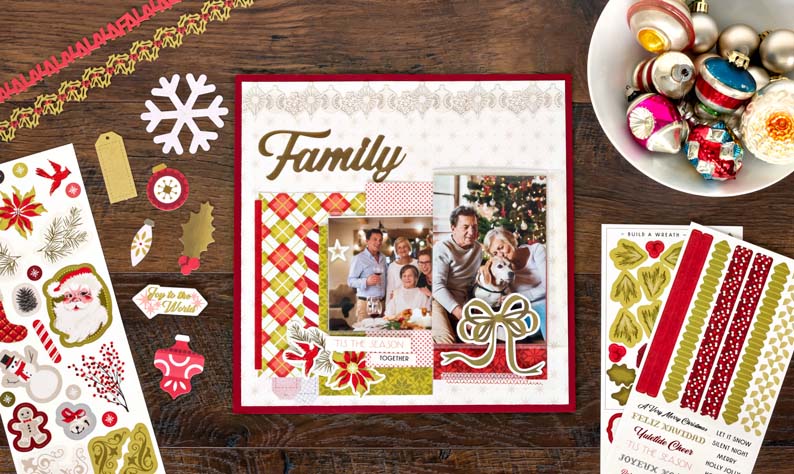
It’s a common problem in the scrapbooking world — you have tons of photos that work great with one another, but you can’t fit all of them on the page in a stylish and organized way. Thankfully, this problem is now a thing of the past thanks to the Peekaboo Pockets™! You can use the Peekaboo Pockets™ to add new layers to your pages and fit all your coordinating photos into a multi-layered scrapbook layout. This helps in terms of functionality, organization and the overall appearance of the page. Check out how they’re used with CM’s newest Christmas collection — Season’s Greetings!

To create this layout, you will need:
- 12×12 Crimson Cardstock
- Season’s Greetings Stickers
- Season’s Greetings Paper Pack
- Season’s Greetings Embellishments
- Season’s Greetings Variety Mat Pack
- Season’s Greetings Laser Cut Border Embellishments
- Red & White Washi Tape
- Peekaboo Pockets™
- 12-inch Straight Trimmer
- All-Purpose Scissors
- Tape Runner
- Foam Squares

Step 1: Use Crimson Cardstock for your base.
Step 2: Using the 12-inch Straight Trimmer, cut the cream star patterned paper to measure 11-1/2″ x 11-1/2″ and adhere it to the center of the base leaving a 1/4″ red trim around the layout.
Step 3: Select four Season’s Greetings mats and adhere them approximately 1″ from the bottom of the cream patterned paper and 1/2″ from the left side of the paper in a zigzag design using your Tape Runner.


Step 4: Using the Repositionable Tape Runner, adhere the ornament Season’s Greeting’s Laser Cut Border at the top of the cream patterned paper. Then, adhere the “Family” die cut above the top left side of the mats. Using the All-Purpose Scissors, cut the candy cane embellishment die cut label in half and tuck it behind the second mat to create a scalloped edge border. Add a red sticker strip to the first mat along the edge. Then, tear a piece of the Washi Tape and adhere it across the bottom of the last mat.
Step 5: Fill two Peekaboo Pockets™ with photos and a mat. Then adhere the pockets to the far right side of the layout, lining the edge of the vertical Peekaboo Pocket™ adhesive strip to the edge of the cream patterned paper. Adhere the horizontal Peekaboo Pocket™ behind the vertical Peekaboo Pocket™. Get a closer look in this video!
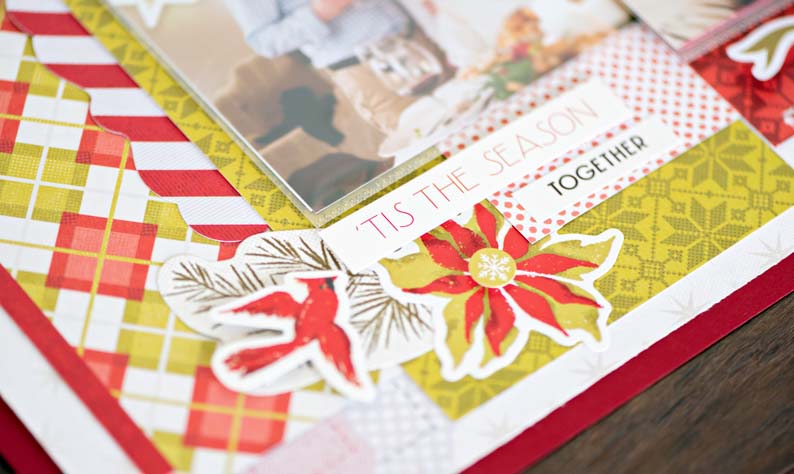
Step 6: Embellish your layout by adding stickers, embellishments and laser cut embellishments. Make sure to use Foam Squares on some of the die cuts for added dimension.
So, does that sound easy or what?! This photo pocket scrapbook layout using the new Season’s Greetings collection is a great example of how you can effectively use Peekaboo Pockets™ to fit the photos you want onto your layout without making it look unorganized. What’s your favorite part of the new Season’s Greetings collection? Comment below!

How would you see the photos in the pockets once the page protector’s on? I thought they needed to be put on the page protector…
Page looks great, but it doesn’t show how many pockets & pictures are layered here?? Also, as above, is this directly on the page to be covered by a page protector?? Just trying to understand how this layout works and how many pictures this allowed to be placed on this page. Thanks!!
Wondering the same as the two comments above. It’s a great idea for using multiple photos. Just like to know what you recommend for attaching to your layouts, with the page protectors.
Hi everyone! Great question – You would put the Peekaboo Pocket™ over the page protector. There is just one horizontal and one vertical Peekaboo Pocket™. Get a closer look in this video – https://youtu.be/UFd6X5N51zE Let us know if you have any other questions!
If I understand, then one would have to take off the page protector to view all the photos?
Decorate your page as normal. If you want to layer photos in peek a boo pages you would put your protector on page then add your pockets. The pockets protect the additional photos.
[…] Curious how to make the Peekaboo Pocket™ layout above? Get the details here! […]