December 10, 2018
Create Wondrous Adventure-Themed Scrapbook Layouts with the Imagine That! Collection
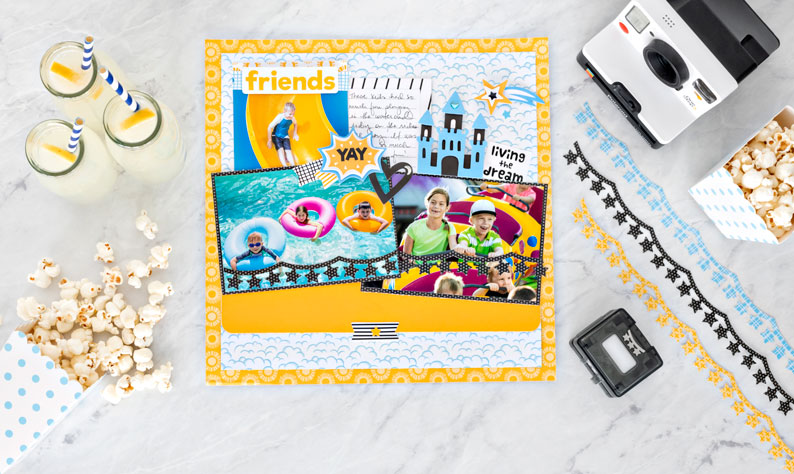
If you’re not living life like it’s an adventure, then you’re doing it wrong. Each day comes with its own stories and experiences, and you can tell these stories like never before with the new Imagine That! collection. It brings all sorts of dreamlike elements and ideas to your scrapbooking projects, making it the perfect canvas for the fun escapades in your life. Want an example of how you can create a gorgeous adventure scrapbook layout using Imagine That!? Check out today’s post from blog contributor Nicole!

To create this layout, you will need:
- Imagine That! Paper Pack
- Imagine That! Stickers
- Imagine That! Layered Embellishments
- Imagine That! Variety Mat Pack
- Goldenrod Cardstock
- Original Border Maker System with the Star Banner Chain Border Maker Cartridge
- 2-Way Corner Rounder
- 12-inch Straight Trimmer
- Personal Trimmer
- All-Purpose Scissors
- Tape Runner
- Precision Point Adhesive Pen
- Foam Squares
- Black Dual-Tip Pen

Step 1: Use the sunshine patterned paper for your base. Cut the cloud patterned paper to measure 11″ x 11″ and adhere to the center of your base.
Step 2: Cut a piece of Goldenrod Cardstock into a rectangle that measures 11″ x 4″. Use the 2-Way Corner Rounder to round the corners and adhere it horizontally across the bottom of the layout, approximately 1-3/4″ from the bottom of the cloud patterned paper.
Step 3: Cut two rectangles from the black patterned paper to measure 6-1/4″ x 4-1/4″. Mat a photo on each of these mats using your Tape Runner. Adhere the matted photos at an angle 1-3/4″ from the bottom of the Goldenrod Cardstock for the first photo and 1″ from the bottom of the Goldenrod Cardstock for the second matted photo.
Step 4: Mount one mat at the top of the layout, tucking it behind the photos as shown. Adhere a 4″ x 6″ photo above the matted photos at the top of the layout, tucking the bottom half of the photo behind the others. Cut a strip from the sunshine patterned mat to measure 4″ x 3/4″ and adhere it across the top photo.

Step 5: Using a piece of the black patterned paper and the Original Border Maker System with the Star Banner Chain Border Maker Cartridge, punch out a 12-inch border. Then, cut it in half using the All-Purpose Scissors and adhere it to the two photos at the bottom of the layout using a Precision Point Adhesive Pen.
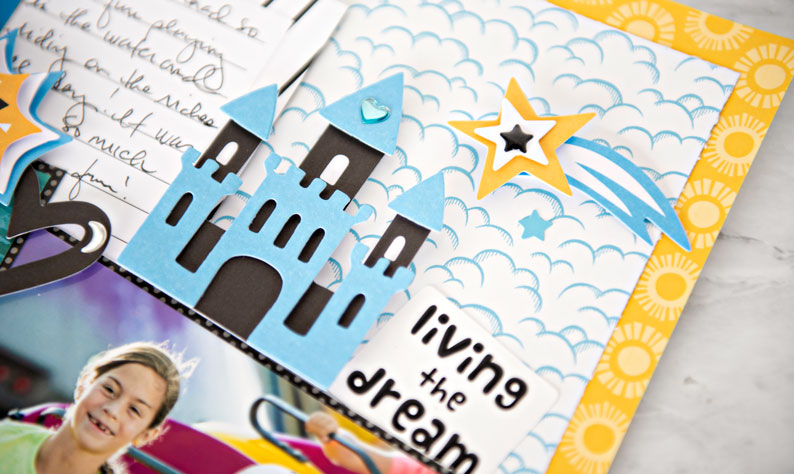
Step 6: Embellish your layout by adding stickers, embellishments and gems. Make sure to use Foam Squares on some for added dimension. Finish by using a Black Dual-Tip Pen to hand journal your story on the journaling mat.
Life is full of adventures, and the Imagine That! collection has everything you need to create awesome adventure-themed scrapbook layouts such as this one. What type of adventures will you fill this layout with? Let us know in the comments below!

[…] Love the Imagine That! scrapbook layout shown above? Get the instructions here! […]
[…] Love the Imagine That! scrapbook layout shown above? Get the instructions here! […]