February 4, 2019
Celebrate Your Happily Ever After with this Wedding Scrapbook Layout
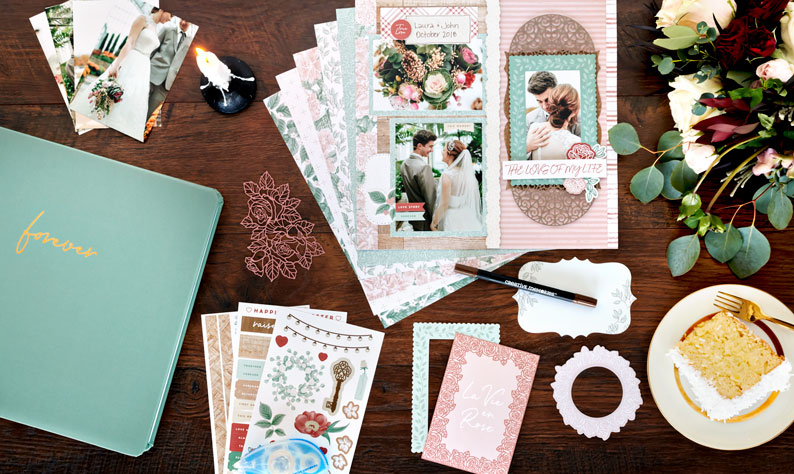
What is it that’s so enchanting about weddings? Is it the atmosphere? The decorations? Everyone being all dressed up? Is it the fact that everyone is happy to be there? Whatever it is, weddings are always a great time, but despite how much fun they are to be an attendant, they’re so much more special to the bride and groom. Your wedding is one of the biggest days of your life, which is why it’s important to preserve the memories properly. The new Ever After collection provides you with all the wedding scrapbook supplies you need to create stunning wedding-themed scrapbook layouts that will perfectly capture the essence of that special day. Take a look at this layout that shows you all the love that’s inside the Ever After collection!
To create this layout, you will need:
- Ever After Paper Pack
- Ever After Laser Cut Frames
- Ever After Stickers
- Ever After Mat Pack
- 12-inch Straight Trimmer
- Tape Runner with Repositionable Adhesive
- Foam Squares
- Brown Dual-Tip Pen
Shop products by clicking your country’s icon below:


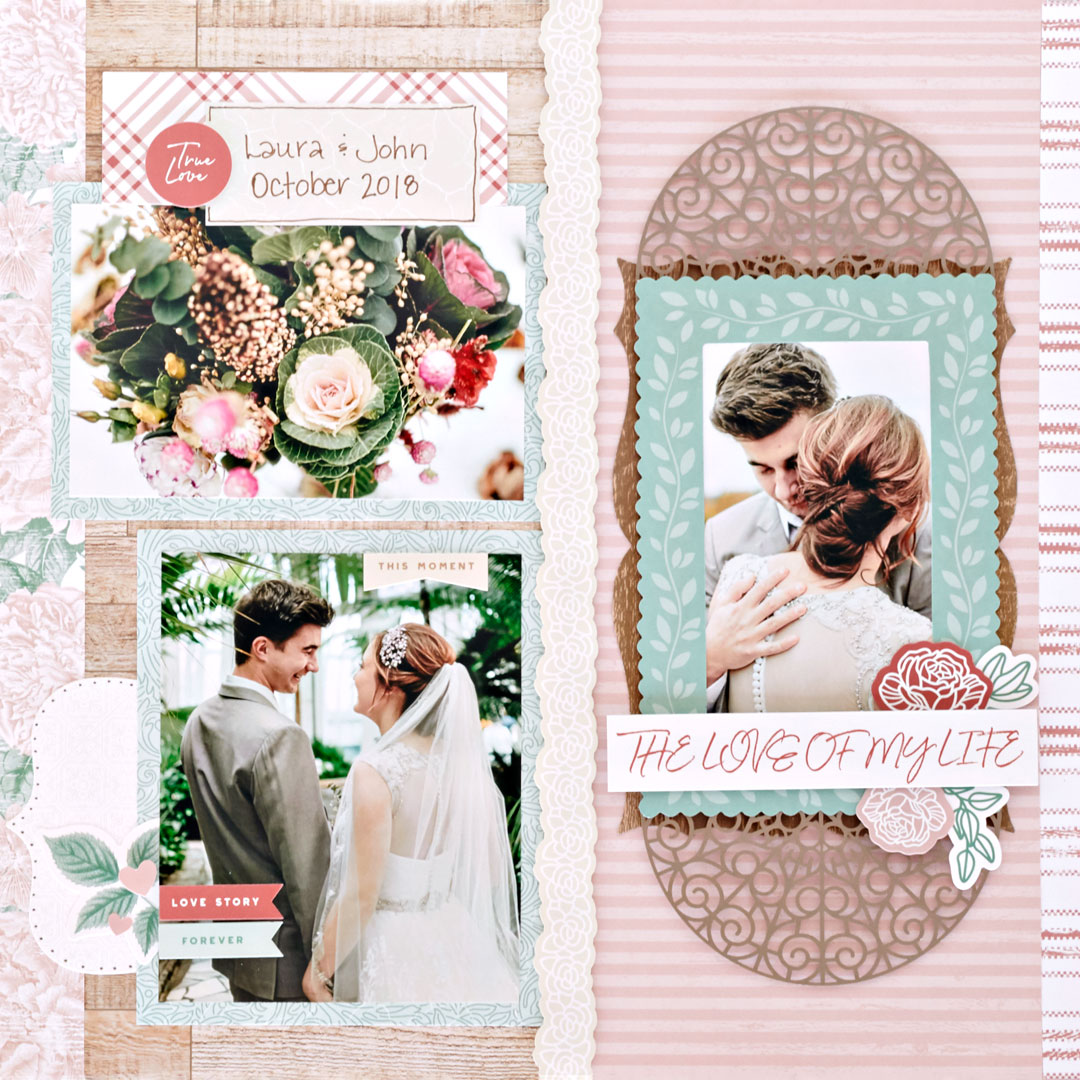
Step 1: Use the wood patterned paper as the base for this layout.
Step 2: Cut a piece from the floral patterned paper to measure 1″ x 12″. Adhere to the far-left edge of the layout.
Step 3: Cut a piece from the red striped paper to measure 1/2″ x 12″. Adhere to the far-right edge of the layout. Then, cut a piece of the pink striped patterned paper to measure 5″ x 12″. Adhere along the left edge of the red striped paper.

Step 4: Layer mats and laser cut frames, adhering on top of the pink striped paper.
Step 6: Cut two pieces from the mint colored paper to measure 4-1/2″ x 5-1/2″ and 5-1/2″ x 3-3/4″. Adhere to the layout.


Step 7: Add photos to the mats. Photo sizes are 4″ x 5″ and 5″ x 3-1/4″.
Step 8: Cut a piece from a red-striped mat to measure 4-1/2″ x 1-1/2″. Adhere along the top edge of the top photo.
Step 9: Cut a piece from the tan patterned paper to measure 3″ x 1-1/4″. Adhere to the top of the red-striped mat.
Step 10: Add stickers, using Foam Squares on some for added dimension. Journal as desired.
Everyone’s love story is unique. Thankfully, the new Ever After collection gives you everything you need to create a distinct wedding scrapbook layout that means something special to the bride and groom. What’s your favorite thing about the new Ever After collection? Let us know in the comments below!

Beautiful
Gorgeous layout, Melissa!
BEAUTIFUL
Great inspiration for my grandson’s upcoming wedding!