March 16, 2019
Showcase a Little Flower Power with this Floral Scrapbook Layout

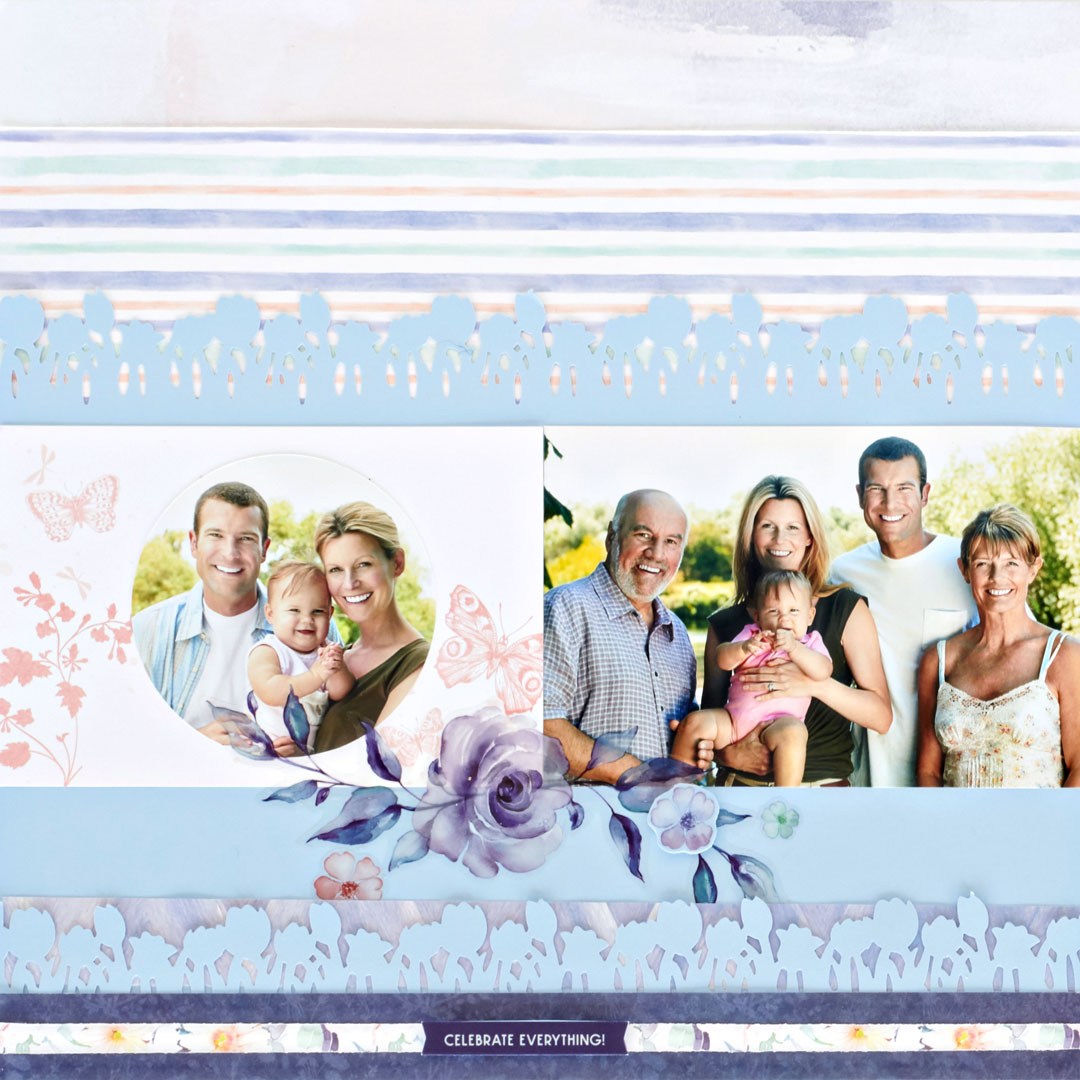
The saying “stop and smell the roses” means that it’s good to slow down and enjoy the little things in life. It’s worthwhile to take the time to enjoy the process of life because there are some instances where you don’t even notice the details you’re missing out on! Take scrapbook layouts for example — slowing down and putting time and effort into the little details, like the borders or the decorations, can improve the look of your layout completely! Want to see an example? Check out this awesome floral scrapbook layout made with the Flourish collection and the Tulips Border Punch!
To create this layout, you will need:
- Flourish Paper Pack
- Flourish Stickers
- Flourish Variety Mat Pack
- Cloud Cardstock
- Tulips Border Punch
- 12-inch Trimmer
- All-Purpose Scissors
- Tape Runner
- Precision Point Adhesive Pen
- Foam Squares
Shop products by clicking your country’s icon below:


Step 1: Use the purple and pink patterned paper for your base. Using your Trimmer, cut a 12″ x 3″ rectangle from the striped patterned paper. Mount the rectangle approximately 1-1/2″ from the top of the base of the layout.
Step 2: Using one sheet of Cloud Cardstock and the Tulips Border Punch, punch a row of tulips across the top of the cardstock. Mount the punched cardstock approximately 1-3/4″ from the top of the striped paper.

Step 3: Using the Custom Cutting System, cut a photo into a circle using the smallest Circle Pattern and the Red Blade on the outside of the circle. Adhere this photo to the middle of the butterfly mat using a Tape Runner. Then adhere it to the Cloud Cardstock approximately 1″ from the top of the tulip punch paper. Adhere another 4″ x 6″ photo next to the mat.
Step 4: Adhere stickers as shown. Add dimension to your layout by sticking a few petals onto a scrap piece of cloud paper and trimming the edges using your All-Purpose Scissors. Mount stickers to the layout as shown using Foam Squares.

Step 5: Use the Tulips Border Punch to punch a row of tulips with a piece of Cloud Cardstock. Cut this border to measure 12″ x 2″ and adhere across the bottom of the layout. Cut one 12″ x 1″ strip from the purple patterned paper and mount it across the bottom of the layout. This will cover the white space below the tulips. Cut one 1/4″ strip from the floral pattern paper. Use your Precision Point Adhesive Pen to glue it across the middle of the purple strip at the bottom of the layout.
Step 6: To complete the layout, cover a scrap piece of the Cloud Cardstock with the “Celebrate Everything!” sticker and cut the image from the cardstock using your All-Purpose Scissors. Add a few Foam Squares to the back of the sticker and adhere it at the bottom of the layout as shown.
The Tulips Border Punch is one of the best tools that you can use to add a floral look to your layout, and when you combine it with the Flourish collection, you get double the flower power! What different types of ways have you been using Flourish and/or the Tulips Border Punch? Comment below and let us know!

Beautiful Page! Cant wait to get those papers and stickers. Just ordered the boarder punch. Think I will try water coloring the tulips.
I would like to find a 12×14 cover, any color. Any available?
Hi Anna – Sorry we do not have that size available. Check out our other album sizes https://www.creativememories.com/shop-all/coversets.html or pocket albums here – https://www.creativememories.com/shop-all/complete-albums/pocket-albums.html
This is just beautiful