April 17, 2019
Show His Earliest Chapters with this Storytime Baby Boy Scrapbook Layout
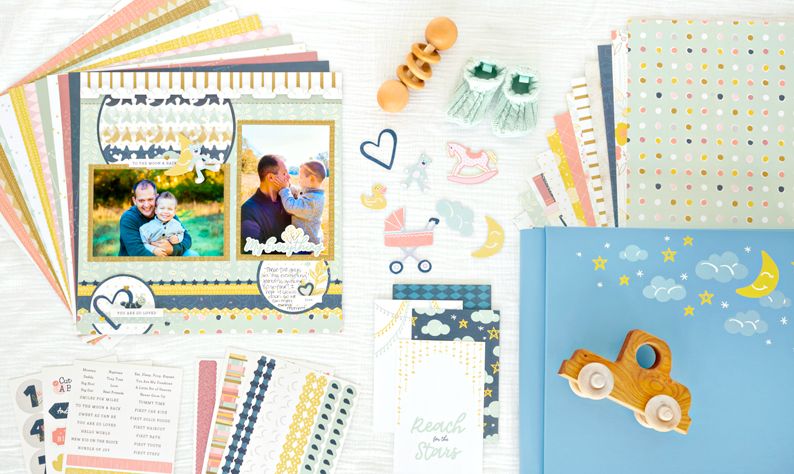
Little boys grow up so fast. One day they’re just learning how to walk and before you know it you’re at their first soccer game, watching them run around and having a blast. Life happens fast, which is why it’s so important to capture these moments and memories with the Storytime collection. The Storytime collection has everything you need to create a baby boy scrapbook layout that helps illustrate those earliest chapters in his life. Take a look at this example!

To create this layout, you will need:
- Storytime Paper Pack or (Shop Canada | Shop Australia)
- Storytime Tone-on-Tone Paper Pack or (Shop Canada | Shop Australia)
- Storytime Stickers or (Shop Canada | Shop Australia)
- Storytime Border Stickers or (Shop Canada | Shop Australia)
- Storytime Embellishments or (Shop Canada | Shop Australia)
- Custom Cutting System with Circle Patterns or (Shop Canada | Shop Australia)
- Original Border Maker System with Moon & Stars Border Maker Cartridge or (Shop Canada | Shop Australia)
- 12-inch Trimmer or (Shop Canada | Shop Australia)
- All-Purpose Scissors or (Shop Canada | Shop Australia)
- Tape Runner with Repositionable Adhesive or (Shop Canada | Shop Australia)
- Foam Squares or (Shop Canada | Shop Australia)
- Black Dual-Tip Pen or (Shop Canada | Shop Australia)

Step 1: Use the blue floral patterned paper as the base for this layout.
Step 2: Cut a piece of the dotted patterned paper to measure 12″ x 1″. Adhere to the lower edge of the layout. Cut a piece from the navy patterned paper to measure 12″ x 3/4″. Adhere just above the dotted paper. Cut a piece from the yellow patterned paper to measure 12″ x 1/2″. Adhere just above the navy strip of paper.

Step 3: Cut a piece of the green striped patterned paper to measure 12″ x 1″. Adhere along the top edge of the layout. Cut a piece of the light blue patterned paper to measure 12″ x 1/2″. Adhere along the edge of the green striped paper.
Step 4: Using the outside edge of the largest Custom Cutting System Circle Pattern, cut a circle with the Blue Blade from the navy patterned paper.
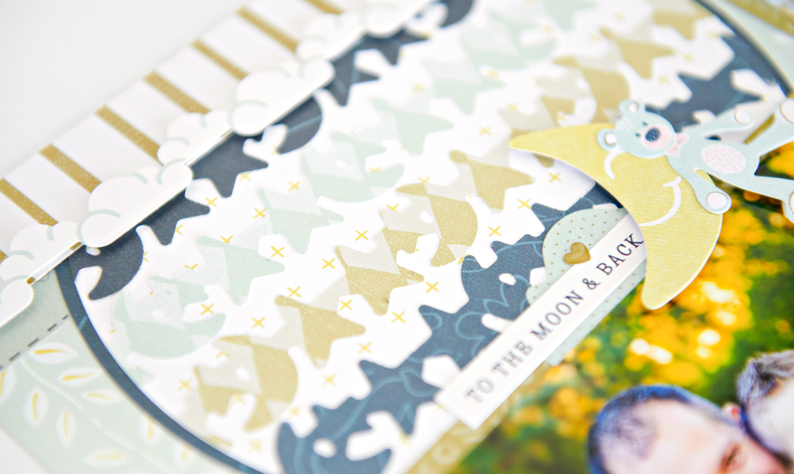
Step 5: Using the Border Maker System with the Moon & Stars Border Maker Cartridge, punch several borders from different patterns of paper. Adhere to a piece of white patterned paper using Repositionable Adhesive. Using the outside edge of the largest Custom Cutting System Circle Pattern, cut a circle using the Green Blade. Adhere this circle to the top of the navy circle. Adhere/tuck under the green striped paper at the top of the layout.
Step 6: Adhere border stickers where the papers all meet.
Step 7: Cut two mats to measure 4-1/2″ x 6-1/2″ and adhere to the layout as shown. Then, adhere photos to the mats that measure: 6″ x 4″, 4″ x 6″.
Step 8: Cut a circle from the navy patterned paper using the inside edge of the largest Custom Cutting System Circle Pattern with the Green Blade. Cut a circle from the white patterned paper using the inside edge of the largest Custom Cutting System Circle Pattern with the Blue Blade. Adhere the white circle on top of the navy circle. Adhere along the bottom edge of the layout and cut away any excess with scissors.

Step 9: Cut a circle from the navy patterned paper using the inside edge of the largest Custom Cutting System Circle Pattern with the Red Blade. Cut a circle from the white patterned paper using the inside edge of the largest Custom Cutting System Circle Pattern with the Green Blade. Adhere the white circle on top of the navy circle. Adhere/tuck under the far right photo.
Step 10: Adhere stickers and embellishments to the layout, using Foam Squares on some for added dimension. Journal as desired.
Creating a baby boy scrapbook layout with Storytime is the perfect way to capture all of his earliest moments and memories, which he’ll love to look back on as he grows older. What types of photos do you fill boy scrapbook layouts with? Comment below!

[…] Learn how to make this layout by following the instructions in this blog post. […]