September 12, 2019
Make Melodies with this Simply Symphonic Scrapbook Layout Idea
When it comes to layouts, every scrapbooker needs an “ace in the hole.” Experimenting with new project ideas and challenging yourself is great, too, but it can be time-consuming. When you just want to put something together quickly, there’s nothing like having a simple scrapbook layout idea in your back pocket. Check out Noreen Smith’s go-to scrapbook layout — maybe it will become yours as well!
Noreen’s Inspiration
Just like having a simple but stunning card design that I can turn to again and again, I always like to have a layout idea I can rely on to get my photos onto pages fast! This one comes together with minimal supplies and in record time!
To create this layout you’ll need:
- Memoirs & Memories Paper Pack or (Shop Canada | Shop Australia)
- Memoirs & Memories Stickers or (Shop Canada | Shop Australia)
- Memoirs & Memories Variety Mat Pack or (Shop Canada | Shop Australia)
- Black and White Cardstock or (Shop Canada | Shop Australia)
- 12-inch Trimmer or (Shop Canada | Shop Australia)
- Original Border Maker System with Music Notes Border Maker Cartridge or (Shop Canada | Shop Australia)
- Tape Runner or (Shop Canada | Shop Australia)
- Foam Squares or (Shop Canada | Shop Australia)
- Black Dual-Tip Pen or (Shop Canada | Shop Australia)
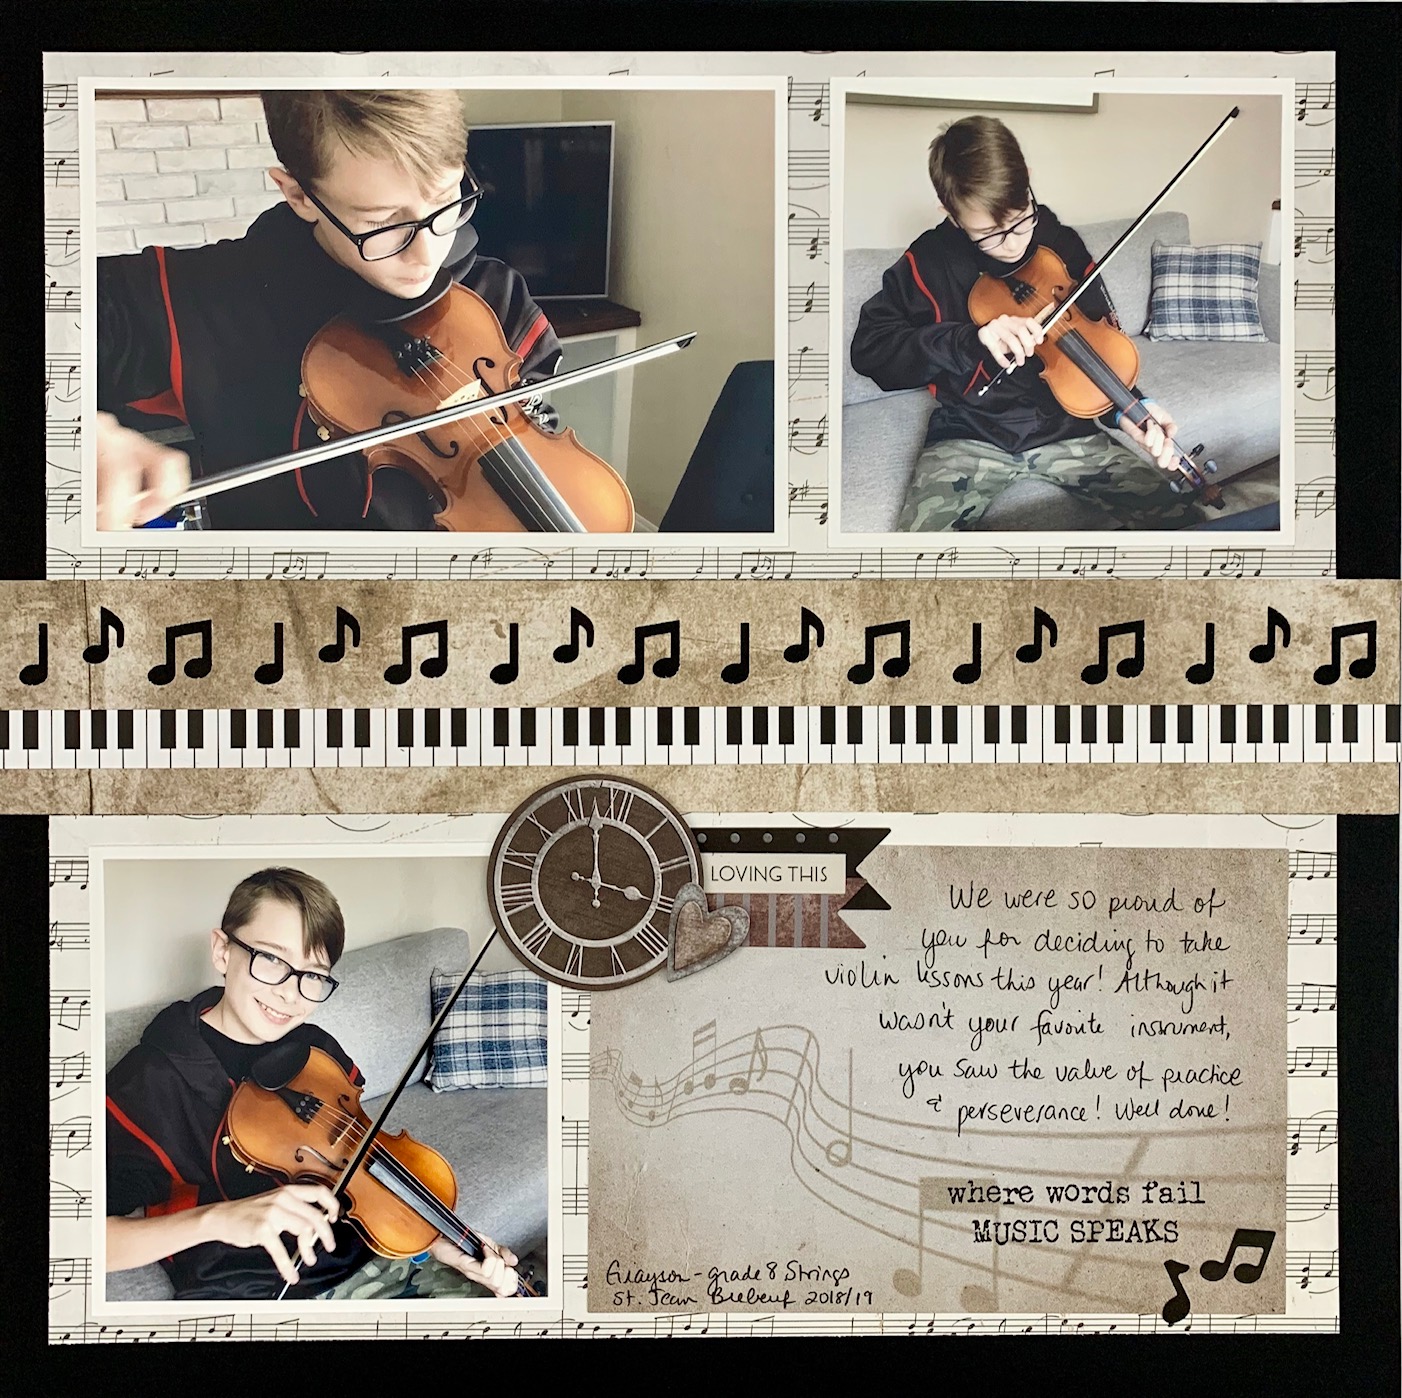
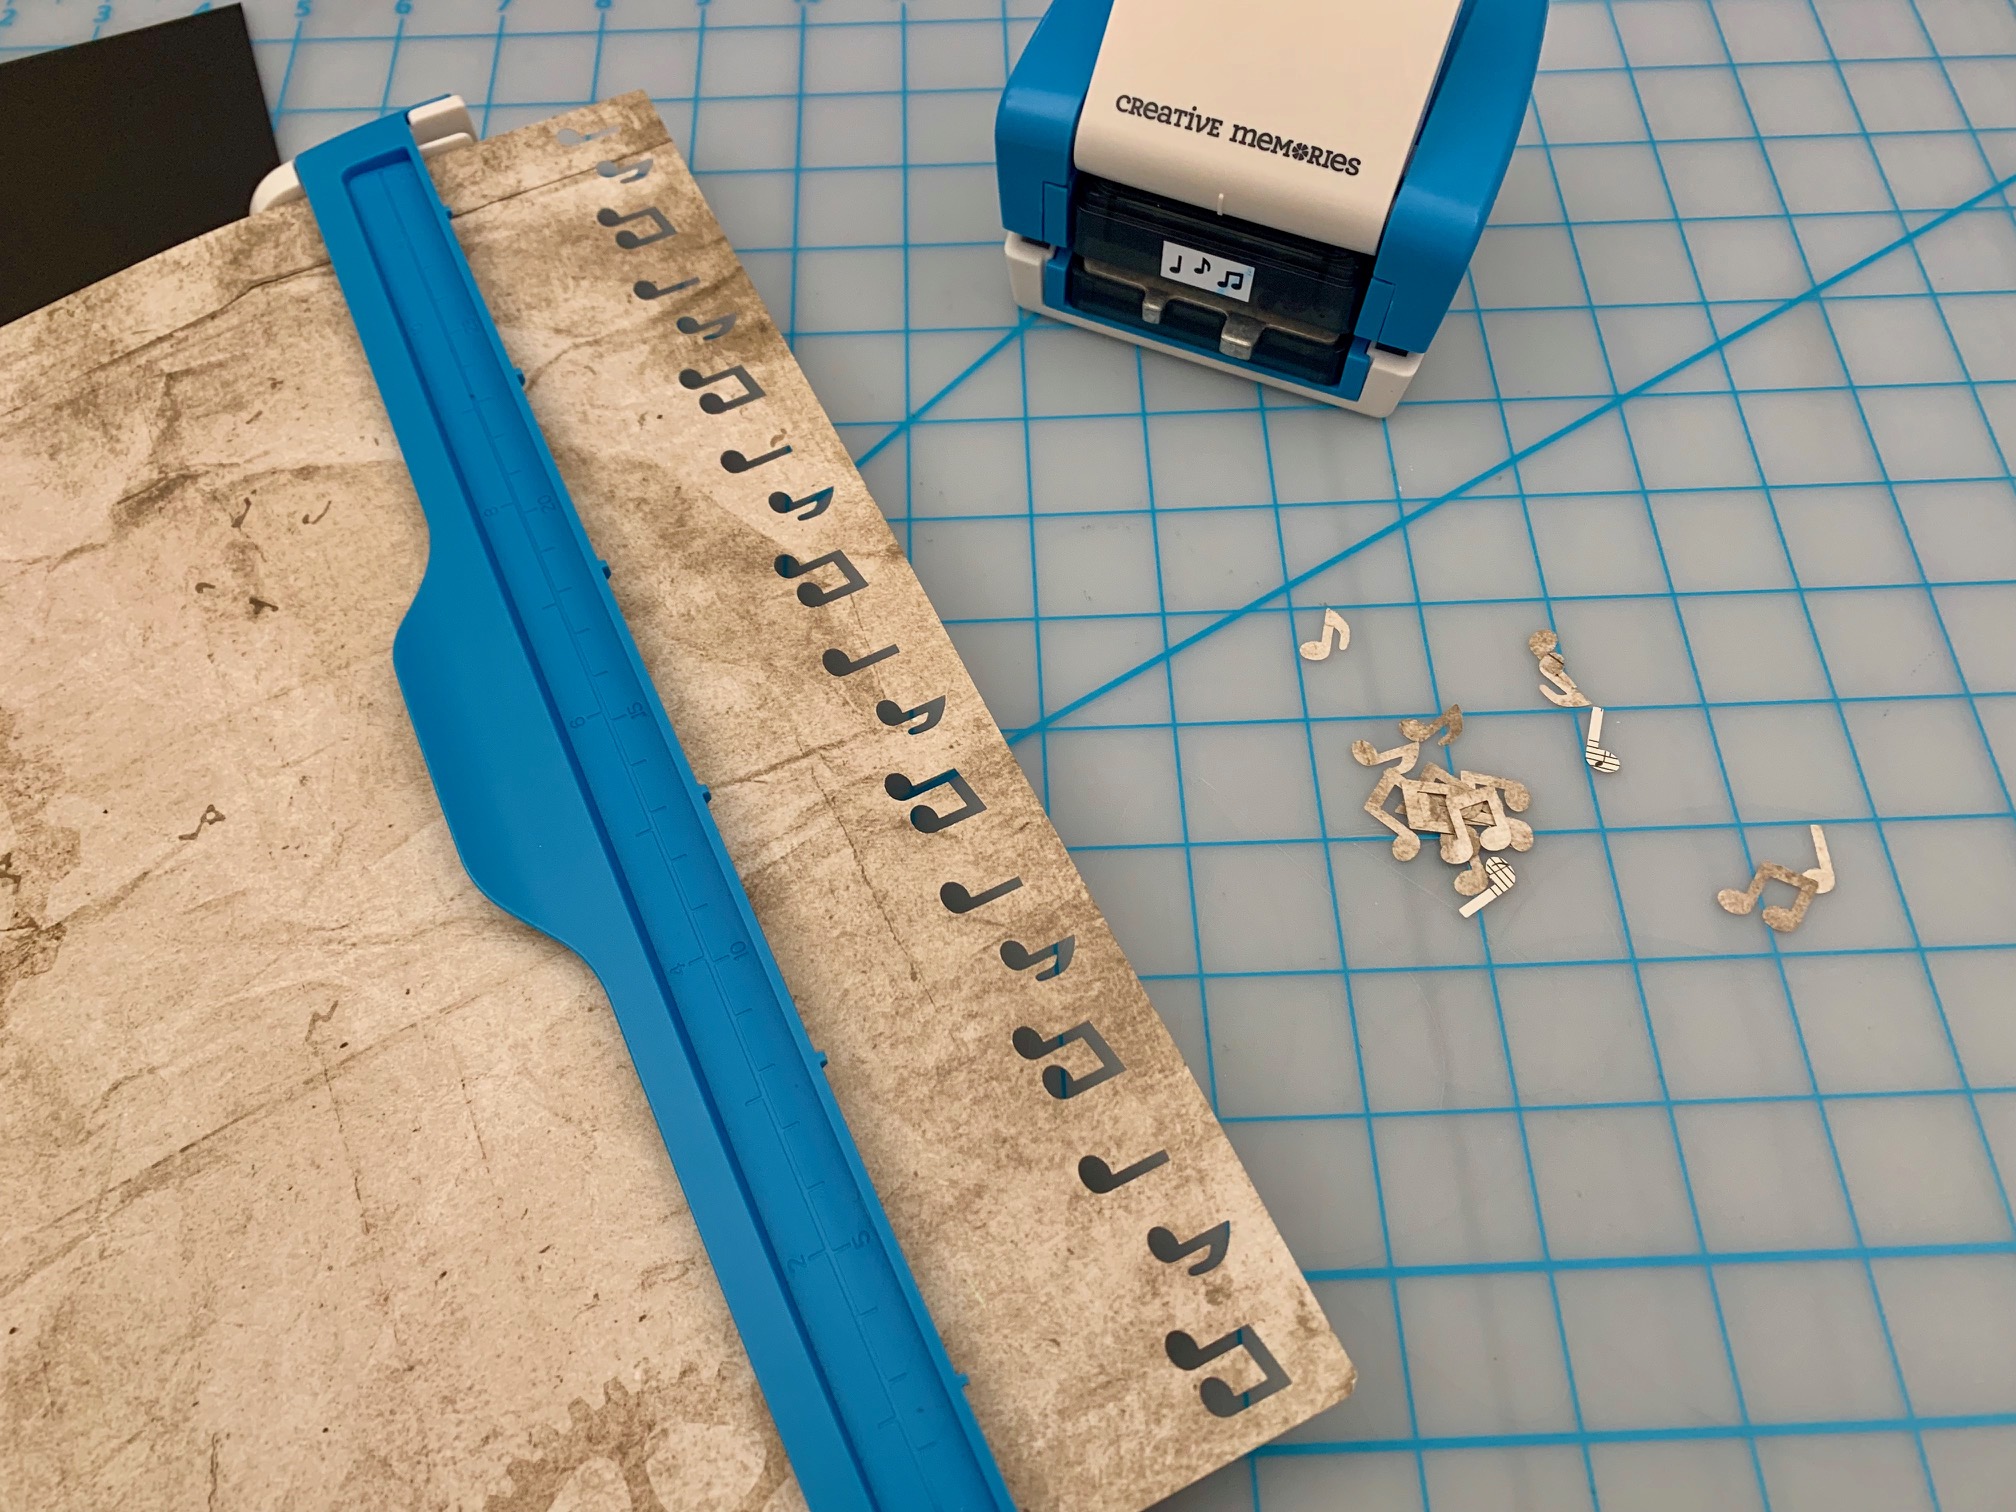
Step 1: Punch a border from one edge of the Memoirs & Memories gears patterned paper with the Original Border Maker System and the Music Notes Border Maker Cartridge. Trim the border strip to measure 2″ x 12″ with the 12-inch Trimmer. Add one of the piano key border stickers below the music notes. Set border aside.


Step 2: Cut two 4-1/2″ x 11″ rectangles from the remaining gears patterned paper. Discard scraps or save for another use. Flip the two rectangles over to reveal the pattern on the opposite side.
Step 3: Use a piece of Black Cardstock as the base and arrange the two rectangles on it about a 1/2″ from the edges. Place the border strip between the rectangles. Adjust and adhere all of the pieces to the Black Cardstock with the Tape Runner.


Step 4: Mat two 4″ x 4″ photos and one 4″ x 6″ photo on White Cardstock. Arrange the photos and one Memoirs & Memories mat on the layout, as shown. Journal on the empty space of the mat with a Black Dual-Tip Pen.
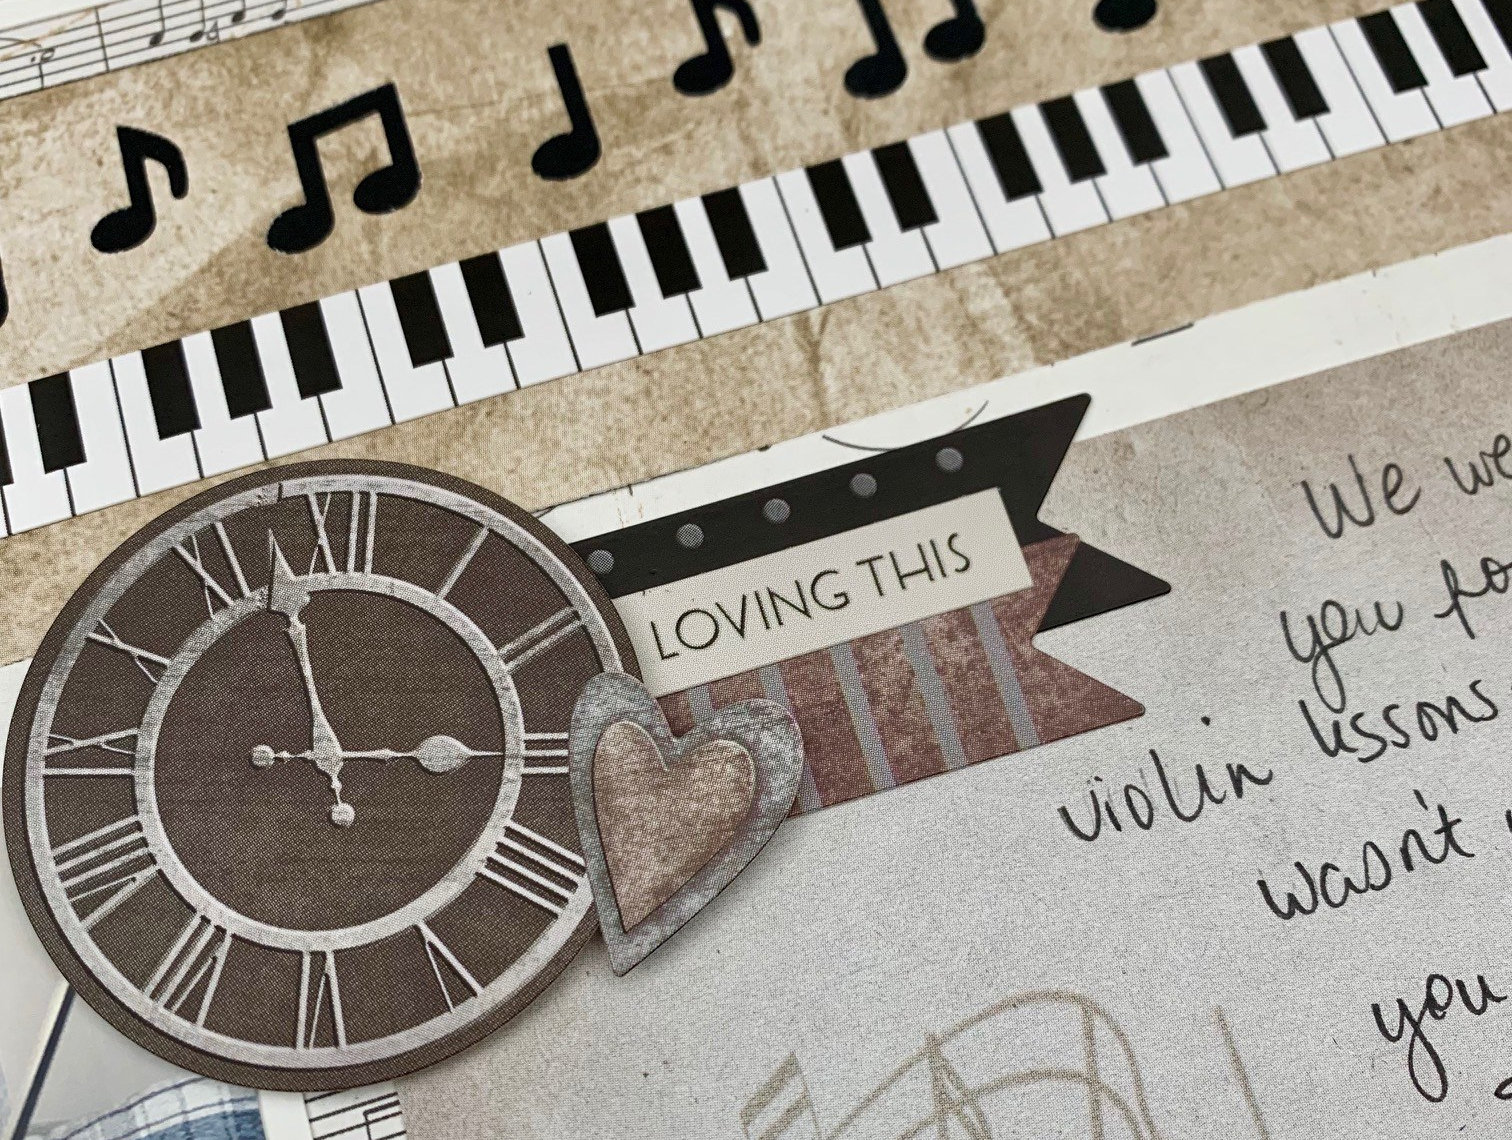
Step 5: Add an embellishment cluster between the photo and the mat on the lower half of the layout. Place banner stickers and word stickers directly on the layout. Layer the clock and heart stickers on top with Foam Squares for added dimension. Add a few music note stickers in the bottom right corner of the mat to finish the layout.

The great thing about a simple scrapbook layout like this is its versatility! You can use it with any double-sided patterned paper and any border punch to achieve a great finished product in a very short time! What type of layout will you create? What other papers and border punches will you use? Comment below and let us know!

Nice layout, but I would love to see more 2 page layout ideas. I normally scrapbook 2 pages together with more than 6 or 7 photos and would love to see some ideas that I may actually use.
Being a musician, I am really happy to see this layout. I will be creating it more than once. Thank you for the lovely idea.
As always, love your ideas! I wouldn’t have guessed you made that with one sheet of paper. I should have known though; that is your specialty!
Such a beautiful layout! I love just about anything with music or dancing in it.
A beautiful layout. I love the music idea also, as I am a pianist. It is a versatile layout that can be adapted to any theme. Love it!
[…] This symphonic scrapbook layout could be used for a wide variety of projects — learn how to make it sing here! […]