November 19, 2019
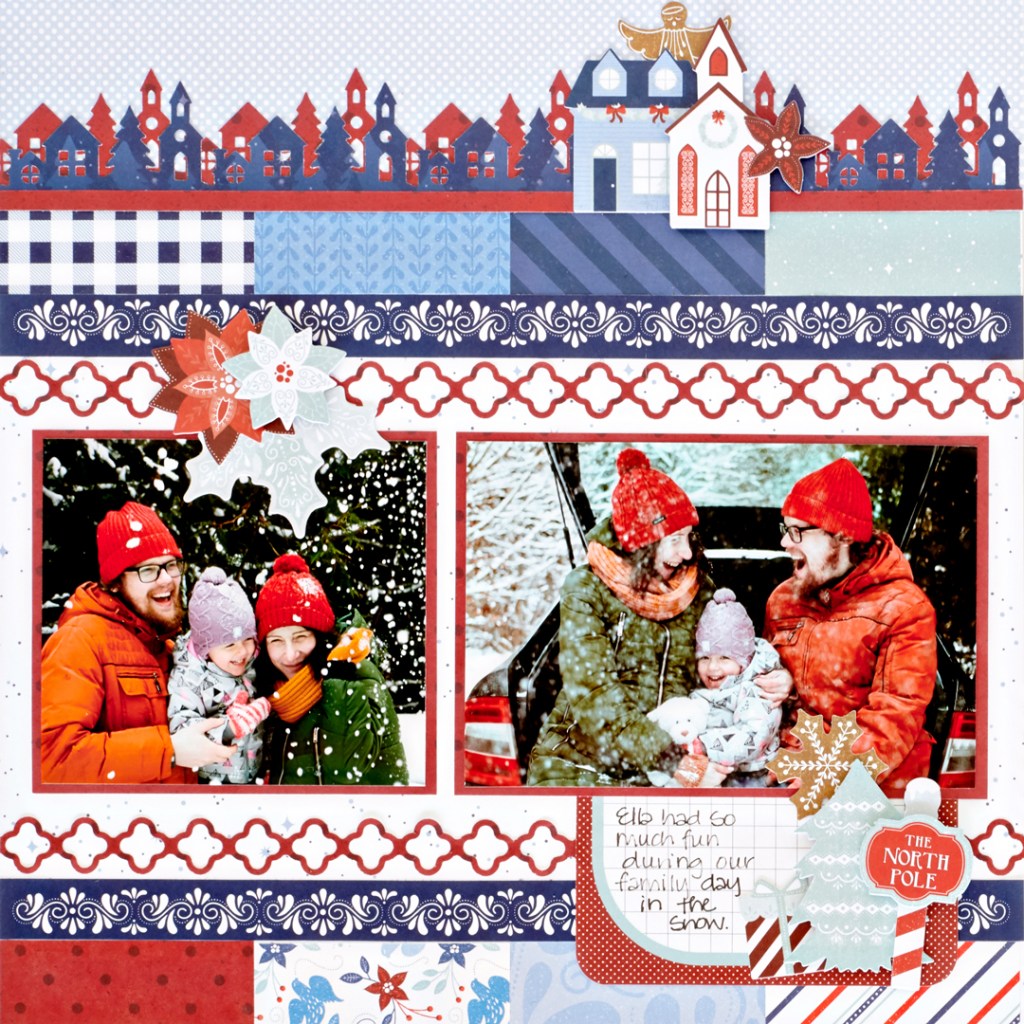
Make Some North Pole Magic with this Holiday Scrapbook Layout

Have you heard about the new North Pole Magic bundle yet? This exclusive bundle is available for FREE from Nov. 18-29 when you purchase the CM products you know and love! It’s full of the feel-good vibes of a small-town Christmas your spreads just can’t do without! Take a look at this holiday scrapbook layout made with products in the bundle and then begin filling your cart to qualify to get yours!
Learn more about the North Pole Magic bundles here!
US: https://bit.ly/348RDIx
CA: https://bit.ly/2OmFxVf
AU: https://bit.ly/2qojNAt
To create this layout, you will need:
- Promotion – North Pole Magic Paper Pack or (Shop Canada | Shop Australia)
- Promotion – North Pole Magic Embellishments or (Shop Canada | Shop Australia)
- Promotion – Charming Village Border Punch or (Shop Canada | Shop Australia)
- Original Border Maker System with Medallion Frame Chain Border Maker Cartridge or (Shop Canada | Shop Australia)
- 2-Way Corner Rounder or (Shop Canada | Shop Australia)
- 12-inch Trimmer or (Shop Canada | Shop Australia)
- Tape Runner or (Shop Canada | Shop Australia)
- Repositionable Tape Runner Refill or (Shop Canada | Shop Australia)
- Foam Squares or (Shop Canada | Shop Australia)
- Black Dual-Tip Pen or (Shop Canada | Shop Australia)
Step 1: Use the white patterned paper as the base for this layout.
Step 2: Cut a piece from the light blue dot patterned paper to measure 12″ x 2-1/2″ and adhere it to top edge of the layout.
Step 3: Cut eight pieces of varied patterned paper to measure 3″ x 1″. Adhere four pieces along the bottom edge of the layout and four pieces below the light blue dot patterned paper.
Step 4: Cut the dark blue borders from the mat patterned paper, as shown. Adhere them along the top and bottom of the previously-adhered pieces.
Step 5: Cut two mats from the red patterned paper that measure: 4-3/4″ x 4-1/4″ and 6-1/4″ x 4-1/4″. Adhere two photos to the mats that measure: 4-1/2″ x 4″ and 6″ x 4″.
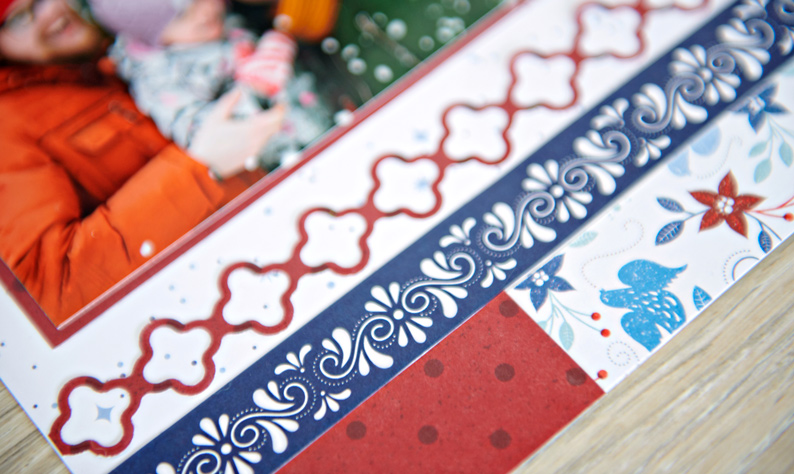
Step 6: Using the Original Border Maker System with the Medallion Frame Chain Border Maker Cartridge, punch two borders from the red patterned paper. Adhere the border to the layout.
Step 7: Cut out a red mat from the mat patterned paper and round the corners using the 2-Way Corner Rounder. Adhere it below the 6″ x 4″ photo.
Step 8: Using the Charming Village Border Punch, punch along one edge of the red patterned paper. Cut it to measure 1-3/4″ and adhere it to the layout.
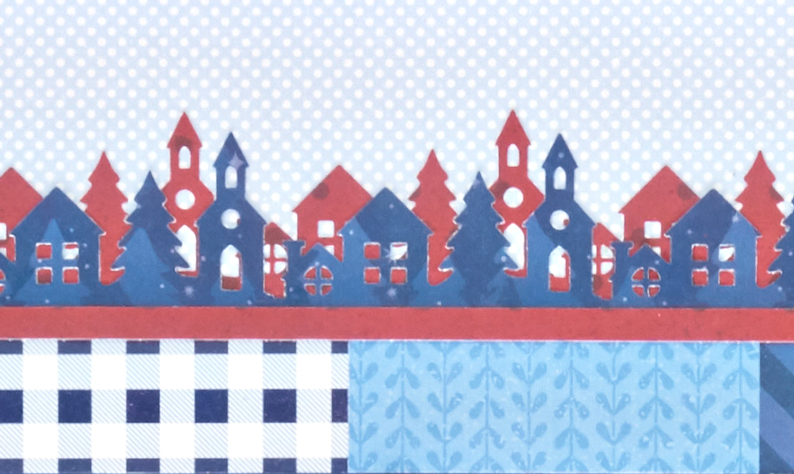
Step 9: Using the Charming Village Border Punch, punch along one edge of the dark blue patterned paper. Cut it to measure 1-1/2″ and adhere it to the top of the red patterned paper border, so they are offset from each other, as shown.
Step 10: Cut a piece of red patterned paper to measure 12″ x 1/4″ and adhere it along the bottom edge of the village borders.
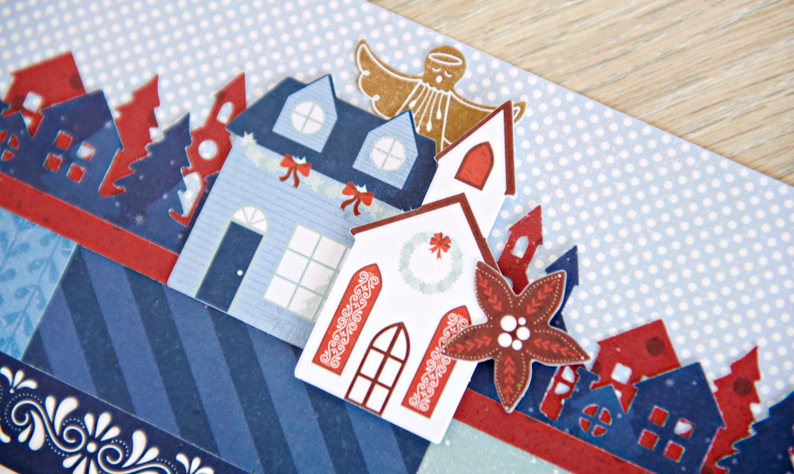
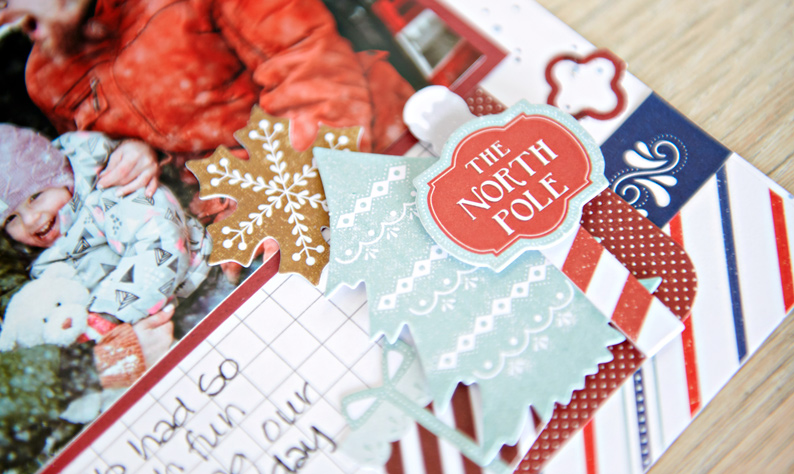
Step 11: Adhere embellishments, using Foam Squares on some for added dimension. Journal as desired.
If you want to create this holiday scrapbook layout for yourself, you’ll need the North Pole Magic products, which are only available for a limited time during the North Pole Magic Bundle Promo. Will you be perking up your pages with this promotion? Let us know in the comments below!

Love this charming new layout with the North Pole Bundle goodies! I really like your use of the Medallion Border Maker Cartridge here. Who knew it could be used as a clever edition to a Scandinavian layout like this and have it look like it was made for the Village Border Punch that comes with the magical bundle? Thanks again, Melissa, for the inspiration!
[…] Learn how to put together this pleasantly polar layout with instructions in this blog post! […]
[…] was available as part of the 2019 Black Friday Promotion and this layout originally debuted on the CM Blog on November 19, […]