August 8, 2020
Pick Up Creative Steam With These Train Scrapbook Projects
Choo-choo-choose your next crafty platform with the Trains collection — it’s your perfect ticket for layouts of long-dreamed trips across the country, railway adventures with family and any other locomotive memories you can think of! Check out these train scrapbook projects and start conducting your own innovative ideas!
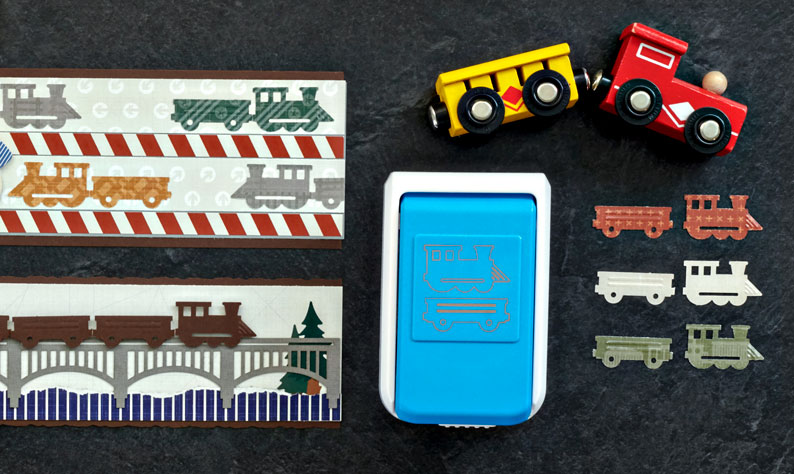
To create these borders and card, you will need:
- Trains Paper Pack or (Shop Canada | Shop Australia)
- Trains Stickers or (Shop Canada | Shop Australia)
- Trains Laser Cut Embellishment Accents or (Shop Canada | Shop Australia)
- Blue & Rich Brown Solid Cardstock or (Shop Canada | Shop Australia)
- Embossed Locomotive Punch or (Shop Canada | Shop Australia)
- Custom Cutting System with the Rectangle Patterns or (Shop Canada | Shop Australia)
- 12-inch Trimmer with Straight & Deckle Blades or (Shop Canada | Shop Australia)
- Tape Runner or (Shop Canada | Shop Australia)
- Repositionable Tape Runner or (Shop Canada | Shop Australia)
- Foam Squares or (Shop Canada | Shop Australia)
All Aboard Border
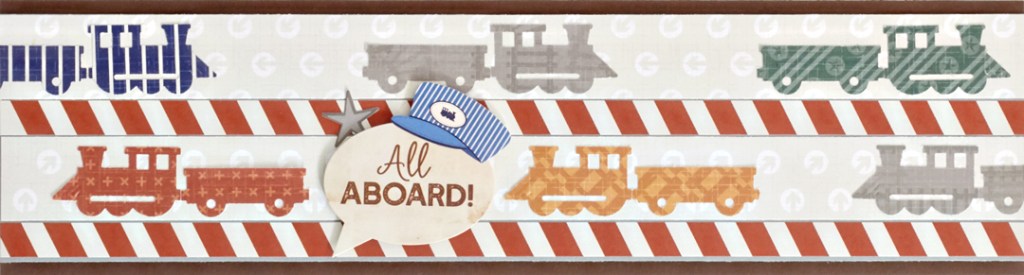
Step 1: Cut a piece from the Rich Brown Solid Cardstock to measure 12″ x 3-1/4″.
Step 2: Cut a piece from the silver tracks patterned paper to measure 12″ x 3″. Adhere to the border.
Step 3: Cut two strips from the cream patterned paper to measure 12″ x 1″. Adhere one along the top edge of the silver tracks paper.
Step 4: Adhere a sticker border just under the first strip. Adhere the second strip of paper under the sticker border. Adhere a sticker border just under the second strip of paper.
Step 5: Using the Locomotive Punch, punch several pieces from a variety of patterned papers. Adhere along the cream strips.
Step 6: Adhere title sticker using Foam Squares.
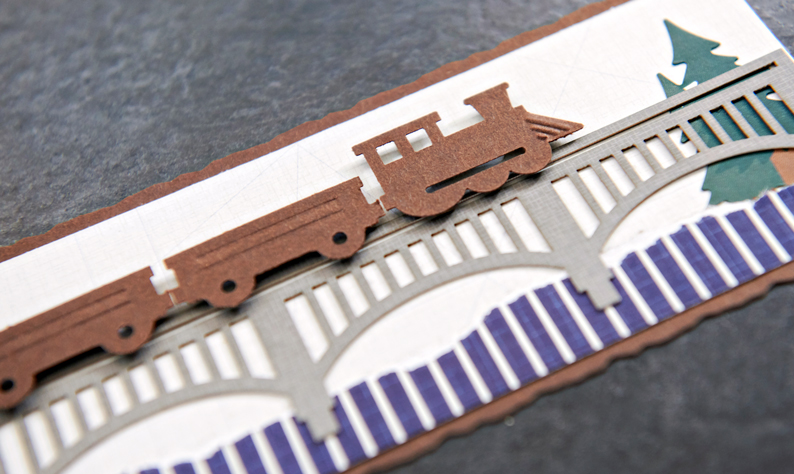
On the Right Track Border

Step 1: Cut a piece from the Rich Brown Solid Cardstock to measure 12″ x 2-3/4″, using the 12-inch Trimmer with the Deckle Blade.
Step 2: Cut a piece from the cream patterned paper to measure 12″ x 2-1/2″. Adhere to the border.
Step 3: Tear a piece approximately 12″ x 1/2″ from the dark blue paper to create “water.” Adhere along the bottom edge of the cream paper.
Step 4: Tuck the tree and hills stickers behind the “water.” Adhere the bridge laser cut embellishment accent along the top edge of the “water.”
Step 5: Using the Locomotive Punch, punch several pieces from Rich Brown Solid Cardstock. Adhere using Foam Squares on the bridge embellishments.
Step 6: Adhere the title sticker using Foam Squares.
Life is Like a Train Track Card
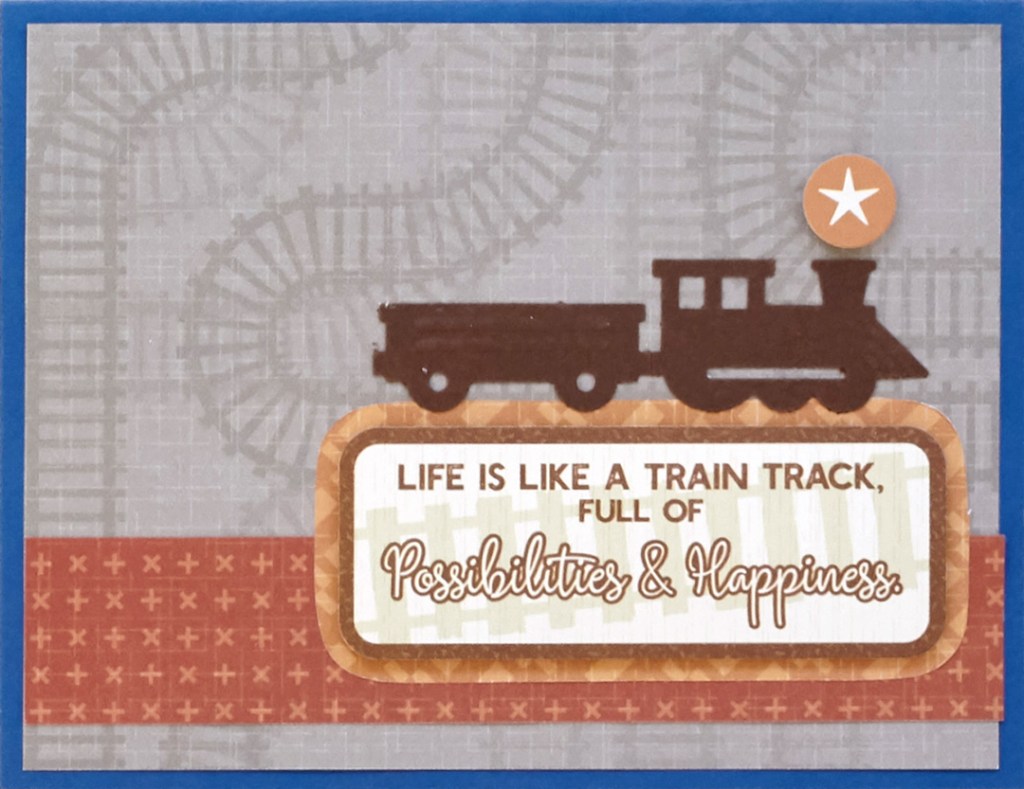
Step 1: Cut a piece of Blue Solid Cardstock to measure 8-1/2″ x 5-1/2″. Fold in half to create card.
Step 2: Cut a piece of the silver tracks patterned paper to measure 5-1/4″ x 4″. Adhere to the card.
Step 3: Cut a piece of the red patterned paper to measure 5-1/4″ x 1″. Adhere to the card.
Step 4: Cut a piece of the gold patterned paper using the inside of the Rectangle Custom Cutting System. Adhere a sticker to the top of this piece using Foam Squares. Adhere to the card.
Step 5: Using the Locomotive Punch, punch with Rich Brown Solid Cardstock. Adhere the pieces to the card.
Have you been picking up creative steam with the Trains collection? Which one of these train scrapbook projects will you be trying out first?

These are great
It is due to arrive on Tuesday. My friend is coming on Wednesdaay to help with set up.
>
Oh my goodness, between my son and grandson I have so many pictures of trains to scrap. Th etrain tracks border is simply adorable. I would have so many pages using that!