August 19, 2020
Reveal All Your Love With These Wedding and Baby Scrapbook Layouts

Although the All My Love collection was designed with beautiful weddings in mind, its elegance, warmth and soft style makes it a versatile collection that can be used for a variety of project types! Blog contributor Noreen Smith got her hands on the collection early, and she made a beautiful wedding scrapbook layout and a stunning baby scrapbook layout — check them out!
Noreen’s Inspiration
I was so excited to have been asked to preview the beautiful new All My Love collection! I love the rich hues and patterns and the Foiled Flower Embellishments are absolutely stunning! And although it is a wedding-themed collection, it can be used to document other themes and occasions as well! I created the two layouts shared in this video — one with a wedding theme and one to showcase some baby pictures! Take a look at how to create them!
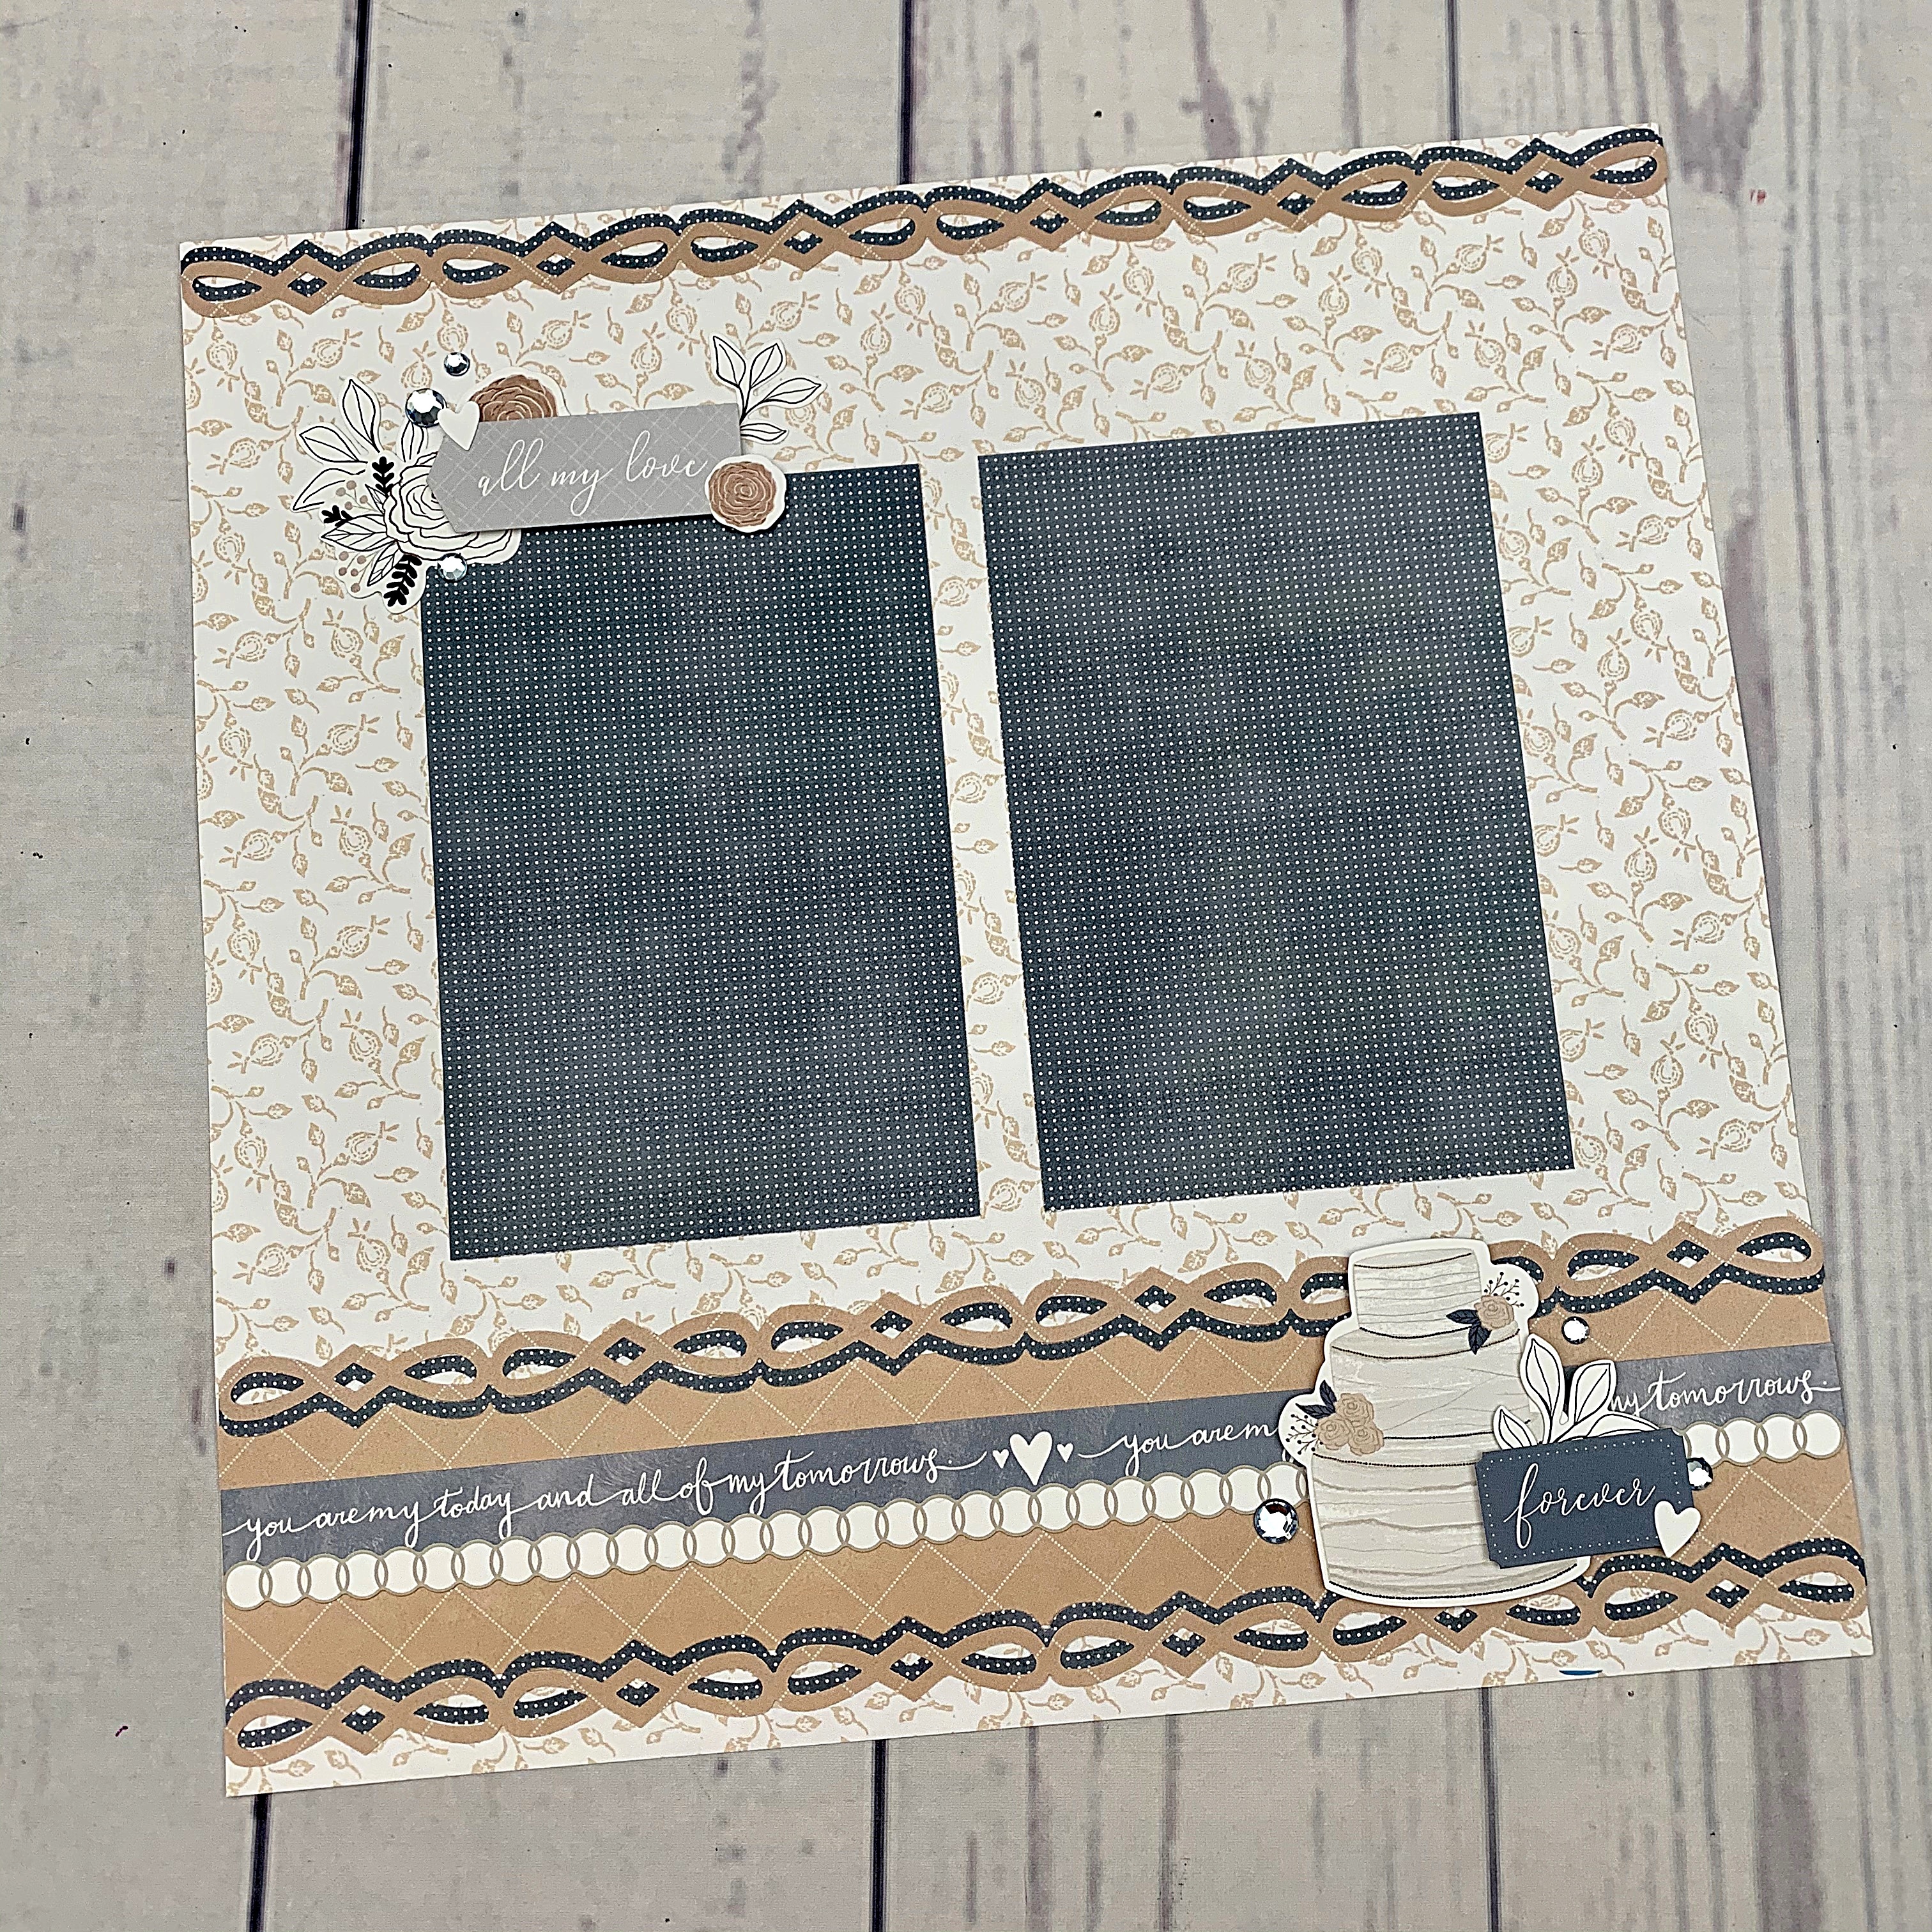
To make the “All My Love… Forever” layout you will need:
- All My Love Paper Pack or (Shop Canada | Shop Australia)
- All My Love Foiled Flower Embellishments or (Shop Canada | Shop Australia)
- All My Love Stickers or (Shop Canada | Shop Australia)
- 12-inch Trimmer or (Shop Canada | Shop Australia)
- Original Border Maker System with the Infinity Chain Border Maker Cartridge or (Shop Canada | Shop Australia)
- Tape Runner or (Shop Canada | Shop Australia)
- Repositionable Tape Runner or (Shop Canada | Shop Australia)
- Foam Squares or (Shop Canada | Shop Australia)

Step 1: Use one sheet of the beige leaf patterned paper for the base. Cut a 2″ x 12″ strip with the 12-inch Trimmer from the diamond squares paper and adhere near bottom of page with Tape Runner adhesive.
Step 2: Punch six borders with the Original Border Maker System and the Infinity Chain Border Maker Cartridge — three from the diamond squares paper and three from the blue dot paper. Overlap the diamond squares strips on top of the blue strips, offsetting them slightly to created a perceived shadow layer. Adhere one pair of border strips along the top edge of the base page with Repositionable Tape Runner adhesive. Adhere the other two pairs of border strips along the top and bottom of the diamond squares strip as shown.
Step 3: Cut two 4″ x 6″ photo mats and mount in middle of layout as shown. Add a small cluster of stickers and gems to the top left corner of the left photo mat as shown. Pop some stickers up with Foam Squares to create dimension and interest. (Tip: Adding word art stickers to each cluster can serve as your page title. Make sure the words are at the top of the page, which will be read first, work with the words you add at the bottom of the page, which will be read next.)


Step 4: Adhere one “You are my today…” border sticker and one rings border sticker along the middle of the diamond squares paper strip. Add a large cluster of stickers and gems across the border as shown using additional Foam Squares for dimension.
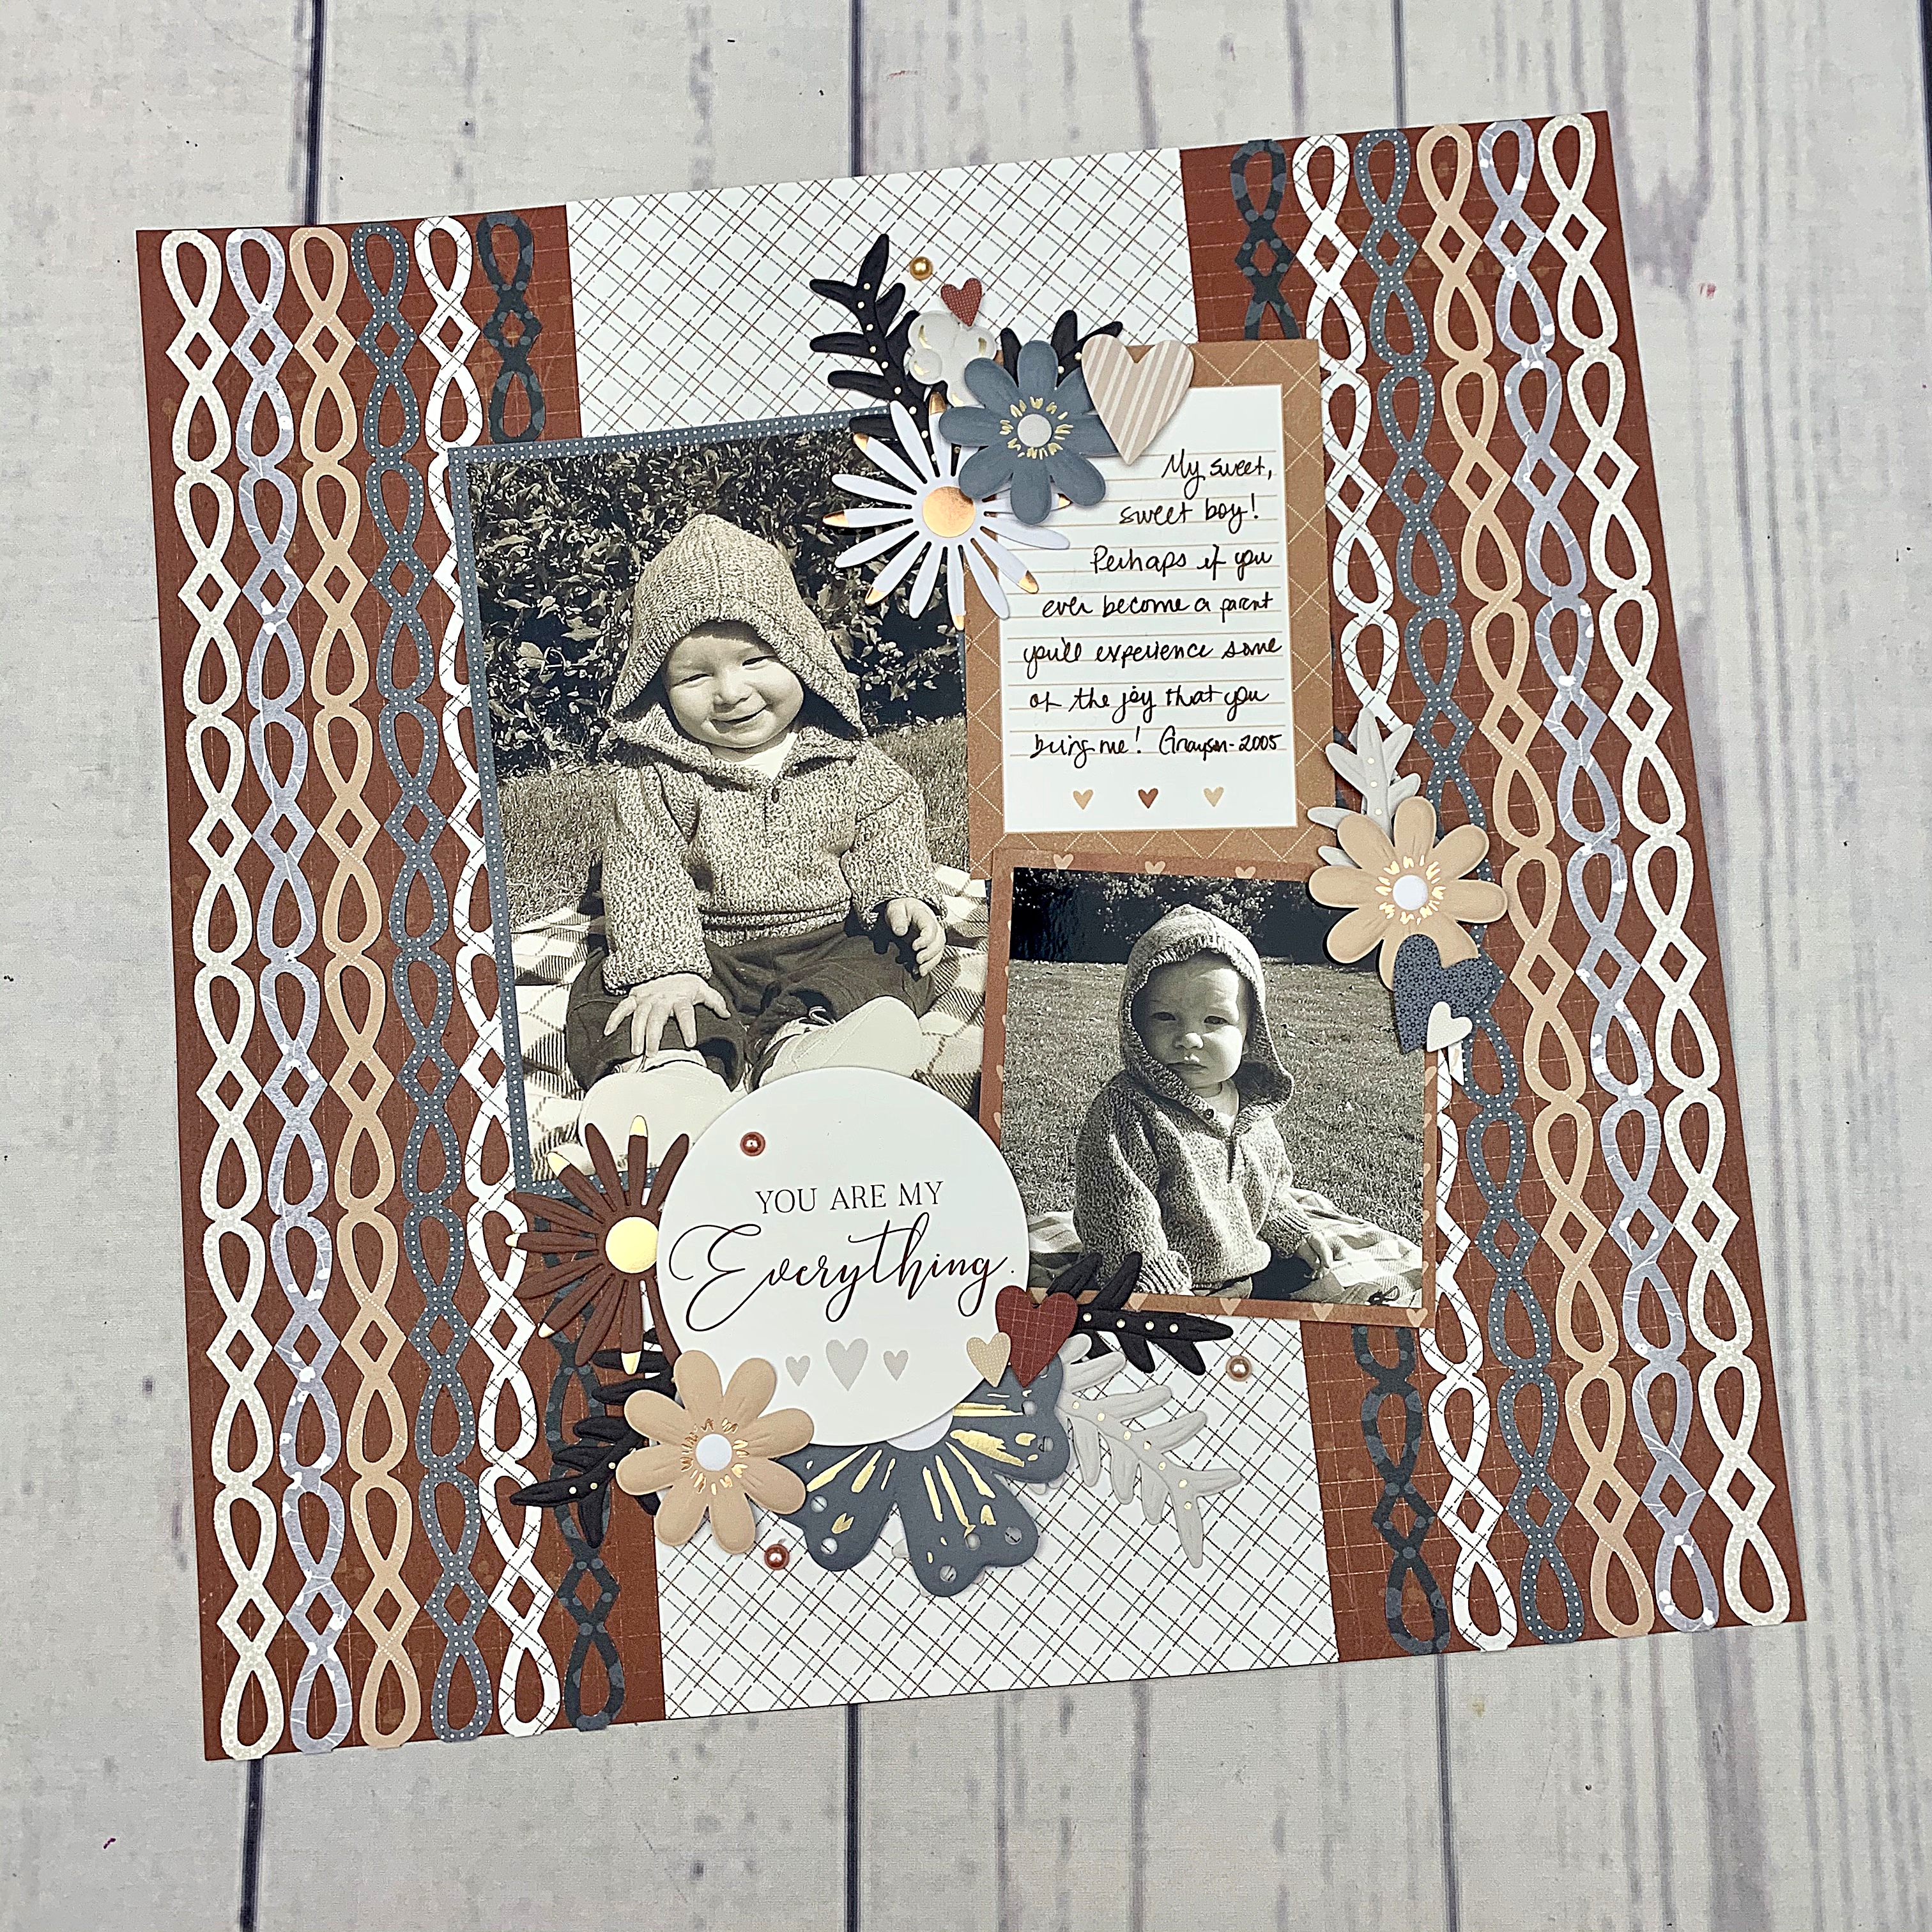
To make the “You Are My Everything” layout you will need:
- All My Love Decorative Bundle or (Shop Canada | Shop Australia)
- 12-inch Trimmer or (Shop Canada | Shop Australia)
- Original Border Maker System with the Infinity Chain Border Maker Cartridge or (Shop Canada | Shop Australia)
- Tape Runner or (Shop Canada | Shop Australia)
- Repositionable Tape Runner or (Shop Canada | Shop Australia)
- Foam Squares or (Shop Canada | Shop Australia)
- Brown Dual-Tip Pen or (Shop Canada | Shop Australia)
Step 1: Use one sheet of the brown grid paper for the layout base. Cut a 5″ x 12″ strip with the 12-inch Trimmer from the white plaid tie paper and adhere it down the middle of the page with Tape Runner adhesive.
Step 2: Punch 12 borders with the Original Border Maker System and the Infinity Chain Border Maker Cartridge from various papers. Tip: Punch four border strips from three different papers and turn over two of each to reveal the pattern on the opposite side! Space the border strips evenly down each side of the white plaid tie strip and adhere with Repositionable Tape Runner as shown.
Step 3: Mat a 4″ x 6″ photo and a 4″ x 4″ photo with two of the same papers used for the border strips. Adhere to the layout, overlapping the white plaid tie strip and the border strips.
Step 4: Cut one of the 4-1/2″ x 6-1/2″ journal cards from the Variety Mat Pack in half. Journal on the card with the Brown Dual-Tip Pen and adhere to layout as shown, forming a block with the photos.


Step 5: Finish the layout with clusters of flower embellishments, stickers and gems.
Although it works great for wedding scrapbook layouts, I know you’ll think of lots of other themes and occasions that will work with this lovely collection — what will you use it for? We’d love to hear from you in the comments below!
