January 26, 2021
Artful Aspirations in Two Ways With These Scrapbook Layout Ideas

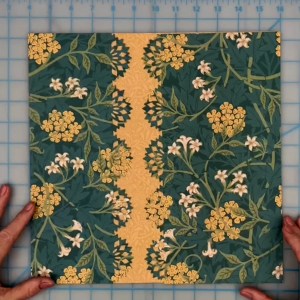
Some people may say you can’t rush art, but you can complete stunning scrapbooking art in a matter of minutes! It’s true! Blog contributor Noreen Smith used the same basic supplies and groundwork — two pieces of paper from the beautiful Art Nouveau Paper Pack, as well as stickers and the fabulous Mandala Burst Border Punch — to create two beautiful layout opportunities. One is more simple and straightforward, while the other is simply fabulous and exudes some intricate intrigue… but both can stand on their own as works of art! Check out these scrapbook layout ideas below and let your artsy side shine!
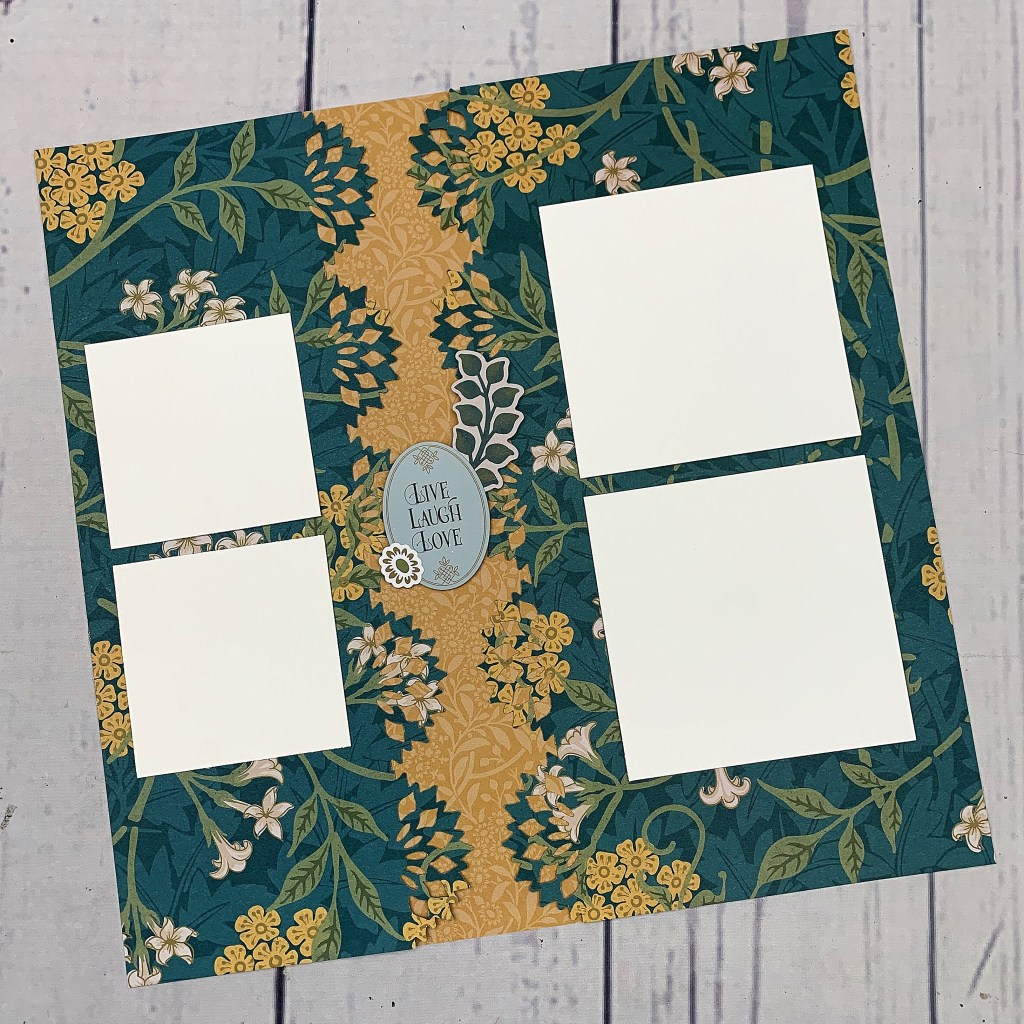
Simple… 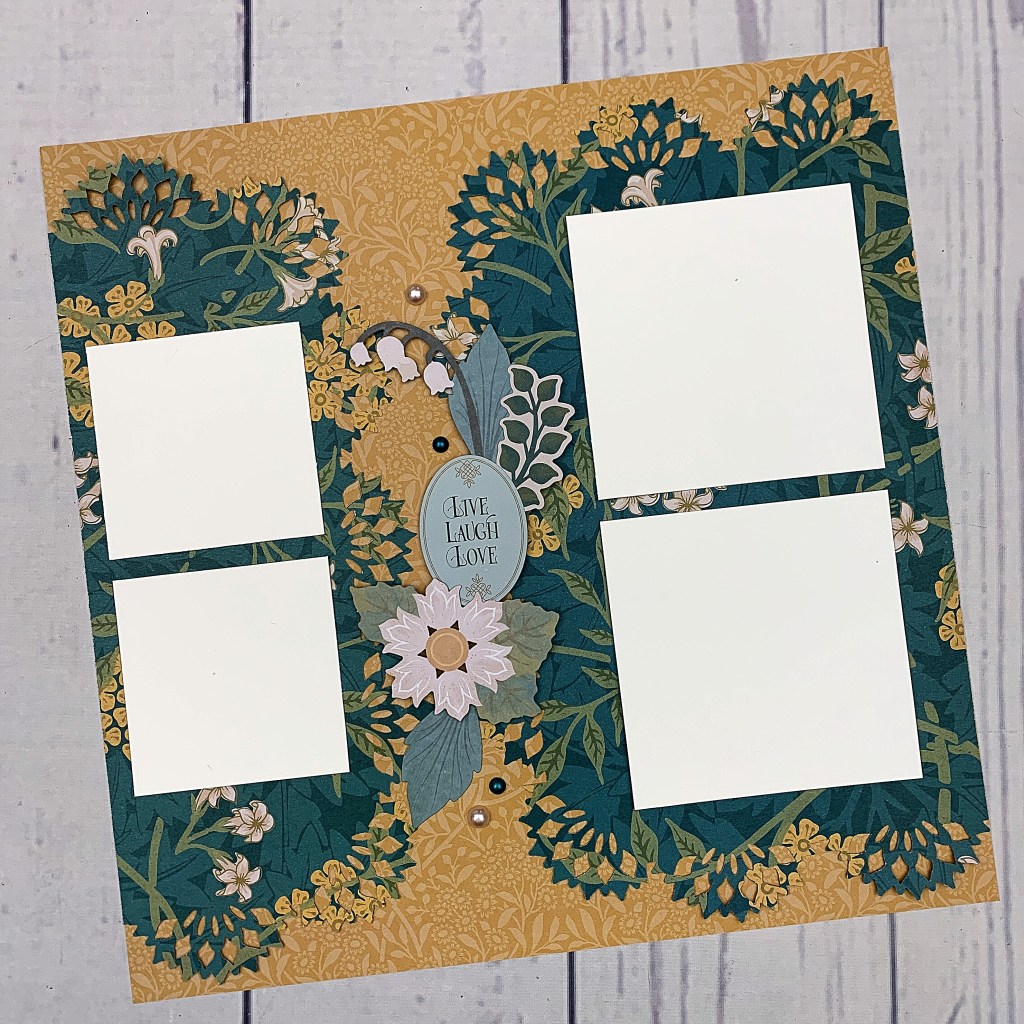
…to Simply Fabulous!
Watch the video to see how easy it is to create either (or both!) the simple or simply fabulous layouts, or follow along with the written instructions below.
To create the simple layout you will need:
- Art Nouveau Paper Pack or (Shop Canada | Shop Australia)
- Art Nouveau Stickers or (Shop Canada | Shop Australia)
- Mandala Burst Border Punch or (Shop Canada | Shop Australia)
- 12-inch Trimmer or (Shop Canada | Shop Australia)
- Repositionable Tape Runner or (Shop Canada | Shop Australia)

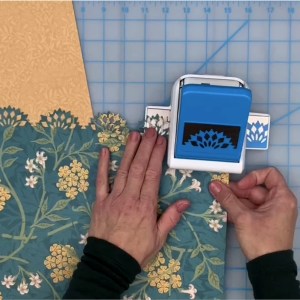
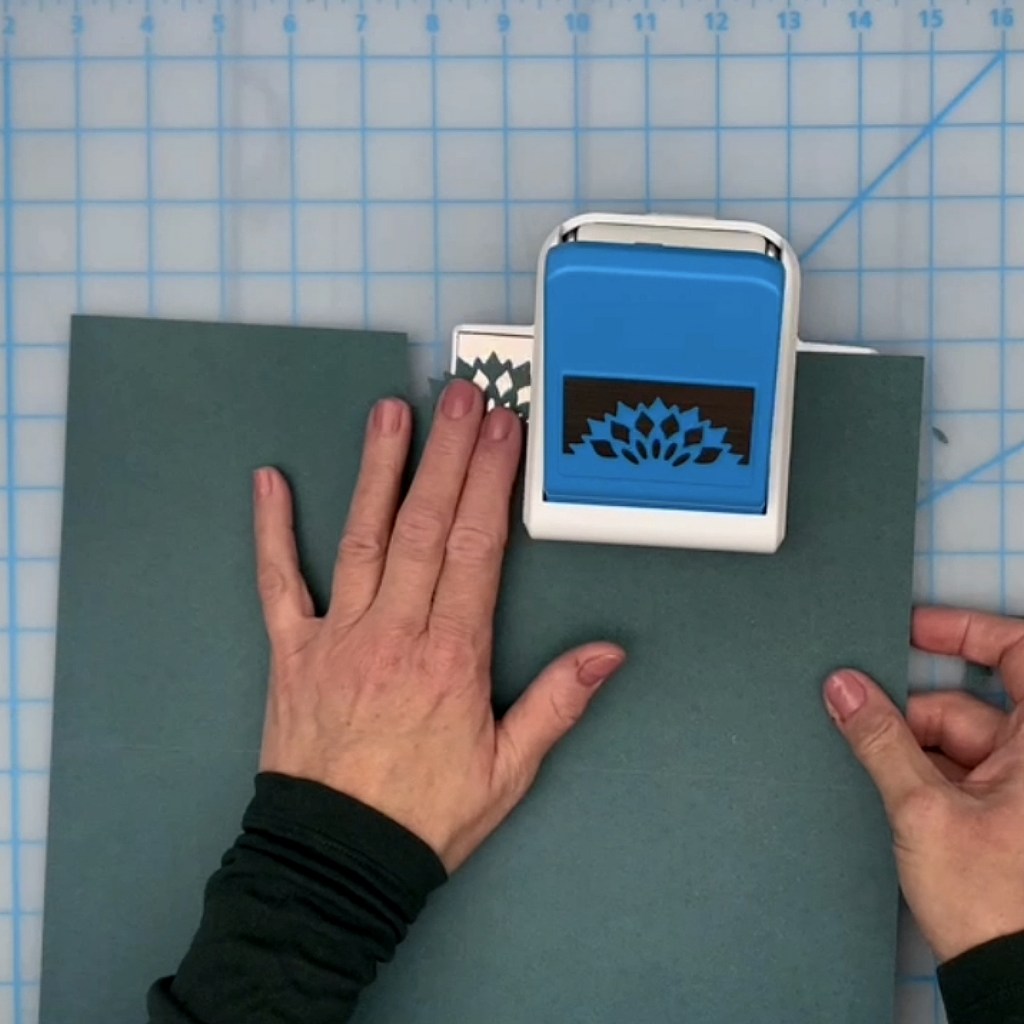
Step 1: Punch one edge of a 12″ x 12″ piece of large florals paper with the Mandala Burst Border Punch. Turn paper and punch the opposite edge.
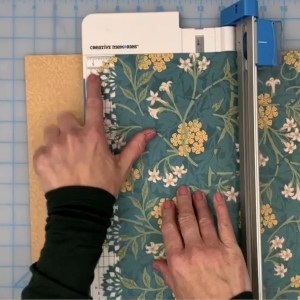
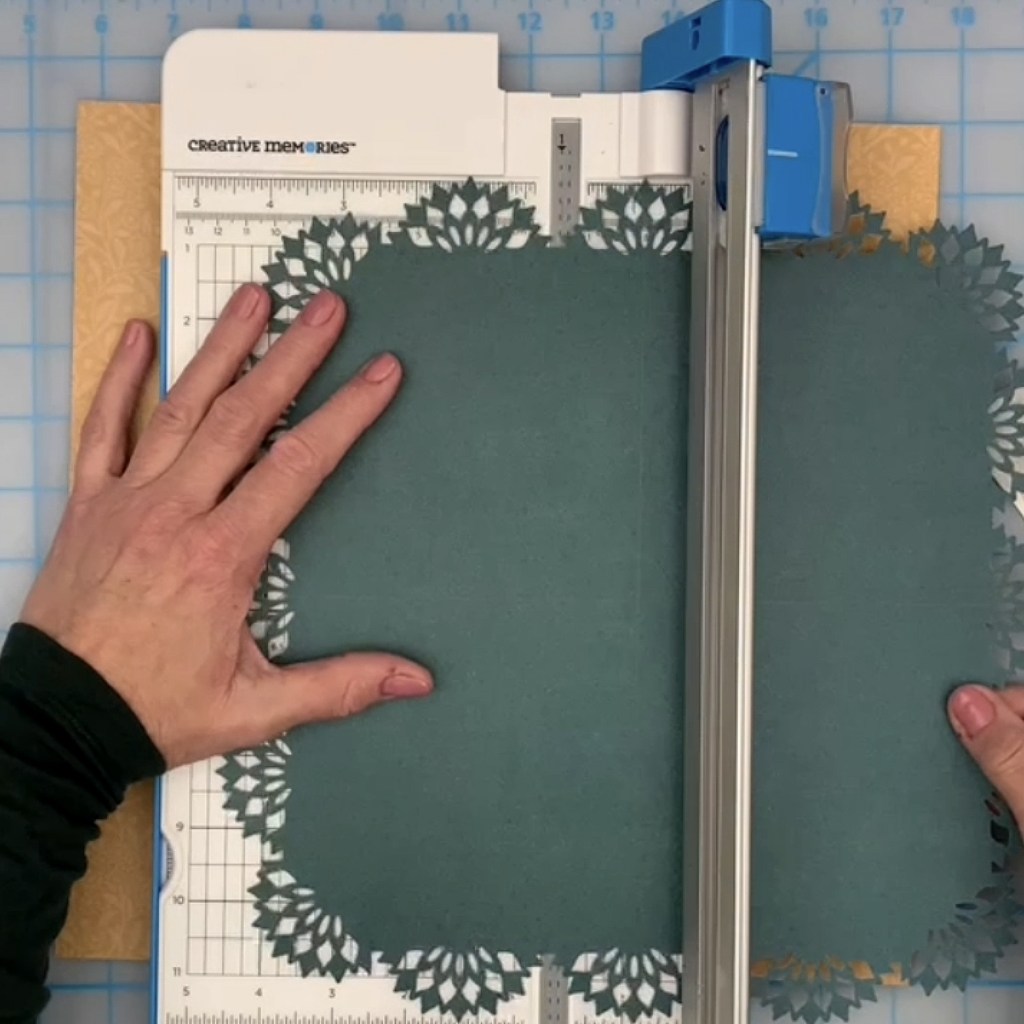
Step 2: Place the paper into your 12-inch Trimmer with one of the punched edges at 5″ and cut.
Step 3: Place pieces on base page so the straight edges are along the right and left sides and the punched edges meet toward the middle.
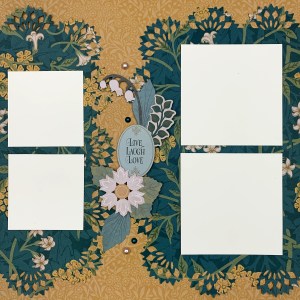
Step 4: Add four photos — two 4″ x 4″ and two 3″ x 3″ — to layout as shown with adhesive.
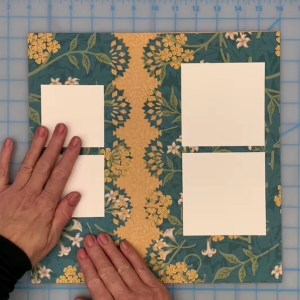
Step 5: Add a sticker title and embellishment in between the photos.
To create the simply fabulous layout you will need:
- Art Nouveau Paper Pack or (Shop Canada | Shop Australia)
- Art Nouveau Stickers or (Shop Canada | Shop Australia)
- Mandala Burst Border Punch or (Shop Canada | Shop Australia)
- 12-inch Trimmer or (Shop Canada | Shop Australia)
- Repositionable Tape Runner or (Shop Canada | Shop Australia)
- Art Nouveau Laser Cut Embellishments or (Shop Canada | Shop Australia)
- 13×13 Custom Cutting System Mat or (Shop Canada | Shop Australia)
- Ruler
- Pencil
Step 1: Start with a full sheet of Art Nouveau paper. Turn it over to the side you do not want showing on your final layout and align it on the 13×13 Custom Cutting System Mat. Use a ruler and pencil to mark the horizontal and vertical points of the paper.

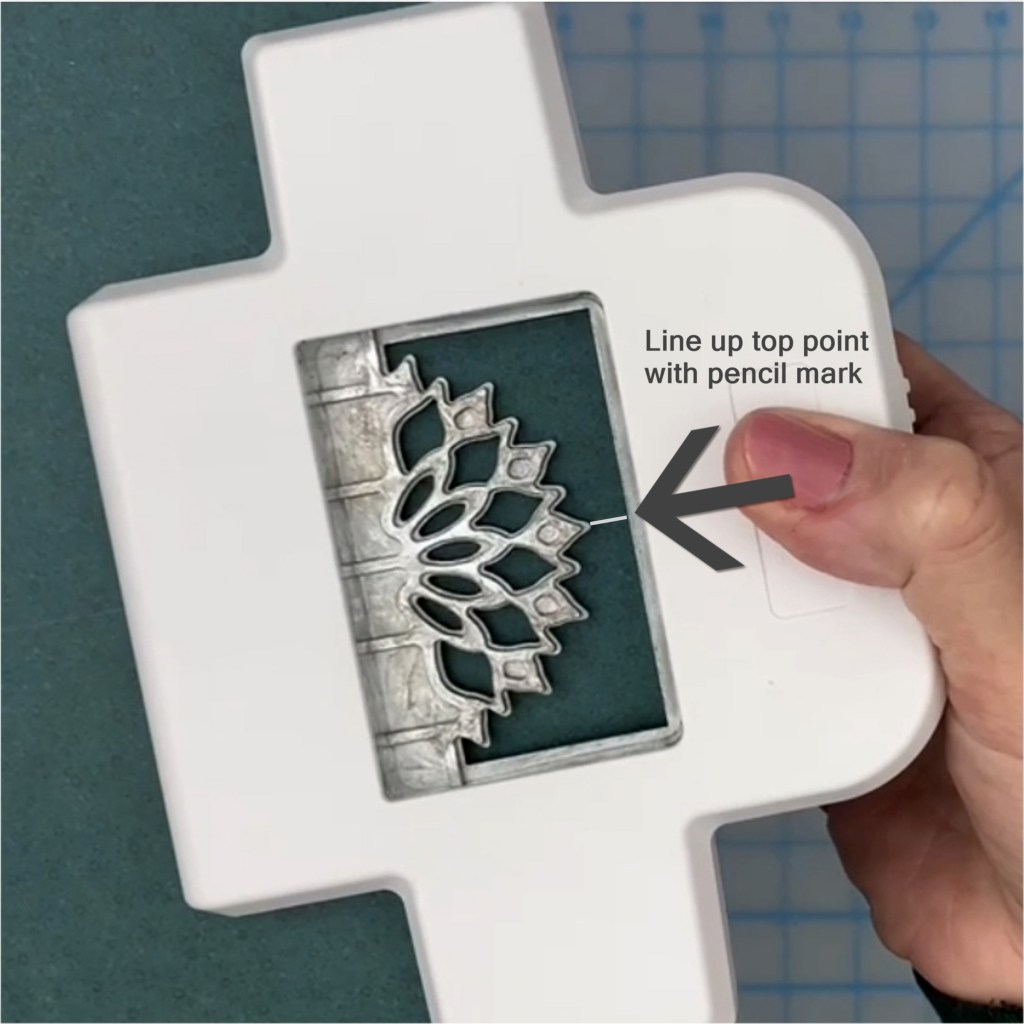
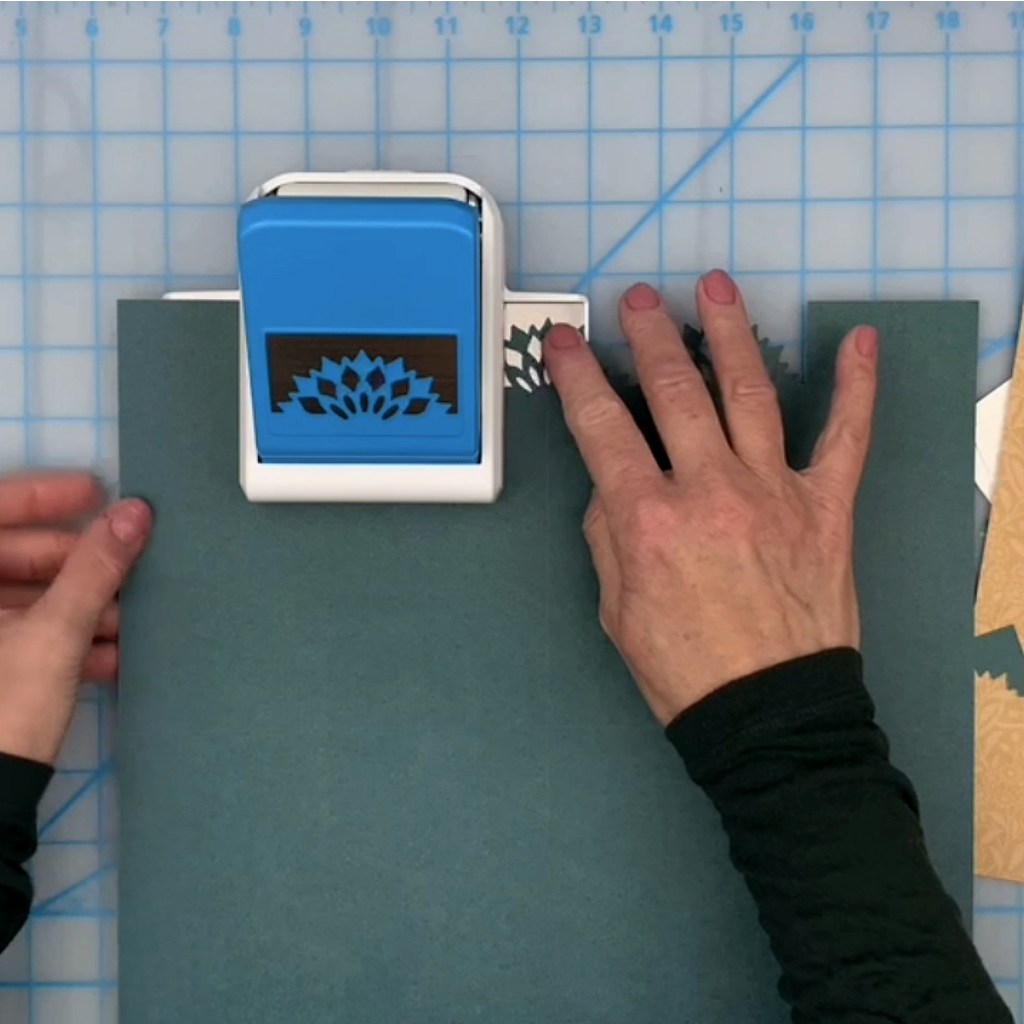
Step 2: Turn the Mandala Burst Border Punch upside down. Place the paper into the punch, lining up the pencil mark with the top point of the Mandala Burst Border Punch. Squeeze gently to keep the paper in place, then turn punch over and punch. Place the Mandala Burst Border Punch flat on your surface and insert the paper, lining up the mandala you just punched with the image on the base plate. Punch. Slide the paper in the opposite direction, lining up the mandala with the image on the opposite base plate. Punch. Repeat this step on all four sides of the paper.
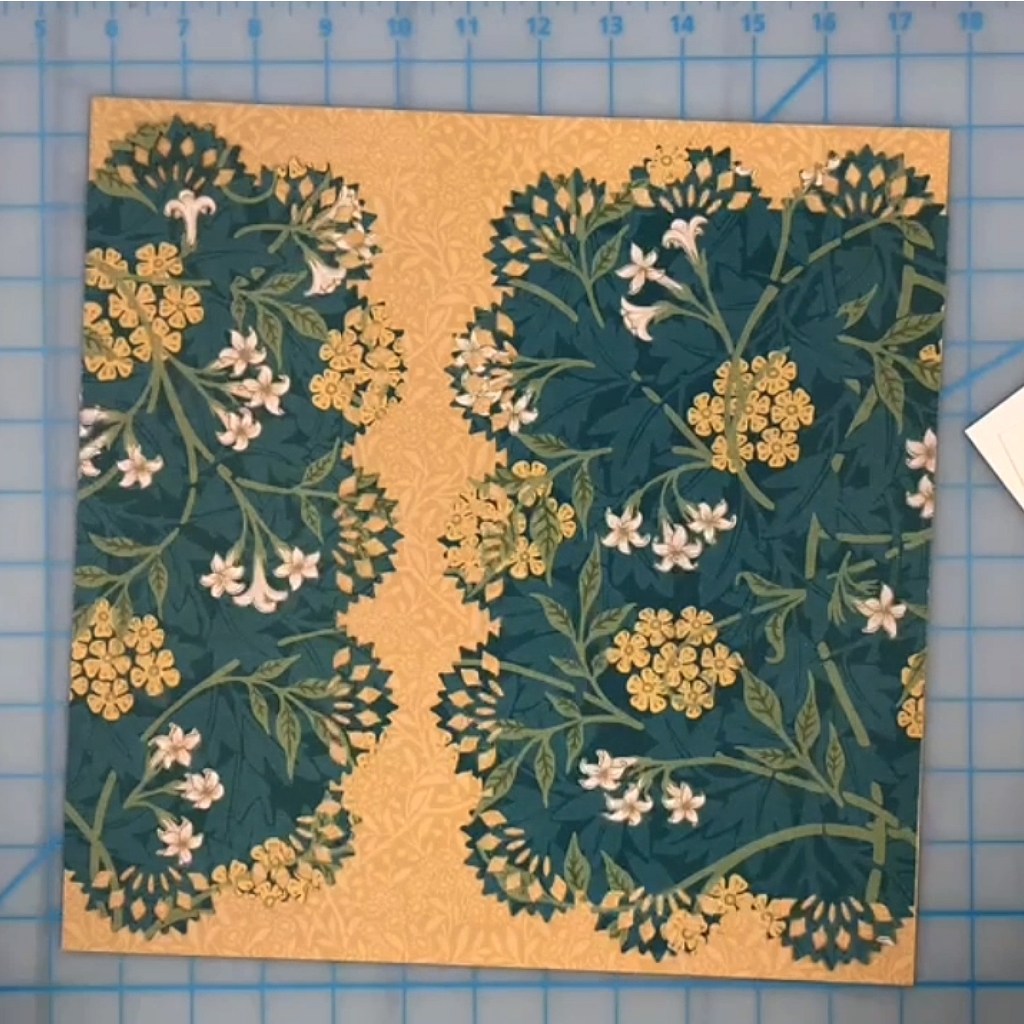
Step 3: You will now have four squares at each corner of your paper. Place the point of a square into the 12-inch Trimmer, lining up the edge of the square with the 45-degree mark and the point with the intersection of the 45-degree mark and the 1-1/4″ line. Cut. Repeat this step on all four square corners.
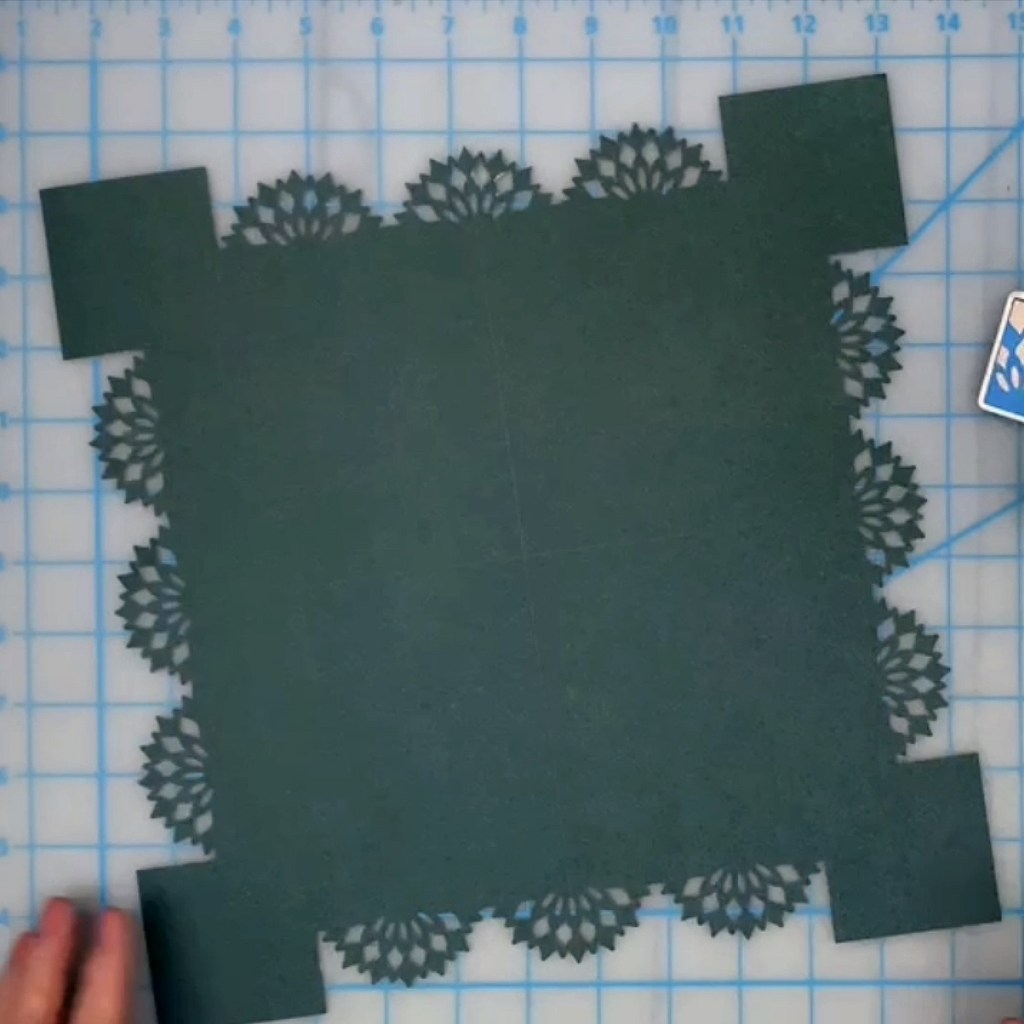
Step 4: Turn the Mandala Burst Border Punch upside down. Insert the cut side of the square into the punch, aligning as best you can. Punch. Repeat this step on all four corners to complete the decorative border around all edges of the paper.

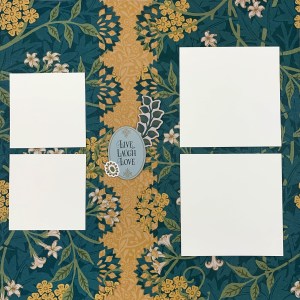
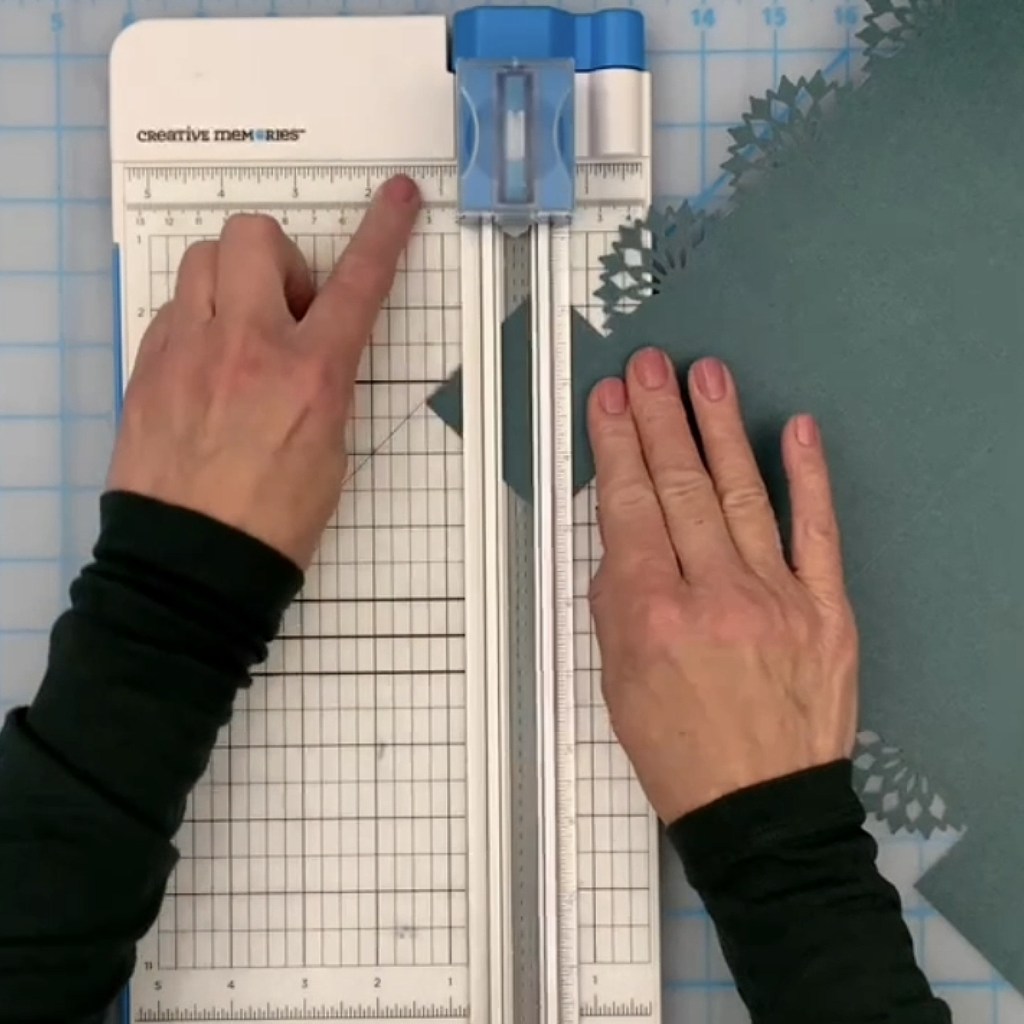
Step 5: Place decorative square into 12-inch Trimmer and cut in between the first and second whole mandalas. Turn the pieces over and place onto the base page so the straight edges are along the right and left sides and punched edges meet toward the middle.
Step 6: Adhere photos in the same arrangement as in the simple layout. Add a sticker title and embellishments as shown or desired.
Which of these scrapbook layout ideas do you have time to bring to life today? Let us know in the comments below!

Both of these layouts are beautiful and fabulous. I have printed off the instructions and will use both of these layouts in an album.
Beautiful.
Very nice, haw do I print the instructions to use these lay outs in my album?
You can always just go back into the blog instead of printing. You should also be able to print from there.
That Blog has lots of great pages and Boarders in there and you can hours looking at these. I knowi
As always a beautiful pages with 2 sheets of paper, a punch and a few embellishments!
I am constantly amazed by Noreen’s talent! These are gorgeous!
I immediately went to my scrapbook room and copied this Simply Fabulous layout. It turned out perfect! Thank you for the idea.
Love your layouts Noreen. Instructions are always easy to follow.
Thanks for sharing once again.
I did the first layout. It was quick & easy. I used your idea as a launch for my Christmas spreads – 40 pictures ! I could use a bold Christmas print & soften the look with the two sides. Thanks for your inspiration!