March 11, 2021
Party Like a Pro With These Quick Birthday Scrapbook Layouts

Birthdays, graduations, anniversaries — there’s always a reason to celebrate life’s special moments. Truth be told, sometimes parties can take quite a bit of preparation and planning, from the menu to the decorations and theme, entertainment and location. But something you won’t have to worry about is how to display the festive fun when the streamers come down. How so? With the Party Time! Fast2Fab™-Inspired Designer Paper Pack, of course. With its pre-designed pages, most of the prep work is done for you — you just need to decide which photos to highlight! Blog contributor Noreen Smith is a big fan of these papers and showcased how easy it is to get the layout party started in five, 10 and 15 minutes! Unwrap the magic with these three quick birthday scrapbook layouts!
Noreen’s Inspiration
Lots of memory-keepers LOVE Creative Memories Fast2Fab™ Refill Pages because, as their name suggests, they are the ultimate in getting pages done fast. But if you prefer to scrapbook directly onto paper and use the Creative Memories Pocket Pages in your albums, you may have passed the Fast2Fab™ Refill Pages by. That’s why I was so excited when CM launched a Fast2Fab™-Inspired Designer Paper Pack as part of the Party Time! collection. These 12×12 double-sided designer papers are versatile and fast — they allow you create quick layouts and slip them in to your CM Pocket Pages or adhere them on a blank refill page in your album. It’s the best of both worlds! And you can use them for a single-page or double-page layouts; I used the fun balloon-themed Fast2Fab™-Inspired papers to create three layouts in record time… only taking five, 10 and 15 minutes each!
Watch the video to see how easy it is to create these three layouts, or follow along with the written instructions below.
To create the five-minute layout you will need:
- 1 piece of paper from the Party Time! Fast2Fab™-Inspired Designer Paper Pack or (Shop Canada | Shop Australia)
- Party Time! Variety Mat Pack or (Shop Canada | Shop Australia)
- 12-inch Trimmer or (Shop Canada | Shop Australia)
- Tape Runner or (Shop Canada | Shop Australia)
- Dual-Tip Pen or (Shop Canada | Shop Australia)

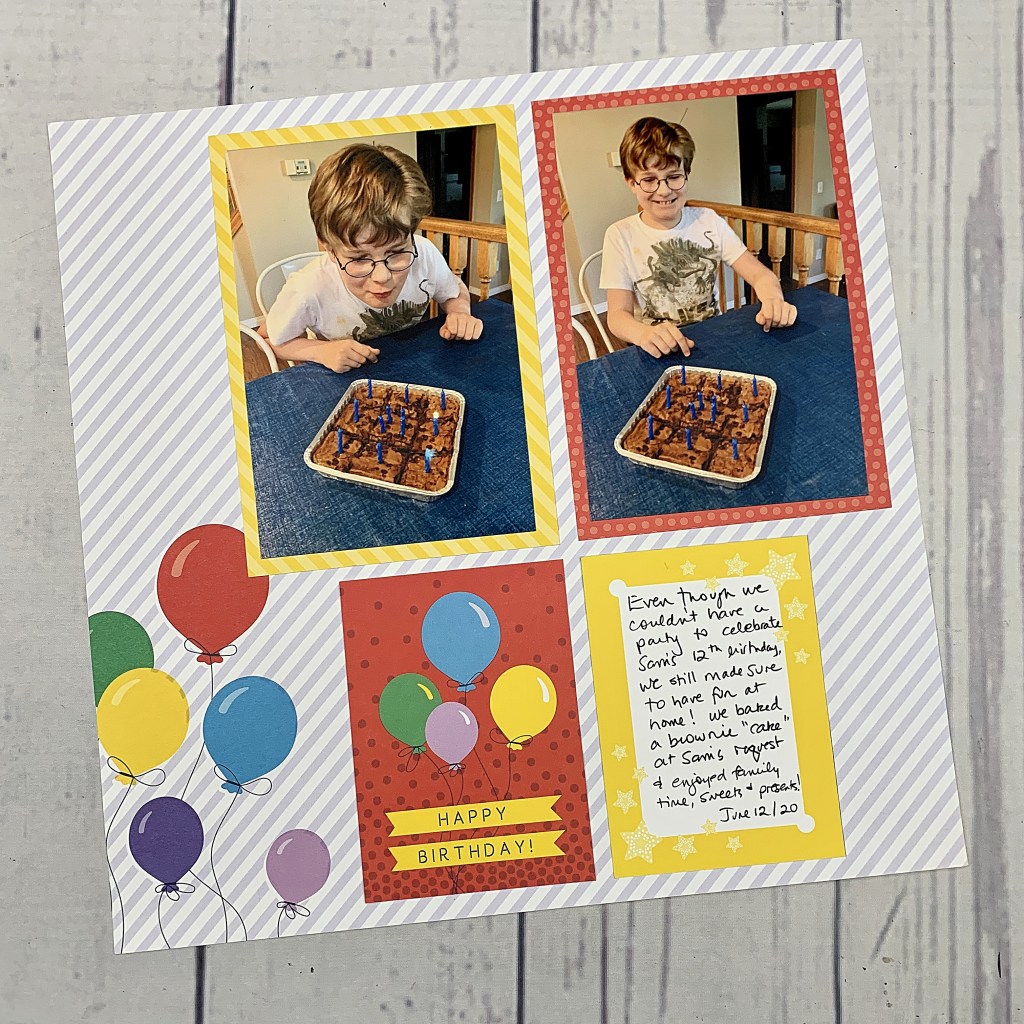
Step 1: Choose two 4-1/2″ x 6-1/2″ mats to mat photos on. Cut the double-mats that features the balloons and “Happy Birthday” title and the yellow stars journal box in half with the 12-inch Trimmer.
Step 2: Mount two 4″ x 6″ photos onto the large mats and adhere to layout.
Step 3: Adhere the balloons and “Happy Birthday” title mat and the yellow stars journal box mat below the photos. Journal on the yellow mat with a pen.
To create the 10-minute layout you will need:
- 1 piece of paper from the Party Time! Fast2Fab™-Inspired Designer Paper Pack or (Shop Canada | Shop Australia)
- Party Time! Stickers or (Shop Canada | Shop Australia)
- Eggplant Solid Cardstock or (Shop Canada | Shop Australia)
- 12-inch Trimmer or (Shop Canada | Shop Australia)
- Tape Runner or (Shop Canada | Shop Australia)
- Foam Squares or (Shop Canada | Shop Australia)
- Dual-Tip Pen or (Shop Canada | Shop Australia)
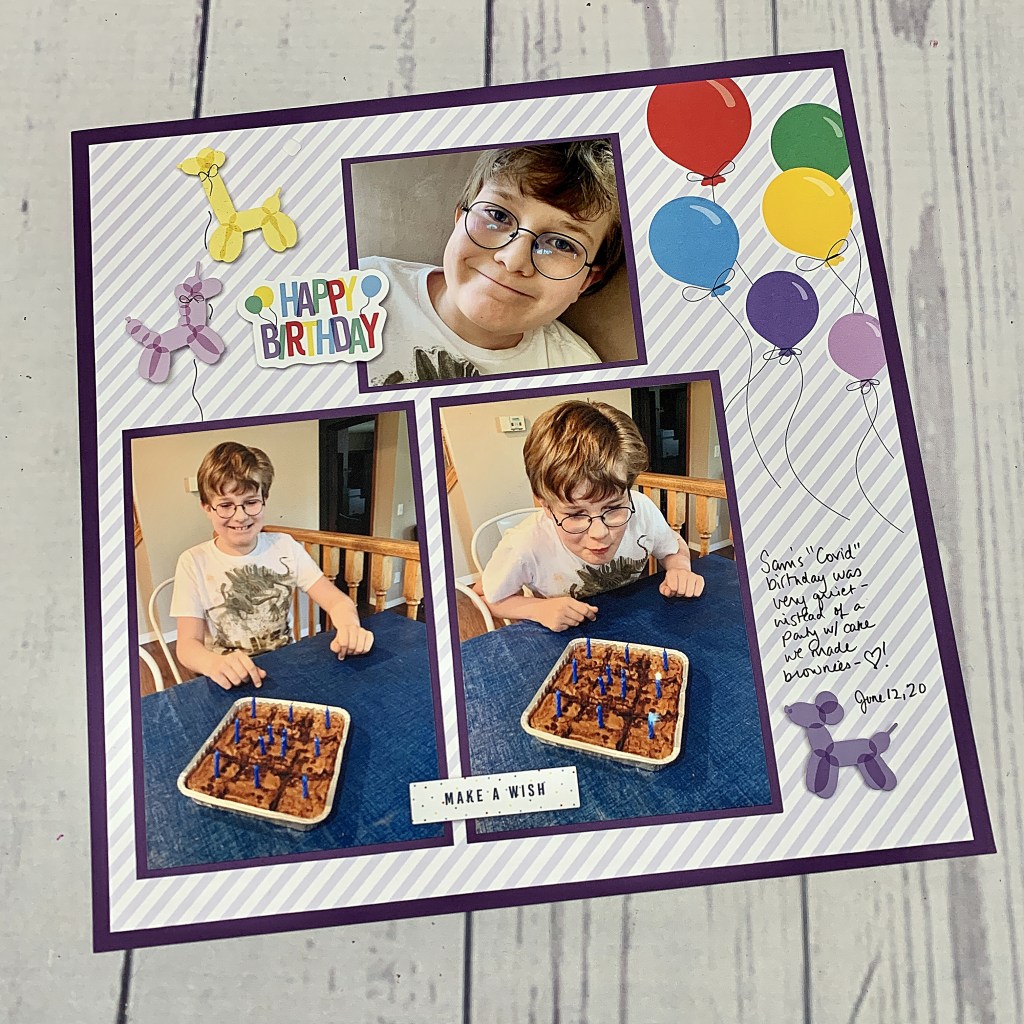
Step 1: Use the 12-inch Trimmer to cut 1/2″ strip off two sides of Fast2Fab™-Inspired paper.
Step 2: Use the 12-inch Trimmer to cut a 10″ square from the middle of the Eggplant Solid Cardstock to create a frame. (How to: Place edge of the cardstock at 1″, then move the blade housing down so the white line on the side of the housing matches the 1″ mark on the base of the trimmer. Engage blade by pressing down. Cut, and then release when the white line on blade housing reaches the 11″ mark on the base of the trimmer. Remove paper, turn 90° and repeat. Continue all the way around until you have cut all four sides, leaving a cardstock frame and a 10″ square.)
Step 3: Cut the 10″ square into two 4-1/4″ x 6-1/4″ photo mats and one 4-1/4″ x 3-3/4″ photo mat. Adhere photos to the mats with adhesive.
Step 4: Adhere Fast2Fab™-Inspired paper to the cardstock frame with adhesive
Step 5: Arrange matted photos onto the layout and adhere. Add stickers using Foam Squares. Journal as desired with a pen.

To create the 15-minute layout you will need:
- 2 coordinating pieces (one double page spread) from the Party Time! Fast2Fab™-Inspired Designer Paper Pack or (Shop Canada | Shop Australia)
- 1 piece of paper from the Party Time! Bright Paper Pack or (Shop Canada | Shop Australia)
- Double Balloon Punch or (Shop Canada | Shop Australia)
- Party Time! Stickers or (Shop Canada | Shop Australia)
- 12-inch Trimmer or (Shop Canada | Shop Australia)
- Tape Runner or (Shop Canada | Shop Australia)
- Foam Squares or (Shop Canada | Shop Australia)
- Dual-Tip Pen or (Shop Canada | Shop Australia)
Step 1: Cut two 2″ x 12″ strips of paper from the Party Time! Bright patterned paper.
Step 2: Place one strip in the Balloon Punch, lining up the edge with edge of punch housing. Punch and then move the strip along the base of the punch. Repeat with the second patterned strip to create two balloons borders. Save the cut-out balloon shapes to use as additional embellishments.
Step 3: Adhere one balloon border 1/4″ down from top edge of left-hand page, and the other 1/4″ up from bottom edge of right-hand page as shown. Flip over the cut-out balloons from the previous step and overlap onto the borders or other areas of layout. Adhere with Foam Squares.
Step 4: Arrange and adhere photos across layout. If desired, mat a focal photo with the same Party Time! patterned paper used for the border strips.
Step 5: Add title and embellishment stickers using Foam Squares. Journal as desired with a pen.
There’s so much versatility with the Fast2Fab™-Inspired Designer Paper Pack! Which of these quick birthday scrapbook layouts do you have time to create today?

Noreen never ceases to amaze me! This time she had a giant head start using the genius designs of the amazing CM design team!
I love Noreen’s layout ideas and especially with the way she demonstrates how she uses the tools and enhancements! Really helps with understanding the applications!