April 28, 2021
Feature At-Home Fun With These Fast, Fabulous and Easy Staycation Scrapbook Layouts
Of course, birthdays, anniversaries, promotions and other big life events are very special… but so are life’s “everyday” moments, like quality time spent at home. These lovely little moments can definitely have big meaning, and when you want to pay homage to at-home adventures, the Staycation Fast2Fab™ Album can let you do that quickly, easily and beautifully! Blog contributor Krislyn Mattei proves just that with these four easy Staycation scrapbook layouts — each one adding a bit more decorative detail! Give them a go and see how fast (and fabulous!) they are to put together!
Krislyn’s Inspiration
Life is made up of countless everyday memories. Capture and celebrate them easily using the Staycation Fast2Fab™ Album. Whether you are new to scrapbooking or have yet to make a Fast2Fab™ Album, I have some layout ideas and tools tips to inspire you to give it a try!
To create these layouts you’ll need:
- Staycation Fast2Fab™ Album or (Shop Canada | Shop Australia)
OR Staycation Fast2Fab™ Refill Pages or (Shop Canada | Shop Australia) - Staycation Paper Pack or (Shop Canada | Shop Australia)
- Staycation Variety Mat Pack or (Shop Canada | Shop Australia)
- Staycation Embellishments or (Shop Canada | Shop Australia)
- Staycation Stickers or (Shop Canada | Shop Australia)
- Dine Border Punch or (Shop Canada | Shop Australia)
- Dragonfly Punch or (Shop Canada | Shop Australia)
- Original Border Maker System with the Climbing Vine Chain Border Maker Cartridge or (Shop Canada | Shop Australia)
- Custom Cutting System with Circle Patterns or (Shop Canada | Shop Australia)
- 2-Way Corner Rounder or (Shop Canada | Shop Australia)
- 12-inch Trimmer with Straight & Scallop Blades or (Shop Canada | Shop Australia)
- Tape Runner or (Shop Canada | Shop Australia)
- Repositionable Tape Runner or (Shop Canada | Shop Australia)
- Foam Squares or (Shop Canada | Shop Australia)
- Black Dual-Tip Pen or (Shop Canada | Shop Australia)
- Optional: 6×12 and 6×4” Peekaboo Pockets™ or (Shop Canada | Shop Australia)

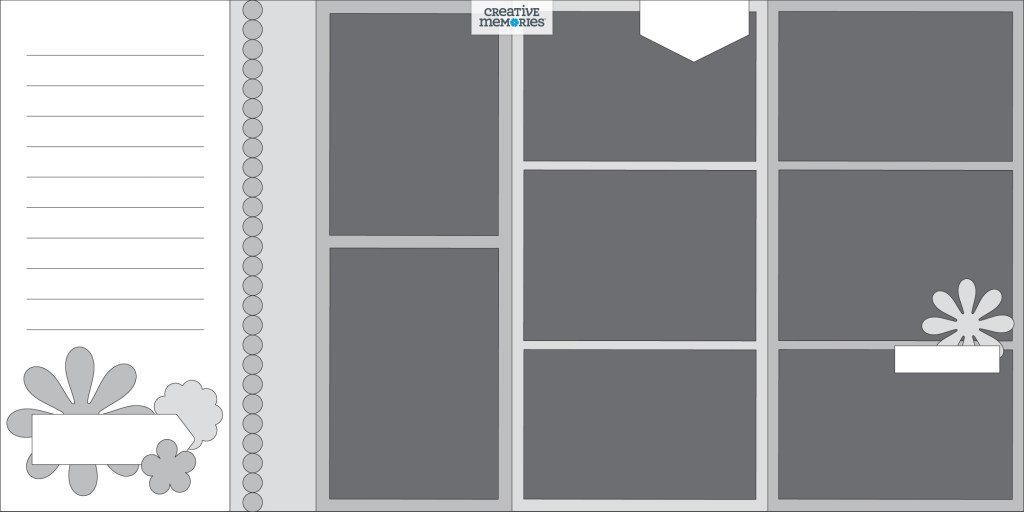
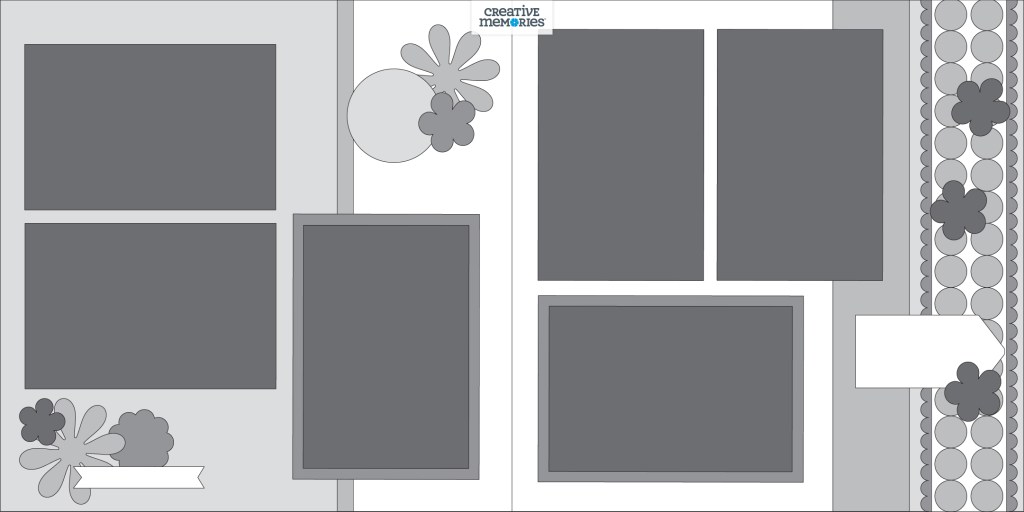
When looking at the Staycation Fast2Fab™ pages, you’ll notice there are four types of layouts the designer created. I have created layouts using each of the four designs. I’m going to start with some basic scrapbooking techniques with the first layout and add on a few more decorative supplies and tools with each layout. Watch the video below to see these pages come together or follow along with the written instructions below. Let’s break it down…
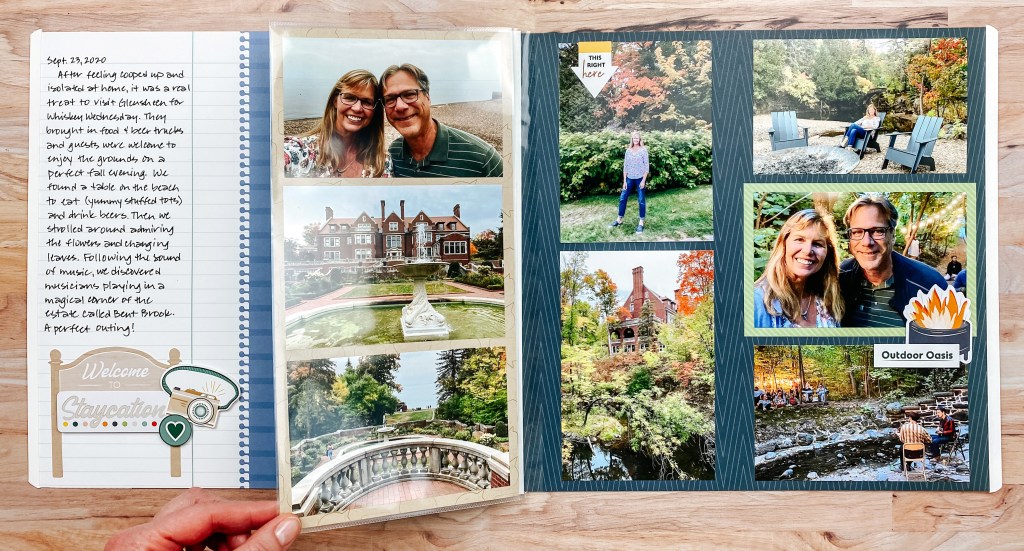
Layout 1: Rainbow Bands and Basic Skills
This layout has printed borders on either the top, bottom or sides, along with a band of rainbow hues and a file folder tab. I think this one is really versatile. There’s a lot of room for photos, and it looks decorative just the way it is. Adding just a few stickers and a variety mat to journal on may be all you need.


Step 1: Select four vertical photos and three more photos that can be cropped. Using the 12-inch Trimmer, crop the three photos to 3-1/2″ x 3-1/2″.

Step 2: Adhere zigzag striped border stickers to the layout. Apply adhesive to the backs of the photos and mount on the layout, using the photo as a guide. Tip: To add a little “life” or movement to your layout, try placing some of your photos at a slight angle and overlap them as I’ve done with the vertical photos.
Step 3: Adhere a mat to the layout to use either as a title or journal box. Journal as desired.
Step 4: Add stickers to the layout to add some flare and to help establish a theme that helps tell the story. Tip: Clustering a few stickers together across the layout is more effective than lots of stickers placed randomly all over.
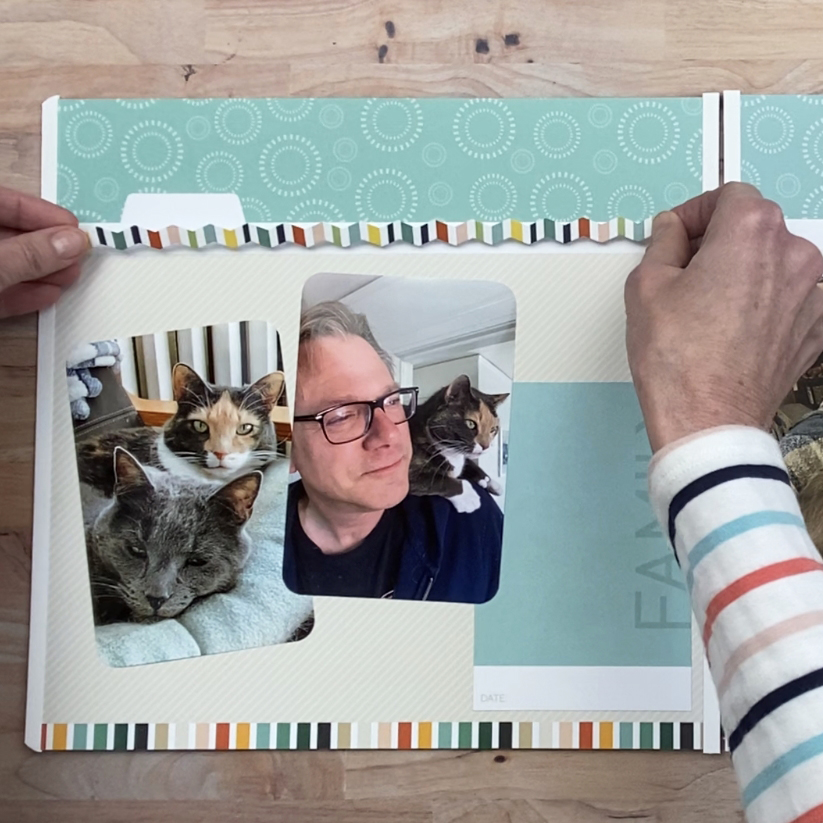
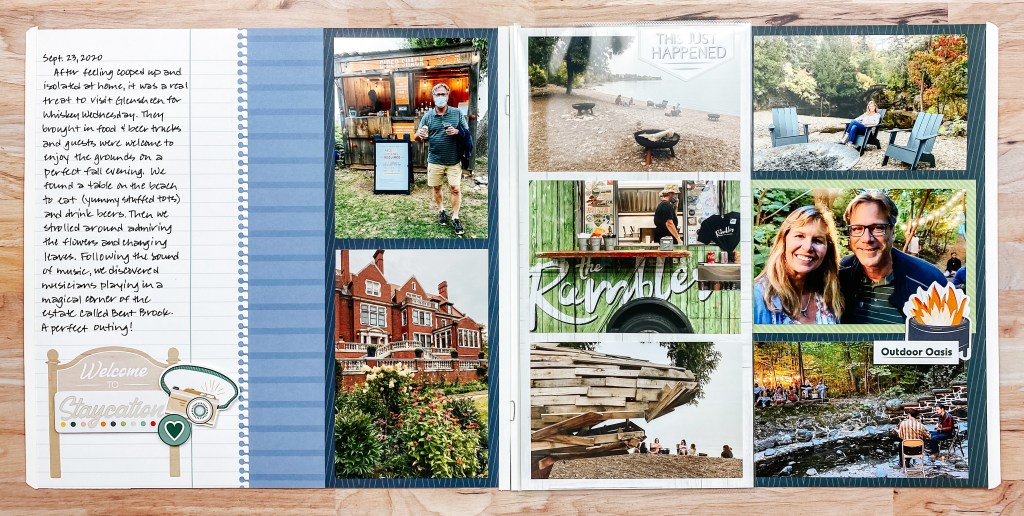
Layout 2: Storytelling and Big Events
These layouts leave plenty of space for telling the whole story. The rest of the layout is just a vibrant backdrop — perfect for lots of photos. Because big events often mean extra photos, I’ll show you how to include them all using 6×12 Peekaboo Pockets™.
Step 1: Select four 4″ x 6″ and three 6″ x 4″ photos. Tip: If you don’t have that many photos, mats can easily be used to fill up space. Crop two of the 4″ x 6″ photos to 4″ x 5-1/4″. Crop the 6″ x 4″ photos to 5-1/2″ x 3-1/2″. Mount one on a 6″ x 4″ variety mat. Adhere all photos to the layout, using the photo as a guide for placement.
Step 2: Adhere stickers and embellishments to the layout, popping some up with Foam Squares for added dimension.
Step 3: Journal as desired.
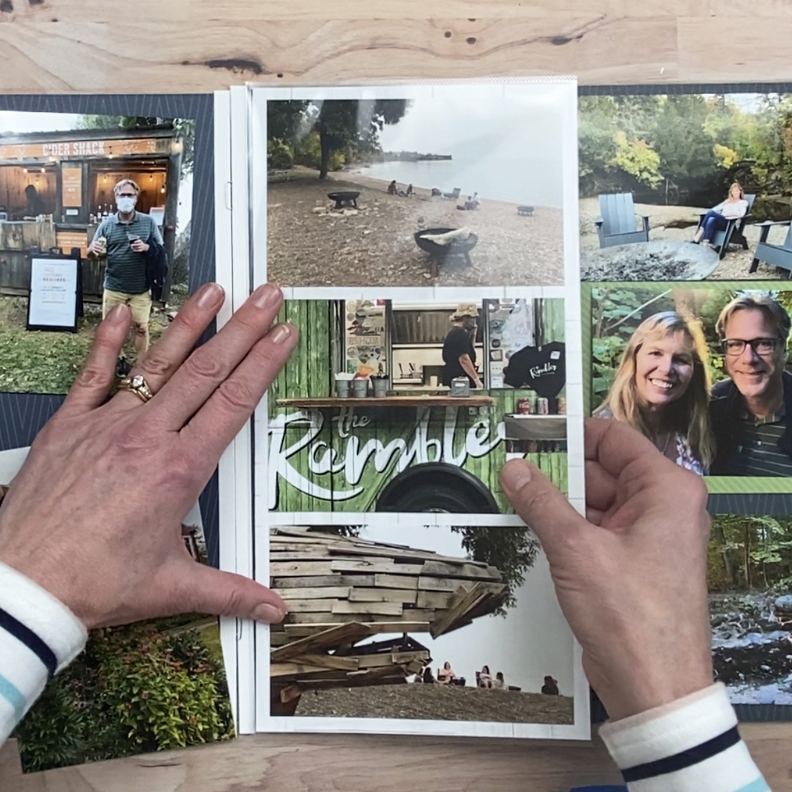
Step 4: As an option, if you have more photos you’d like to include, add a 6×12 Peekaboo Pocket™. Cut a 6″ x 12″ piece of designer paper. Select six 6″ x 4″ photos and crop four of them to 5-1/2″ x 3-1/2″ and two to 5-1/2″ x 4″. Adhere three to the front and three to the back of the paper. Journal if desired. Slide into a 6×12 Peekaboo Pocket™, making sure the flap is facing the desired direction. Remove the backing from the flap and carefully place the pocket, adhesive flap-side down, along the left edge of the right side of the layout. Tip: When using the large 6×12 Peekaboo Pocket™, it’s best to mount it directly on the scrapbook page rather than on top of a page protector because of its weight. Place it along the left or right edge of your page, open it up and slide the page protector over the top, closing it over the top of the page protector.
Layout 3: Horizontal Borders with Punches and Shapes
This layout features multi-hued bands across the bottom and is a perfect backdrop for punched borders. “Punch” up your layout just by choosing a shape that matches your photos or theme. Easy!
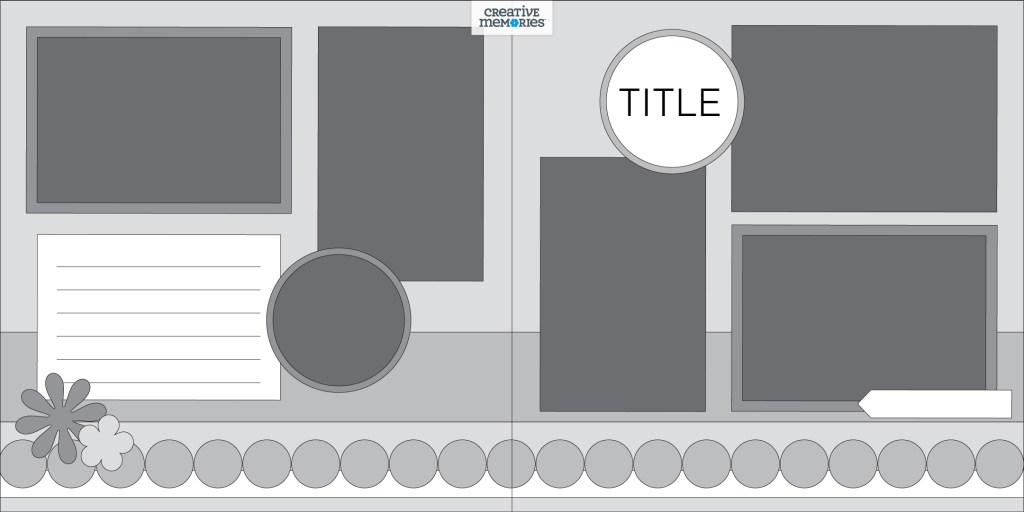
Step 1: Select two 4″ x 6″ photos, three 6″ x 4″ photos and one photo that can be cropped into a circle shape. Cut two 6-1/2″ x 4-1/2″ pieces of teal Wi-Fi icons paper to mat two 6″ x 4″ photos. Adhere all five rectangular photos to the layout, using the photo as a guide. Adhere a journal mat to the layout as shown.
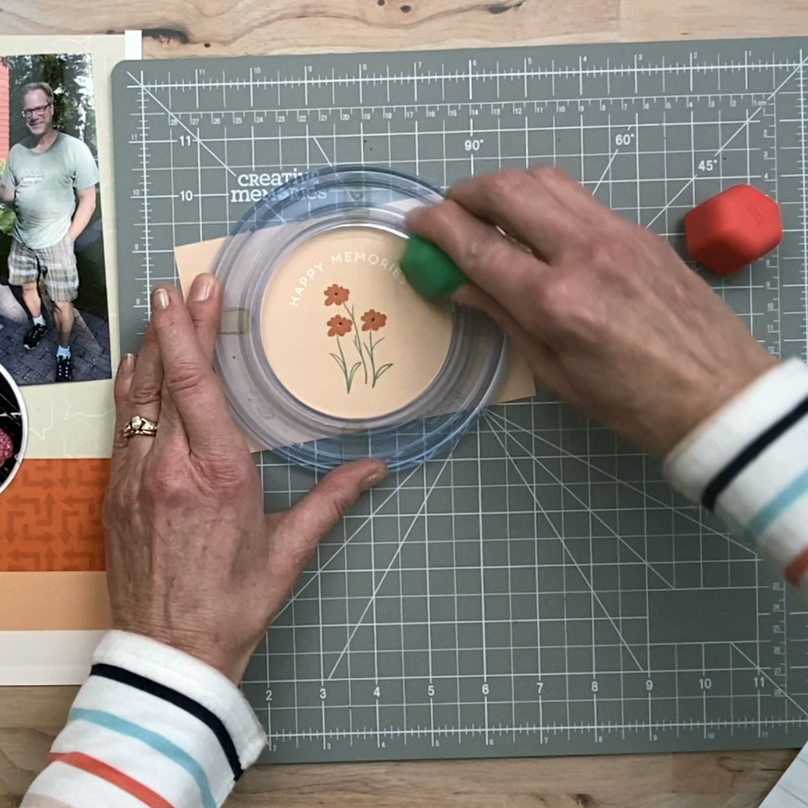
Step 2: Crop your last photo into a circle shape (or choose another shape you like). Place your photo on the 13×13 Custom Cutting System Mat and place the largest Custom Cutting System Circle Pattern on top, aligning over the portion of the photo you’d like to crop. Tip: It’s helpful to use the clear guide that comes with the circle patterns for placement. Place the Green Blade with the pegs in the inside track of the largest Custom Cutting System Circle Pattern, hold the pattern firmly and cut your photo into a circle. Cut a white designer paper as the mat for your photo, using the inside of the largest Circle Pattern and the Red Blade. Adhere both to the layout as shown.
Step 3: Repeat Step 2 using a mat instead of a photo. Cut out a white designer paper as the mat to place behind it. Adhere both to the layout.
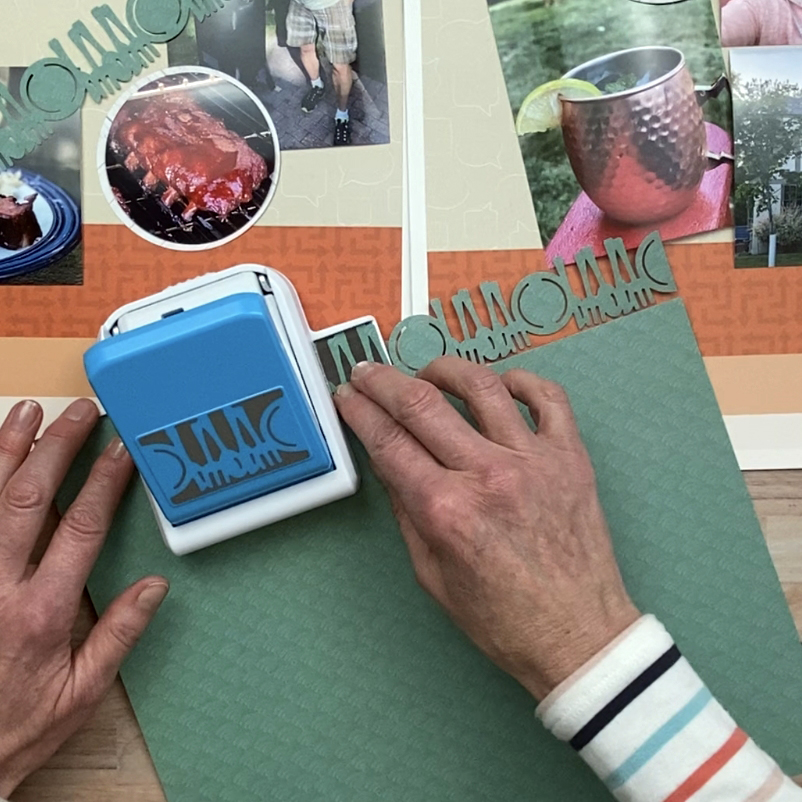
Step 4: Create your borders. Using the Done Border Punch, punch two border with teal Wi-Fi- icons paper. Slide your paper into the punch, all the way to the back and aligned with one of the black markings on the front. Punch, then slide the paper over until the punched piece aligns exactly with the shape printed on the punch. Punch again and continue on until the border is complete. Repeat to make a second border. Apply the Repositionable Tape Runner on the back of each border and adhere to the multi-hued bands along the bottom of each page. Tip: The Repositionable Tape Runner is the best adhesive to use with punched borders and other small or intricate shapes, as the tiny adhesive dots are translucent and stick just to the paper. Any excess rubs right off.
Step 5: Apply stickers as desired, mounting some with Foam Squares for added dimension.
Step 6: Journal as desired.
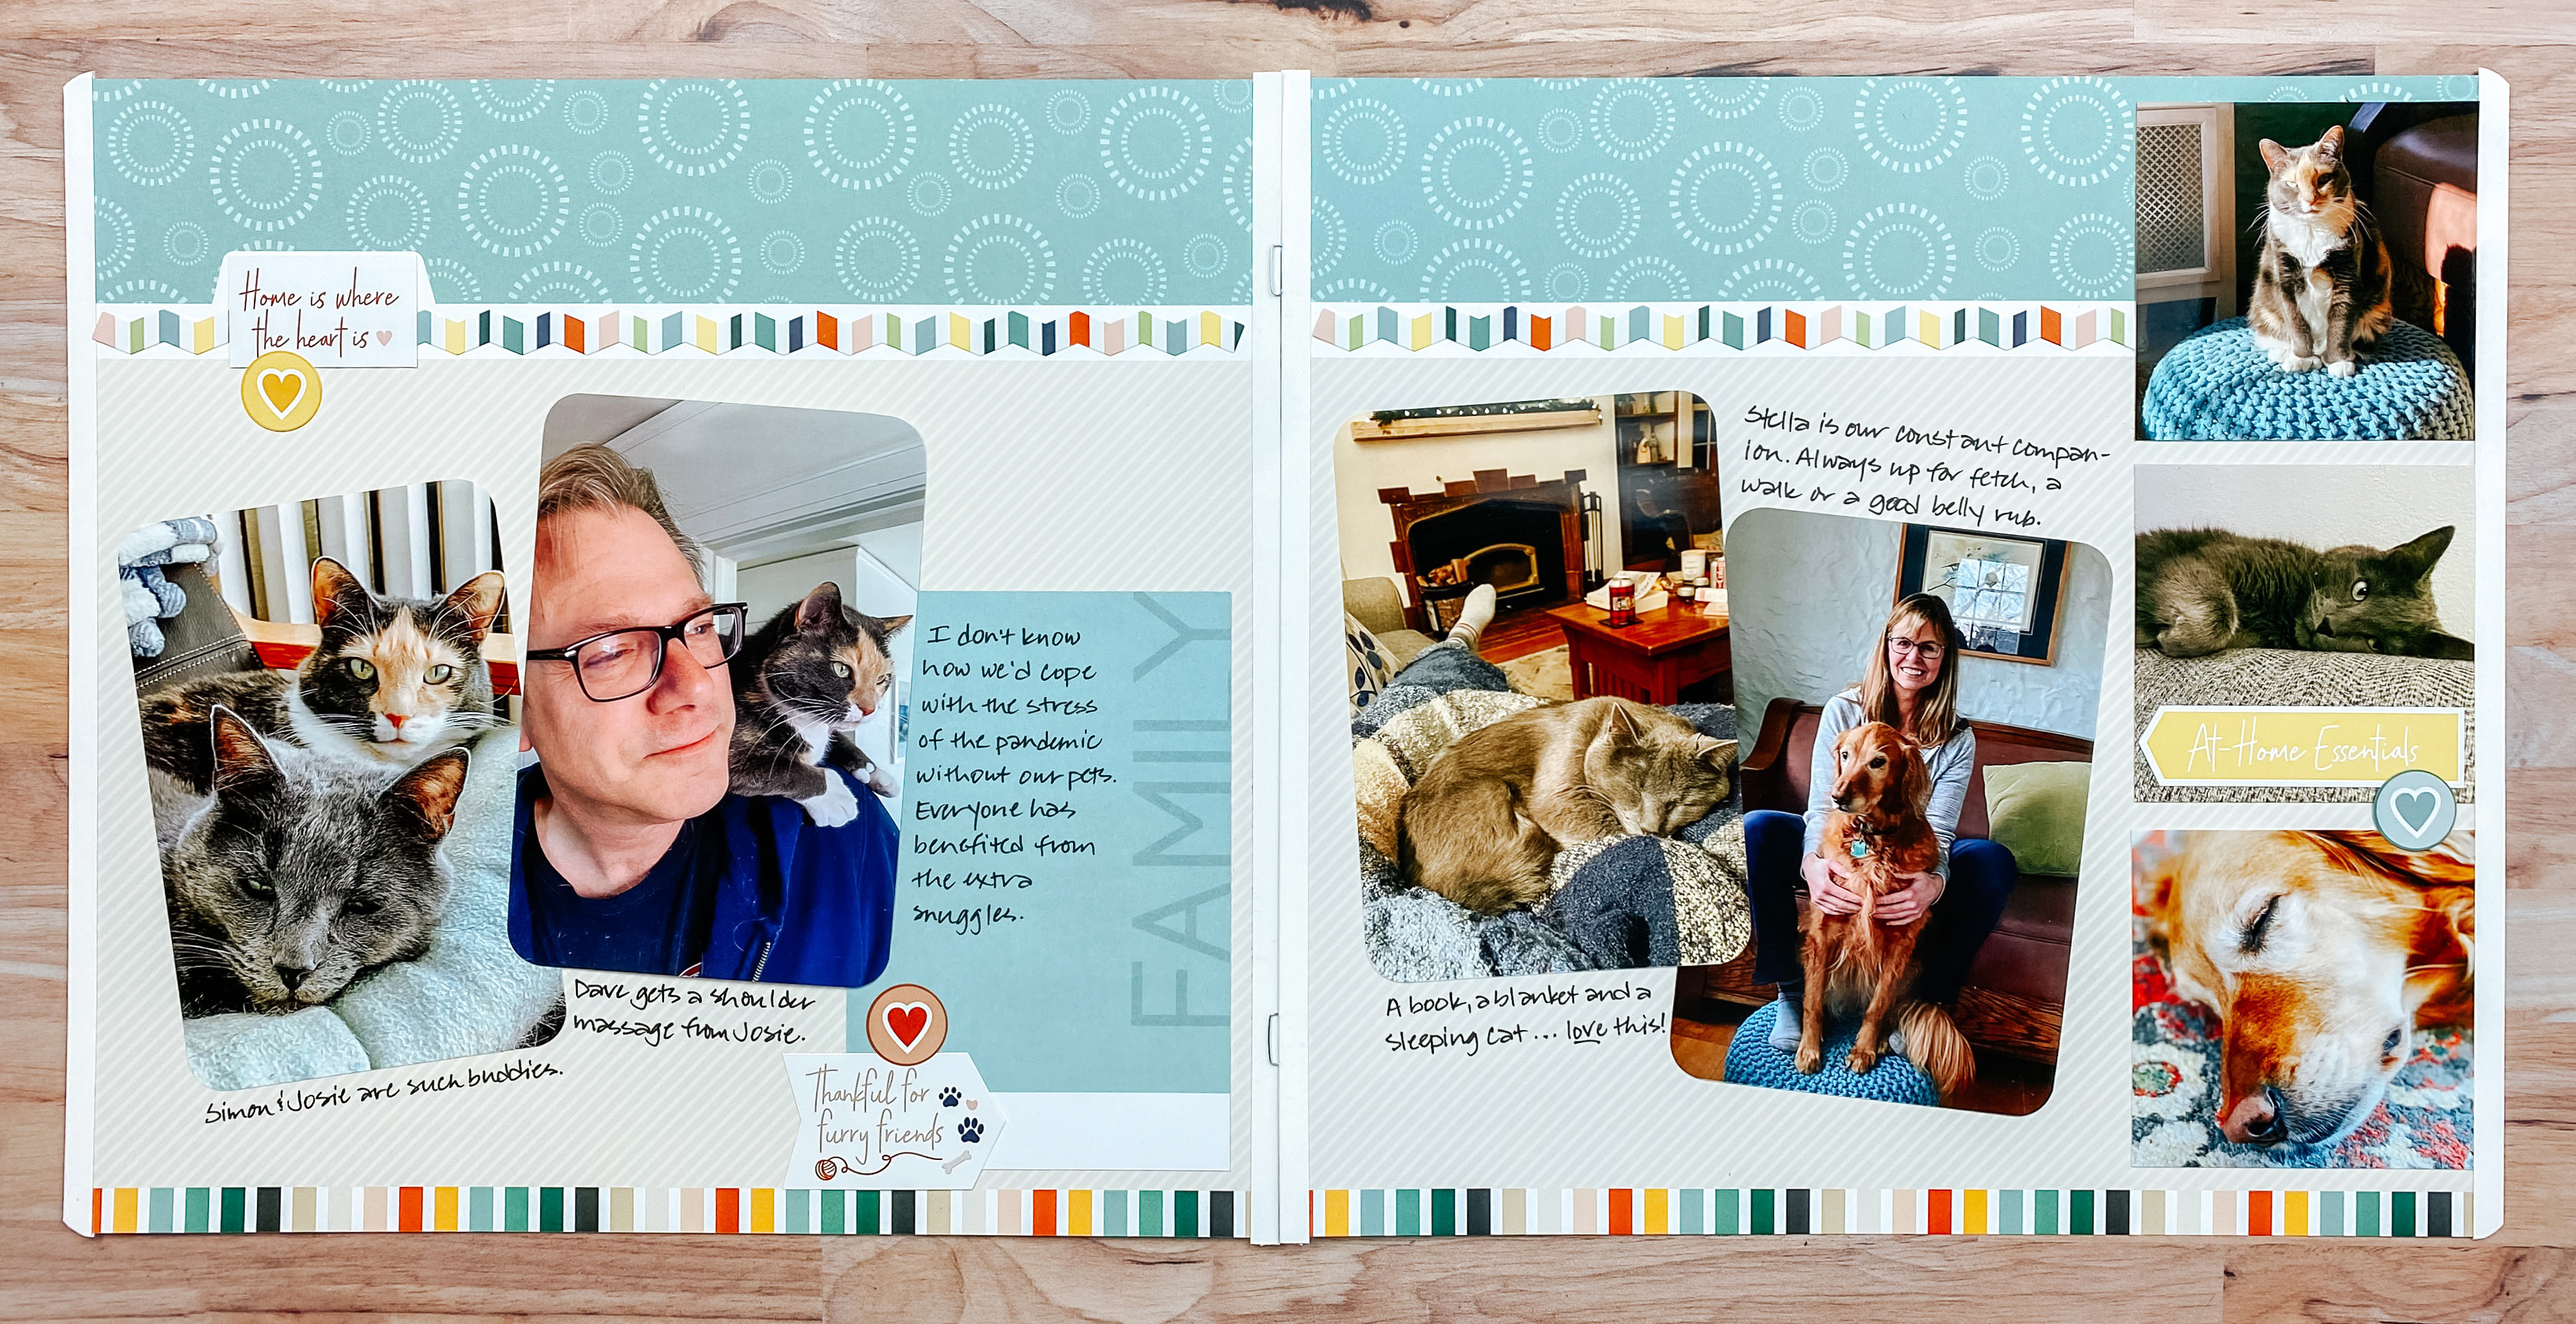
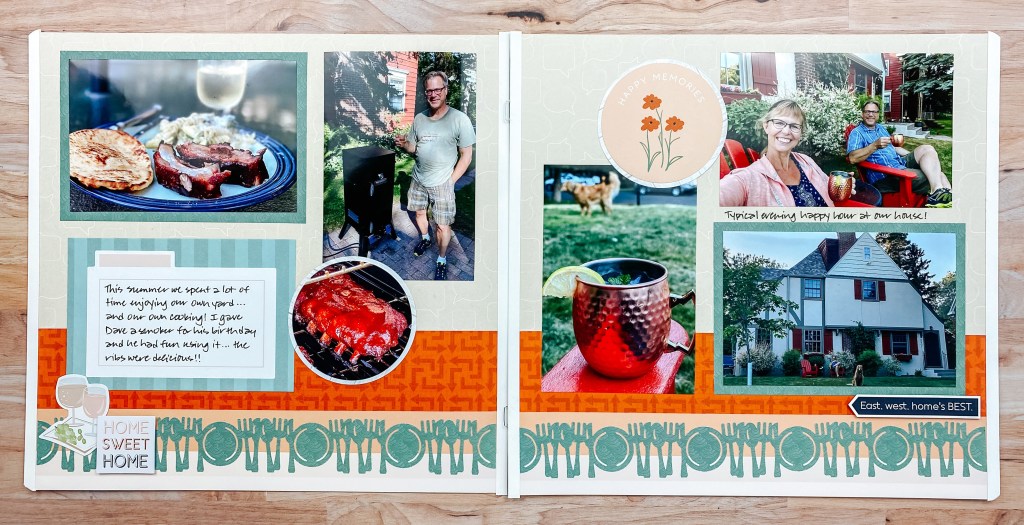
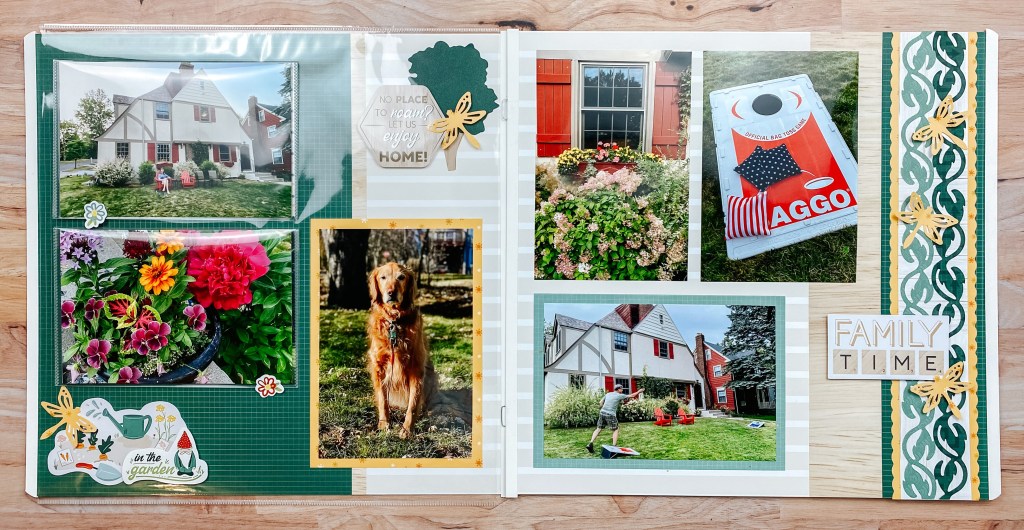
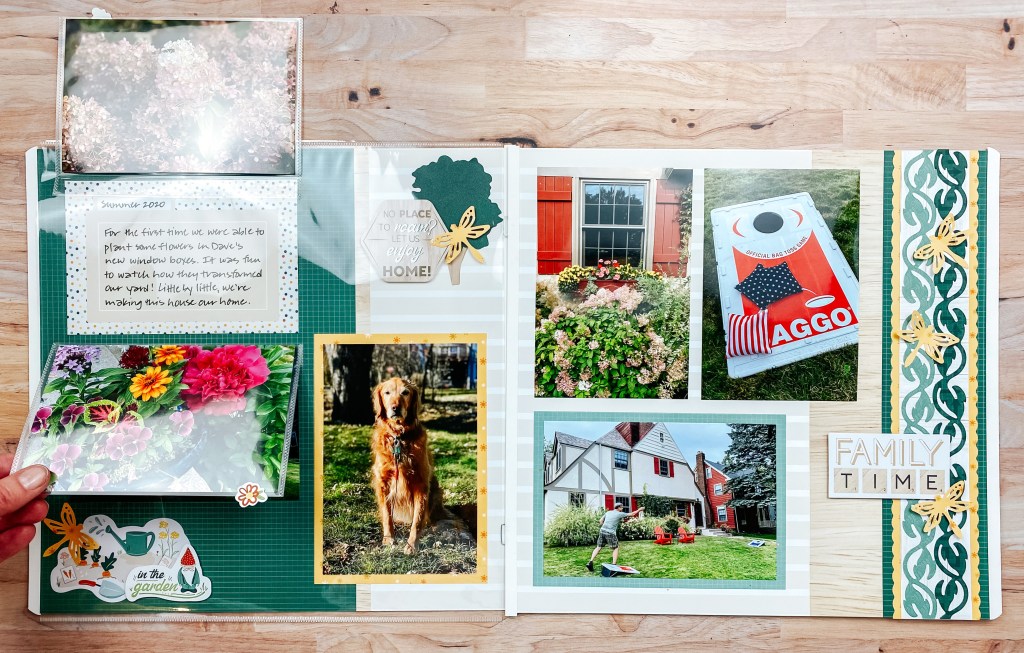
Layout 4: Decorative Borders
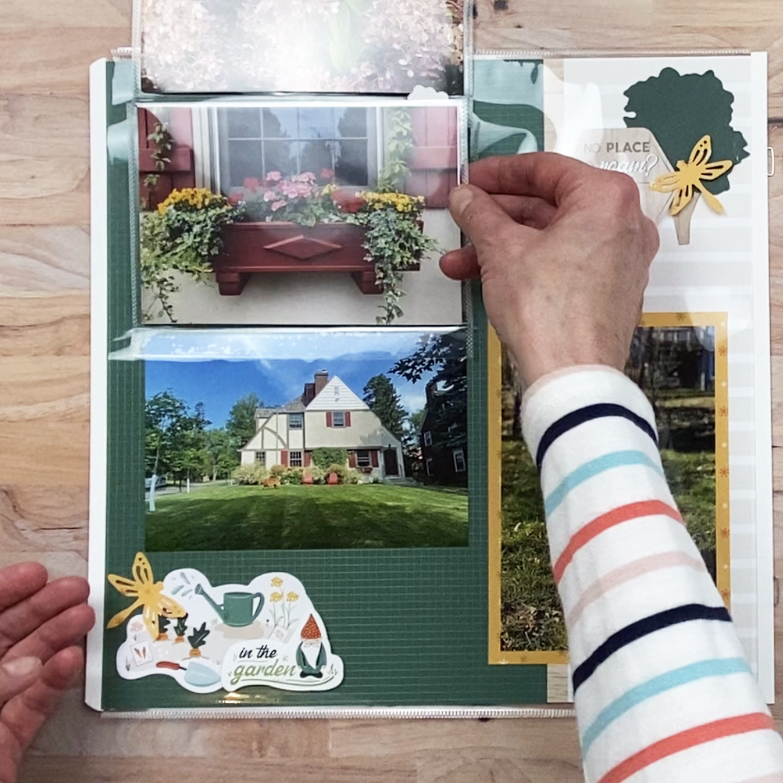
This last layout design offers a vertical band perfect for adding one eye-catching decorative border. A decorative border is an element that adds lots of personality and helps create or highlight a theme, yet still allows the photos to shine. Let’s pull out all the stops, add some tools and create a fun one!
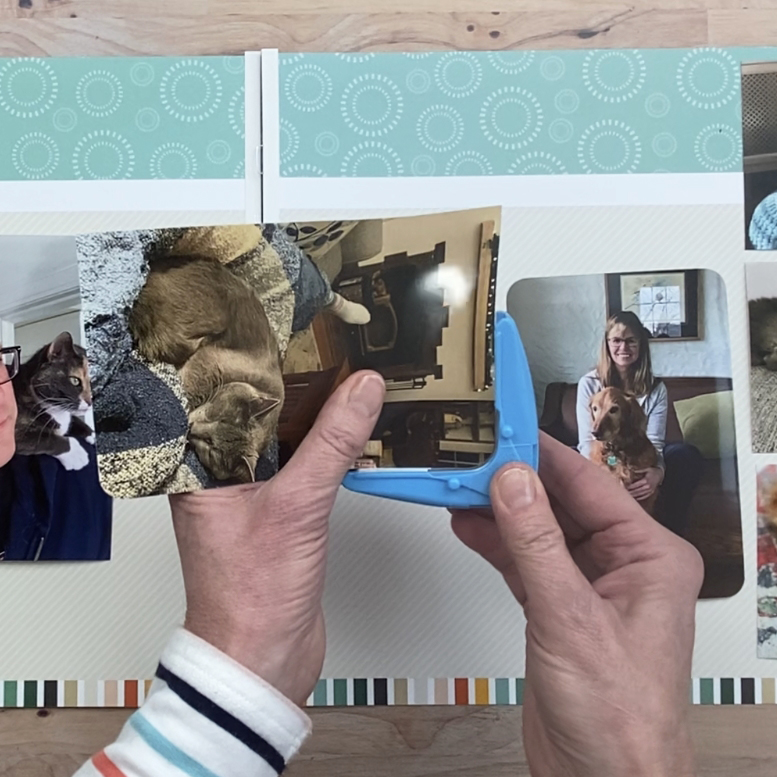
Step 1: Select three 4″ x 6″ and three 6″ x 4″ photos. Choose a 6-1/2″ x 4-1/2″ mat and mount one photo on it. Cut another 6-1/2″ x 4-1/2″ mat from yellow suns designer paper. Mount all photos and mats on the layout, using the photo as a guide for placement.
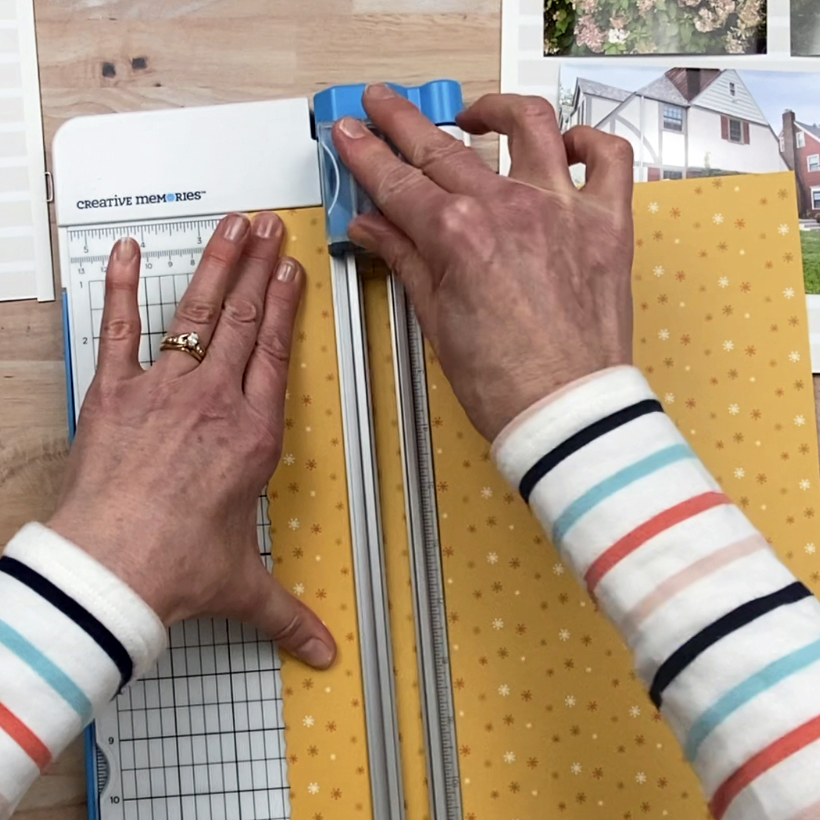
Step 2: Create a border. Insert the Scallop Blade into the blade housing of the 12-inch Trimmer with the shutter flower facing left. Place a piece of yellow suns designer paper in the trimmer and cut one edge off. Flip the paper around, align the scalloped cut edge at the 2″ mark and cut again. Insert the Straight Blade into the 12-inch Trimmer and cut a 1-3/4″ x 12″ strip of white designer paper. Adhere on top of the yellow piece.
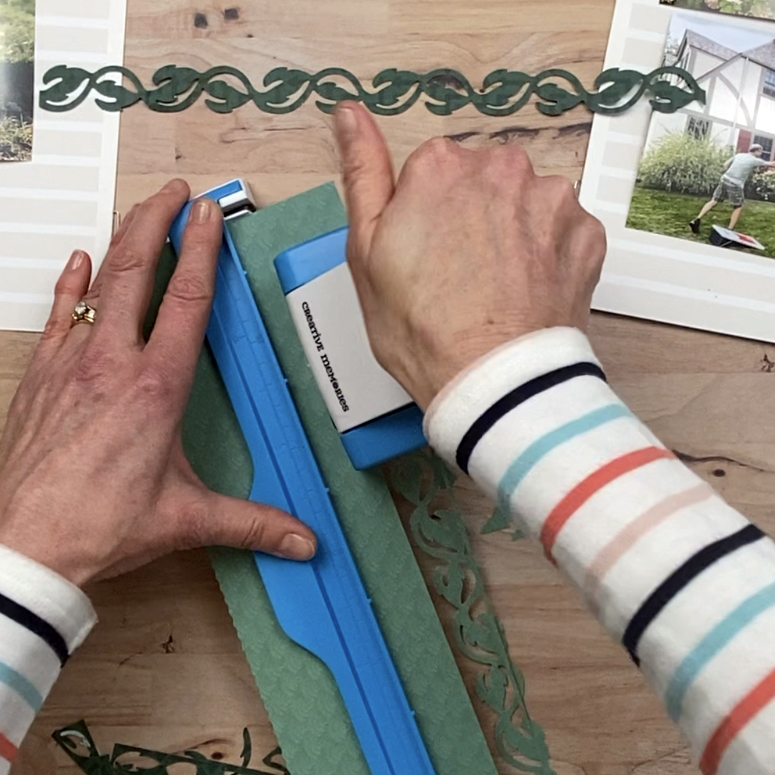
Step 3: Insert the Climbing Vine Chain Border Maker Cartridge into the Original Border Maker System. Flip out the bottom tray of the guide and lift up the blue arm. Place a piece of teal Wi-Fi icons designer paper under the arm until it aligns with the edge of the tray. Close the arm and flip the tray back under. Slide the edge of the paper into the slot on the cartridge and line up the notch on the lever with the notch on the guide arm (you’ll feel it sort of “lock” into place). Punch, then move the cartridge along the guide to align with the next notch. Repeat to complete the border. Create another border using dark green arrows designer paper. Adhere the borders side by side on the white strip. Mount the border on top of the border band on the layout.
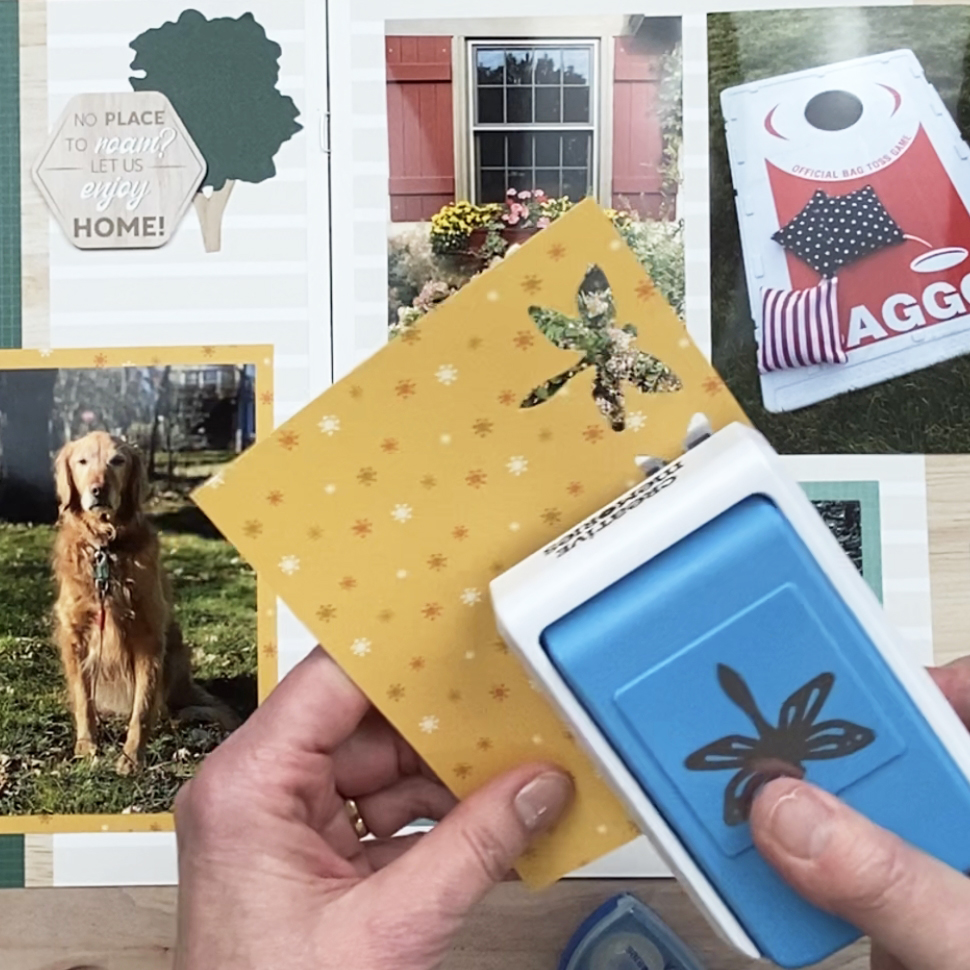
Step 4: Punch several dragonflies using scraps of yellow suns and pink striped papers with the Dragonfly Punch. Adhere a few to the border. Adhere others, along with stickers and/or embellishments, to the layout as shown.
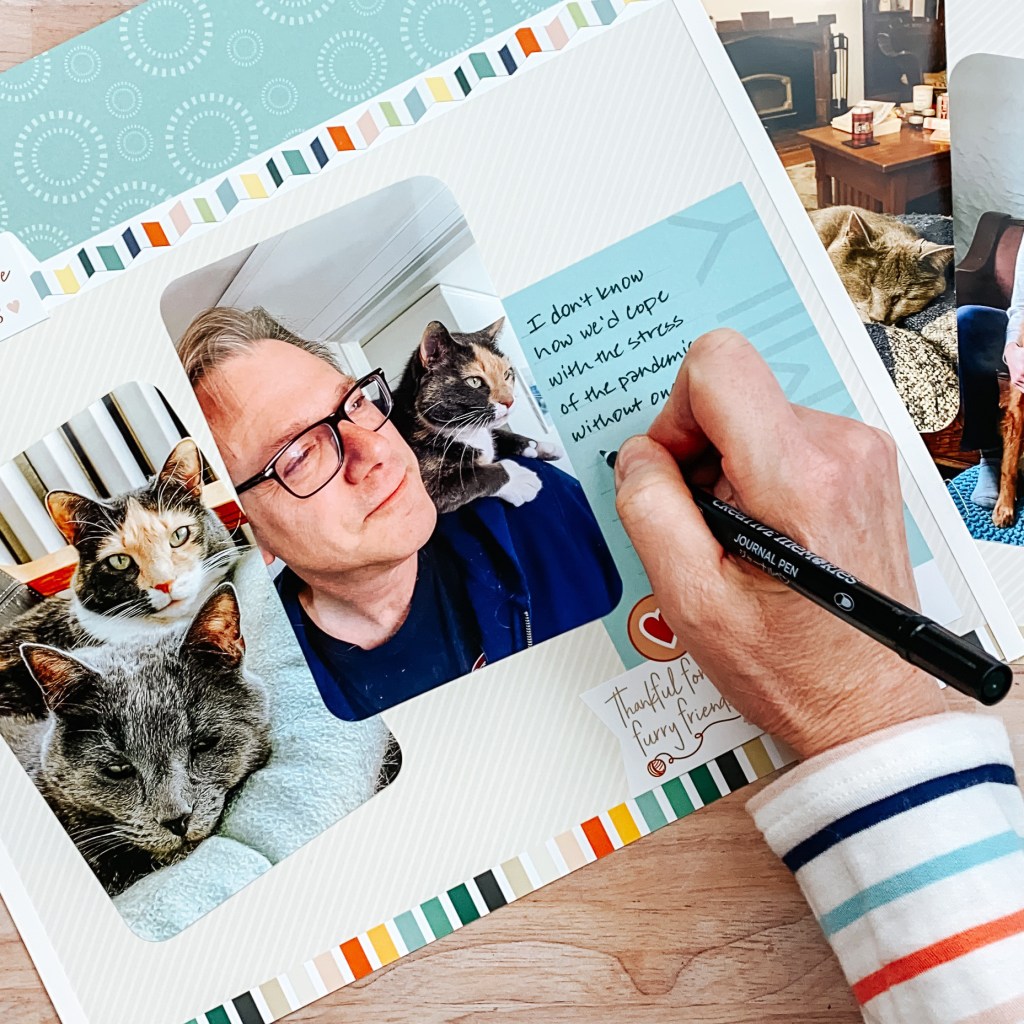
Step 5: Journal as desired.
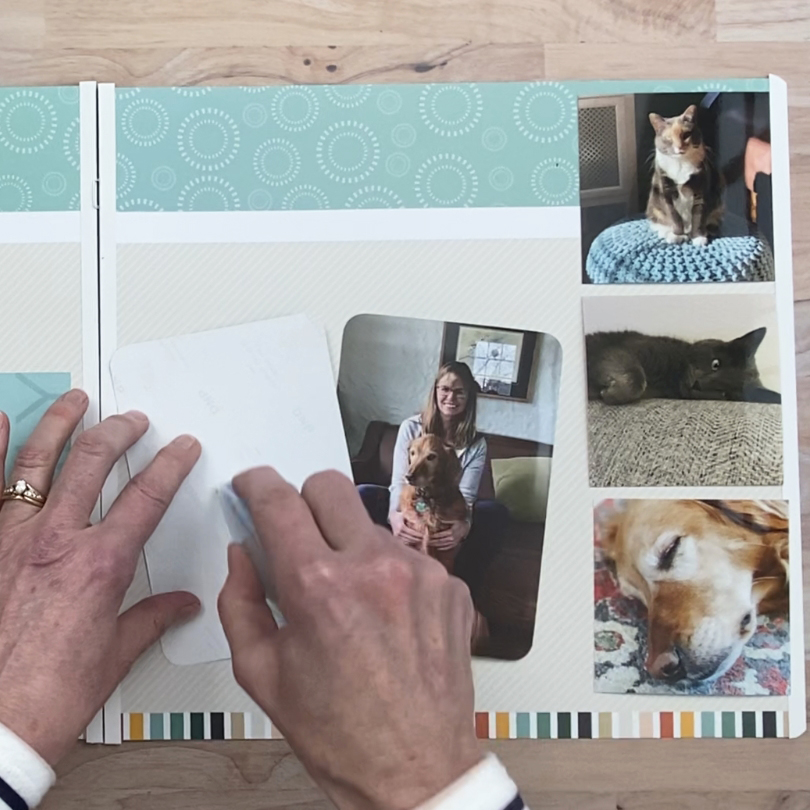
Step 6: As an option, if you have more photos you would like to include, add one or two 6×4 Peekaboo Pockets™. Simply place two photos back to back in the pocket. Slide a page protector over the page. Remove the strip from the flap of the pocket and adhere to the top of the page protector, directly over your photo.

Well, this wraps it up! I’ve shown you ideas to complete all four styles of layouts in the Staycation Fast2Fab™ Album and some tips and techniques for using my beloved Creative Memories tools. I hope you are inspired to incorporate Fast2Fab™ pages into your scrapbooking. Which of these easy Staycation scrapbook layouts will you be trying out first?

Love the idea with the peek a boo pockets!! Will have to try that out!! Thanks so much for the inspiration!!
I enjoyed watching this video. It inspires me to want to get scrappin’…
Great ideas! I love the videos to guide me! Thank you!
Love ?? these Krislyn you always have such great ideas
[…] along with the step-by-step instructions in this blog post if you’d prefer to do it that […]
This is fabulous! Thank you for sharing.