May 10, 2021
Dream And Design Big With This Outer Space Scrapbook Layout

Buzz Aldrin once said “I know the sky is not the limit because there are footprints on the Moon — and I made some of them!” Every single one of us, young or old, can dream big and achieve big! You just need to believe in yourself. That same sentiment can be said about your creativity, too — there’s no limit to your designs, imagination and innovation! See how this outer space scrapbook layout takes flight toward a galaxy of greatness — to infinity and beyond!

To create this layout you will need:
- Outta This World Paper Pack or (Shop Canada | Shop Australia)
- Outta This World Variety Mat Pack or (Shop Canada | Shop Australia)
- Outta This World Foiled Embellishments or (Shop Canada | Shop Australia)
- Outta This World Stickers or (Shop Canada | Shop Australia)
- Platinum Shimmer Solid Cardstock or (Shop Canada | Shop Australia)
- Piece by Piece Mini Trio Punch Set or (Shop Canada | Shop Australia)
- Custom Cutting System with Oval Patterns or (Shop Canada | Shop Australia)
- 2-Way Corner Rounder or (Shop Canada | Shop Australia)
- 12-inch Trimmer or (Shop Canada | Shop Australia)
- Micro-Tip Scissors (Shop Canada | Shop Australia)
- Tape Runner or (Shop Canada | Shop Australia)
- Repositionable Tape Runner or (Shop Canada | Shop Australia)
- Foam Squares or (Shop Canada | Shop Australia)
- Black Dual-Tip Pen or (Shop Canada | Shop Australia)

Step 1: Use a piece of aquamarine green constellations paper as the base for this layout. (Tip: You may wish to cut away the inside to conserve paper.) Cut a piece of white dotted stars paper to measure 11-3/4″ x 11-3/4″.

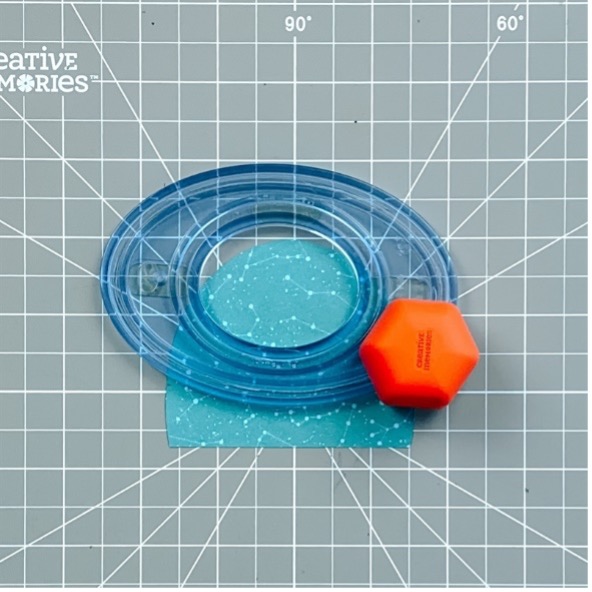
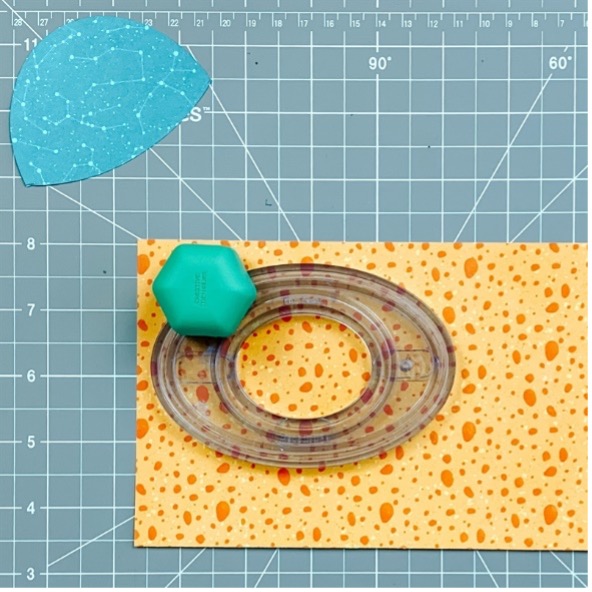


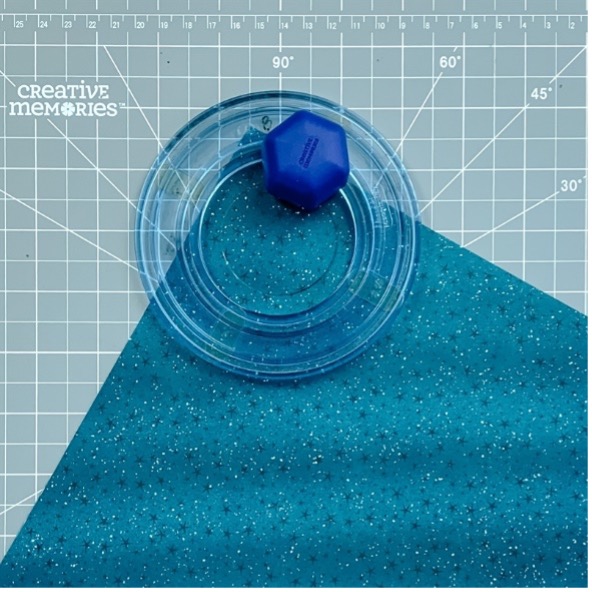
Step 2: Create the spaceship. Using the outside of the smallest Custom Cutting System Oval Pattern and the Green Blade, cut a half oval with aquamarine green constellations paper. Using the outside of the second-smallest Custom Cutting System Oval Pattern and the Red Blade, cut the bottom of the shape so it measures about 2-1/4″ high. Cut a round hole in the middle using the inside of the smallest Custom Cutting System Circle Pattern and the Red Blade. Cut a scrap of night sky stars designer paper to place behind the hole. Adhere an alien embellishment and place behind the aquamarine green spaceship. Cut a half oval from orange craters paper using the outside of the second-smallest Custom Cutting System Oval Pattern and the Green Blade. Move the pattern so that the oval “shrinks” and cut the other half to measure about 2-1/8″ high. Round the pointy edges with scissors. Adhere to the aquamarine green piece as shown. Punch five circles from Platinum Shimmer Solid Cardstock with the Piece By Piece Mini Trio Punch Set and adhere to the spaceship.


Step 3: Cut six “rays” from various designer papers. Adhere side by side to the white dotted stars designer paper as shown. Trim off excess. Mount the spaceship on top. Adhere the white dotted stars designer paper to the base.
Step 4: Using the 2-Way Corner Rounder, snip the corners of two 6″ x 4″ photos. Mount on two 6-1/2″ x 4-1/2″ mats and adhere to the layout. Using the inside of the largest Custom Cutting System Circle Pattern and the Blue Blade, cut a circle from a 6″ x 4″ mat. Apply Foam Squares to the back of the mat and mount on a photo. Adhere to the layout.
Step 5: Add stickers and embellishments, popping some up with Foam Squares for added dimension.
Step 6: Journal as desired on the mat with a Black Dual-Tip Pen.
What draws you in the most about this outer space scrapbook layout? What do you like best about the Outta This World collection? Answer these questions in the comments below!

Super cute!
Sent from my iPhone
[…] flight with another Outta This World beauty — it’s perfect for all types of kid-related memories and […]