August 11, 2021
Shoot for the Sky (and Fun!) With These Star Crafts: Scrapbook Borders and DIY Card
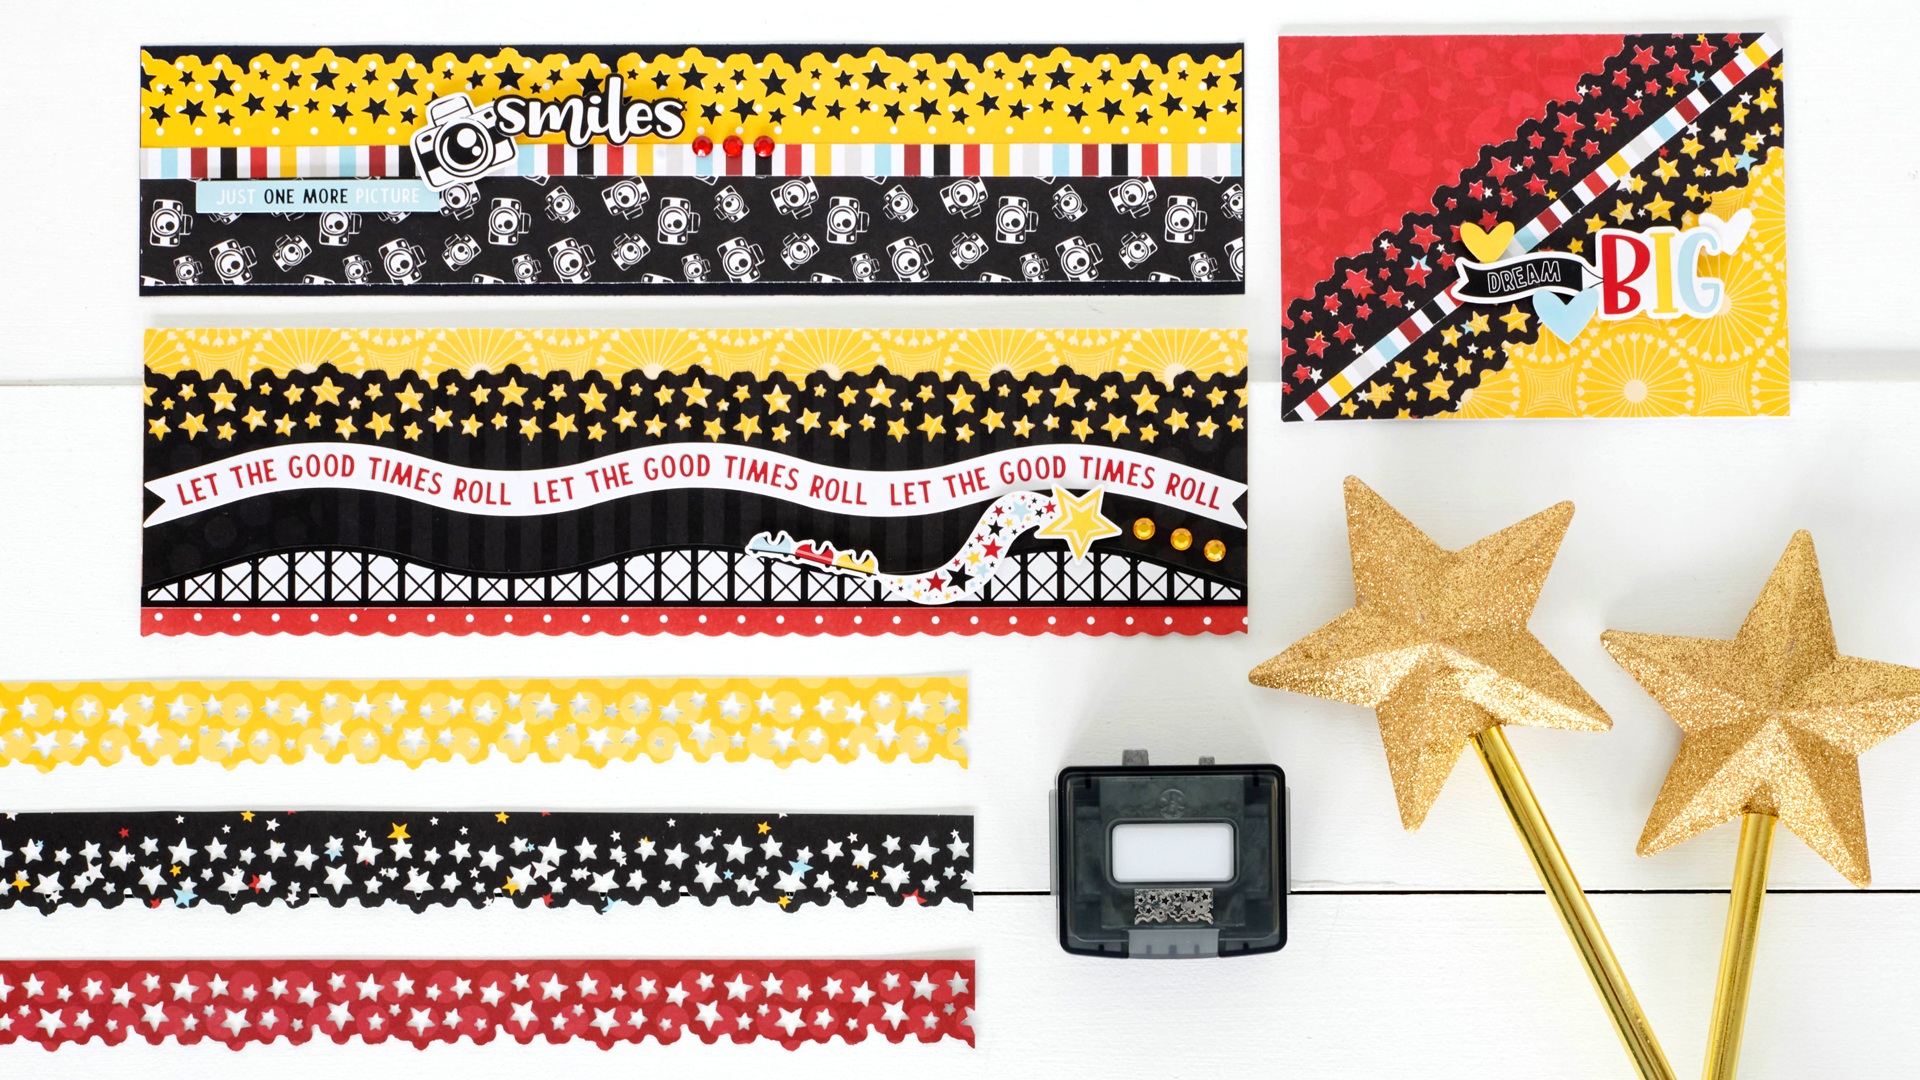
Looking for five-star ideas?! Well, you’re in luck, for today’s blog features star crafts — two scrapbook borders and a DIY card — that will surely be superstars for your layouts or to send out to friends and family! Grab your Starry Border Maker Cartridge and shoot for the skies!

To create these borders and card, you will need:
- Sparks of Magic Paper Pack or (Shop Canada | Shop Australia)
- Sparks of Magic Tone-on-Tone Paper or (Shop Canada | Shop Australia)
- Sparks of Magic Embellishments or (Shop Canada | Shop Australia)
- Sparks of Magic Stickers or (Shop Canada | Shop Australia)
- Black Solid Cardstock or (Shop Canada | Shop Australia)
- Blank Card Kit or (Shop Canada | Shop Australia)
- Original Border Maker System with the Starry Border Maker Cartridge or (Shop Canada | Shop Australia)
- 12-inch Trimmer with Straight & Scallop Blades or (Shop Canada | Shop Australia)
- Micro-Tip Scissors or (Shop Canada | Shop Australia)
- Repositionable Tape Runner or (Shop Canada | Shop Australia)
- Foam Squares or (Shop Canada | Shop Australia)
Check out the Starry Border Maker Cartridge in action in the video below!

Good Times Roll Border

Step 1: Cut a piece of yellow carnival paper to measure 12″ x 1-1/2″.
Step 2: Use the Original Border Maker System with the Starry Border Maker Cartridge to punch a border from black striped polka dots tonal paper. Cut off of the paper at 2-1/2″ and adhere to the bottom of the yellow carnival strip as shown.
Step 3: Cut a piece of red polka dots tonal paper to measure 12″ x 1″ using the 12-inch Trimmer and the Scallop Blade on one long end. Adhere the piece underneath the black striped polka dots tonal piece as shown.
Step 4: Adhere two sticker strips as shown.
Step 5: Add additional stickers with Foam Squares as shown. Add gemstone embellishments.
Smiles Border
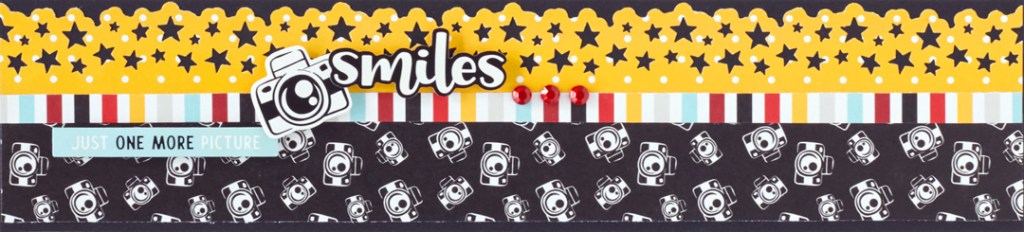
Step 1: Cut a piece of Black Solid Cardstock to measure 12” x 2-3/4”.
Step 2: Use the Original Border Maker System with the Starry Border Maker Cartridge to punch a border from yellow polka dots tonal paper. Cut the paper at 1-1/4″ and adhere to the top of the black cardstock strip as shown.
Step 3: Cut the black cameras paper to measure 12″ x 1-1/4″ and adhere to the bottom of the black cardstock strip as shown.
Step 4: Cut a 12″ x 3/8″ strip from stripes paper and adhere to the middle of the border as shown.
Step 5: Add stickers with Foam Squares and gemstone embellishments.
Dream Big Card
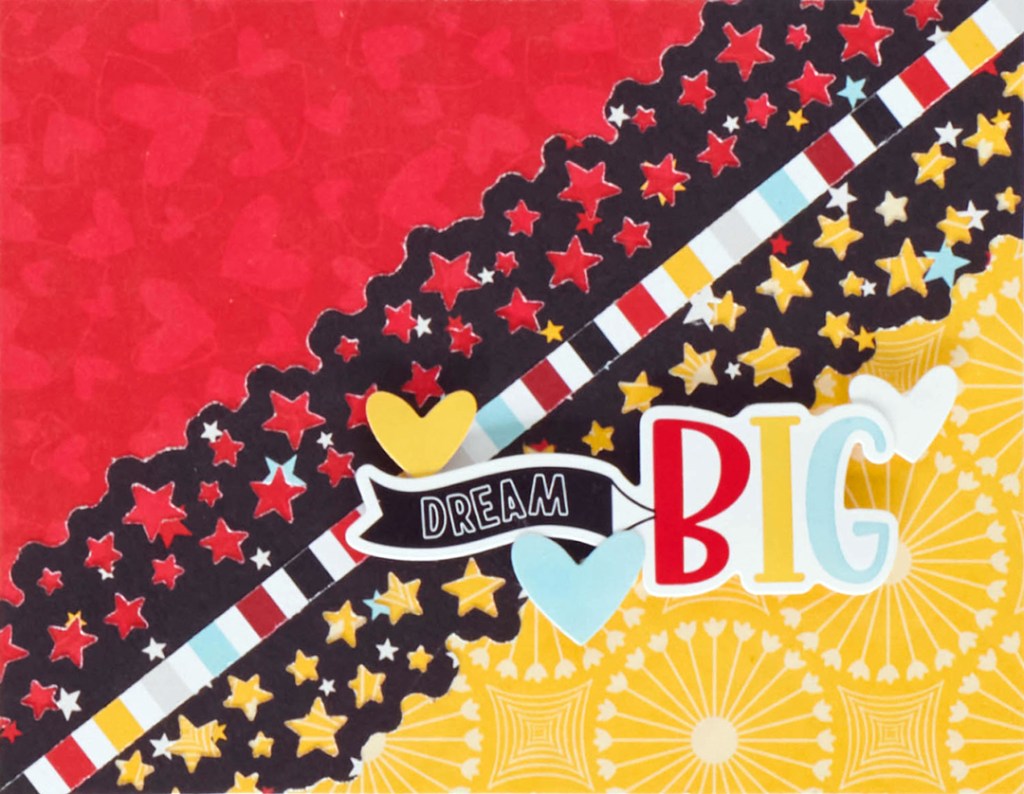
Step 1: Cut a 5-1/2″ x 4-1/4″ piece from red hearts paper. Cut in half on the diagonal from the top-right corner to the bottom-left corner. Adhere half of the piece to a blank card base.
Step 2: Cut a 5-1/2″ x 4-1/4″ piece from yellow carnival paper. Cut in half on the diagonal from the top-right corner to the bottom-left corner. Adhere half of the piece to the blank card base.
Step 3: Use the Original Border Maker System and the Starry Border Maker Cartridge to punch a border from black multi-hued stars paper. Trim the paper at 2-1/4″.

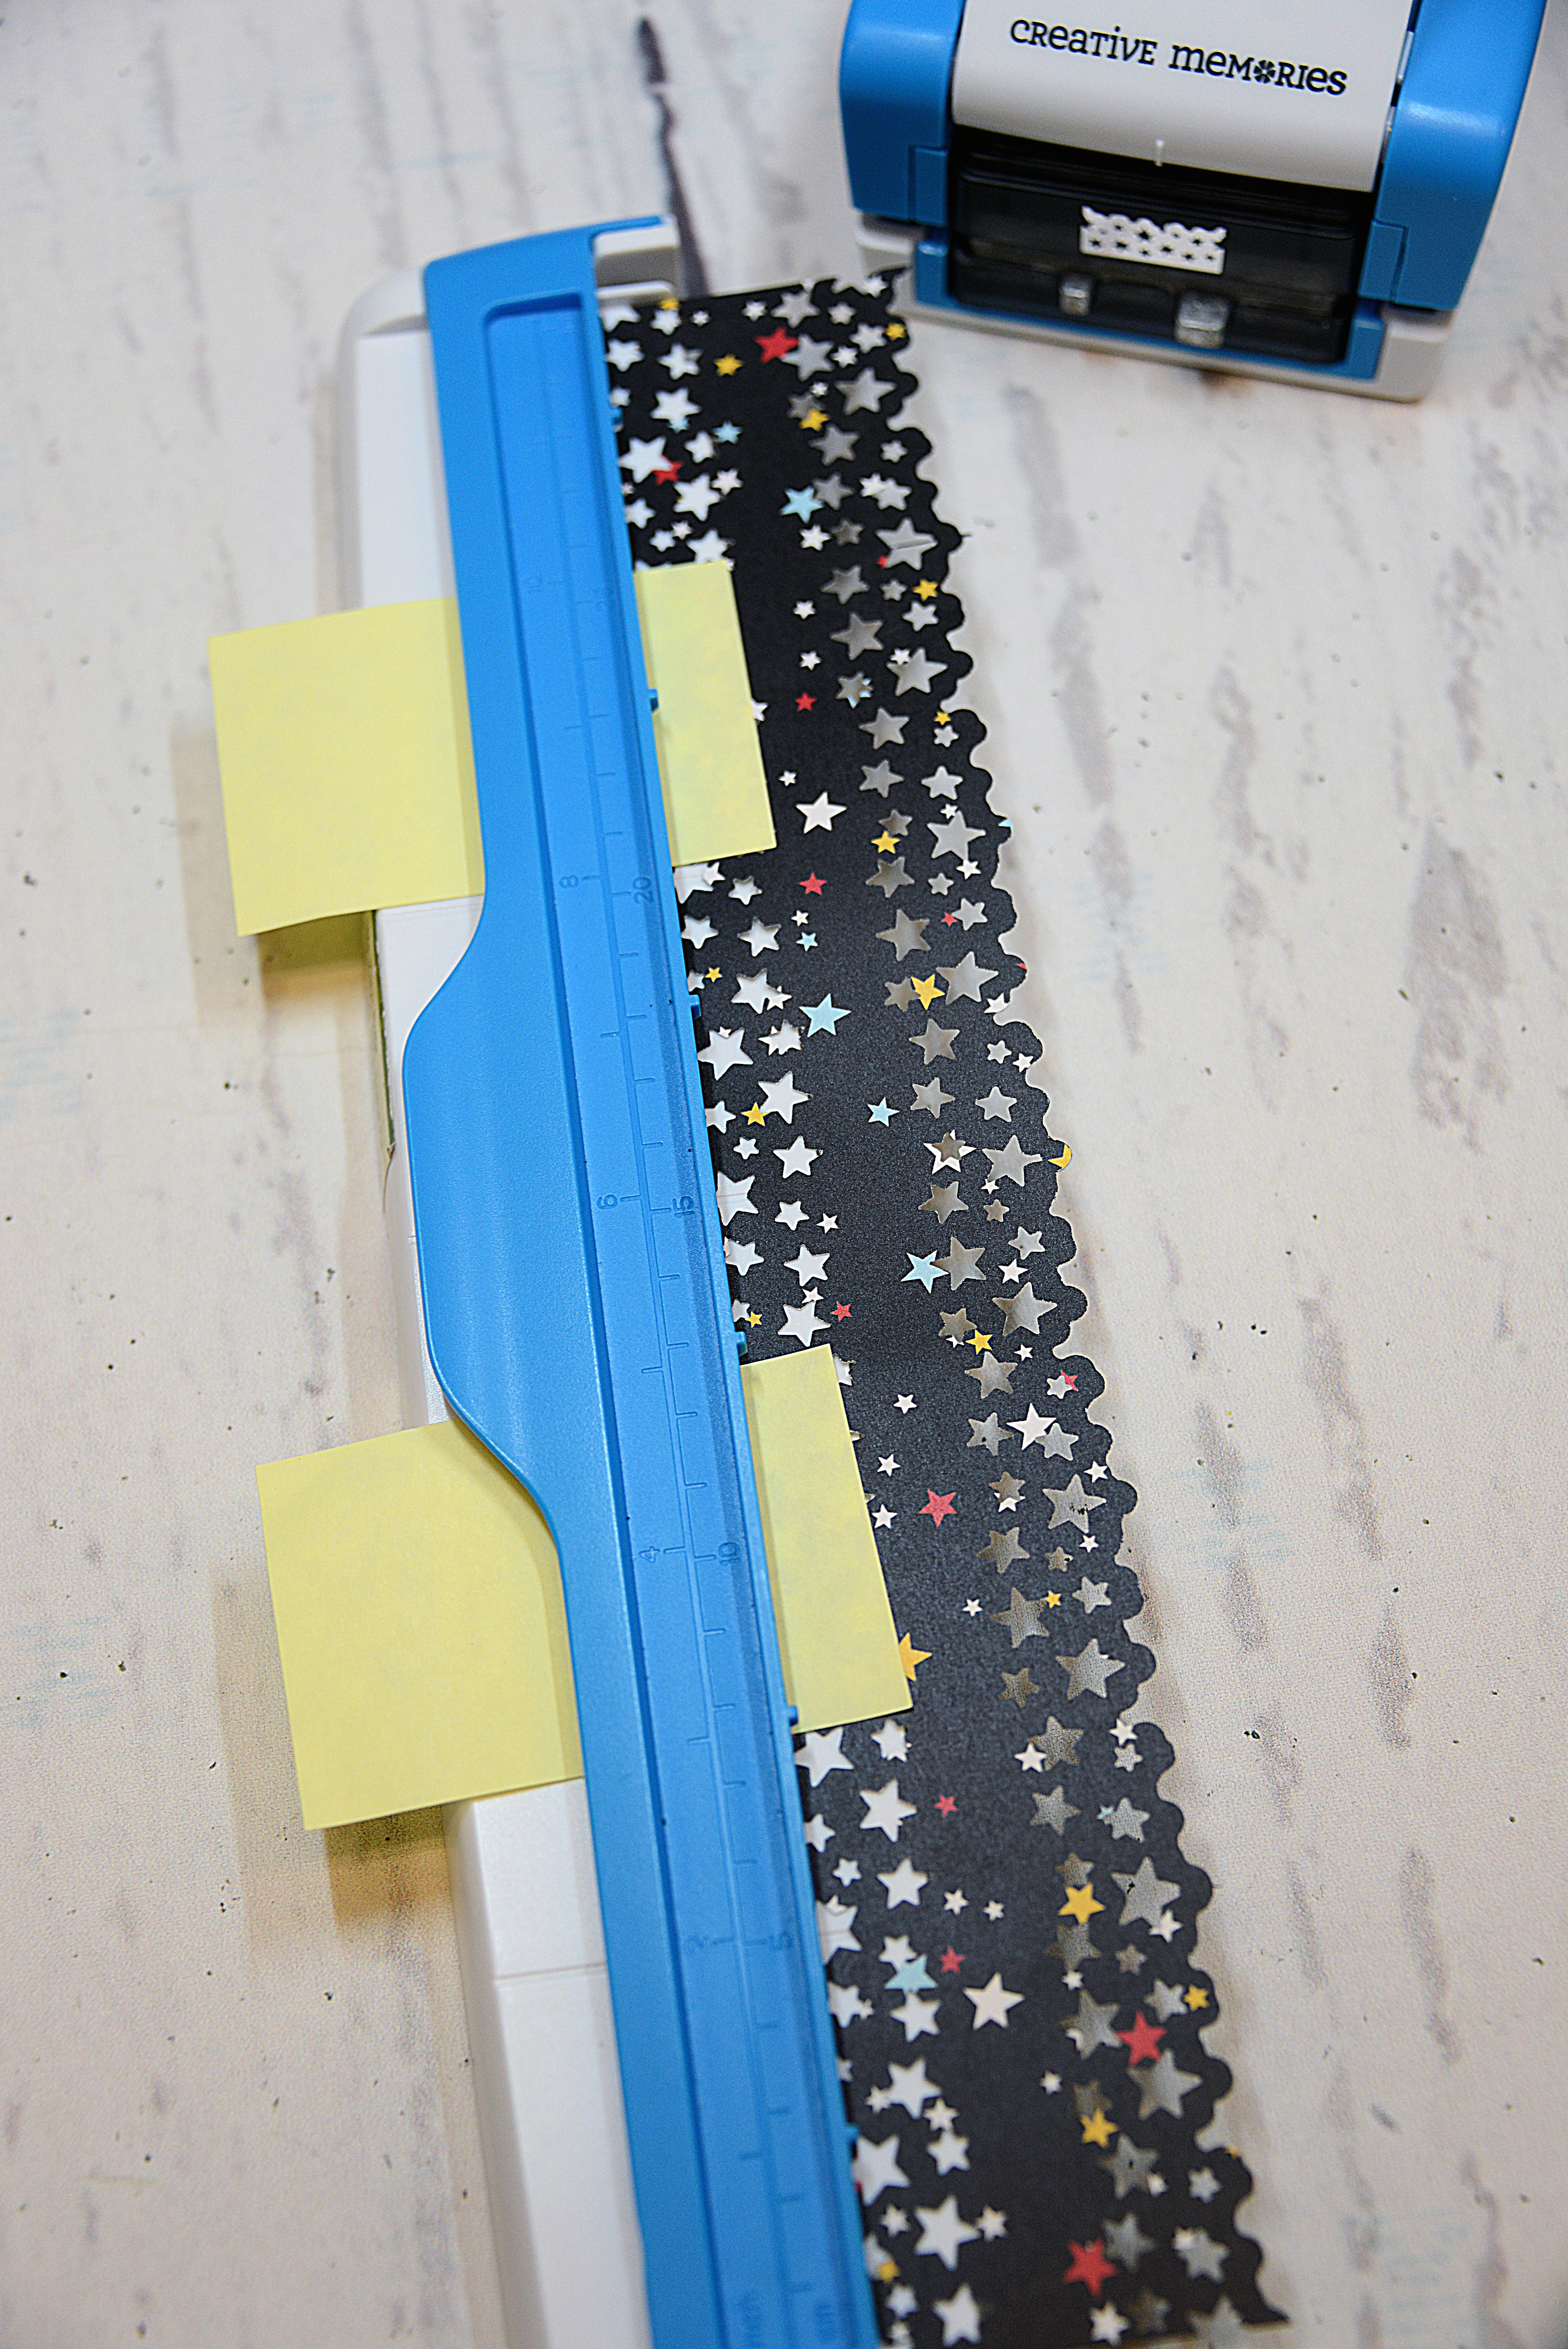
Step 4: Use Post-it Notes to secure the border piece into the tray of the Original Border Maker System and use the Starry Border Maker Cartridge to punch the other end of the border piece.
Step 5: Adhere the border on a diagonal to the middle of the card. Use Micro-Tip Scissors to trim off the excess.
Step 6: Adhere stickers with Foam Squares.
Which of these star crafts do you like the most? How will you use the Stary BMC? Share your projects, thoughts and ideas with us and others!

Great idea! Thanks,
Really like starry border marker cardridge.
Seems like it can be used many times.
Lovely borders, Karyn.
Is there a pdf of this I can print out… I love it
[…] The good times are definitely rolling in with Sketch #1! See how you can make this five-star craft (and others!) by following along to this blog post! […]