October 6, 2021
Add a Peppermint Twist With These Candy Cane Crafts: Christmas Scrapbook Borders and DIY Card
O Christmas treat, o Christmas treat… you know, the candy cane! Candy canes are an iconic (and sweet!) symbol of Christmastime. Their red and white twisted stripes — but can also be found in an array of bright and bold hues — adorn trees and homes during this festive time of year, while their pepperminty palate delights taste buds. Today’s blog is a total treat, for it showcases the latest Candy Cane Chain Border Maker Cartridge. It’ll definitely come in candy for your yuletide projects, like these candy cane crafts — three Christmas scrapbook borders and a DIY card!
To create these borders and card, you will need:
- Joy to the World Paper Pack or (Shop Canada | Shop Australia)
- Joy to the World Tone-on-Tone Paper Pack or (Shop Canada | Shop Australia)
- Joy to the World Embellishments or (Shop Canada | Shop Australia)
- Joy to the World Stickers or (Shop Canada | Shop Australia)
- Bronze Shimmer, Firecracker Shimmer, White Shimmer & White Solid Cardstocks or (Shop Canada | Shop Australia)
- Original Border Maker System with Candy Cane Chain Cartridge or (Shop Canada | Shop Australia)
- 4×6 Peekaboo Pockets™ or (Shop Canada | Shop Australia)
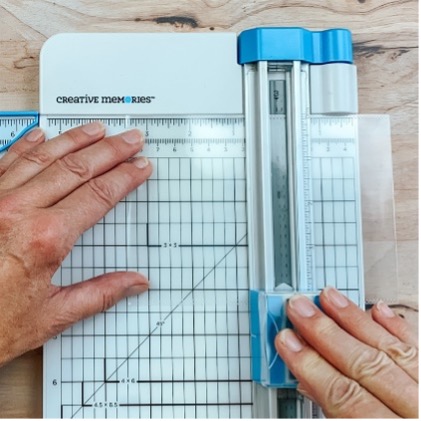
- 12-inch Trimmer with Straight, Scoring & Scallop Blades or (Shop Canada | Shop Australia)
- Micro-Tip Scissors (Shop Canada | Shop Australia)
- Custom Cutting System with Circle Patterns or (Shop Canada | Shop Australia)
- Tape Runner or (Shop Canada | Shop Australia)
- Repositionable Tape Runner Refill or (Shop Canada | Shop Australia)
- Mini Tape Runner Refill or (Shop Canada | Shop Australia)
- Foam Squares or (Shop Canada | Shop Australia)
Check out the Candy Cane Chain Border Maker Cartridge in action in the video below!

Happiest Season Border

Step 1: Cut a 12″ x 2-3/4″ strip of teal stripes tonal paper for the base. Cut a 12″ x 2-1/4″ strip of holly leaves and berries designer paper and adhere on top. Cut a 12″ x 1-5/8″ strip of Bronze Shimmer Solid Cardstock and adhere to border.
Step 2: Using the 12-inch Trimmer with the Scallop Blade, cut a 12″ x 1-1/2″ strip of plaid designer paper and mount on the bronze strip.
Step 3: Using the Candy Cane Chain Cartridge, punch a border with red holly berries designer paper. Punch another with green evergreen branches designer paper and trim out two sets of candy canes. Punch another with teal dots designer paper and trim out two sets of candy canes. Adhere on top of the red holly berries border using the photo as a guide for placement. (The middle will be covered.)
Step 4: Adhere embellishments to the middle of the border, popping some up with Foam Squares. Adhere the “Happiest season” sticker on top.
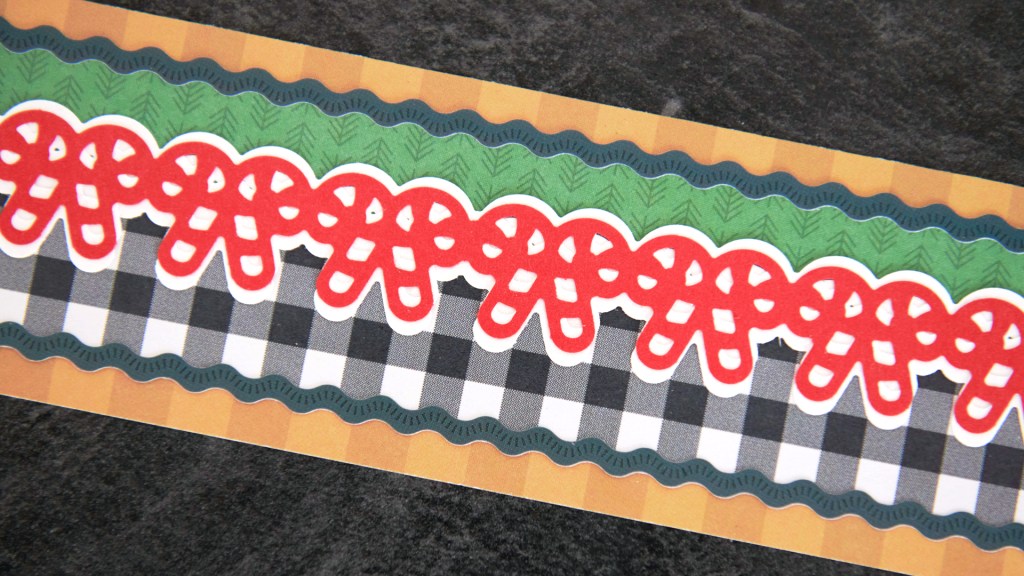
Deck the Halls Border
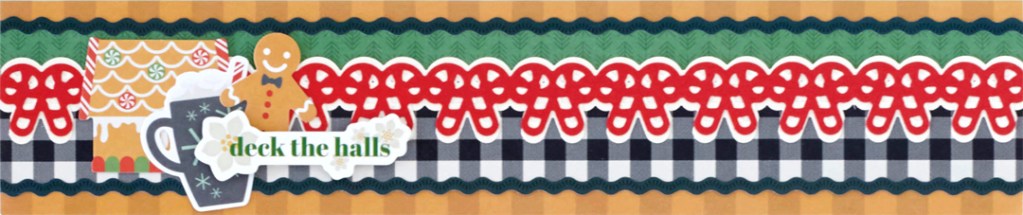
Step 1: Cut a 12″ x 2-1/2″ strip of gold stripes tonal paper for the base. Cut a 12″ x 3/4″ strip of green evergreen branches designer paper and adhere to the border. Cut a 12″ x 1″ strip of gingham designer paper and adhere below the green evergreen branches strip. Place a navy blue wavy border sticker on the border as shown.
Step 2: Using the Candy Cane Chain Cartridge, punch two borders with White Shimmer Solid Cardstock and one border with Firecracker Shimmer Cardstock. (Save white shimmer “confetti” for the card.) Adhere the red shimmer border on top of the white shimmer borders, offsetting them slightly so to create a white border all around the candy canes. Mount on the border.
Step 3: Add embellishments and the “Deck the halls” sticker with Foam Squares.
Diagonal Candy Canes Border

Step 1: Cut a 2-3/4″ x 12″ strip of Firecracker Shimmer Solid Cardstock for the base of the border.
Step 2: Cut a 2-1/2″ x 11-3/4″ strip of navy blue snowflakes designer paper. Cut a 2-1/2″ x 4-3/4″ piece of green evergreen branches designer paper. Trim the short ends at an angle and adhere to the middle of the navy strip.
Step 3: Using the Candy Cane Chain Cartridge, punch a border with Firecracker Shimmer Solid Cardstock. Cut a 12″ x 1″ strip of White Shimmer Solid Cardstock and adhere the border on top. Trim the border into three sections. Adhere to the navy blue snowflakes strip at an angle, trimming off the excess. Repeat in two more places, using the photo as a guide for placement.
Step 4: Adhere an evergreen bristles laser-cut border and a holly berries laser-cut border to the navy blue snowflakes strip at an angle, trimming off the excess. Repeat in two more places, using the photo as a guide for placement.
Step 5: Mount navy blue snowflakes strip on the base.
Joy to the World Shaker Card
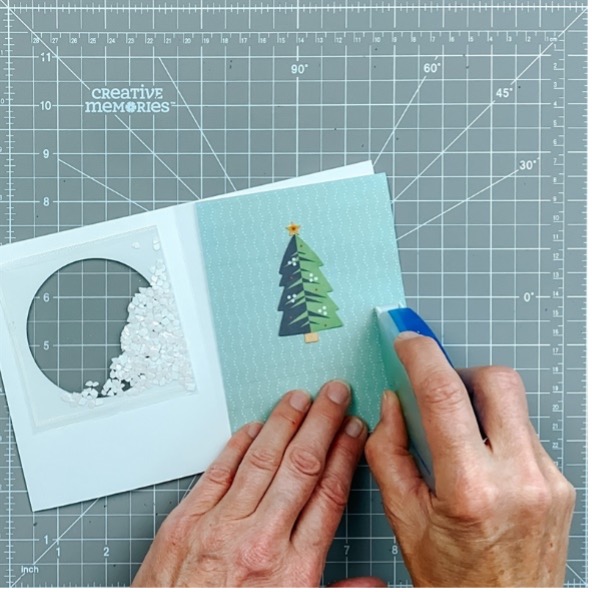
Step 1: Create the card base. Cut an 8-1/2″ x 5-1/2″ piece of White Solid Cardstock. Using the 12-inch Trimmer with the Scoring Blade, score along the long edge at 4-1/4″ and fold in half.


Step 2: Cut a 4″ x 5-1/4″ piece of holly leaves and berries designer paper and adhere to the card front. Open the card and place on the 13×13 Custom Cutting System Mat. Using the inside edge of the largest Custom Cutting System Circle Pattern and the Blue Blade, cut a circle from the card, placing the pattern so it’s even on the top three sides as shown. Save the cut out circle for Step 6.
Step 3: Using the Candy Cane Chain Cartridge, punch a border with White Solid Cardstock (saving the “confetti”) and another with gold ornaments designer paper. Trim the white border to 4″, layer it over the gold ornaments border and trim off the gold ornaments border at 4″. Adhere to the card.

Step 4: Cut a 4×6 Peekaboo Pocket™ to measure 3-1/2″ x 3-1/2″, saving two of the folded edges. Use the white “confetti” from the candy cane borders to fill up the pocket. Apply Mini Tape Runner Refill adhesive to the two open edges, sealing the pocket. Apply Mini Tape Runner Refill adhesive to all four edges and adhere to the inside of the front cover, over the hole.
Step 5: Cut a 4″ x 5-1/4″ piece of teal dots designer paper. Adhere a tree embellishment and star sticker and adhere it over the shaker pocket on the inside of the front cover.
Step 6: Cut a 4″ x 5-1/4″ piece of teal dots designer paper and adhere it to the inside right of the card. Place the saved circle piece on it and add a snow globe embellishment.
Step 7: Adhere the “Joy to the World “sticker to the front with Foam Squares.
Which of these candy cane crafts showcases the most Christmas spirit? Will you be making these Christmas scrapbook borders and DIY card in preparation for your yuletide layouts or to send to a friend? Give an insight to your scrapbooking tastes in the comments!

How did you make the white backing of the candy cane’s that are nearly the same shape?