November 1, 2021
Create Flurries of Fun With This Winter Scrapbook Layout

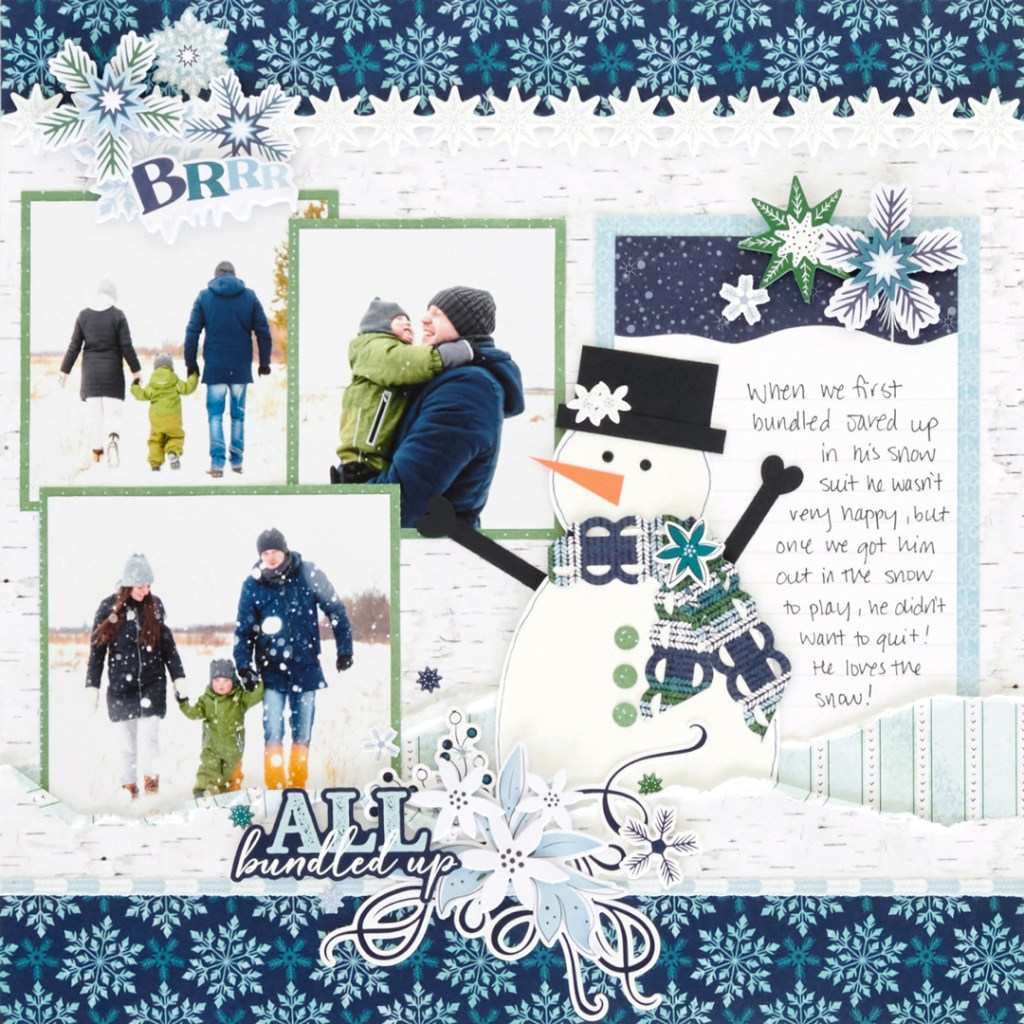
The temps may be dropping at Home Office, but the latest cold-weather collection is sure to warm your hearts! Say hello to the Snowbound collection! Inspired by the throwing snowballs, snow days, rainy days cuddled under a warm blanket and all sorts of frosty fun, these winter- and overcast-themed supplies will help you put together a blizzard of beautiful projects. And when the air gets chilly and the powdery white precipitation turns your world into a winter wonderland, making snowmen and snowwomen is an absolute must! Check out this winter scrapbook layout that would make Frosty blush with joy at your creating abilities!
To create this layout you will need:
- Snowbound Paper Pack or (Shop Canada | Shop Australia)
- Snowbound Stickers or (Shop Canada | Shop Australia)
- Snowbound Layered Embellishments or (Shop Canada | Shop Australia)
- Snowbound Variety Mat Pack or (Shop Canada | Shop Australia)
- Black, Orange Shimmer & White Solid Cardstocks or (Shop Canada | Shop Australia)
- Custom Cutting System with Circle & Oval Patterns or (Shop Canada | Shop Australia)
- Original Border Maker System with Mirrored Scallops Chain Border Maker Cartridge or (Shop Canada | Shop Australia)
- Piece by Piece Mini Trio Punch Set or (Shop Canada | Shop Australia)
- 12-inch Trimmer or (Shop Canada | Shop Australia)
- Micro-Tip Scissors (Shop Canada | Shop Australia)
- Tape Runner or (Shop Canada | Shop Australia)
- Repositionable Tape Runner Refill or (Shop Canada | Shop Australia)
- Foam Squares or (Shop Canada | Shop Australia)
- Navy Dual-Tip Pen or (Shop Canada | Shop Australia)
Check out the whole Snowbound collection in the video below!

Step 1: Use the royal blue dancing snowflakes paper as the base for this layout.
Step 2: Cut the piece of birch paper to measure 12″ x 9″. Adhere to the middle of the layout.
Step 3: Use a 3″ piece of the birch paper that you cut off from the previous step, tear it in half length-wise. Adhere to the lower edge of the birch paper, creating “snowdrifts.”
Step 4: Layer a large and small variety mat on the right side of the layout.
Step 5: Cut three mats from the green grid paper to measure:
- (1) 4-1/4″ x 4-1/4″
- (1) 3-3/4″ x 3-3/4″
- (1) 3-1/4″ x 3-3/4″
Photo sizes will be:
- (1) 4″ x 4″
- (1) 3-1/2″ x 3-1/2″
- (1) 3″ x 3-1/2″
Step 6: Adhere the matted photos to the layout as shown.
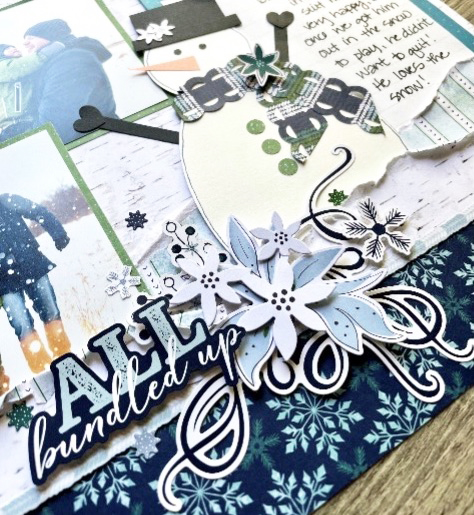
Step 7: Create the Snowperson:
- Using the inside edge of the smallest Custom Cutting System Circle Pattern with the Blue Blade, cut from White Solid Cardstock for the head.
- Using the outside edge of the second-smallest Custom Cutting System Oval Pattern with the Red Blade, cut from White Solid Cardstock for the body.
- Hat: Black Solid Cardstock to measure 2″ x 1/4″ and 1-1/2″ x 3/4″.
- Arms: Black Solid Cardstock to measure 1-1/2″ x 1/4″. Punch Black Solid Cardstock using the Piece by Piece Mini Trio Punch Set — hearts for the hands/gloves and small circles for the eyes.
- Using the large circles from the Piece by Piece Mini Trio Punch Set, punch with green grid paper for the buttons
- Using the Border Maker System with Mirrored Scallops Chain Border Maker Cartridge, punch a border from chunky knit paper. Cut into smaller lengths to create the “scarf”.
- Use a scissors to hand cut a carrot nose from Orange Shimmer Solid Cardstock.
- Use Navy Dual-Tip Pen to doodle along the outer edge of the snowperson.
- Tuck the snowperson into the “snowdrifts.”
Step 8: Adhere stickers and embellishments to the layout, using Foam Squares on some for added dimension.
Step 9: Journal as desired.
What are your first impressions of the Snowbound collection? Do you like snow and colder weather? Relay your input on this winter scrapbook layout in the comments down below!

Pretty
[…] […]
Great layout! Thanks for sharing.
[…] Building snowpeople can be snow much fun… and in building this layout, too! Check out how to put it together by following along in this blog post. […]
Step 7. First instruction seems to be incorrect. The inside of the smallest circle is 1″. I’m thinking the inside of the middle-sized circle with the green or red blade. ?
Yes, use #2 (middle size) circle with blue blade to avoid a “pinhead” snowperson!