December 17, 2021
Grid the Great Outdoors With This Forest Scrapbook Layout
It’s good to unplug and enjoy the great outdoors — hiking, fishing, mountain climbing, stand-up paddleboarding, cross-country skiing, stargazing and so much more! And if you want to frame your off-the-grid adventures after breathing in all that fresh air, you can in six simple steps! Yes, really — see for yourself with this forest scrapbook layout and set up your creative camp!

To create this layout you will need:
- Deep in the Woods Paper Pack or (Shop Canada | Shop Australia)
- Deep in the Woods Texture Paper Pack or (Shop Canada | Shop Australia)
- Deep in the Woods Stickers or (Shop Canada | Shop Australia)
- Dark Green & White Solid Cardstocks or (Shop Canada | Shop Australia)
- 12-inch Trimmer or (Shop Canada | Shop Australia)
- Micro-Tip Scissors (Shop Canada | Shop Australia)
- Tape Runner or (Shop Canada | Shop Australia)
- Repositionable Tape Runner Refill or (Shop Canada | Shop Australia)
- Foam Squares or (Shop Canada | Shop Australia)
- Black Dual-Tip Pen or (Shop Canada | Shop Australia)

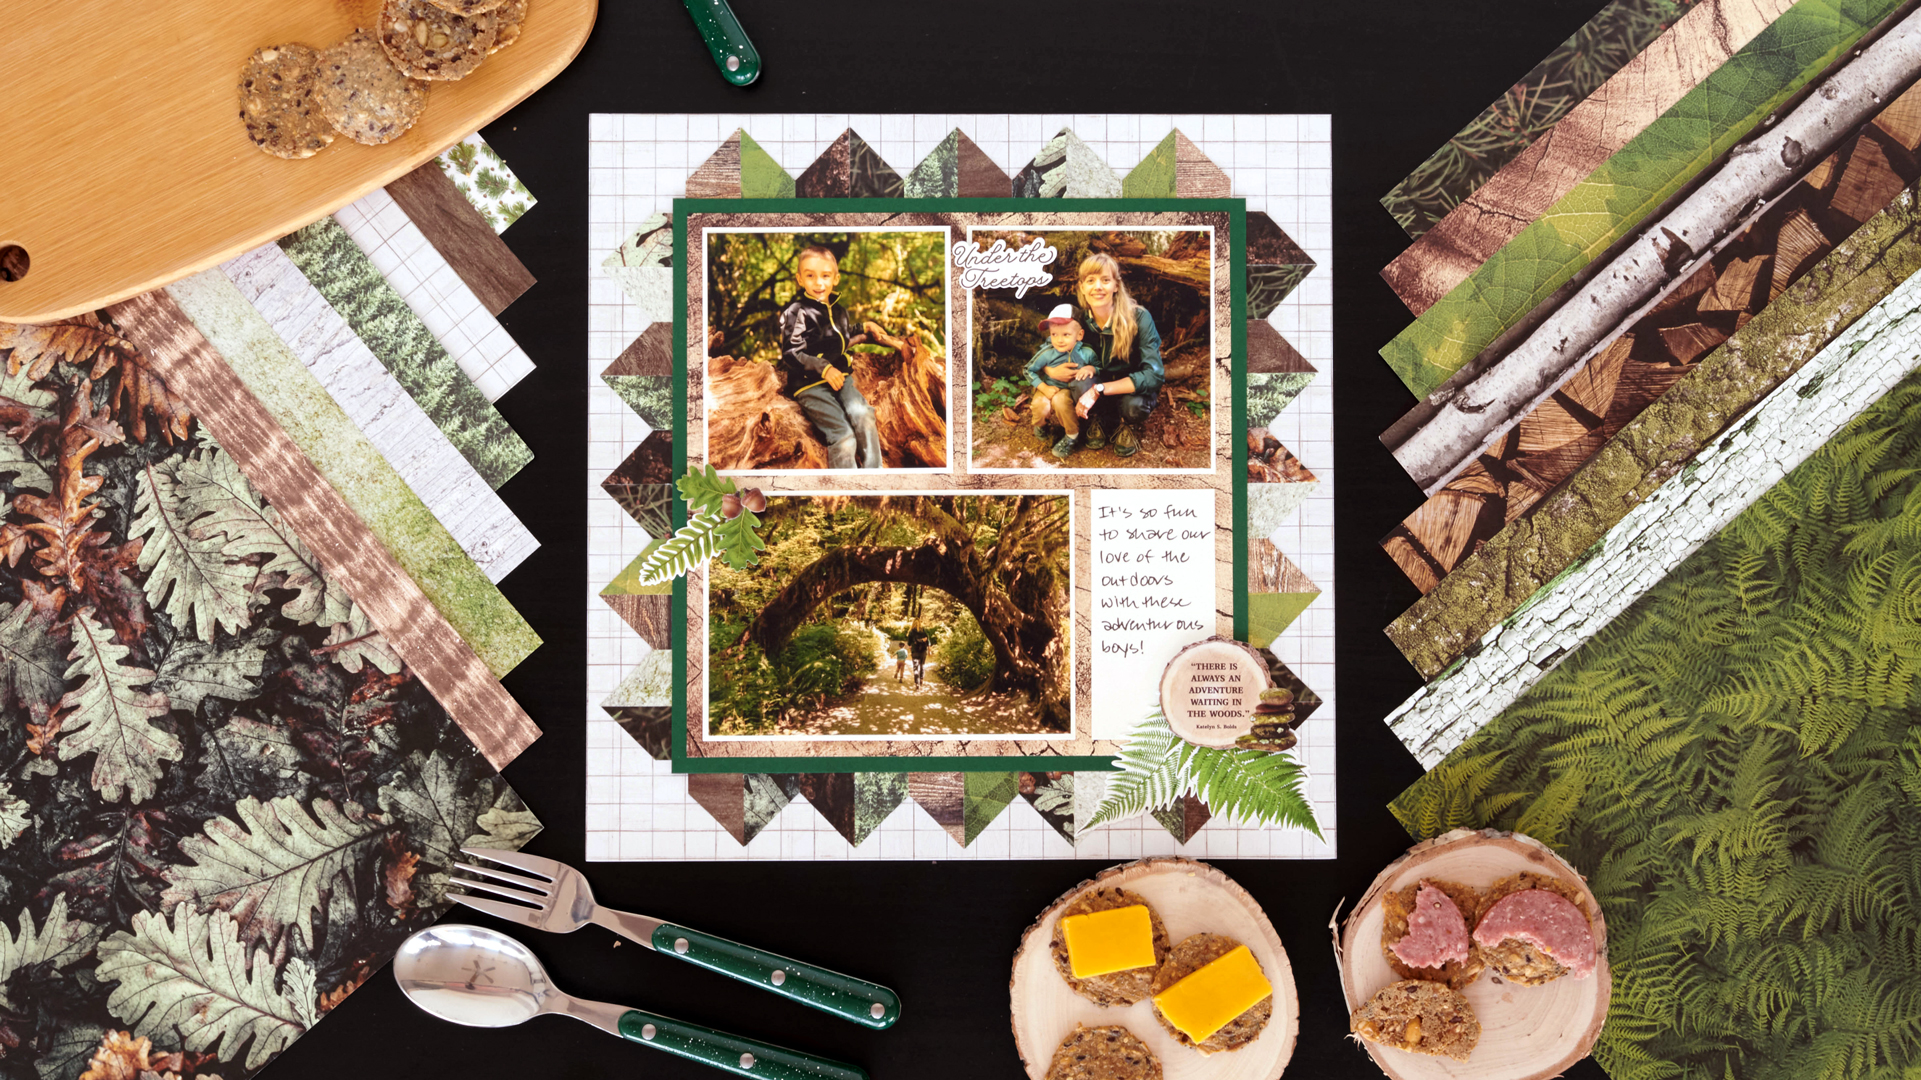
Step 1: Use a piece of wooden plaid designer paper as the base for this layout.

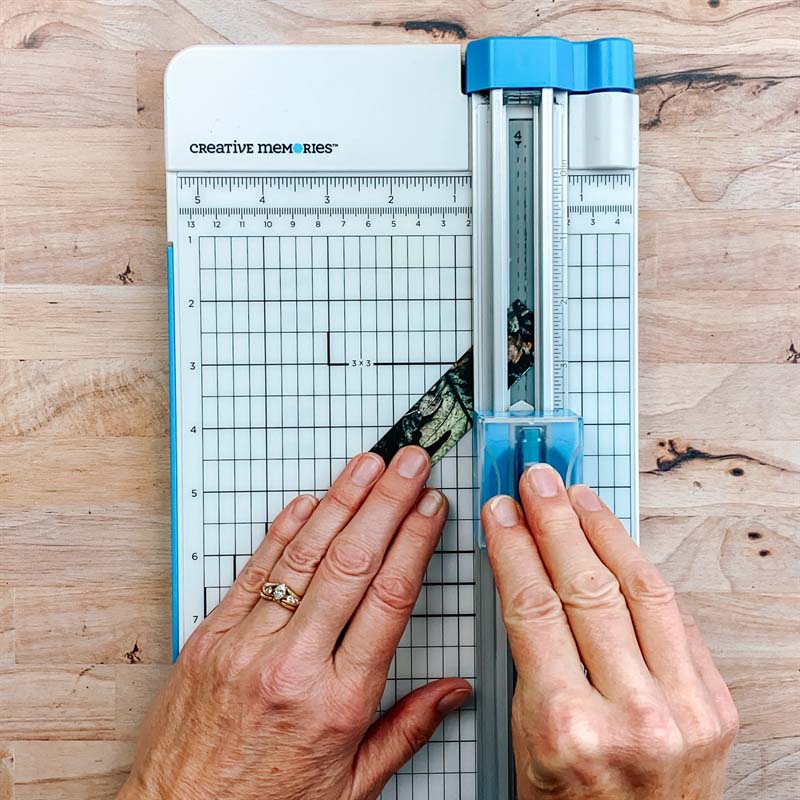

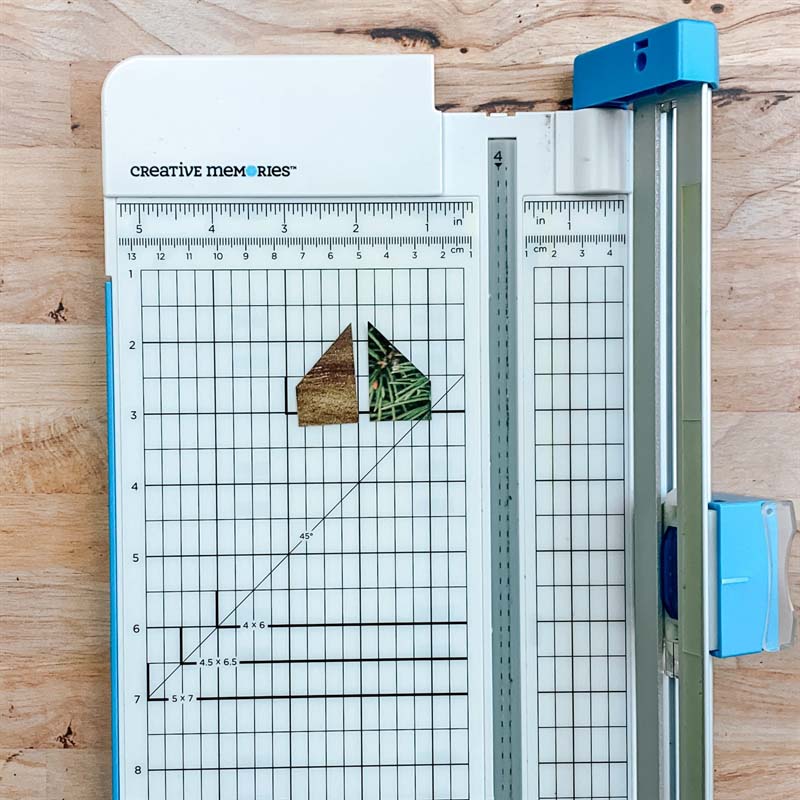
Step 2: Cut a piece of White Solid Cardstock to measure 9-1/2″ x 9-1/2″. Cut several 7/8″ wide strips from various papers. Stack two together, align along the 45-degree line on the 12-inch Trimmer and cut the ends off. Line the points up at 1-1/2″ and cut. Repeat until you have 20 sets.


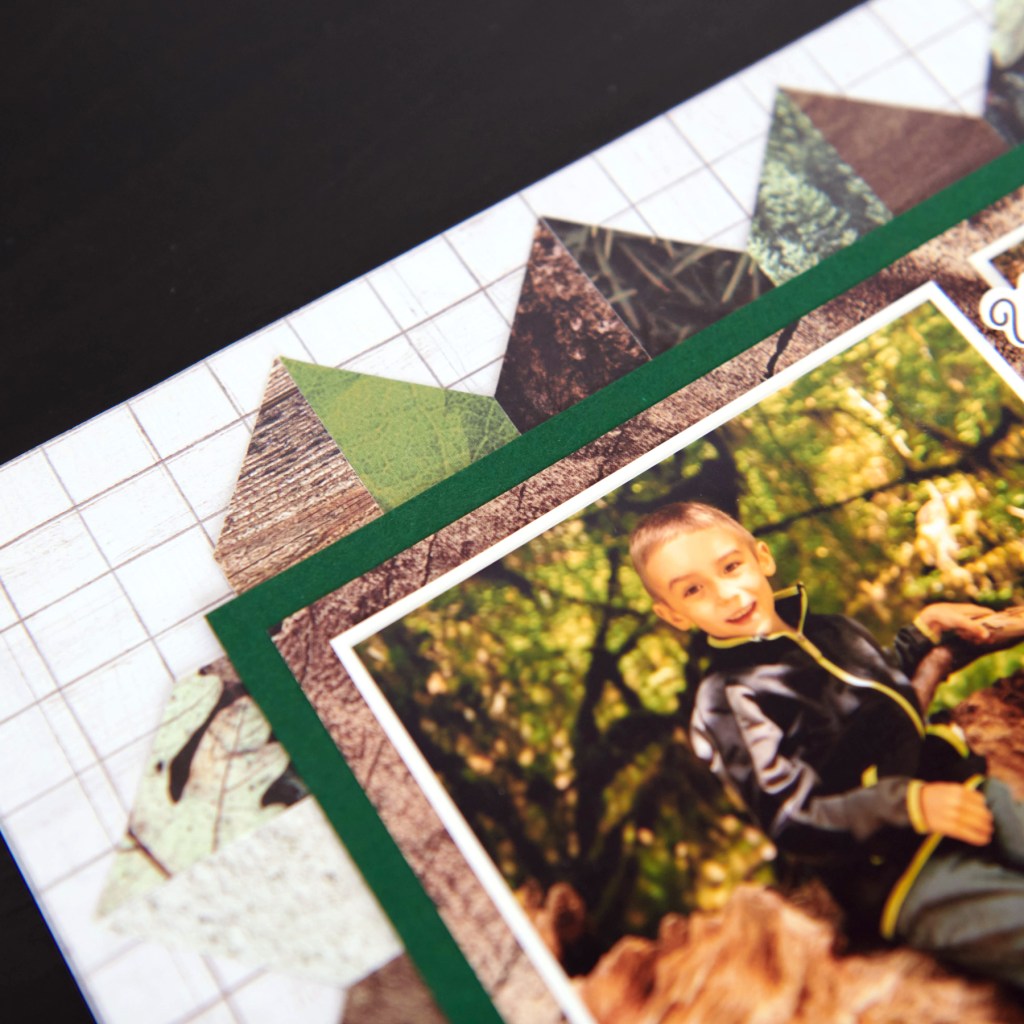
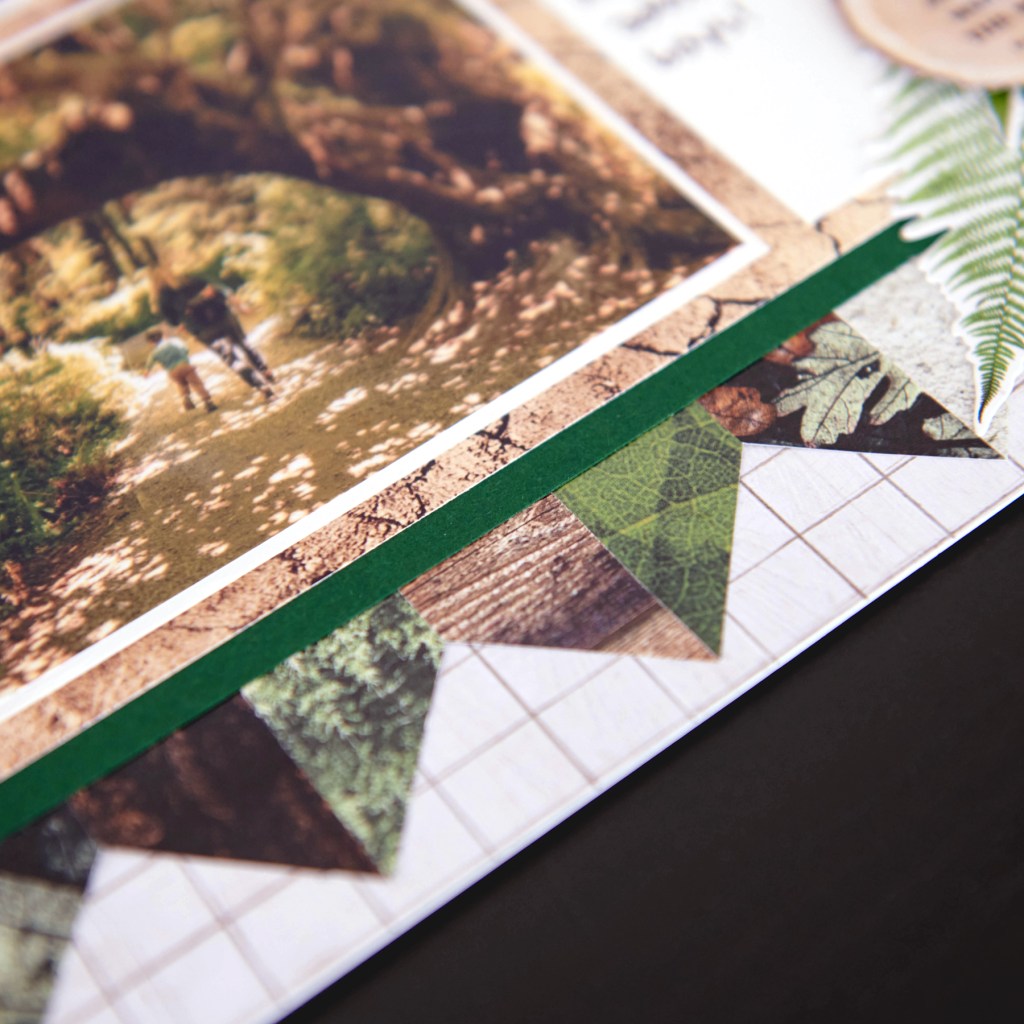
Step 3: Adhere the straight edges about 1/2″ from the edge of the cardstock, points together as shown, all around the cardstock. Using the Micro-Tip Scissors, trim off the corners of the cardstock. Adhere to the base.
Step 4: Cut a 9-1/4″ x 9-1/4″ piece of Dark Green Solid Cardstock (trim out the inside of this piece if desired). Mount on top of the layout. Cut an 8-3/4″ x 8-3/4″ piece of tree grain texture paper and mount on top.
Step 5: Crop two photos to measure 3-3/4″ x 3-3/4″ and mat on two 4″ x 4″ pieces of White Solid Cardstock. Crop one photo to measure 5-3/4″ x 3-3/4″ and mat on a 6″ x 4″ piece of White Solid Cardstock. Adhere to the layout, along with a 2″ x 4″ piece of White Solid Cardstock to journal on.
Step 6: Add stickers and journal as desired.
What activities do you like to do in the great outdoors? What memories would you pitch upon this forest scrapbook layout? Share your thoughts and ideas in the comments — we’d love to hear from you!

Very clever idea.