May 19, 2022
Shoot for the Stars With These DIY Summer Scrapbook Cards

It’s no secret that there is a plethora of activities to do during a sweltering summer’s day (after slathering on the sunscreen, of course!) — pool days with friends, making sidewalk chalk art, playing beach volleyball, weekends at the lake and boating, family cookouts, yard games and more. We try to soak up as much sunshine as possible during these warm-weather months, but the outdoor fun doesn’t need to end when the sun goes down! The longer evenings call for after-dark fun like sitting around a crackling bonfire and toasting s’mores, camping in the backyard, chasing fireflies and stargazing. These nighttime wonders can light up unforgettable memories, and even more so when you use the layered glitters stickers from the Sunrays for Days Buy-It-All Bundle. (And they’re ONLY available in this bundle while supplies last!)
Dance in the moonlight (and then straight to your craft room!) with these DIY summer scrapbook cards!

To create these cards you will need:
- Sunrays for Days Paper Pack or (Shop Canada | Shop Australia)
- Sunrays for Days Layered Glitter Stickers or (Shop Canada | Shop Australia) — A bonus ONLY found in the Buy-It-All Bundle (item not sold separately; this bundle is while supplies last!)
(Note: Glitter is not photo safe; contact with photos is not recommended.) - Sunrays for Days Variety Mat Pack or (Shop Canada | Shop Australia)
- Blank Card Kit or (Shop Canada | Shop Australia)
- Custom Cutting System with Circle Patterns or (Shop Canada | Shop Australia)
- 12-inch Trimmer with Straight & Wave Blades or (Shop Canada | Shop Australia)
- Micro-Tip Scissors or (Shop Canada | Shop Australia)
- Tape Runner or (Shop Canada | Shop Australia)
- Foam Squares or (Shop Canada | Shop Australia)
Check out the limited-time Sunrays for Days Buy-It-All Bundle in the video below!

Shoot For The Stars Card
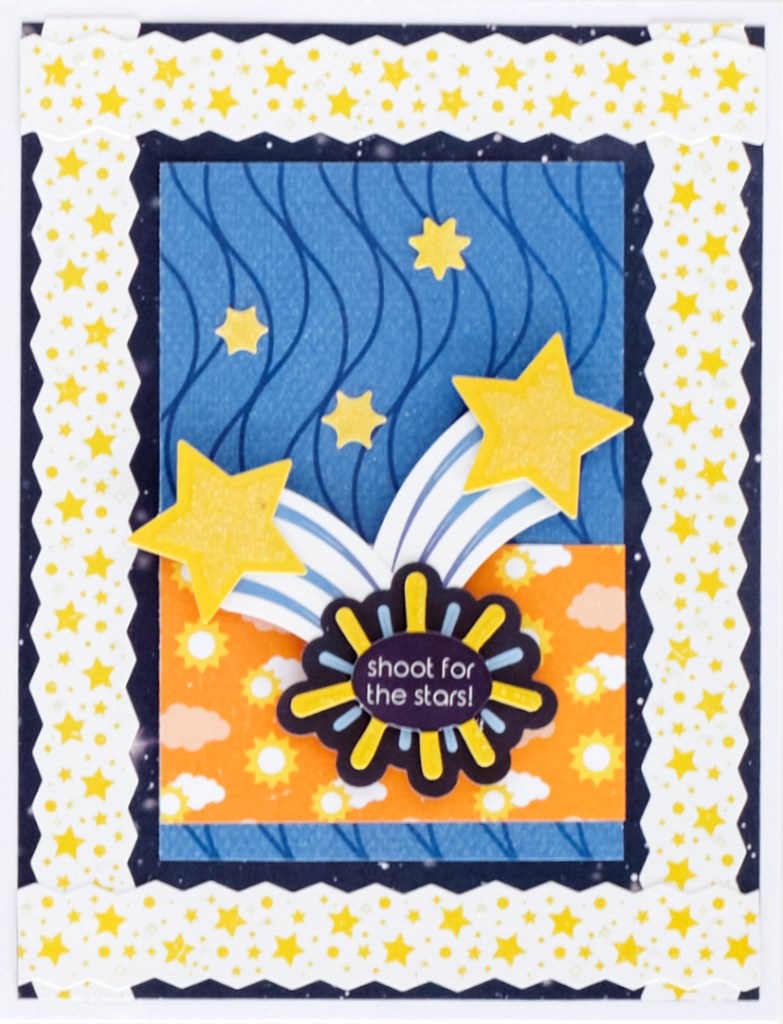
Step 1: Use a blank card from the Blank Card Kit as the base.
Step 2: Cut a piece of dark blue starry night designer paper to measure 4″ x 5-1/4″.
Step 3: Adhere glitter stars border stickers along the edges, snipping off any excess with a scissors.
Step 4: Cut a piece of blue waves designer paper to measure 2-1/2″ x 3-1/2″. Adhere to the middle of the card.
Step 5: Cut a piece of orangesicle sunny skies paper to measure 2-1/2″ x 1-1/2″. Adhere to the card.
Step 6: Adhere glitter stickers to the card using Foam Squares for added dimension.
Step 7: Adhere small glitter star stickers to the “sky.”
You’re My Shining Star
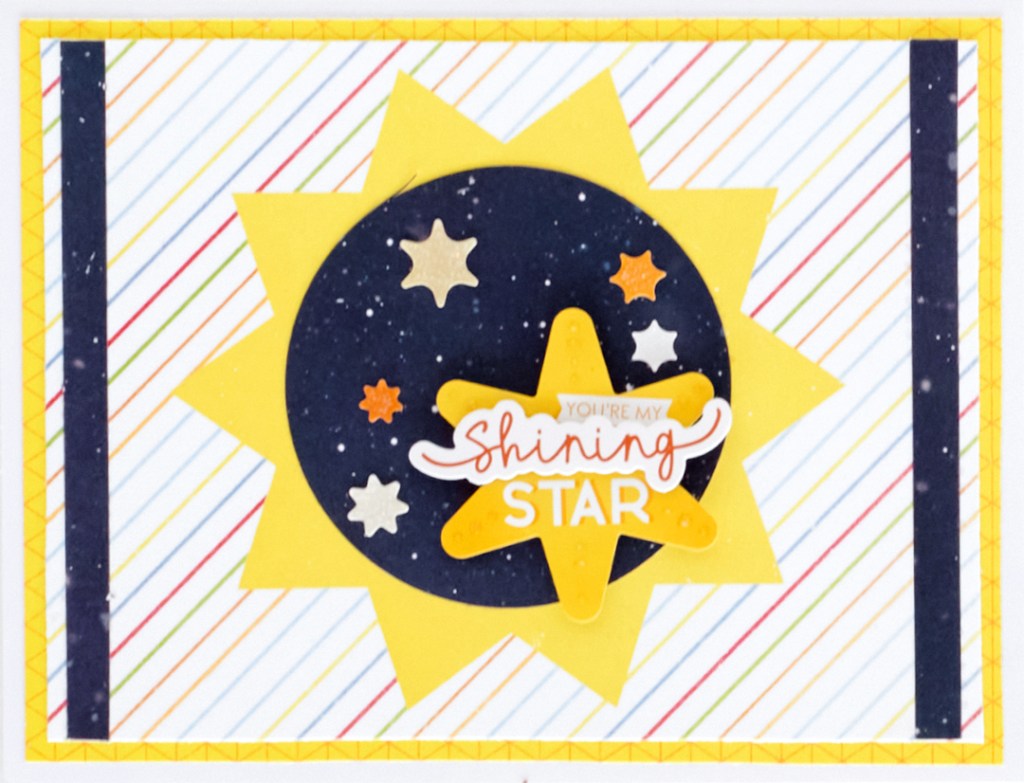
Step 1: Use a blank card from the Blank Card Kit as the base
Step 2: Cut a piece of pineapple grid paper to measure 5-1/4″ x 4″. Adhere to the card.
Step 3: Cut down a variety mat (with the sun) to measure 5″ x 3-3/4″. Adhere to the card.
Step 4: From the inside edge of the medium Custom Cutting System Circle Pattern with the Blue Blade, cut a circle from dark blue starry night paper. Adhere to the middle of the sun.
Step 5: Cut two strips of dark blue starry night paper to measure 1/4″ x 3-3/4″. Adhere to the card near the left and right edges as shown.
Step 6: Adhere glitter stickers to the card, using Foam Squares on the “You are my shining star” glitter sticker for added dimension.
I Love You to the Moon and Back

Step 1: Use a blank card from the Blank Card Kit as the base
Step 2: Cut a piece of blue waves designer paper to measure 4″ x 5-1/4″. Adhere to the card.
Step 3: Cut a piece of pineapple grid designer paper to measure 3-3/4″ x 5″. Adhere to the card.
Step 4: Cut a piece of blue waves designer paper using the 12-inch Trimmer and the Wave Blade to measure 4″ x 1-1/4″. Adhere to the card.
Step 5: Cut a piece of dark blue starry night designer paper to measure 4″ x 1″. Adhere to the previous wavy strip.
Step 6: Adhere a glitter stars border sticker to the top of the strip, cutting any excess with a scissors.
Step 7: From the inside edge of the medium Custom Cutting System Circle Pattern and the Blue Blade, cut a circle from the dark blue starry night designer paper. Adhere to the card.
Step 8: Adhere glitter stickers for a sentiment, using Foam Squares for added dimension.
Step 9: Adhere small glitter star stickers to the upper-left edge of the card.
What evening or nighttime activities do you like doing in the summer months? Will you be making (and sending out!) these summer scrapbook cards to friends and family?
