July 19, 2022
Earn Your Stripes: Zoo Themed Scrapbooking Projects With Zebra Stripe Designs

Why do zebras have stripes?
Because they don’t want to be spotted.
Okay, okay, jokes aside, there’s something truly captivating about zebras with their intricate and distinctly patterned black-and-white stripes. Even more so, did you know a group of zebras is called a “dazzle?” Well, dazzle your own layouts, cards and borders today with the dynamic design of the Zebra Stripe Border Maker Cartridge! Just herd together your scrapbooking supplies and make these zoo themed scrapbooking projects featuring zebra stripe designs!
To create these borders and card, you will need:
- What A Zoo, Too! Paper Pack or (Shop Canada | Shop Australia)
- What A Zoo, Too! Layered Embellishments or (Shop Canada | Shop Australia)
- What A Zoo, Too! Stickers or (Shop Canada | Shop Australia)
- What A Zoo, Too! Border Stickers or (Shop Canada | Shop Australia)
- Black & Light Gray Solid Cardstocks or (Shop Canada | Shop Australia)
- Original Border Maker System with Zebra Stripe Border Maker Cartridge or (Shop Canada | Shop Australia)
- 12-inch Trimmer with Straight & Deckle Blades or (Shop Canada | Shop Australia)
- Micro-Tip Scissors or (Shop Canada | Shop Australia)
- Tape Runner or (Shop Canada | Shop Australia)
- Repositionable Tape Runner or (Shop Canada | Shop Australia)
Check out the Zebra Stripe Border Maker Cartridge in action in the video below!

Wild Border
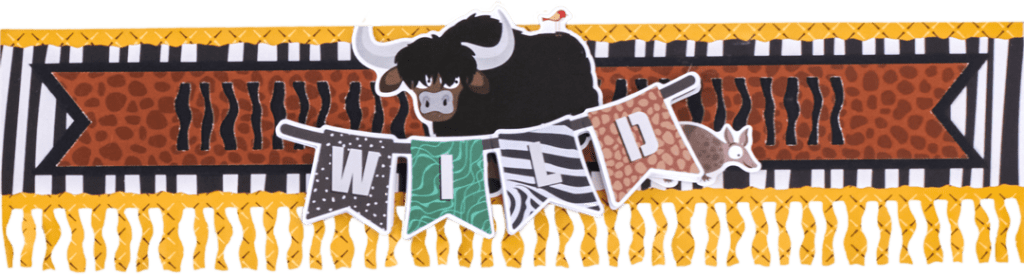
Step 1: Using the Zebra Stripe Border Maker Cartridge, punch a border with mustard diamond grid designer paper. Trim to 12″ x 3″. Using the 12-inch Trimmer and the Deckle Blade, trim off 1/4″ from the end of the zebra stripes, leaving a fringe.
Step 2: Cut a 12″ x 1-3/4″ strip of zebra stripes designer paper and mount on the border.
Step 3: Using the Zebra Stripe Border Maker Cartridge, punch a border brown animal spots designer paper. Trim to be 12″ x 1-1/8″. Using scissors, make a “V” notch in both ends. Cut a 12″ x 1-3/8″ strip of Black Solid Cardstock. Adhere the brown animal spots zebra stripe border on top. Using scissors, cut a “V” notch in both ends as shown. Mount on the border.
Step 4: Adhere animal stickers and “Wild” embellishment.
Zoo Animal Border
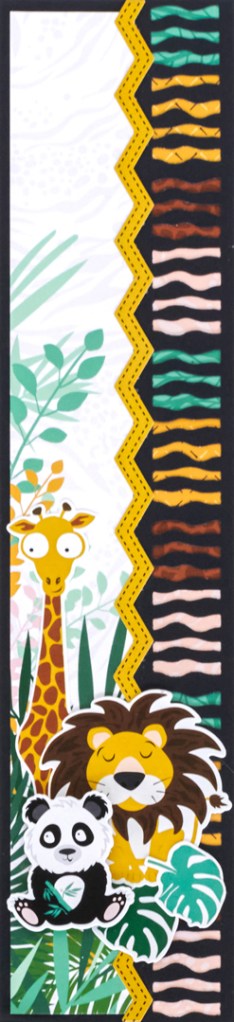
Step 1: Using the Zebra Stripe Border Maker Cartridge, punch a border with Black Solid Cardstock. Trim to 2-3/4″ x 12″.
Step 2: Cut 1″ x 1″ pieces of kelly green palm leaves, mustard diamond grid, brown animal spots and light pink animal prints designer papers. Adhere behind the zebra stripes as shown.
Step 3: Cut a 1-1/2″ x 12″ strip of white jungle corners designer paper and adhere it along the left side of the border. Place a mustard zigzag border sticker along the right side of this strip.
Step 4: Add stickers as desired.
Zoo Venture Border

Step 1: Cut a 2-3/4″ x 12″ strip of jungle leaves designer paper for the base. Cut a 2″ x 11-1/4″ strip of dark brown snakeskin designer paper and adhere on the base.
Step 2: Using the Zebra Stripe Border Maker Cartridge, punch a border with dark brown snakeskin designer paper. Using the 12-inch Trimmer and the Deckle Blade, trim off the bottom section of the stripe, leaving a fringe. Trim the border to 12″ x 1-3/4″ and cut into 2″ sections. Repeat with light pink animal prints and mustard diamond grid designer papers. Layer six sections on the border, starting at the bottom and alternating shades/patterns.
Step 3: Cut a 2″ x 5″ piece of light pink animal prints designer paper. Punch one short end with the Zebra Stripe Border Maker Cartridge. Using the 12-inch Trimmer and the Deckle Blade, trim off the bottom section of the stripe, leaving a fringe. Adhere this piece toward the top of the border. Top with gold and brown layers.
Step 4: Add stickers and embellishments.
Hearts Card
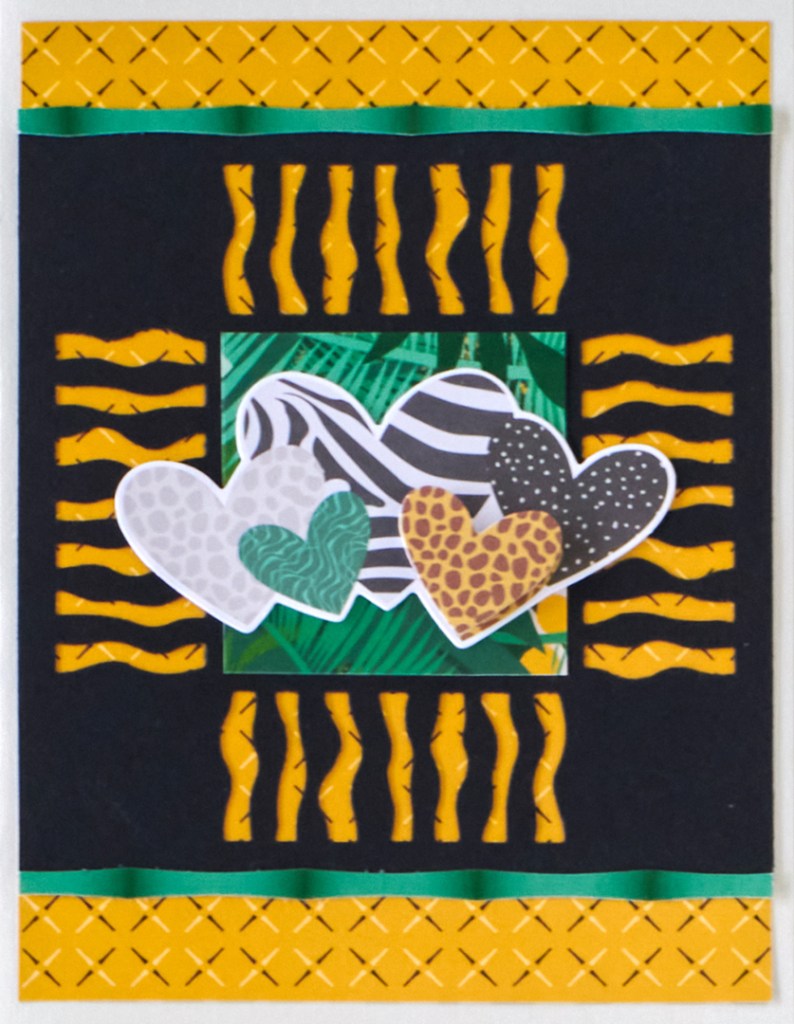
Step 1: Create the card base. Cut an 8-1/2″ x 5-1/2″ piece of Light Gray Solid Cardstock. Using the 12-inch Trimmer and the Scoring Blade, score along the long edge at 4-1/4″ and fold in half.
Step 2: Cut a 4″ x 5-1/4″ piece of mustard diamond grid designer paper. Mount on the front of the card.
Step 3: Cut a 4″ x 4″ piece of Black Solid Cardstock. Align one side in the Border Maker housing with the Zebra Stripe Border Maker Cartridge inserted. Punch once. Repeat on each of the sides. Mount on the middle of the card.
Step 4: Adhere 4″ sections of a bamboo stalks border sticker along the top and bottom of the black piece. Add the hearts embellishment.
Will you be making any of these zoo themed scrapbooking projects with zebra stripe designs? What layouts and crafts have you made with the Zebra Stripe BMC? Comments below with your thoughts and project ideas with us and others!

[…] just love the What a Zoo, Too borders from the CM Blog! They have been on my “Gotta Make That!” list for a while and I […]