November 3, 2022
Sprinkle Your Sweet Memories With This Birthday Scrapbook Layout
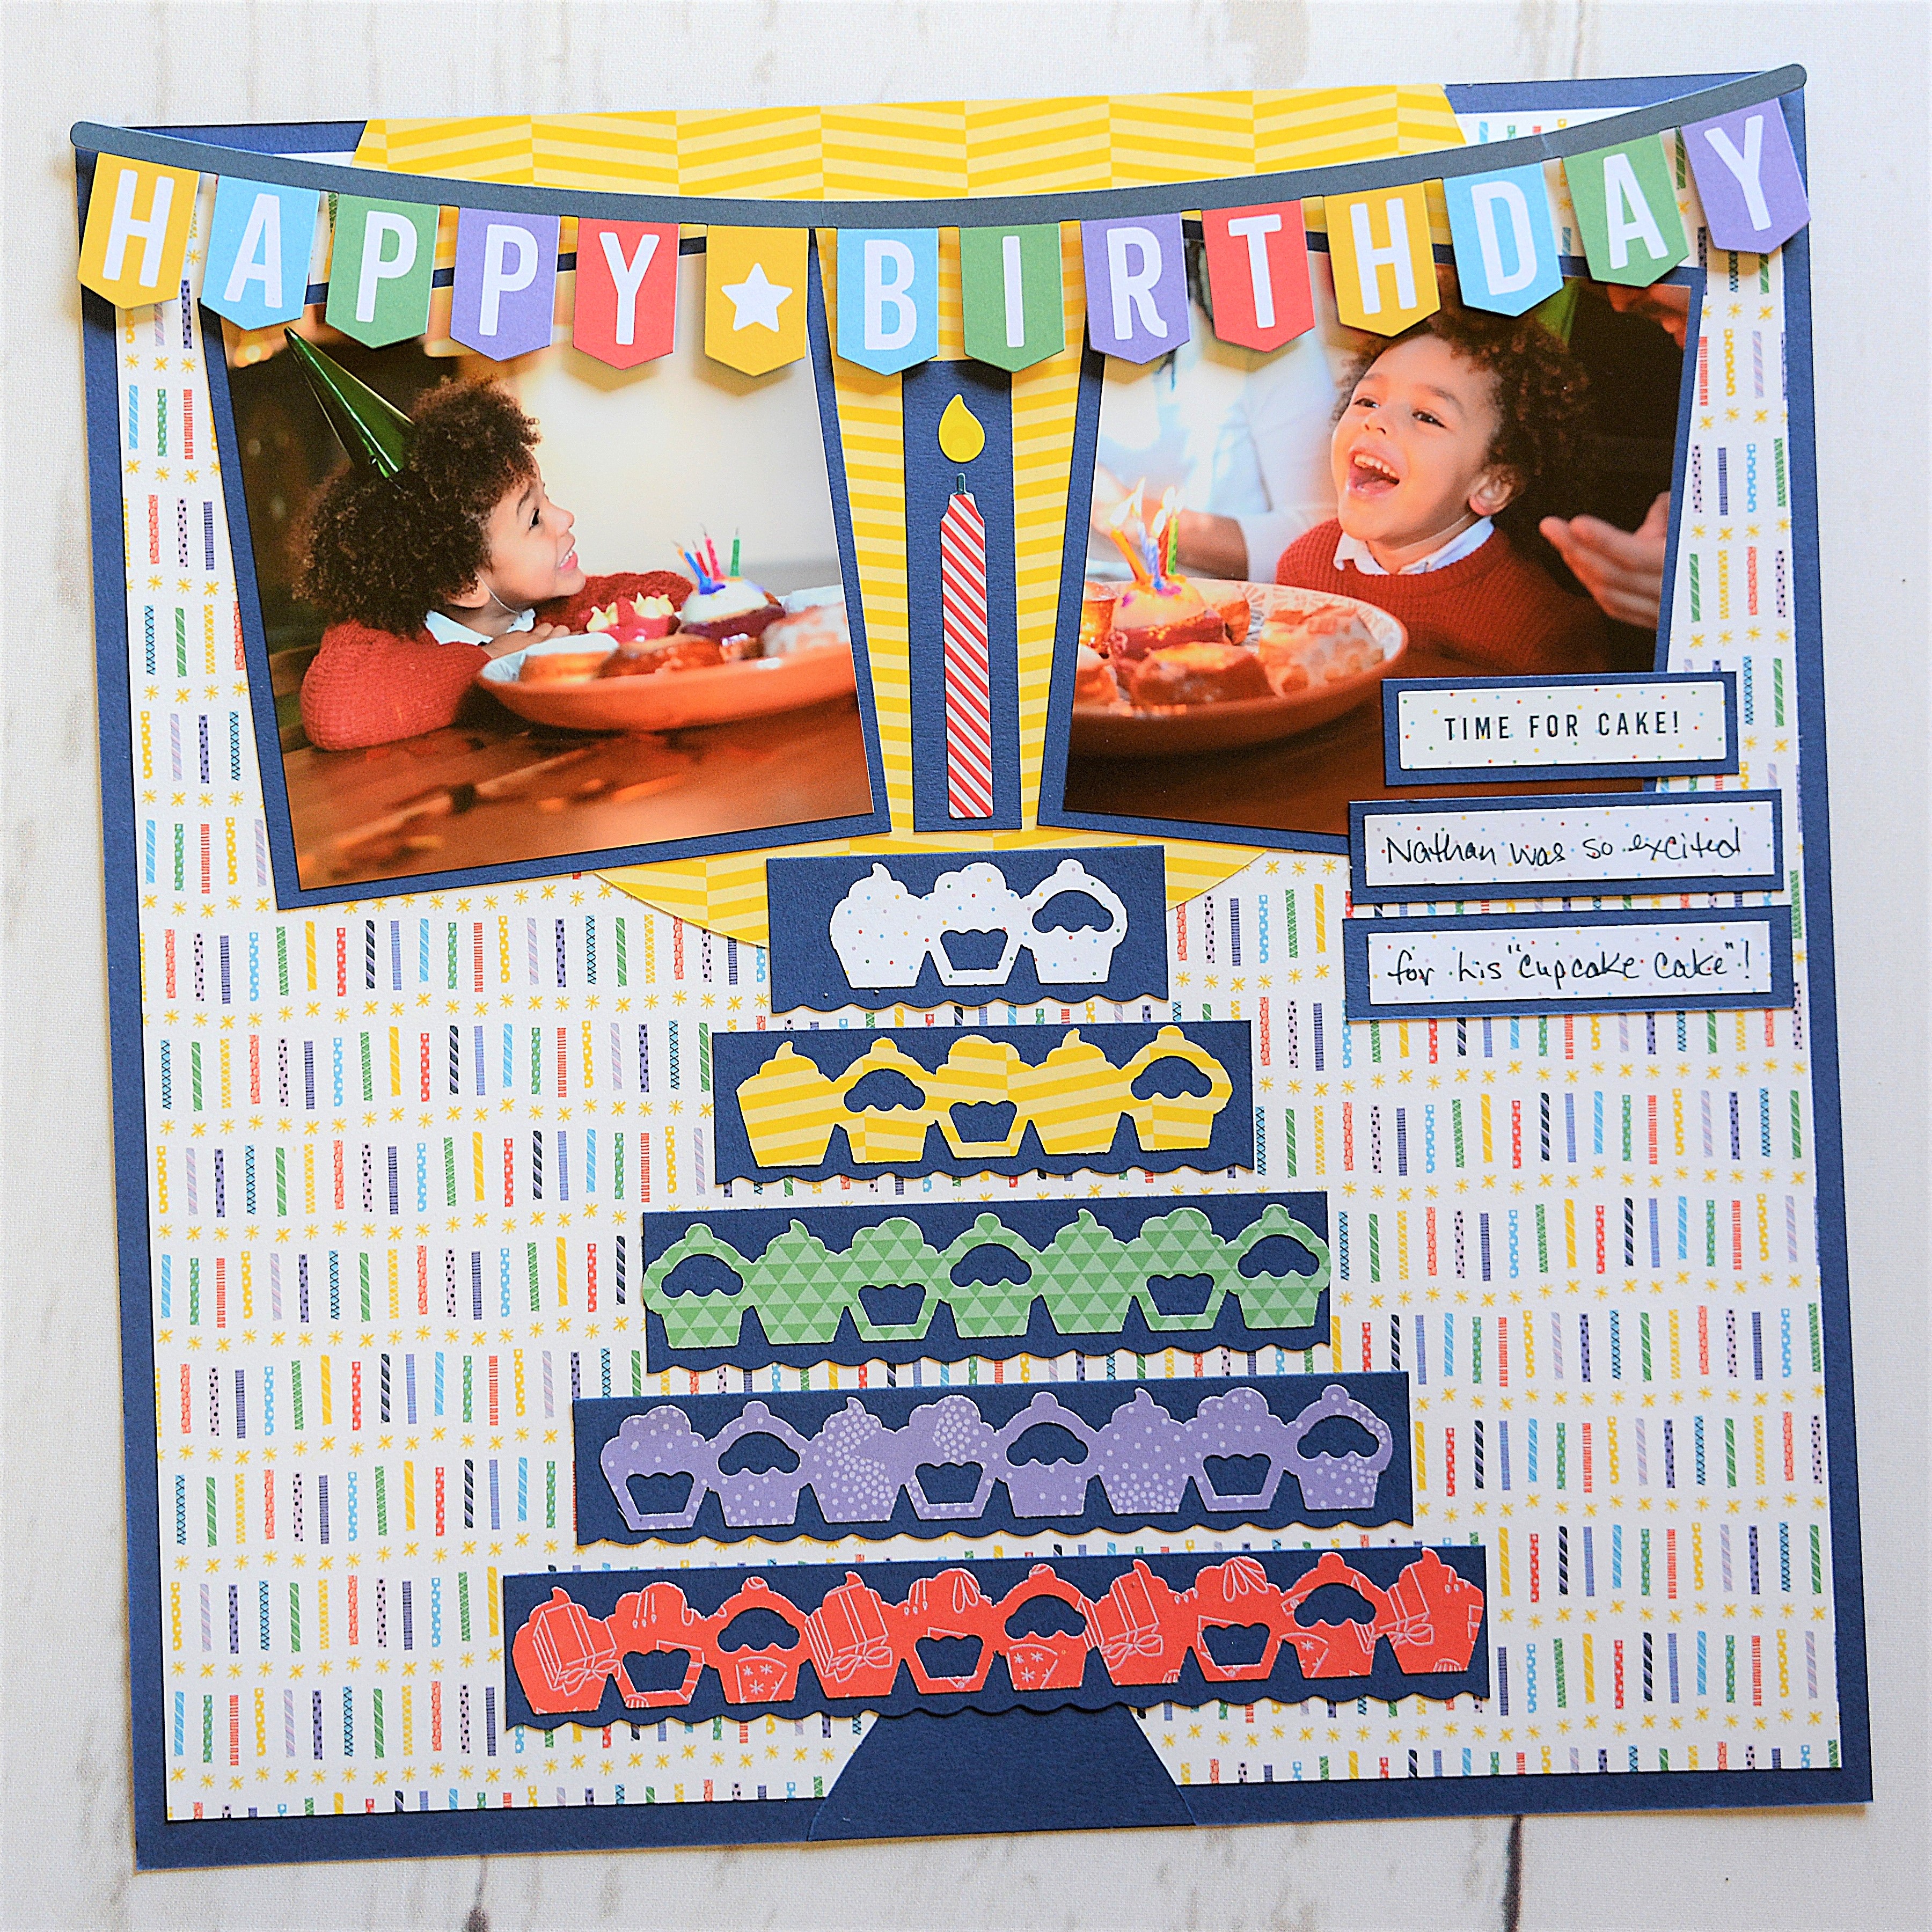
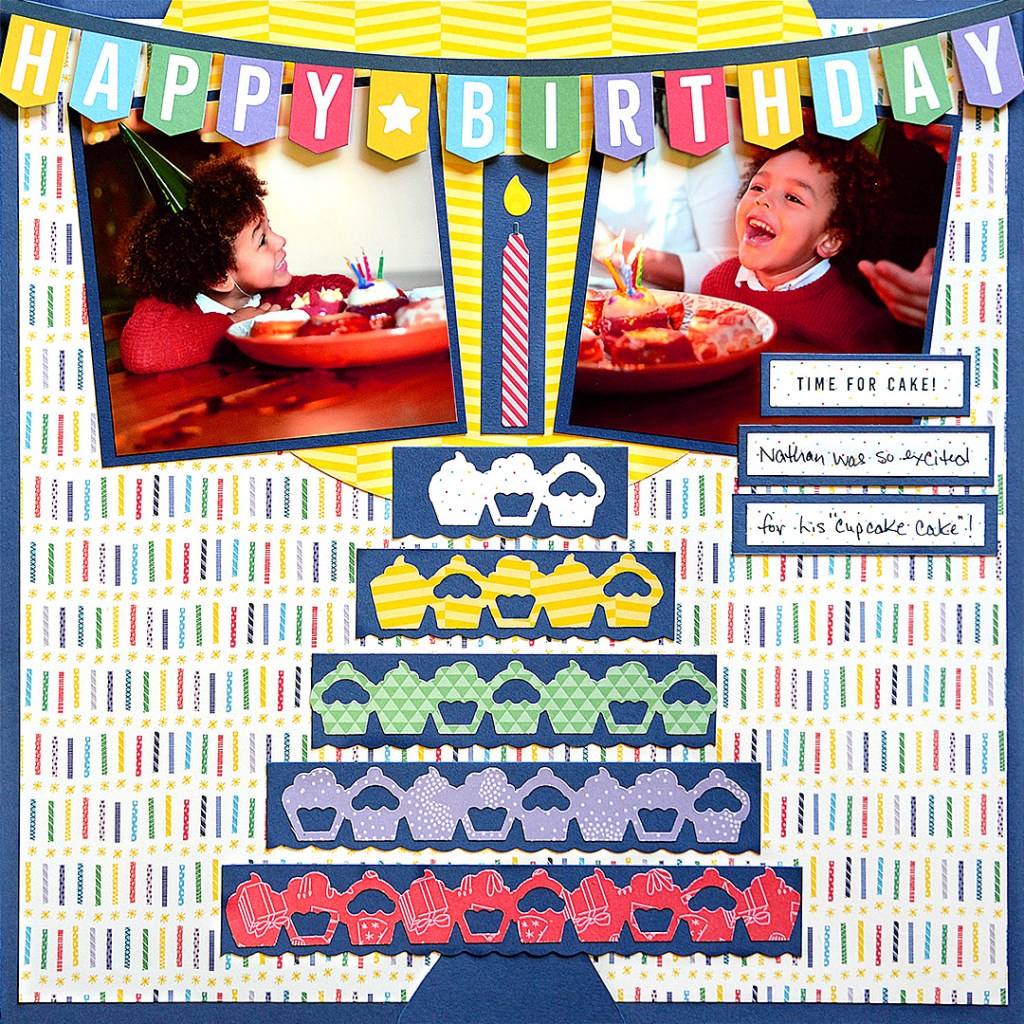
Bring on the fun… and funfetti, for today we’re all about birthday bonanzas, craveable cupcakes and wonderful wishes. And to treat your sweet memories (like sprinkles on top of the dessert!) here’s a birthday scrapbook layout that celebrates that special someone!
Psst, speaking of birthdays, make sure to check out CM’s Birthday Week promo — it’s about to go out like the birthday boy or girl blowing out their candle, for it ends TOMORROW!
For more details, visit: US | CA | AU
To create this layout you’ll need:
- Party Time! Bright Paper Pack or (Shop Canada | Shop Australia)
- Party Time! Stickers or (Shop Canada | Shop Australia)
- Party Time! Border Stickers or (Shop Canada | Shop Australia)
- Celebration Laser Cut Borders — NOTE: These borders were part of the initial Birthday Week Bundle and are OOS; feel free to use the Party Time! Border Stickers instead. (Shop Canada | Shop Australia)
- Blue Solid Cardstock or (Shop Canada | Shop Australia)
- 12-inch Trimmer with Straight & Scallop Blades or (Shop Canada | Shop Australia)
- Special-Edition Original Border Maker System with the Frosted Cupcake Chain Cartridge or (Shop Canada | Shop Australia)
- Custom Cutting System with Jumbo Circle & Gemstone Patterns or (Shop Canada | Shop Australia)
- Micro-Tip Scissors (Shop Canada | Shop Australia)
- Repositionable Tape Runner or (Shop Canada | Shop Australia)
- Foam Squares or (Shop Canada | Shop Australia)
- Navy Dual-Tip Pen or (Shop Canada | Shop Australia)

Step 1: Cut a 1″ hollow frame from a sheet of Blue Solid Cardstock. Cut candles bright paper to 11-1/2″ x 11-1/2″ and adhere to the hollow frame.
Step 2: Using the inside edge of the Jumbo Circle Custom Cutting System Pattern and Blue Blade, cut a circle from yellow diagonal bright paper. Trim circle to 6″ and adhere to the top of the layout as shown.
Step 3: Using the inside edge of the diamond Gemstone Custom Cutting System Pattern and Red Blade, cut a diamond from Blue Solid Cardstock. Trim the diamond to 1-3/4″ high. Adhere to the bottom-middle of the layout.
Step 4: Use the 12-inch Trimmer with the Scallop Blade to cut three 1″ strips with a scallop on the long edge. Trim strips to 6-3/4″, 5-3/4″, 4-3/4″, 3-3/4″ and 2-3/4″. Adhere the pieces as shown on the layout.

Step 5: Use the Original Border Maker System with the Frosted Cupcake Chain Border Maker Cartridge to punch borders from red birthday icons, purple speckly stars, green triangles, yellow diagonal and white confetti dots bright papers. Use Micro-Tip Scissors to trim to strips with 10, 8, 7, 5 and 3 cupcakes. Adhere the cupcake border pieces to the blue strips.
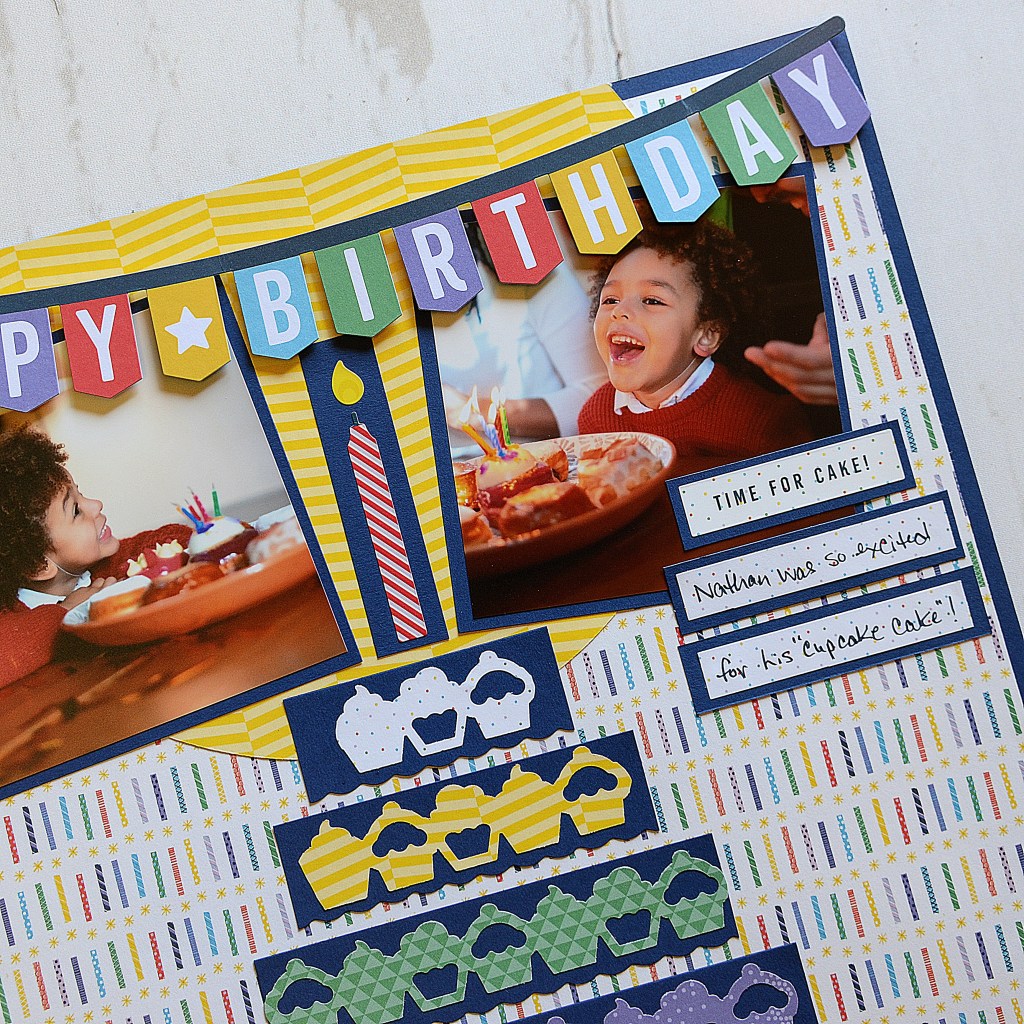

Step 6: Cut a 3/4″ x 3-1/4″ piece from Blue Solid Cardstock and adhere to the top of the cupcake tower. Adhere a birthday candle sticker to the piece.
Step 7: From Blue Solid Cardstock, cut two photo mats to 4-1/4″ x 4-1/4″. Crop photos to 4″ x 4″, adhere to the mats and adhere to the layout as shown.
Step 8: Add a laser-cut border with Foam Squares.
Step 9: Cut a 2-1/2″ x 3/4″ strip from Blue Solid Cardstock. Adhere a title sticker and adhere to the layout. Cut 3″ x 3/4″ strips from Blue Solid Cardstock and 2-3/4″ x 1/2″ pieces from white confetti dots bright paper. Adhere to the blue mats and adhere to the layout. Journal.
Do you liked the tiered cupcake design on this birthday scrapbook layout?

These are so cute! Definitely saving this blog for next yaer.