November 9, 2022
They’re A Piece Of Cupcake To Make: Birthday Scrapbook Borders And DIY Card

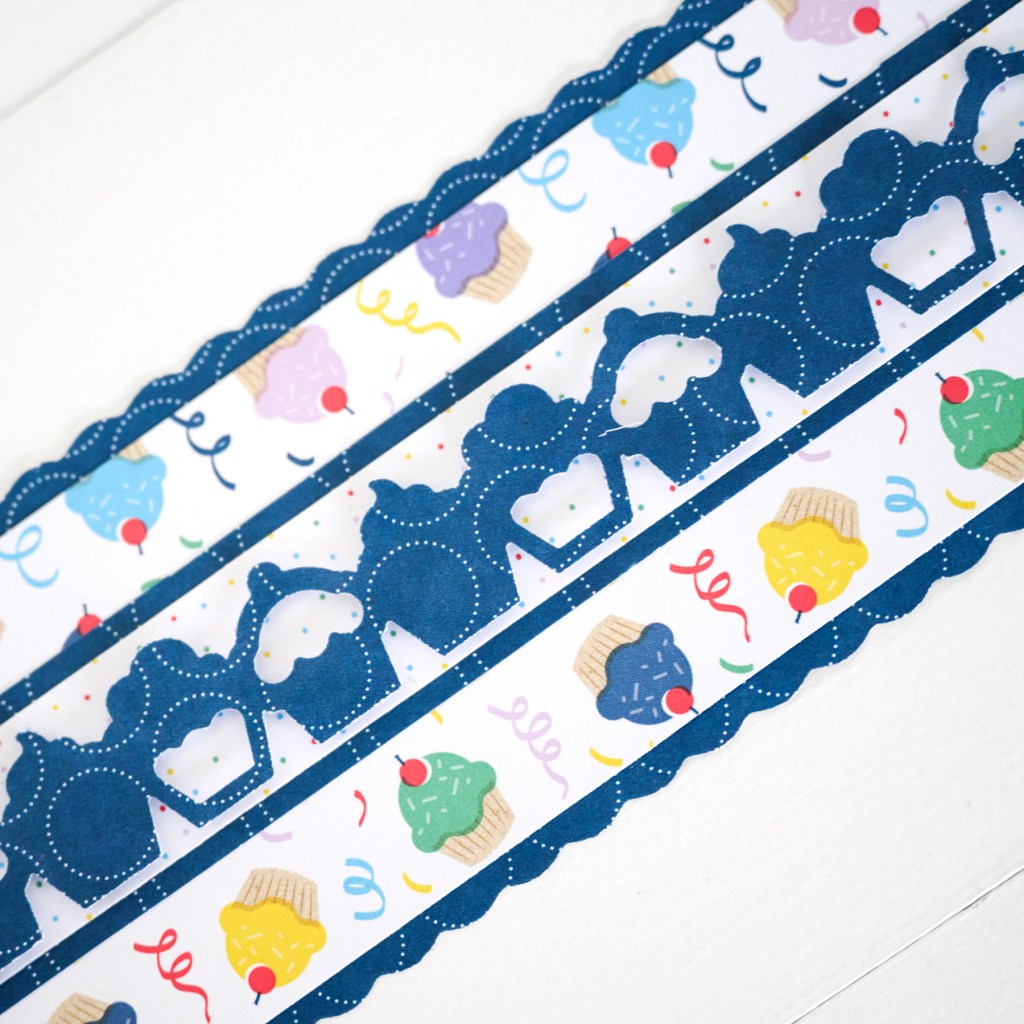
Who’s hungry for a cupcake… or some cupcake borders?! Pint-sized morsels in an array of tastes — chocolate, vanilla, red velvet, banana, peanut butter, lemon — just as scrapbooking borders can come in an array of sensations and styles too! Ready to get your party hat on? Then take on these cupcake birthday scrapbook borders now!
To create these borders and card, you will need:
- Party Time! Bright Paper Pack or (Shop Canada | Shop Australia)
- Party Time! Blue Paper Pack (12/pk) or (Shop Canada | Shop Australia)
- Party Time! Stickers or (Shop Canada | Shop Australia)
- Island Waters, Soft Pink & Purple Ice Solid Cardstocks or (Shop Canada | Shop Australia)
- Blank Card Kit or (Shop Canada | Shop Australia)
- Special-Edition Original Border Maker System — includes the the limited-time Frosted Cupcake Chain Border Maker Cartridge or (Shop Canada | Shop Australia)
- 12-inch Trimmer with Straight & Scallop Blades or (Shop Canada | Shop Australia)
- Micro-Tip Scissors or (Shop Canada | Shop Australia)
- Foam Squares or (Shop Canada | Shop Australia)
- Tape Runner or (Shop Canada | Shop Australia)
- Precision Point Adhesive Pen or (Shop Canada | Shop Australia)
- Navy Dual-Tip Pen or (Shop Canada | Shop Australia)

Surprise! Border

Step 1: Using the 12-inch Trimmer and the Scallop Blade, cut navy blue dotted circles paper to 12″ x 3″.
Step 2: Cut sprinkled cupcakes bright paper to 12″ x 2-1/2″ and adhere to the navy blue strip.
Step 3: Cut navy blue dotted circles paper to 12″ x 1-1/4″ and adhere to the middle of the border.
Step 4: Cut white confetti dots bright paper to 12″ x 1″ and adhere to the middle of the border.
Step 5: Use the Original Border Maker System with the Frosted Cupcake Border Maker Cartridge to punch a border from navy blue dotted circles paper. Adhere to the middle of the border using Foam Squares for added dimension.
Step 6: Add stickers.
Happy Birthday Border

Step 1: Use 12-inch Trimmer with the Scallop Blade to cut a 2-3/4″ x 12″ strip from Island Waters Solid Cardstock.
Step 2: Use 12-inch Trimmer with the Scallop Blade to cut a 2-1/2″ x 12″ strip from Soft Pink Solid Cardstock. Adhere to the island waters strip.
Step 3: Cut “Happy Birthday” paper to 2-1/4″ x 12″ and adhere to the border.
Step 4: Use the Original Border Maker System with the Frosted Cupcake Chain Border Maker Cartridge to punch borders from Island Waters, Purple Ice and Soft Pink Solid Cardstocks.
Step 5: Use Micro-Tip Scissors to cut apart the island waters and purple ice borders into segments of three cupcakes.
Step 6: Adhere the border segments to the border as shown.
Step 7: Use the Precision Point Adhesive Pen to adhere the punch debris from the soft pink border to the cupcakes on the border.
Step 8: Use the Navy Micro-Tip Pen to add details to the border as shown.
Cupcake Card

Step 1: Cut “Happy Birthday” paper to 5-1/2″ x 4-1/4″ and adhere to a blank card from the Blank Card Kit as the base.
Step 2: Cut blue confetti dots paper to 5″ x 3-3/4″ and adhere to the middle of the card.
Step 3: Trim a cupcakes border sticker and adhere to the middle of the card.
Step 4: Use the Original Border Maker System with the Frosted Cupcake Border Maker Cartridge to punch a border from Purple Ice Solid Cardstock.
Step 5: Use Micro-Tip Scissors to cut the purple ice border apart into ~ 5″ segments. Adhere the segments to the top and bottom of the cupcake border sticker as shown.
Step 6: Add stickers with Foam Squares.
Will you be making these birthday scrapbook borders? Will you be sending this DIY card for your next birthday recipient?

Someone from creative memories made it possible for me to log in without problems . I can’t believe this is happening again!!!!!!!!