March 14, 2023
An Ode To Opulence: Brocade Border Ideas For Scrapbooking

Brocade is an ornate fashion trend that has stood the test of time, originating from the Middle Ages. It’s a decorative fabric that is shuttle-woven with a raised pattern, typically featuring silver or gold thread, which exudes a feeling of timeless elegance and luxuriousness. Inspired by this stylish, scrolly sentiment, the Brocade Chain Border Maker Cartridge can make your special moments (think milestone anniversaries, dinner parties, prom, black-tie weddings and more) dress to the nines with ease. Make a fashion statement frenzy in a flash with these brocade border ideas for scrapbooking!
To create these borders you will need:
- Silver & Gold Tone-on-Tone Paper Pack or (Shop Canada | Shop Australia)
- Silver & Gold Foiled Accent Paper Pack or (Shop Canada | Shop Australia)
- Silver & Gold Foiled Border Stickers or (Shop Canada | Shop Australia)
- Silver & Gold Foiled & Layered Embellishments or (Shop Canada | Shop Australia)
- Black Shimmer, Bronze Shimmer, Platinum Shimmer & White Shimmer Solid Cardstocks or (Shop Canada | Shop Australia)
- Original Border Maker System with Brocade Chain Cartridge or (Shop Canada | Shop Australia)
- 12-inch Trimmer or (Shop Canada | Shop Australia)
- Micro-Tip Scissors or (Shop Canada | Shop Australia)
- Tape Runner or (Shop Canada | Shop Australia)
- Repositionable Tape Runner or (Shop Canada | Shop Australia)
- Foam Squares or (Shop Canada | Shop Australia)

Loved & Blessed Border
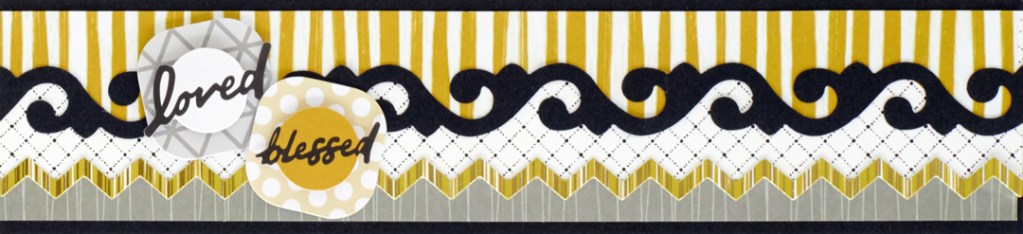
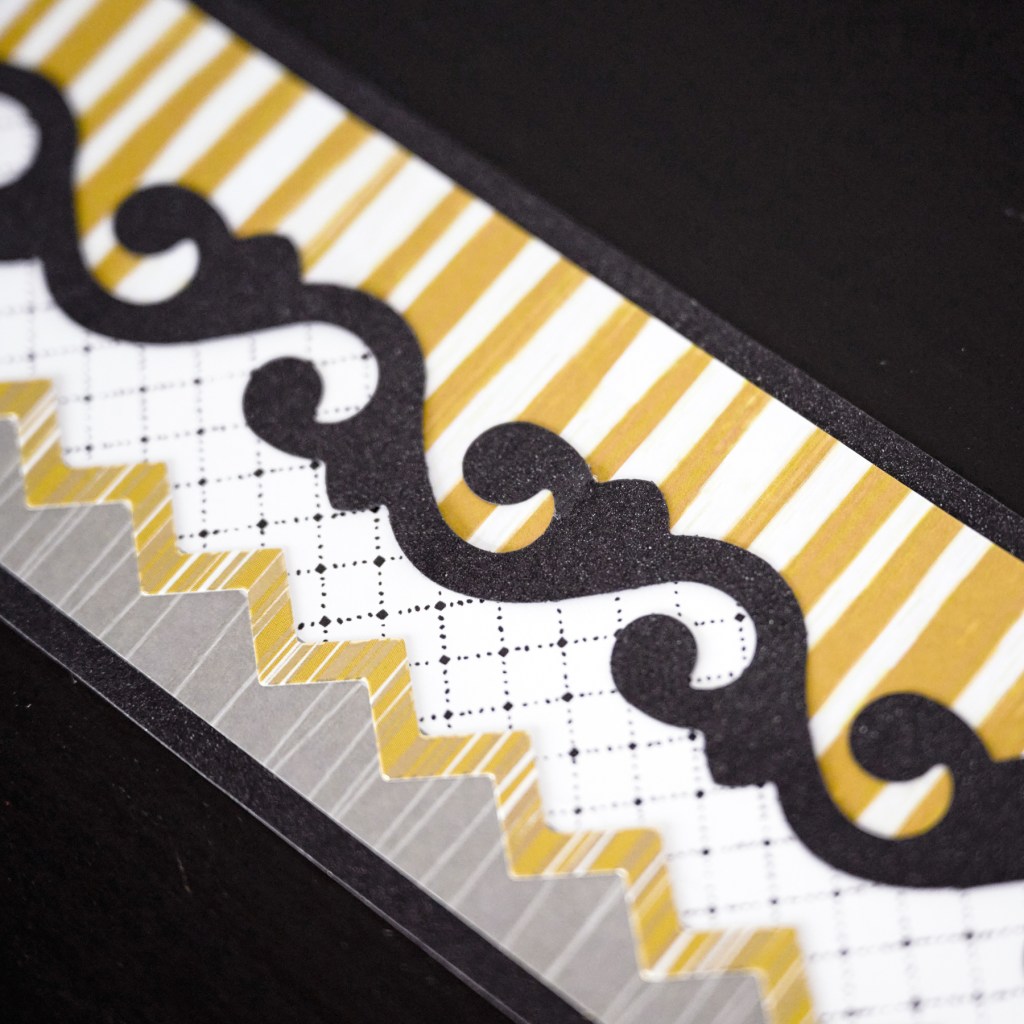
Step 1: Cut a 12″ x 2-3/4″ strip with Black Shimmer Solid Cardstock for the base. Cut a 12″ x 2-1/2″ piece with diagonal grid tonal paper and adhere to the base.
Step 2: Using the Brocade Chain Border Maker Cartridge, punch a border with Black Shimmer Solid Cardstock. Cut a 12″ x 1-1/4″ strip with brushstroke stripes accent paper. Place the border on top and cut away small pieces of paper that show on the underside of the border. Adhere the pieces on the top of the border.
Step 3: Cut a 12″ x 1/2″ strip with slate thin stripes accent paper and adhere on the bottom of the border. Adhere a zigzag border sticker on top.
Step 4: Add embellishments.
Love Border

Step 1: Cut a 12″ x 2-1/”” strip with Black Shimmer Solid Cardstock for the base. Cut a 12″ x 2-1/4″ piece with ikat zigzag accent paper and adhere on the base.
Step 2: Using the Brocade Chain Border Maker Cartridge, punch two borders with Black Shimmer Solid Cardstock. Cut a 12″ x 1″ strip with gold diamond dashes accent paper. Wind the borders around the strip as shown. Adhere on the border.
Step 3: Add embellishments.
Live Joyfully Border

Step 1: Cut a 3″ x 12″ strip with gold ikat zigzag tonal paper for the base. Cut a 2″ x 12″ strip with black cascading asterisk accent paper and adhere on the left side of the base. Adhere a hearts border sticker along the right side of the base.
Step 2: Using the Brocade Chain Border Maker Cartridge, punch a border with each White Shimmer and Platinum Shimmer Soldi Cardstocks. Arrange and adhere together so that they form “hearts.” Cut 1″ squares with gold dotted circles tonal paper and adhere behind the hearts. Mount the piece on the border.
Step 3: Add an embellishment.
Make A Toast Border

Step 1: Cut a 12″ x 2-3/4″ strip with slate damask tonal paper for the base. Cut a 2-1/4″ x 11-1/2″ strip with Black Shimmer Solid Cardstock and adhere on the base. Cut a 2″ x 11-1/4″ strip with gold outline damask accent paper and mount on top.
Step 2: Cut a 2″ x 12″ strip with Bronze Shimmer Solid Cardstock. Turn the border maker housing upside down. Insert a 2″ end into the border maker, align to the middle and punch. Repeat until you have eight 2″ pieces. Adhere the pieces on the border as shown.
Step 3: Add an embellishment.
Do you like the luxurious and elegant looks of these brocade border ideas for scrapbooking?
P.S. Are YOU a member of the Virtual Crop Facebook Group? It’s your go-to place for MONTHLY Virtual Crops, MONTHLY Completed Album Challenges, WEEKLY LIVE STREAMING of Fast & Fun Projects with Noreen, LIVE QUARTERLY Secret Box Openings with project tutorials and so much more! We hope you’ll join our community of more than 30,000 fellow memory-keeping enthusiasts — you’ll feel right at home!

Krislyn, These are spectacular! I do not have a Border Maker system, but this could easily sway me into buying the set. My hubby and I celebrate our 50th anniversary this year. . . .