March 20, 2023
Handmade Hues For You: Tonal Scrapbook Borders and DIY Cards
Let’s be honest: Handmade is best. Quilts, candles, wall art, wreaths, metalwork… the list goes on and we love (and appreciate!) the handiwork that needs to go into it. Well, that homemade, heartfelt happiness just got easier with the latest promo by making scrapbook borders and DIY cards a breeze!
For a limited time, you can earn exclusive rad and really cool gifts — the Borders & Cards Recipe Template (hello, endless borders and card creations!), Rainbow Blank Card Kit (hue-tiful and heartfelt sendings) and How-Do-You-Do Warm & Cool Stickers (a dynamic duo of delights!) — FREE with qualifying orders! And, for any quantity you earn, you can choose exactly which gift(s) you would like to get free! To share the good vibes, you need to keep reading on to get six (YES, six!) project ideas using the exclusive gifts so you can see them in action!
For details, visit: US | CA | AU


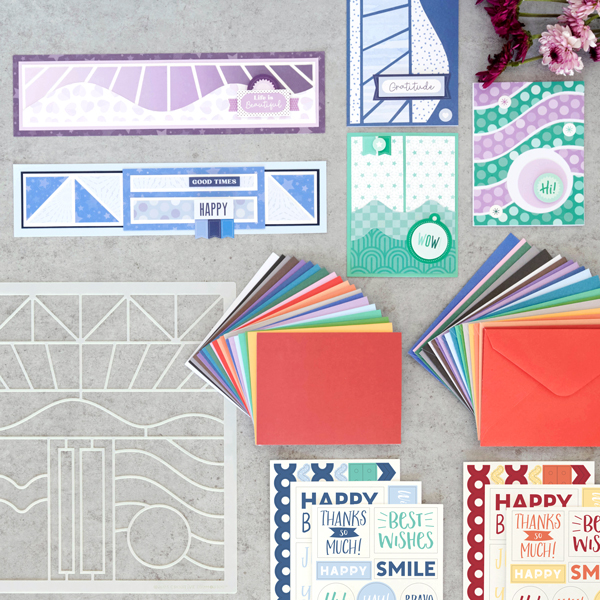
To create these borders and cards you will need:
- Borders & Cards Recipe Template & Rainbow Blank Card Kit — exclusive gifts you can earn FREE during the spend/get promo through March 28 or while supplies last!
- Totally Tonal Island Waters, Baby Blue & Purple Ice Paper Packs & Stickers or (Shop Canada | Shop Australia)
- Island Waters, Baby Blue, Purple Ice, Blue, Navy & White Solid Cardstocks or (Shop Canada | Shop Australia)
- Custom Cutting System with Circle Patterns or (Shop Canada | Shop Australia)
- 12-inch Trimmer with Straight & Scoring Blades or (Shop Canada | Shop Australia)
- Micro-Tip Scissors or (Shop Canada | Shop Australia)
- Tape Runner or (Shop Canada | Shop Australia)
- Repositionable Tape Runner or (Shop Canada | Shop Australia)
- Foam Squares or (Shop Canada |
- CM Zero-Centering Ruler or (Shop Canada | Shop Australia)
- Pencil

Life Is Beautiful Border

Step 1: Cut a 12″ x 3-1/4″ strip with stars paper for the base. Cut an 11-1/2″ x 2-3/4″ strip with Purple Ice Solid ardstock and adhere on the base. Cut an 11-1/4″ x 2-1/2″ strip with White Solid Cardstock and mount on top.
Step 2: Using the Borders & Cards Recipe Template, trace the slanted stripe shapes on ombré paper. Cut out with scissors and adhere the shapes on the border, using the template as a guide for placement.
Step 3: Trace and cut the large wavy shape with hearts paper. Adhere on the border.
Step 4: Add stickers, popping some up with Foam Squares for added dimension.
Happy Border

Step 1: Cut a 12″ x 2-3/4″ strip with Baby Blue Solid Cardstock for the base. Cut an 11-1/2″ x 2-1/4″ strip with Navy Solid Cardstock and adhere on the base. Cut an 11-1/4″ x 2″ strip with White Solid Cardstock and mount on top.
Step 2: Using the Borders & Cards Recipe Template, trace and cut six triangles with stars and bursts papers. Adhere as shown on the border.
Step 3: Cut a 5-1/4″ x 2-1/2″ strip with stars paper. Adhere it on the border. Trace and cut bar shapes with White Solid Cardstock and bursts and polka dots papers. Adhere as shown on the border.
Step 4: Add stickers.
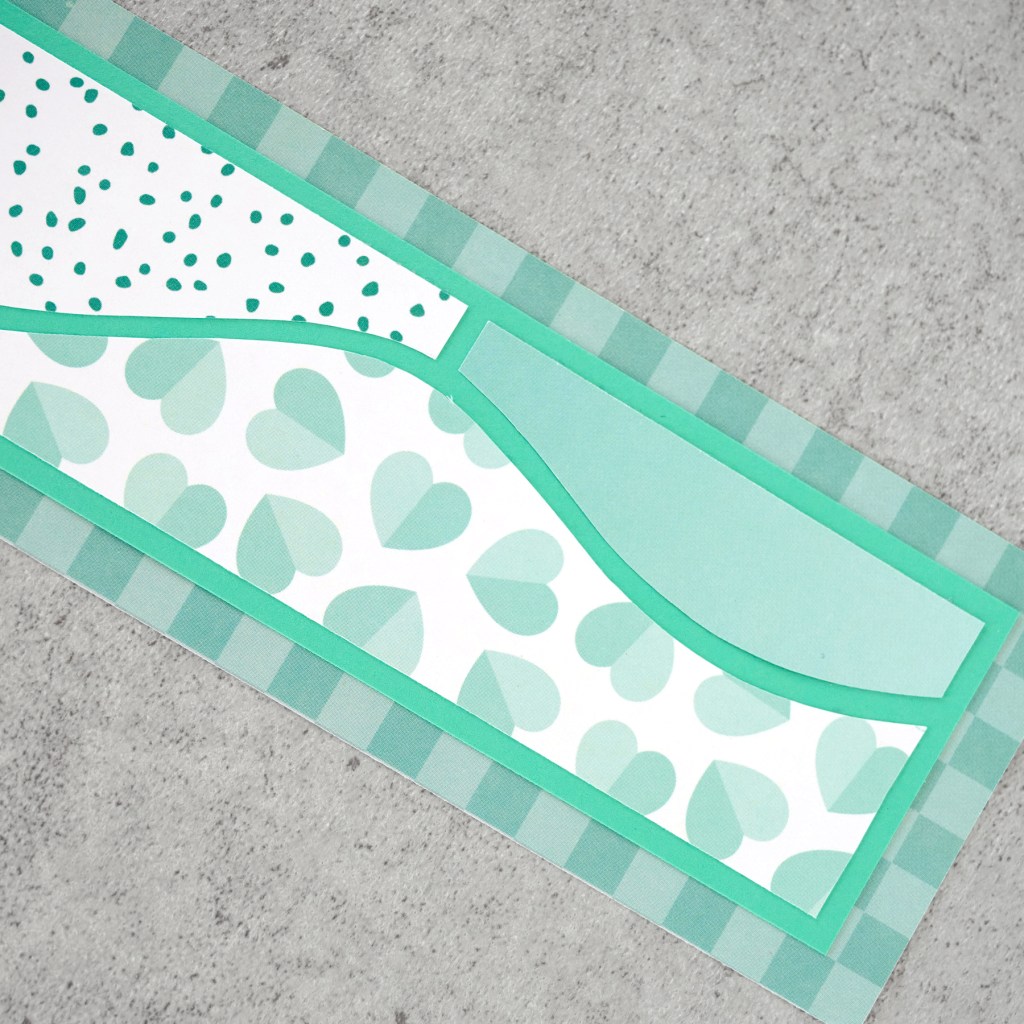
Find Your Bliss Border

Step 1: Cut a 2-1/2″ x 12″ strip with checkerboard paper for the base. Cut a 2″ x 11-1/2″ strip with Island Waters Solid Cardstock and adhere on the base.
Step 2: Using the Borders & Cards Recipe Template, trace and cut large wavy pieces with a variety of island waters papers. Adhere on the border as shown.
Step 3: Using the inside edge of the medium Circle Custom Cutting System pattern and the Red Blade, cut a circle with Island Waters Solid Cardstock. Using the Green Blade, cut a circle with speckled paper. Layer and adhere circles on the border. Top with stickers.
Hi! Card

Step 1: Create the card base. Cut an 8-1/2″ x 5-1/2″ piece of White Solid Cardstock. Using the 12-inch Trimmer and the Scoring Blade, score along the long edge at 4-1/4″ and fold in half.
- Hint: You can use the white card from the Rainbow Blank Card Kit (20/pk) for the base.
Step 2: Using the Borders & Cards Recipe Template, trace and cut diagonal wavy pieces with island waters and purple ice polka dot papers. Adhere on the card as shown.
Step 3: Using the inside edge of the medium Circle Custom Cutting System Pattern and the Green Blade, cut a circle with Purple Ice Solid Cardstock. Adhere on the card. Mount a sticker with Foam Squares for added dimension.
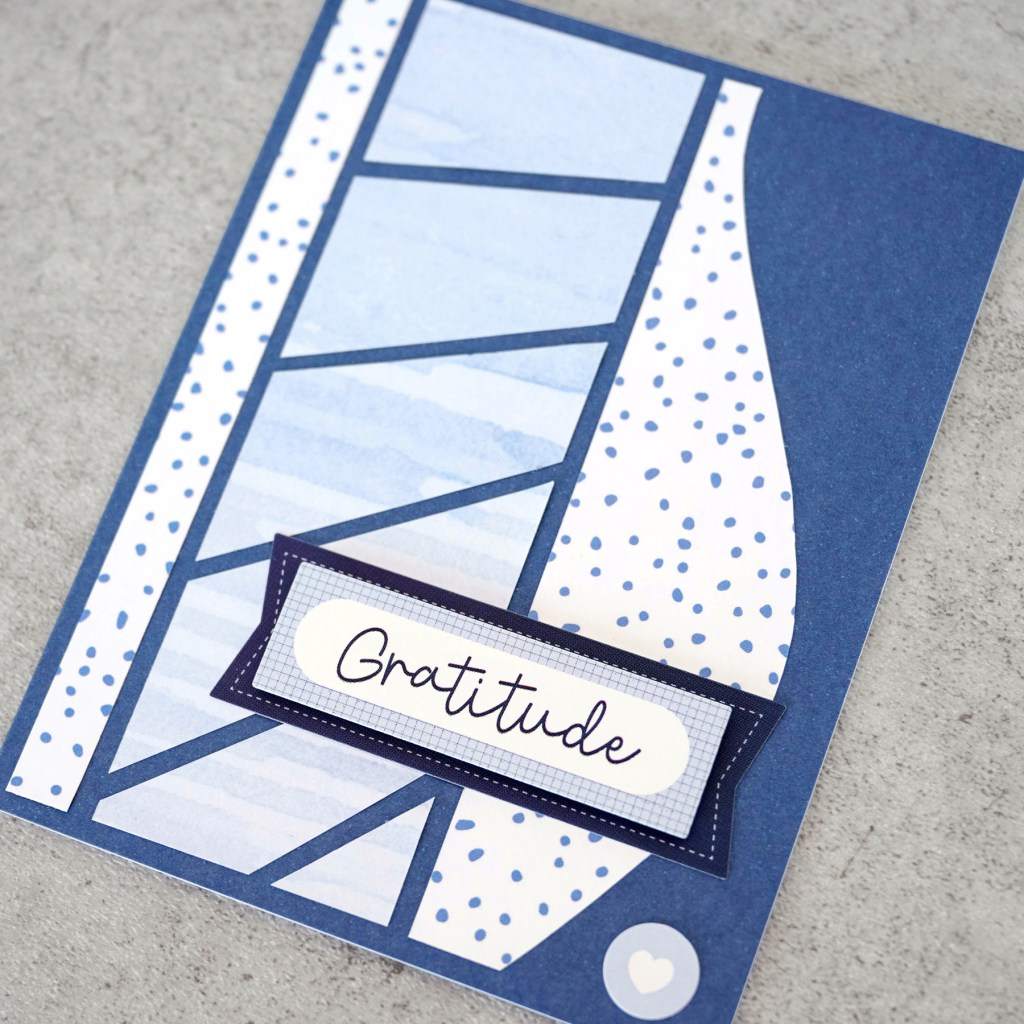
Gratitude Card

Step 1: Create the card base. Cut an 8-1/2″ x 5-1/2″ piece of Blue Solid Cardstock. Using the 12-inch Trimmer and the Scoring Blade, score along the long edge at 4-1/4″ and fold in half.
- Hint: You can use the blue card from the Rainbow Blank Card Kit (20/pk) for the base.
Step 2: Using the Borders & Cards Recipe Template, trace and cut pieces as shown with speckled and wash brushstrokes papers. Adhere on the card as shown.
Step 3: Adhere stickers using Foam Squares for added dimension.
Wow! Card
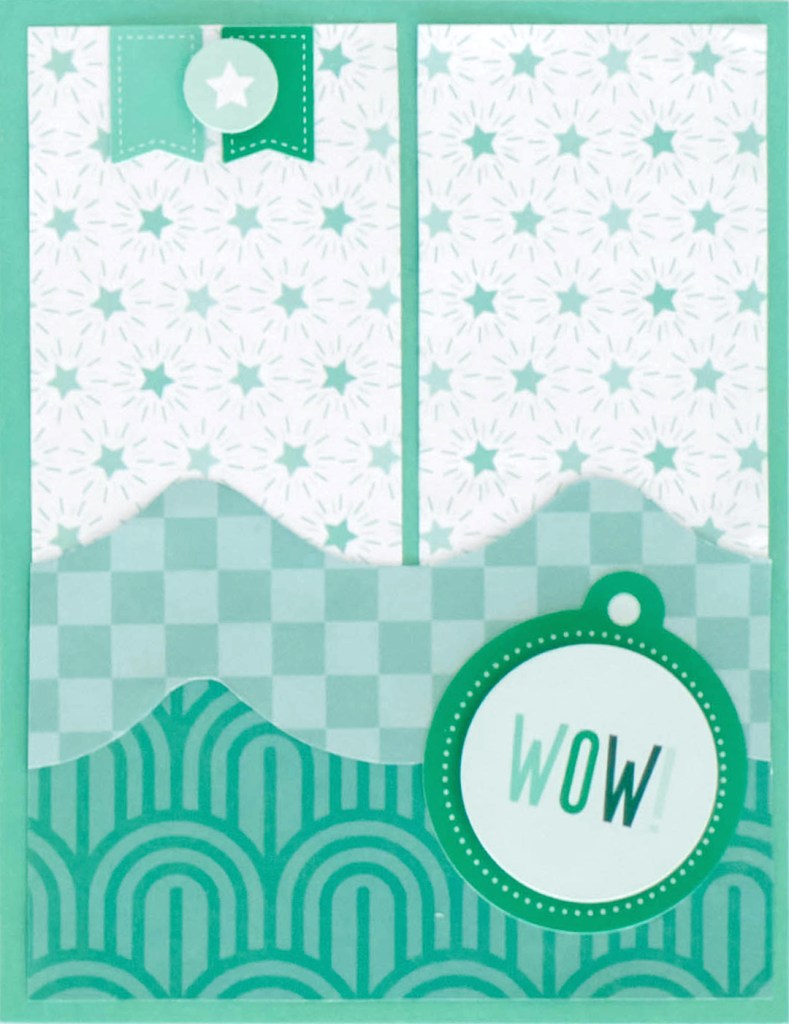
Step 1: Create the card base. Cut an 8-1/2″ x 5-1/2″ piece of Island Waters Solid Cardstock. Using the 12-inch Trimmer and the Scoring Blade, score along the long edge at 4-1/4″ and fold in half.
- Hint: You can use the aqua card from the Rainbow Blank Card Kit (20/pk) for the base.
Step 2: Using the Borders & Cards Recipe Template, trace and cut wavy banner/short wavy pieces with stars, checkerboard and arches papers. Adhere on the card as shown.
Step 3: Add stickers, popping some up with Foam Squares for added dimension.
Do you like these tonal scrapbook borders and DIY cards? What freebie will you get during the current spend/get promo?
P.S. Are YOU a member of the Virtual Crop Facebook Group? It’s your go-to place for MONTHLY Virtual Crops, MONTHLY Completed Album Challenges, WEEKLY LIVE STREAMING of Fast & Fun Projects with Noreen, LIVE QUARTERLY Secret Box Openings with project tutorials and so much more! We hope you’ll join our community of more than 30,000 fellow memory-keeping enthusiasts — you’ll feel right at home!

Borders & Cards Recipe Template is it only for the cards or can you use it on your 12×12 Scrapbooking pages?
Hi Cheryl! It’s not only for cards — you can use the template however you’d like! If you’re looking for a few tips and ideas, you can check out this week’s Fast & Fun Projects with Noreen episode!
Watch in the Virtual Crop Group: https://www.facebook.com/noreen.smith.988/videos/948420789512069?idorvanity=247845236530816
Watch on YouTube: https://www.youtube.com/watch?v=BMb7dFuj0tA/
Lovely cards and can use with lots of the other Tonal paper packs or scraps in my stash. Wondering why the Floral Peaks cartridge for the Border Maker System is included in the list of needed supplies? I don’t see it used in the examples…
Hi Katherine! Thanks for pointing that out — it was an error. We’ve updated the ingredients list!