May 16, 2023
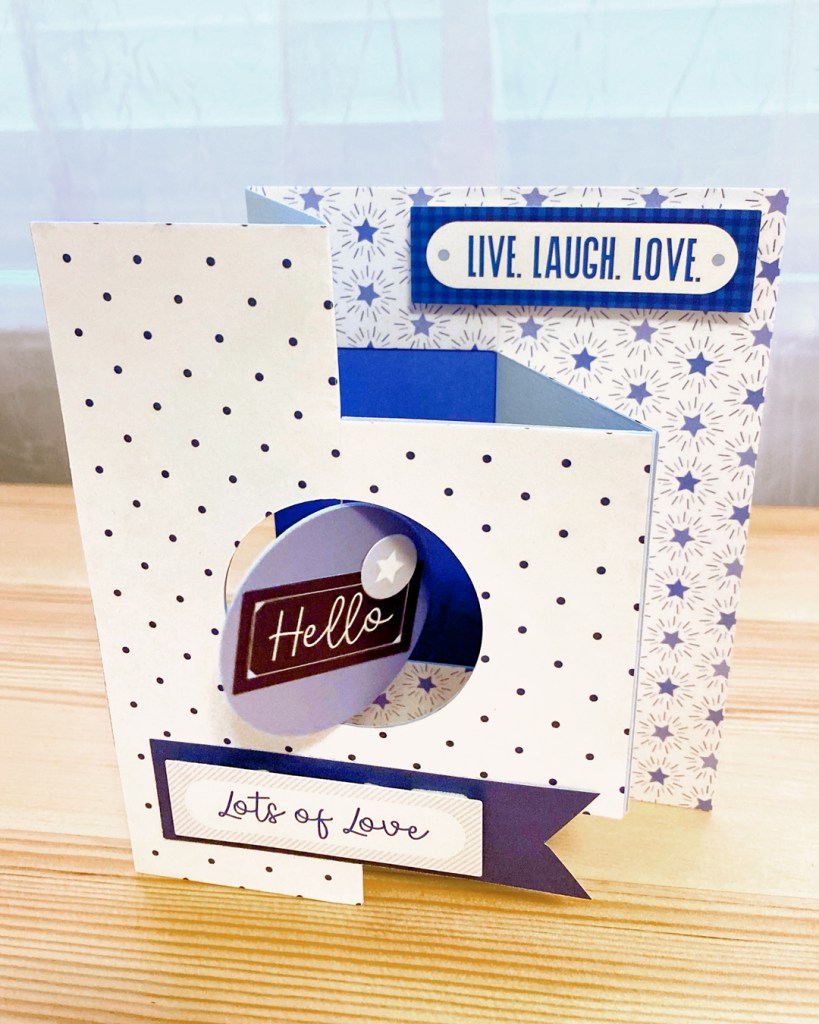
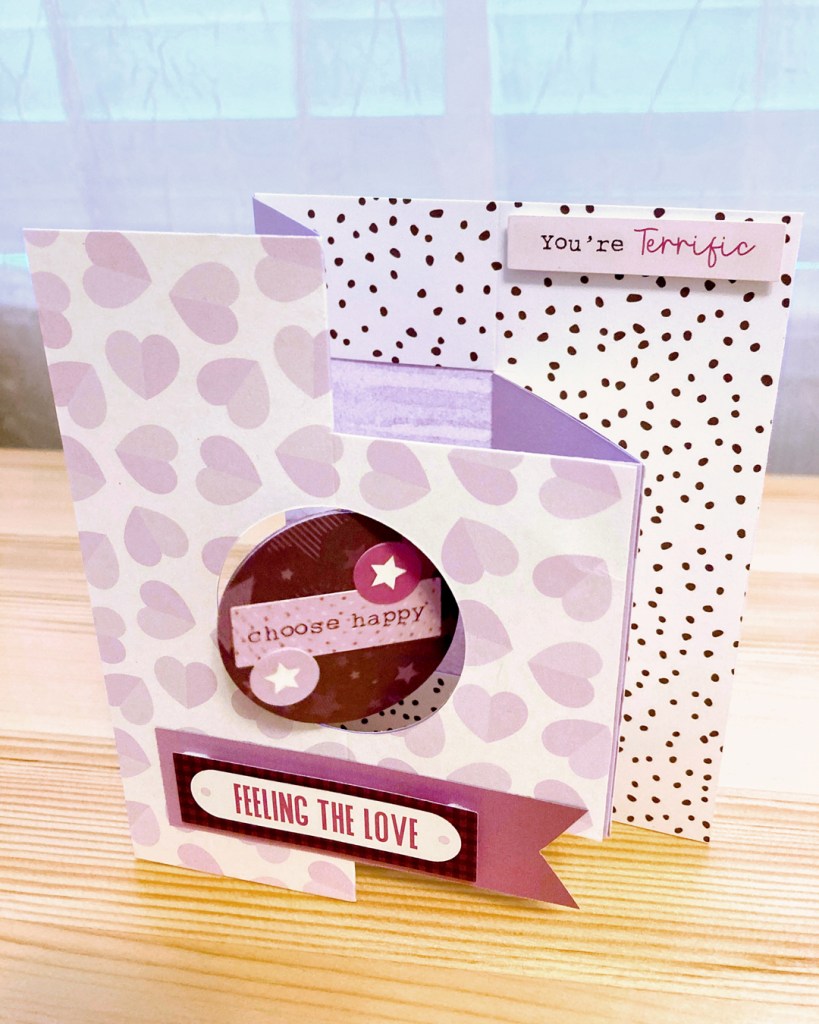
Panel Perfection: Accordion Fold Card Examples With Tonal Scrapbook Products
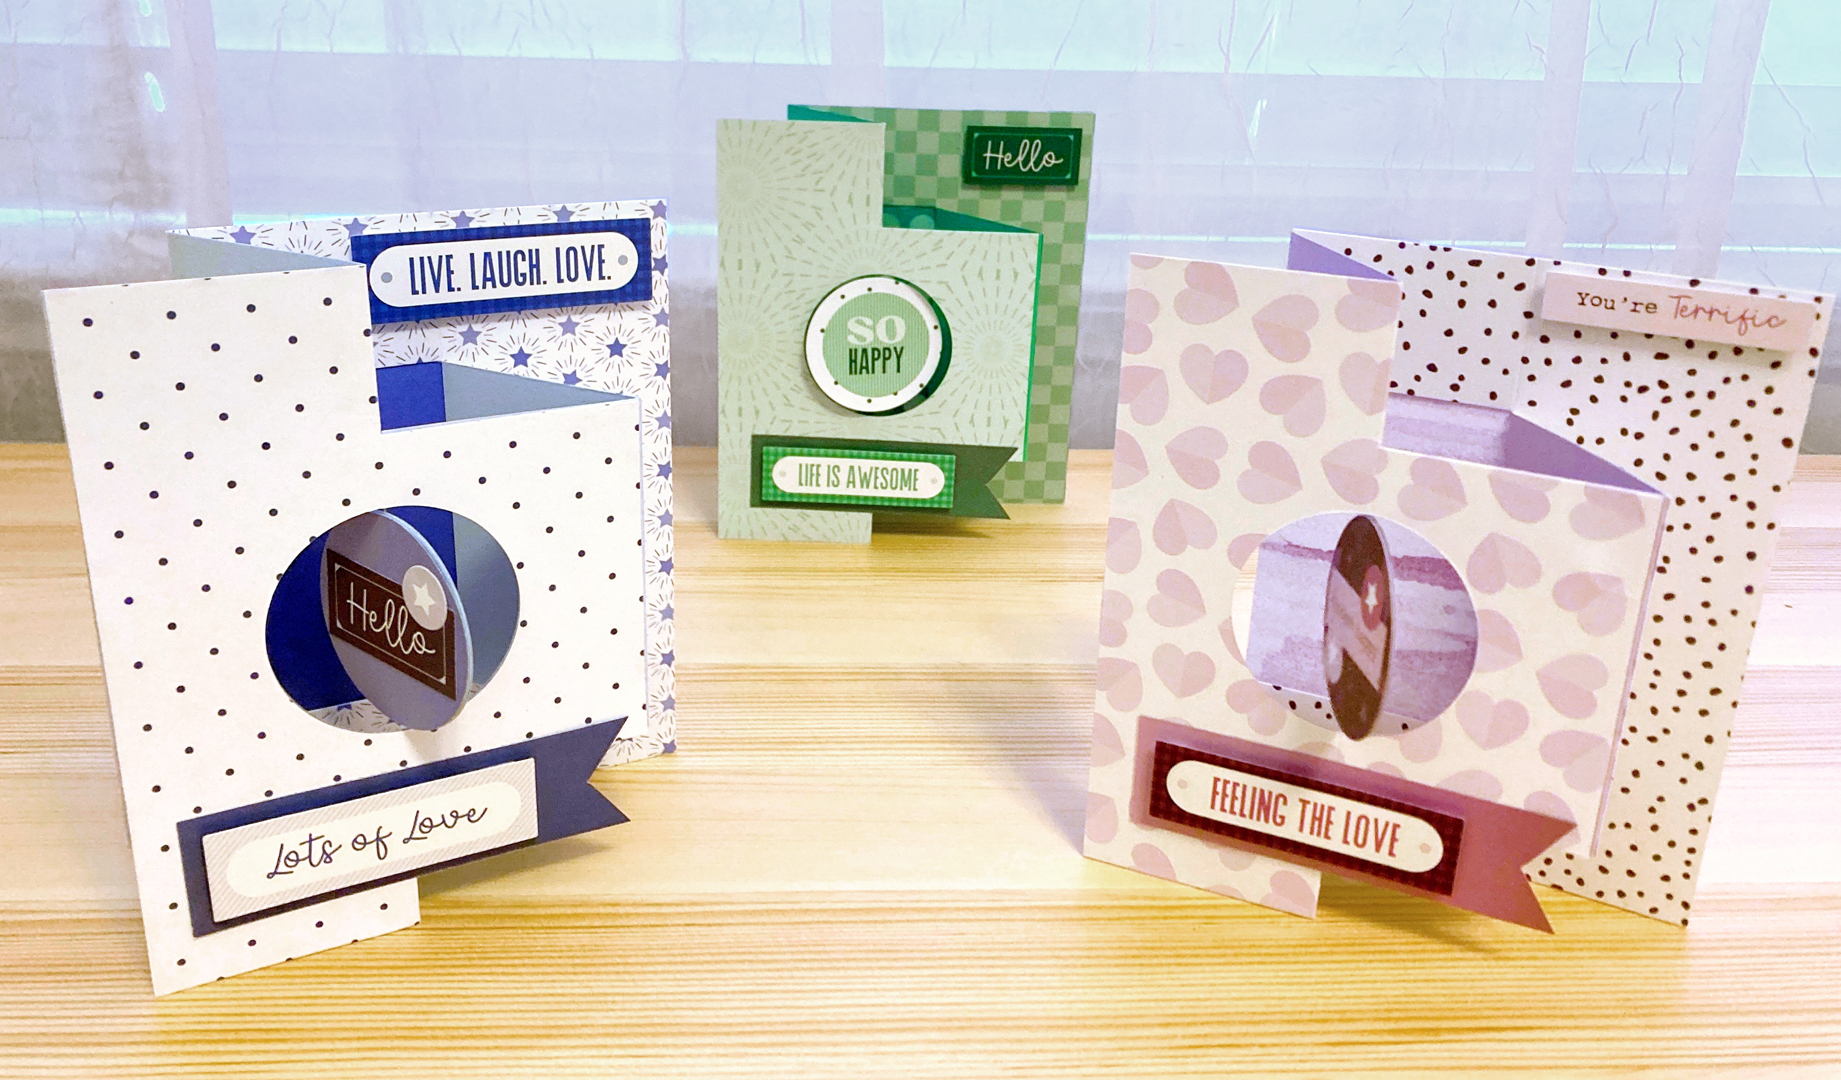
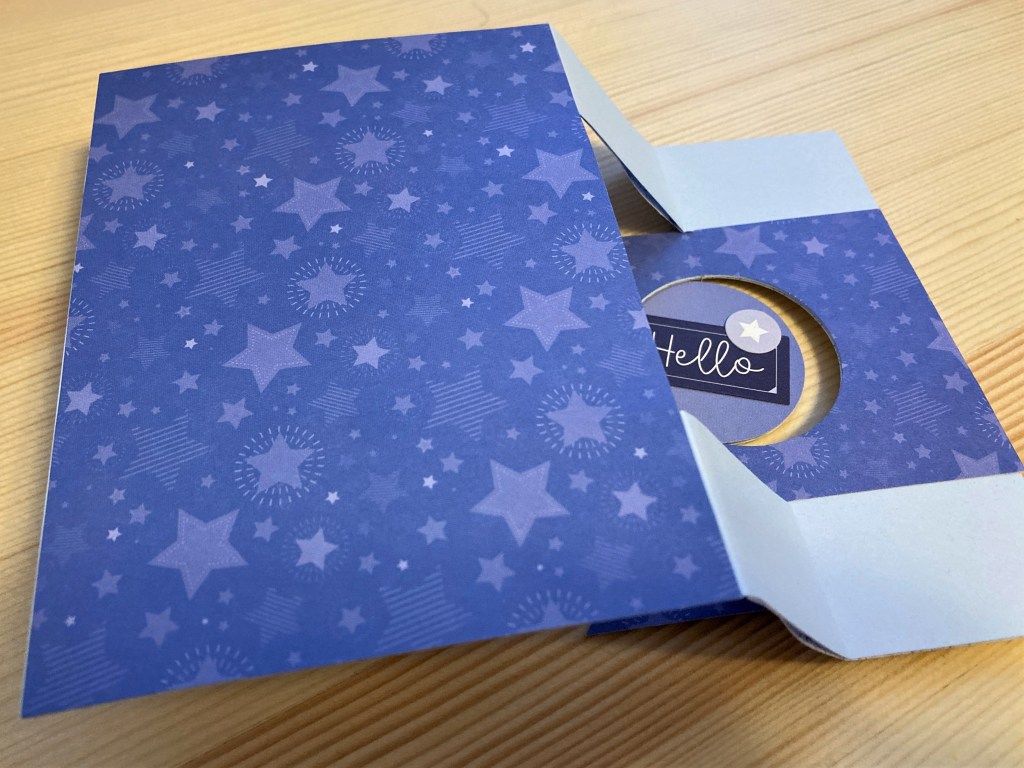
Today, we’re acting accordingly — or accordion-gly — for it’s all about fantastic folds and lovely layering… accordion cards! Blog contributor Sachiyo Omitsu is showing us how easy an accordion fold card is to make (and oh-so, eye-catching, too!). Crease and cut your way to cardmaking — and better yet, with tonal scrapbook products, that make for a cohesive, classy look.

To create these cards you will need:
- Totally Tonal Purple Ice, Island Waters & Baby Blue Paper Packs or (Shop Canada | Shop Australia)
- Totally Tonal Purple Ice, Island Waters & Baby Blue Stickers or (Shop Canada | Shop Australia)
- Purple Ice, Island Waters & Baby Blue Solid Cardstocks or (Shop Canada | Shop Australia)
- Circle Punch or (Shop Canada | Shop Australia)
- Custom Cutting System with Circle Patterns or (Shop Canada | Shop Australia)
- 12-inch Trimmer with Straight & Scoring Blades or (Shop Canada | Shop Australia)
- All-Purpose Scissors or (Shop Canada | Shop Australia)
- Bone Folder or (Shop Canada | Shop Australia)
- Tape Runner or (Shop Canada | Shop Australia)
- Repositionable Tape Runner or (Shop Canada | Shop Australia)
- Foam Squares or (Shop Canada | Shop Australia)
- Precision Point Adhesive Pen or (Shop Canada | Shop Australia)
- Sewing thread


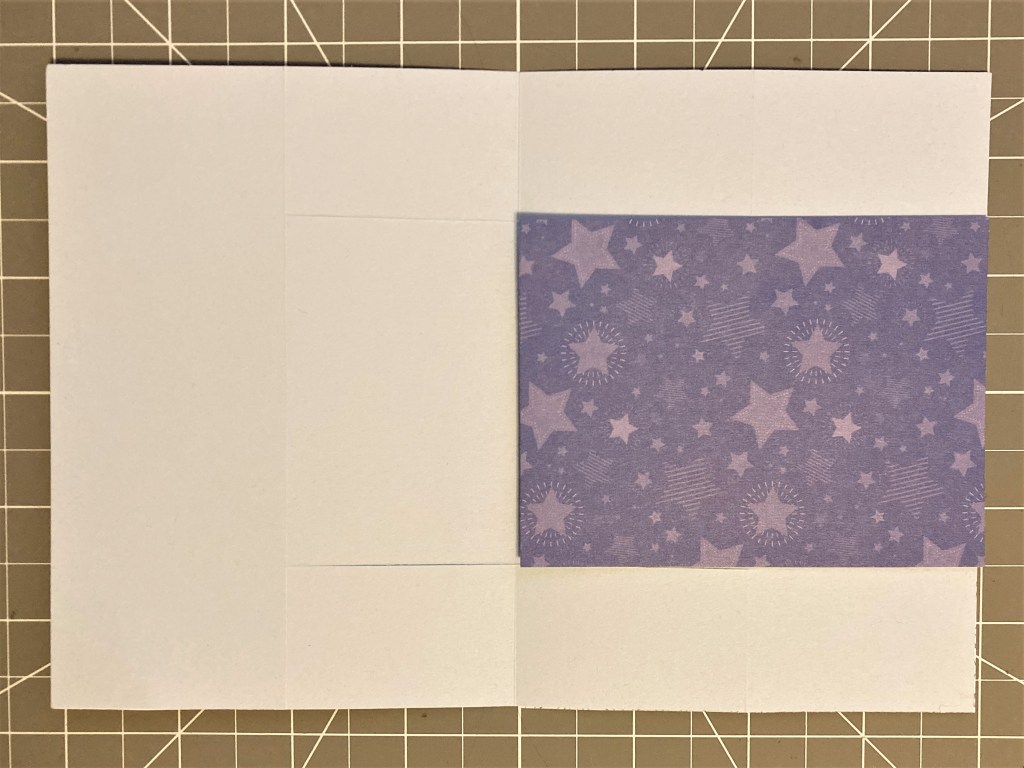
Step 1: Cut a piece of cardstock to measure 5-1/2” x 8”. Score at 4” on the longer side. Cut three pieces of patterned paper to measure 4” x 5-1/2”. Adhere two of the pieces to the card base as shown.
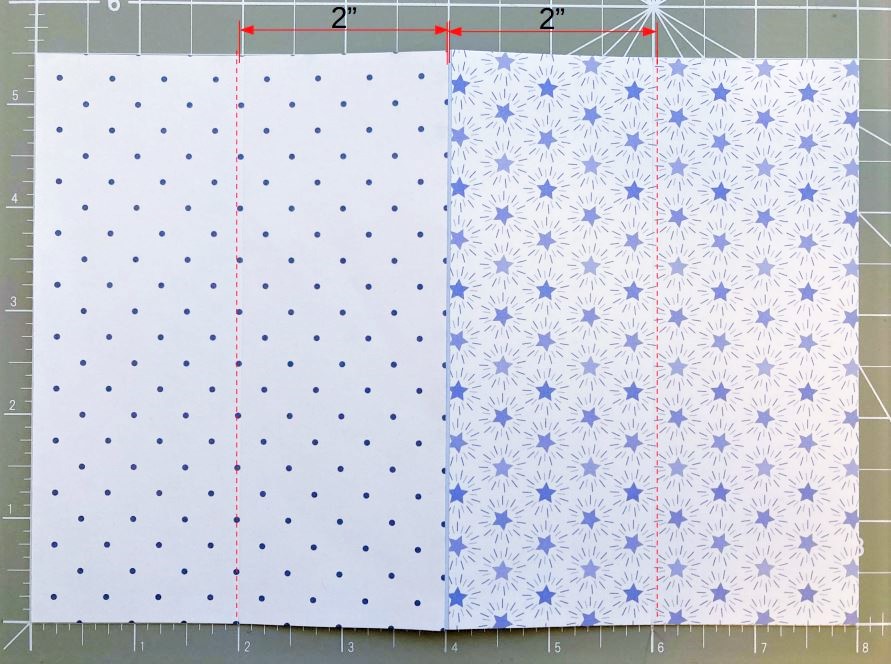
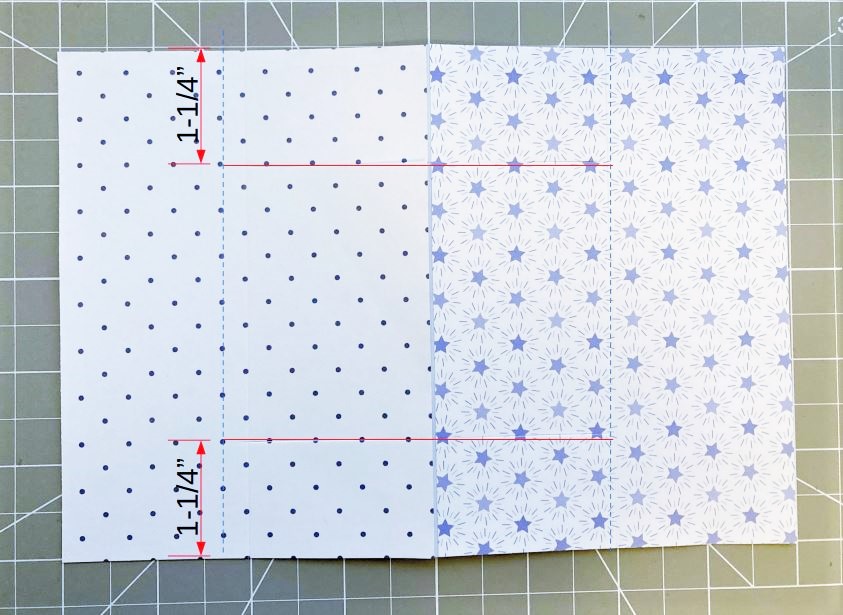
Step 2: Score at 2” from the middle line.
Step 3: Cut from one of the scored lines to the other at 1-1/4” from the edge.
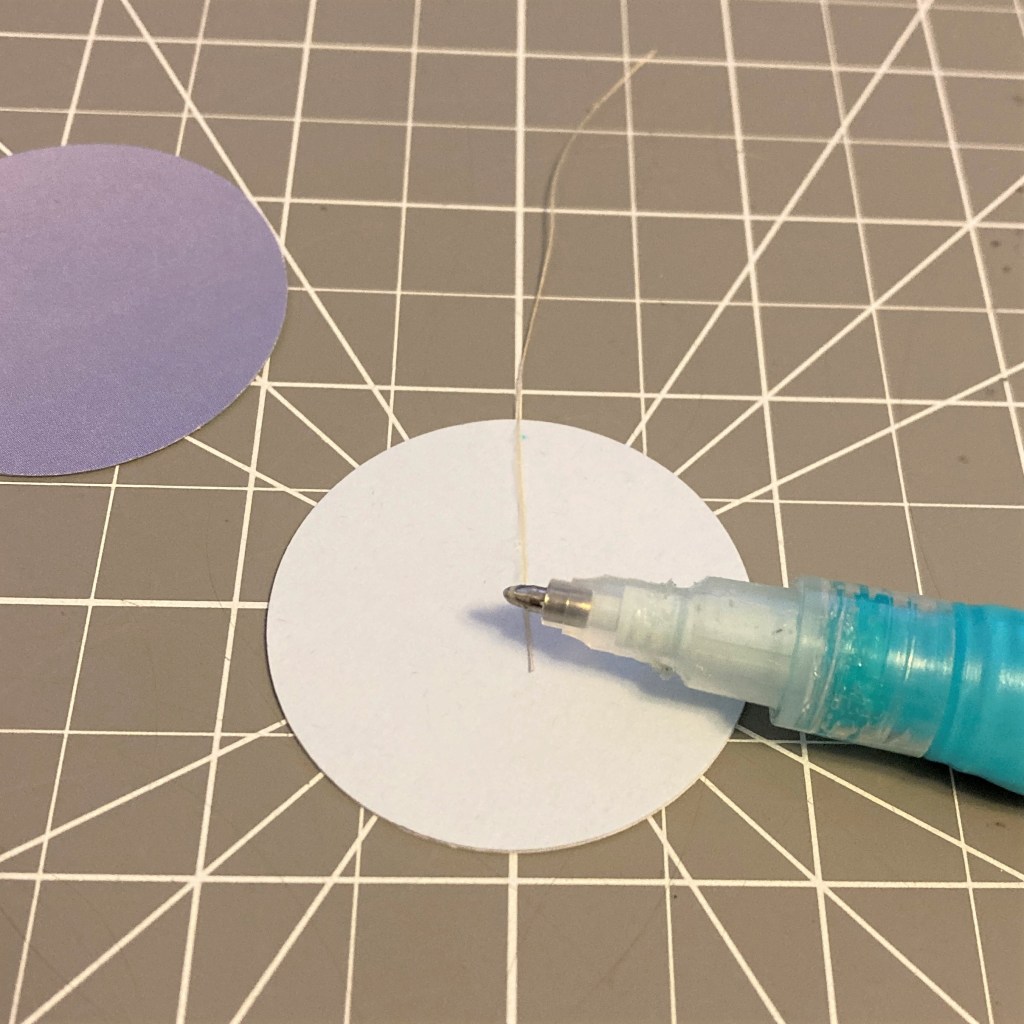
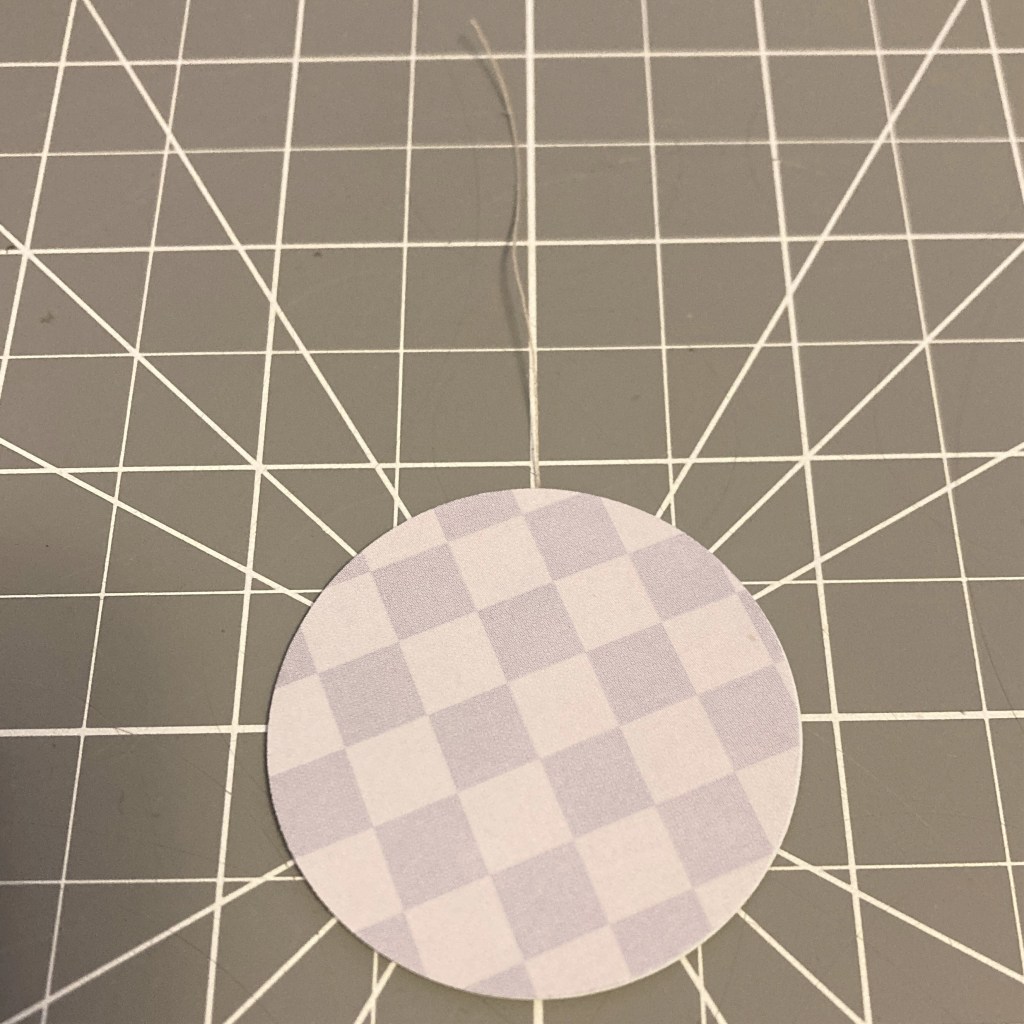
Step 4: Use the Circle Punch to punch two circles from a piece of cardstock and two circles from patterned paper. Adhere the patterned circle to the cardstock circle. Use Precision Point Adhesive to glue the thread. Adhere another circle piece to cover.
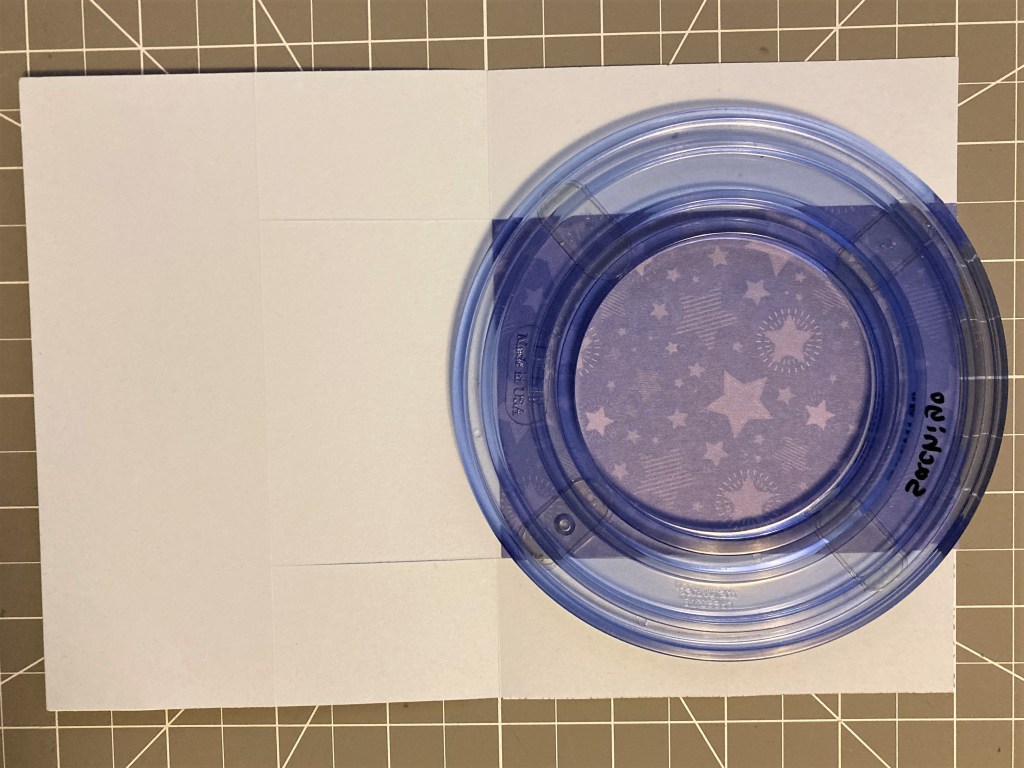
Step 5: Cut a piece of patterned paper to measure 3” x 4”. Place the piece to the card base as shown. Cut a circle using the inside edge of the medium Circle Custom Cutting System Pattern with the Blue Blade.

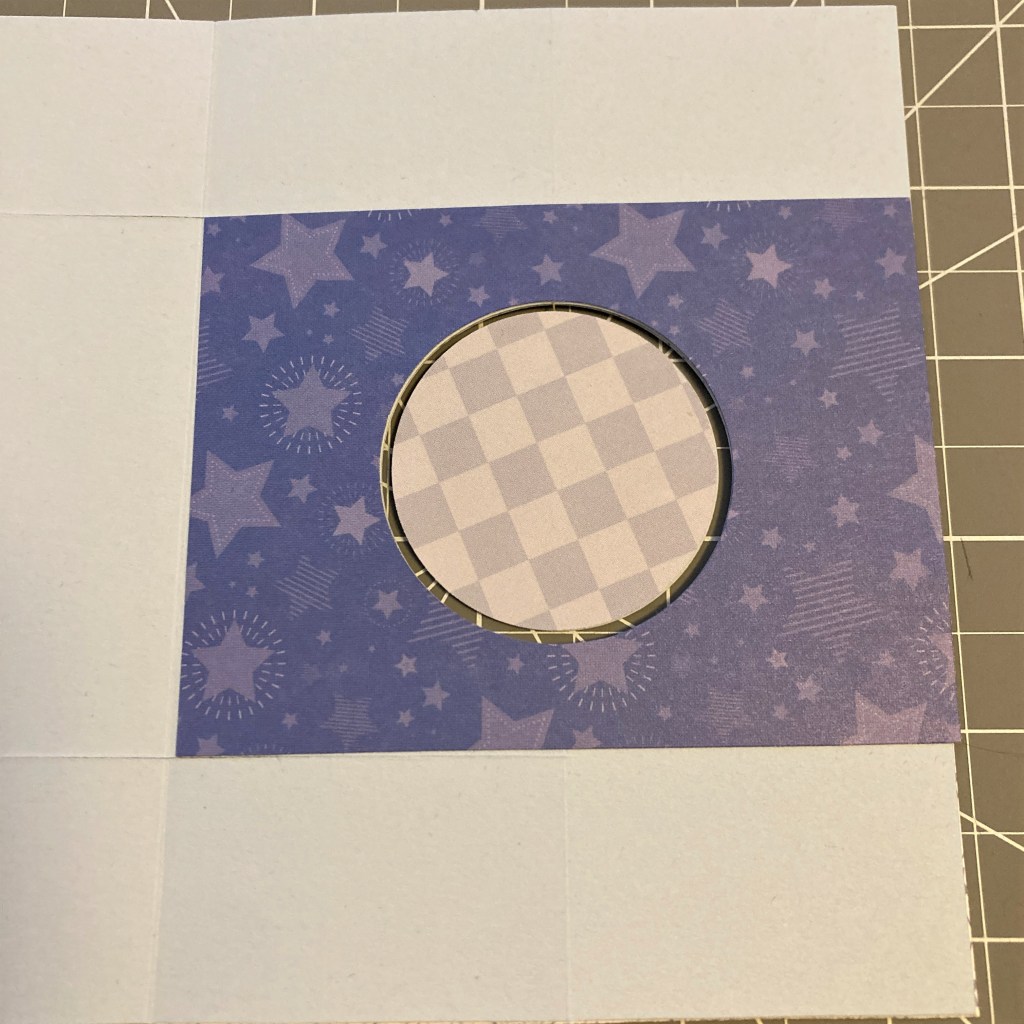
Step 6: Place the swinging piece in the middle of the circle window. Adhere the thread with some pieces of Tape Runner. Adhere the 3” x 4” piece to cover.
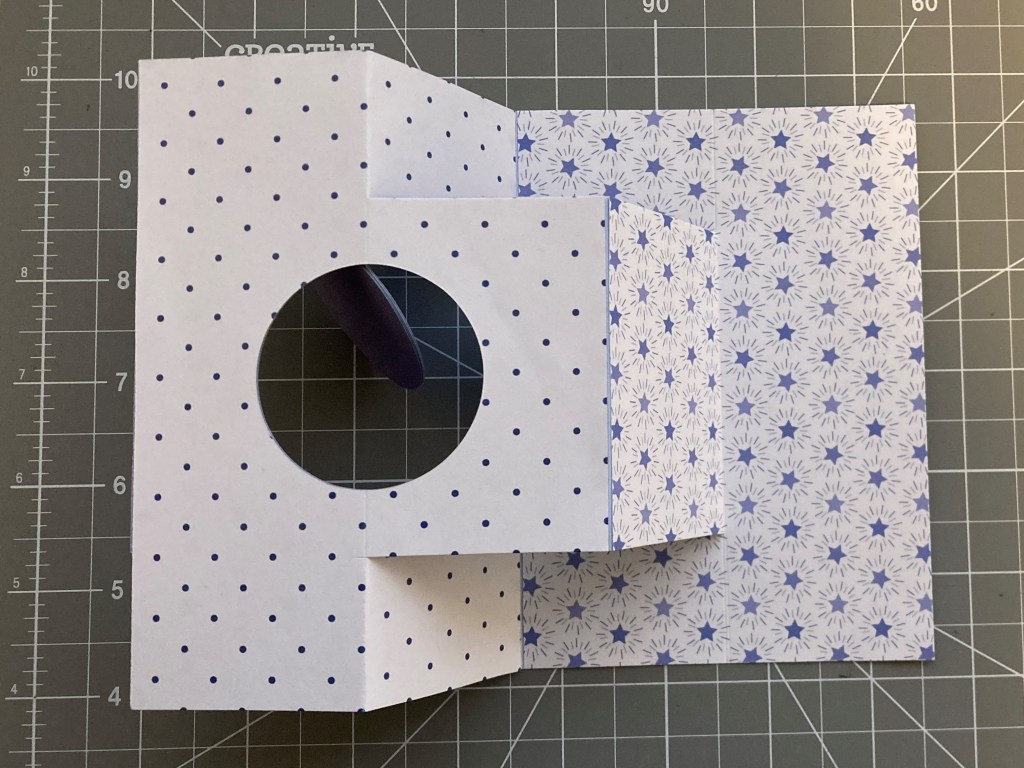
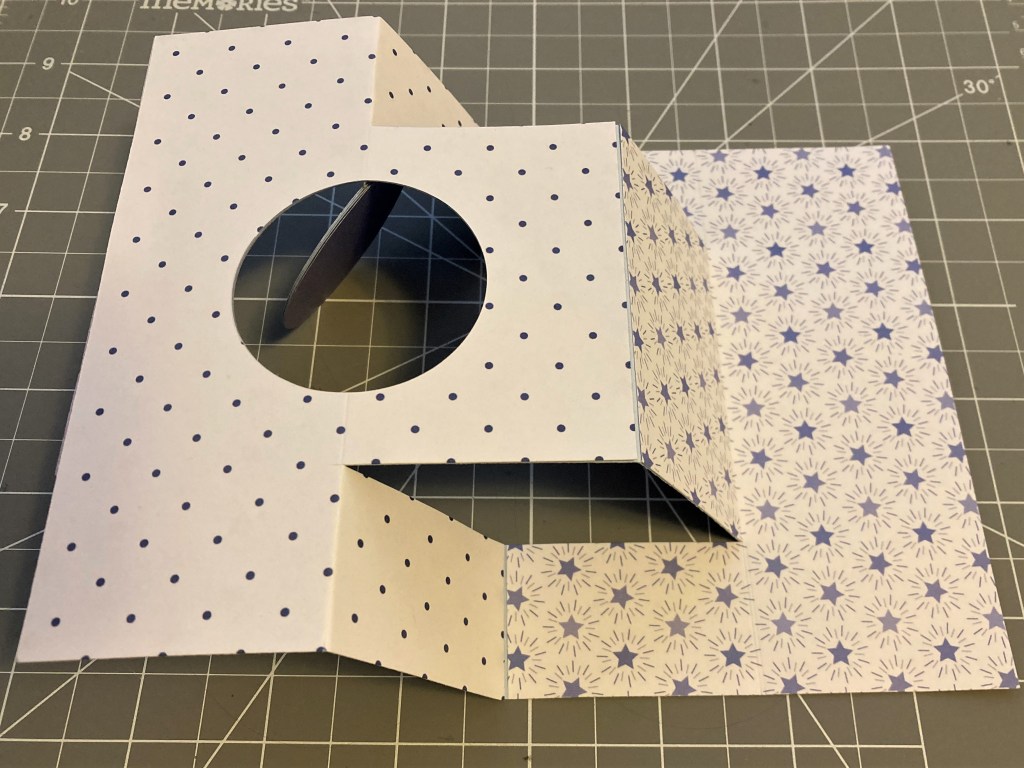
Step 7: Accordion-fold the card as shown. Use the Bone Folder to make the crease. Add a 4” x 5-1/2” patterned piece to the back of the card as shown.
Step 8: Cut a piece of patterned paper to measure 1” x 3-1/2”. Cut one edge to make a banner shape. Adhere the banner and stickers, using Foam Squares on some for added dimension.
Do you like these awesome accordion fold card examples from Sachiyo? What are yor thoughts on the cohesiveness of the tonal scrapbook products?
P.S. Are YOU a member of the Virtual Crop Facebook Group? It’s your go-to place for MONTHLY Virtual Crops, MONTHLY Completed Album Challenges, WEEKLY LIVE STREAMING of Fast & Fun Projects with Noreen, LIVE QUARTERLY Secret Box Openings with project tutorials and so much more! We hope you’ll join our community of more than 32,000 fellow memory-keeping enthusiasts — you’ll feel right at home!

Love this! Can’t wait to try it. Thanks.
Fantastic card! Thank you!
Neede a biased to be clear!
Needed a video to be clear instructions!
I am confused in step1. Where do you score? Where do you adhere the cut pieces of 4″ x 5 1/2″. Arrows or lines would be helpful. I think I understand the rest of the instructions. Nice work.
Score at 4” on 8” side.
I reread the instructions. have 3 different colors of paper to start right? one main piece and the two adhered on top to that right? thanks
where do you adhere the cut pieces in step one
Yes there’re three different patterned pieces; two goes in the front as you see in the pic of step 1 (dot patterned paper and star patterned paper). The third piece goes to the back of the card as you see in the pic of step 7 (blue star patterned paper)
Written directions are difficult to understand for me but I love the card.
Sachi, Sachi, Sachi … you hit it out of the park AGAIN!! Can’t wait to try this one :)
I love the card and can’t wait to try it! But it’s not clear from the instructions & photos what to do for steps 5 and 6. Do you have a video? Thanks!