September 18, 2023
Be The Jack-O’-Lantern Of All Trades With These Fall Scrapbook Borders And Frame Punch

From carving jack-o’-lanterns to perfecting table pieces for family potlucks, making delicious meals and snacks (roasted seeds, pumpkin puree, soups and chili, lattes, breads and muffins, pie and more!) and enjoying a harvest of happy times at an outdoor festival like watching pumpkin catapults or picking the perfect orange orb, the humble pumpkin is the belle of the autumnal ball! Have your pick of the project patch with these fall scrapbook borders that feature the Pumpkin Patch Frame Punch — they’re gourd-geous!
To create these borders you will need:
- Autumn Harvest Paper Pack or (Shop Canada | Shop Australia)
- Autumn Harvest Stickers or (Shop Canada | Shop Australia)
- Autumn Harvest Foiled Embellishments — Out of stock
- Tip: Substitute with the Golden Harvest Laser Cut Foiled Embellishments or (Shop Canada | Shop Australia)
- 12-inch Trimmer with Straight & Victorian Blades or (Shop Canada | Shop Australia)
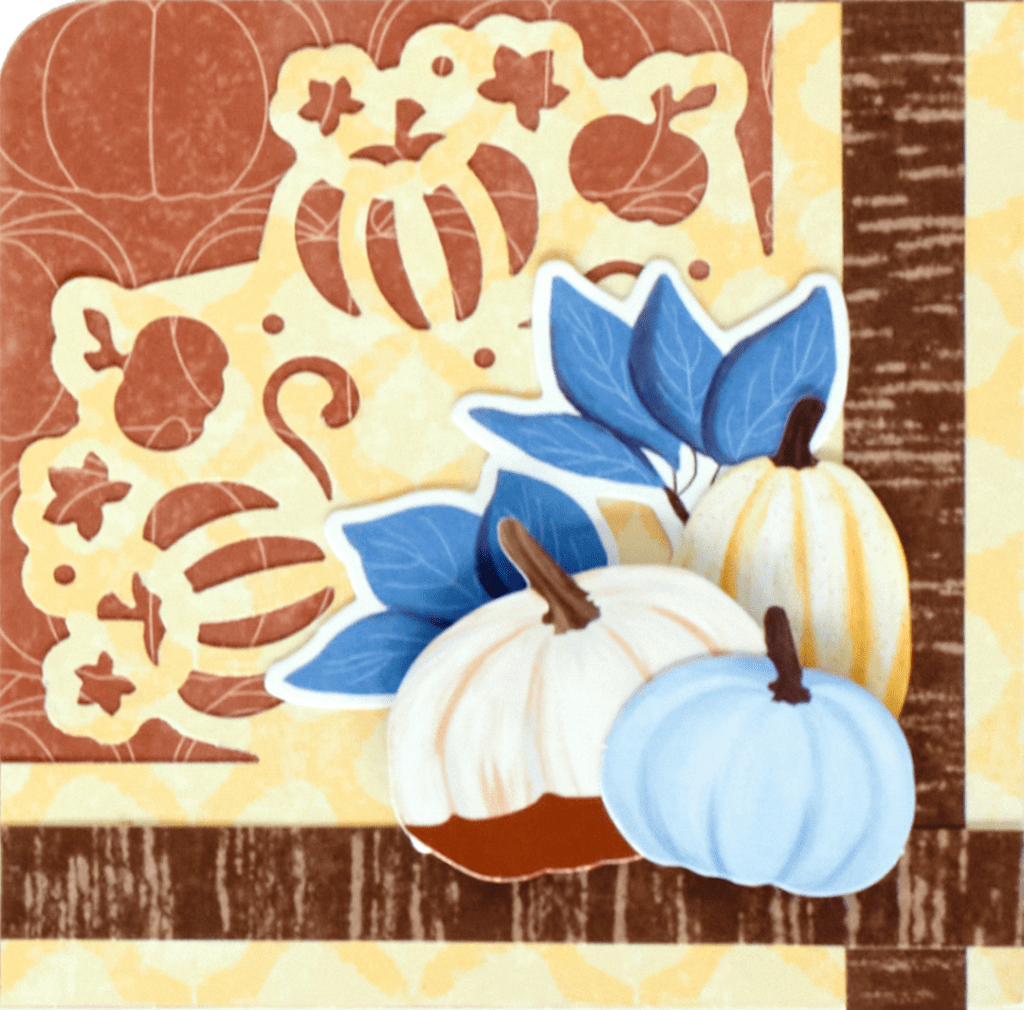
- Pumpkin Patch Frame Punch or (Shop Canada | Shop Australia)
- 2-Way Corner Rounder or (Shop Canada | Shop Australia)
- Black & Navy Solid Cardstocks or (Shop Canada | Shop Australia)
- Tape Runner or (Shop Canada | Shop Australia)
- Repositionable Tape Runner or (Shop Canada | Shop Australia)
- Foam Squares Variety Pack or (Shop Canada | Shop Australia)

Gathered Around The Table Border

Step 1: Cut a piece of maple leaves gingham paper to measure 12” x 3”. Use this as the base for the border.
Step 2: Cut a piece of dark woodgrain paper to measure 12” x 4”. Using the Pumpkin Patch Frame Punch, punch along one long edge and then once on the short edges. Cut 1” off from the bottom edge with 12-inch Trimmer. Adhere to the base piece.
Step 3: Cut a piece from the blue juniper leaves paper to measure 8” x 1-1/4”. Gently fold the ends and then cut at an angle with scissors to create the banner ends. Adhere to the border.
Step 4: Adhere stickers/embellishments to the border using Foam Squares on some for added dimension.
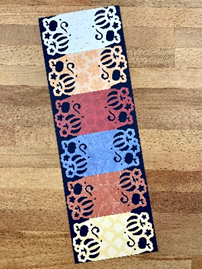
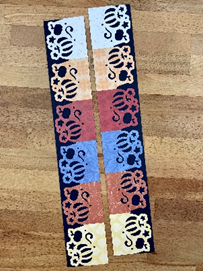
Autumn Adventure Border
Step 1: Cut a piece of yellow birch leaves paper to measure 12” x 2-1/2” using the 12-inch Trimmer and the Victorian Blade.
Step 2: Using the Pumpkin Patch Frame Punch, punch along the edge of maple leaves gingham paper. Then cut with the 12-inch Trimmer to measure 2-1/4”.
Step 3: Using the Pumpkin Patch Frame Punch, punch along the edge of Black Solid Cardstock. Then cut with the 12-inch Trimmer to measure 2”. Adhere behind the previous piece, offsetting to create a shadow.
Step 4: Adhere border to the yellow birch leaves base.
Step 5: Adhere stickers and embellishments to the border, using Foam Squares/Foam Tape for added dimension.
Fresh Start Pair Of Borders


Step 1: Cut a piece of Navy Solid Cardstock to measure 4” x 12”.
Step 2: Cut six pieces of various papers to measure 4” x 2”. Center each of the 2” ends in the frame punch between the smaller lines, then punch. Repeat this step with all six pieces. Adhere to the cardstock base. Then cut the base in half so that you have a pair of borders that each measure 2” x 12”.
Step 3: Cut two strips from the light woodgrain paper to measure 12” x 1/4”. Adhere to each border.
Step 4: Adhere stickers/embellishments to the borders, using Foam Squares on some for added dimension.
Step 5: Adhere to the top and bottom of a single-page layout or to each side of a two-page spread.
Crisp Days Corner
Step 1: Cut two pieces of yellow birch leaves paper to measure 4” x 4”.
Step 2: Place two edges of each piece in the Pumpkin Patch Frame Punch and punch.
Step 3: Cut two pieces of pumpkin outlines paper to measure 4” x 4”. Adhere behind the yellow birch leaves pieces.
Step 4: Using the 2-Way Corner Rounder, round one corner of the pumpkin outlines paper.
Step 5: Cut four strips of dark woodgrain paper to measure 1/2” x 4”. Adhere so that they cross over each other in the corners to each of the corner pieces.
Step 6: Adhere stickers/embellishments to each corner, using Foam Squares on some for added dimension.
Step 7: Adhere to the corners of a layout or Fast2Fab™ pages.
How do you incorporate pumpkins into your life during autumn? Will you make these fall scrapbook borders that feature the latest Pumpkin Patch Frame Punch?
P.S. Are YOU a member of the Virtual Crop Facebook Group? It’s your go-to place for MONTHLY Virtual Crops, MONTHLY Completed Album Challenges, WEEKLY LIVE STREAMING of Fast & Fun Projects with Noreen, LIVE QUARTERLY Secret Box Openings with project tutorials and so much more! We hope you’ll join our community of more than 36,000 fellow memory-keeping enthusiasts — you’ll feel right at home!

Lovely! Great ideas!