October 19, 2023
Dance Around Classic Christmas Sentiments: Christmas Scrapbook Layout

It’s as quintessentially Christmas as gingerbread cookies, stockings on the mantel and twinkling trees — “The Nutcracker!” Local auditoriums and ballet companies all over the world are ready to pointe toward Tchaikovsky’s classic ballet with families planning their annual yuletide pilgrimage to see Clara, the Nutcracker, Mouse King and Sugar Plum Fairy. Well, with a bit of traditional trimmings, blog contributor Sachiyo Omitsu was able to create a dazzling Christmas scrapbook layout that will make you want to dance right to Christmas Eve and all the merry magic ahead!

To create this layout you will need:
- Christmas Cheer Paper Pack or (Shop Canada | Shop Australia)
- Christmas Cheer Accessory Paper Pack or (Shop Canada | Shop Australia)
- Christmas Cheer Stickers or (Shop Canada | Shop Australia)
- Dark Green, Baby Blue, Soft Pink, Beige, Red, Gold Shimmer, Black & White Solid Cardstocks or (Shop Canada | Shop Australia)
- Nutcracker Border Punch or (Shop Canada | Shop Australia)
- Festive Ornament Build-A-Punch — formerly available in the Christmas Cheer Buy-It-All Bundle and coming individually in November
- Custom Cutting System with Circle Patterns or (Shop Canada | Shop Australia)
- 12-inch Trimmer or (Shop Canada | Shop Australia)
- All-Purpose Scissors or (Shop Canada | Shop Australia)
- Tape Runner or (Shop Canada | Shop Australia)
- Repositionable Tape Runner or (Shop Canada | Shop Australia)
- Foam Squares Variety Pack or (Shop Canada | Shop Australia)
- Black Dual-Tip Pen or (Shop Canada | Shop Australia)


Step 1: Use a piece of candy cane stripes paper as the base of this layout. Cut a piece of Dark Green Solid Cardstock to measure 11-3/4” x 11-3/4” and add to the base.
Step 2: Cut the following segments and ink the edge with the Black Dual-Tip Pen for the
Mouse King.
- Face: Using the outside edge of the smallest Circle Custom Cutting System Pattern and the Red Blade, cut a circle from Baby Blue Solid Cardstock. Carefully trim the bottom part with scissors to make a face.
- Ears: Using the inside edge of the medium Circle Custom Cutting System Pattern and the Blue Blade, cut two circles from Baby Blue Solid Cardstock. Using the inside edge of the smallest Circle Custom Cutting System Pattern and the Red Blade, cut two circles from Soft Pink Solid Cardstock.
- Nose: Using the inside edge of the smallest Circle Custom Cutting System Pattern and the Red Blade, cut a piece of circle from Beige Solid Cardstock. Use scissors to trim to make an oval shape as shown.
- Tooth: Cut two pieces to measure 1/4” x 1/2” from White Solid Cardstock.
- Body: Cut a piece to measure 4” x 2” from Red Solid Cardstock. Cut a piece to measure 1” x 2” from White Solid Cardstock and cut to make a triangle shape as shown below. Add to the middle of the red piece.
- Arms: Cut two pieces to measure 3/4” x 2” from Red Solid Cardstock. Cut two pieces to measure 1” x 3/4” from Gold Shimmer Solid Cardstock. Round the corners with scissors.
- Use the Festive Ornament Punch to punch decorative pieces with Black Solid Cardstock. Decorate the arms and body, using the photo below as a guide.
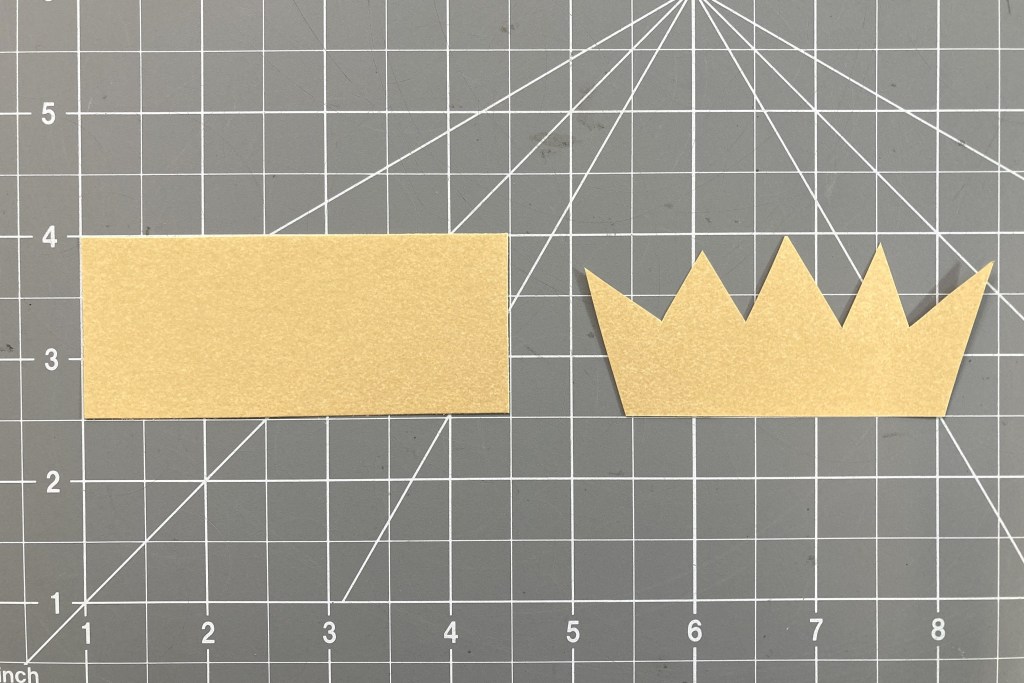
- Crown: Cut a piece to measure 3-1/2” x 1-1/2” from Gold Shimmer Solid Cardstock. Use scissors to cut a crown shape.


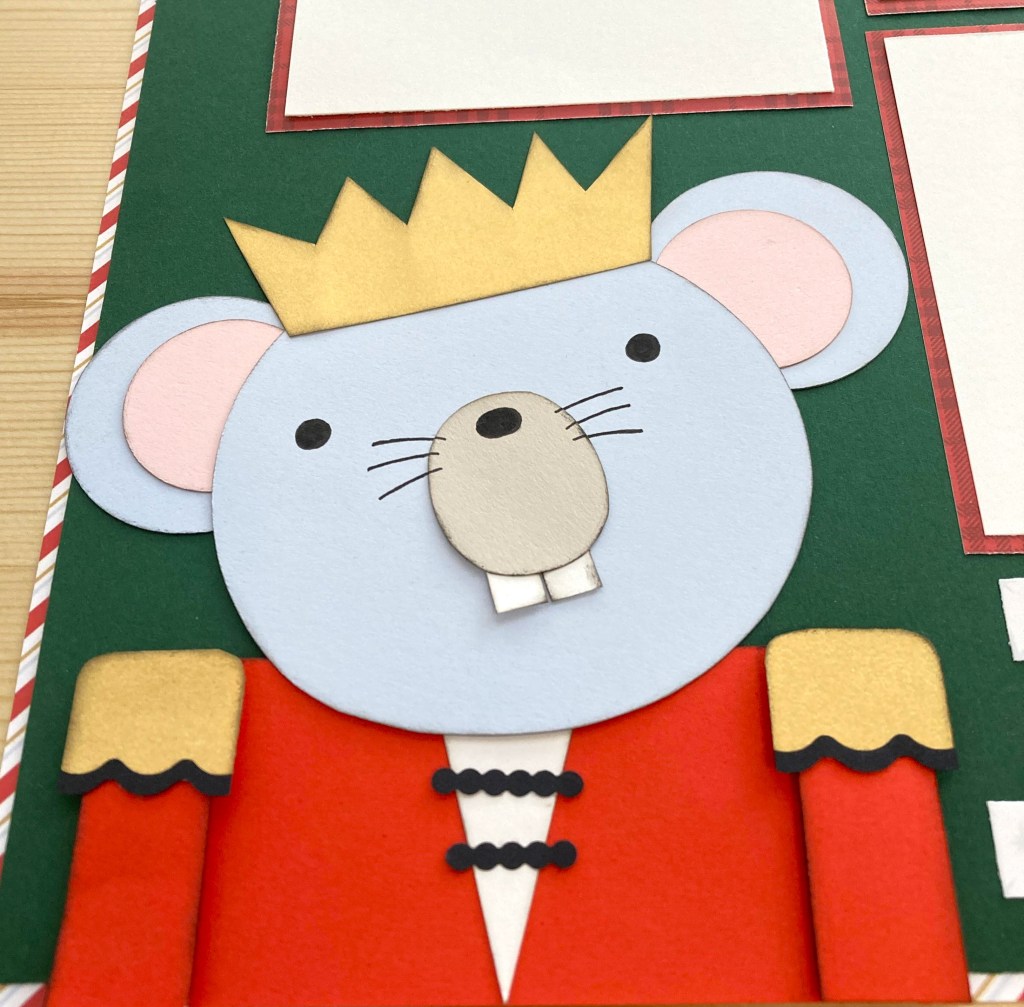
Step 3: Assemble the Mouse King. Draw his eyes, nose and whiskers with the Black Dual-Tip Pen. Add to the page.
Step 4: Use the Nutcracker Border Punch to punch a border with Gold Shimmer Solid Cardstock. Punch nutcrackers shapes with red plaid tonal paper, blue and red plaid accessory paper and Black and White Solid Cardstocks. Trim and decorate on the gold shimmer border. Adhere to the page.
Step 5: Cut three mats to measure 4-1/2” x 4-1/2” from a piece of red plaid tonal paper. Cut three mats to measure 4-1/4” x 4-1/4” from White Solid Cardstock and mount on the red mats. Add to the page.
Step 6: Cut a 1/2” strip from white stars paper. Cut it into three pieces and add to the page to journal on.


Step 7: Adhere the stickers, using Foam Squares on some for added dimension.
Is “The Nutcracker” an annual tradition in your family? What do you think of this Christmas scrapbook layout?
P.S. Are YOU a member of the Virtual Crop Facebook Group? It’s your go-to place for MONTHLY Virtual Crops, MONTHLY Completed Album Challenges, WEEKLY LIVE STREAMING of Fast & Fun Projects with Noreen, LIVE QUARTERLY Secret Box Openings with project tutorials and so much more! We hope you’ll join our community of more than 36,000 fellow memory-keeping enthusiasts — you’ll feel right at home!

LOVE it!! So cute to be so detailed with the nutcrackers!
I love this, and it a really cute idea using the nutcracker and ornament punches.
I can’t wait to use mine.
Perfect! My two granddaughters will be performing in The Nutcracker this year so I’m looking forward to lots of photos!
very creative love it!!!!