February 6, 2024
Tabs & Tales: Crafting Everyday Memories With This Life And The Tab Punch

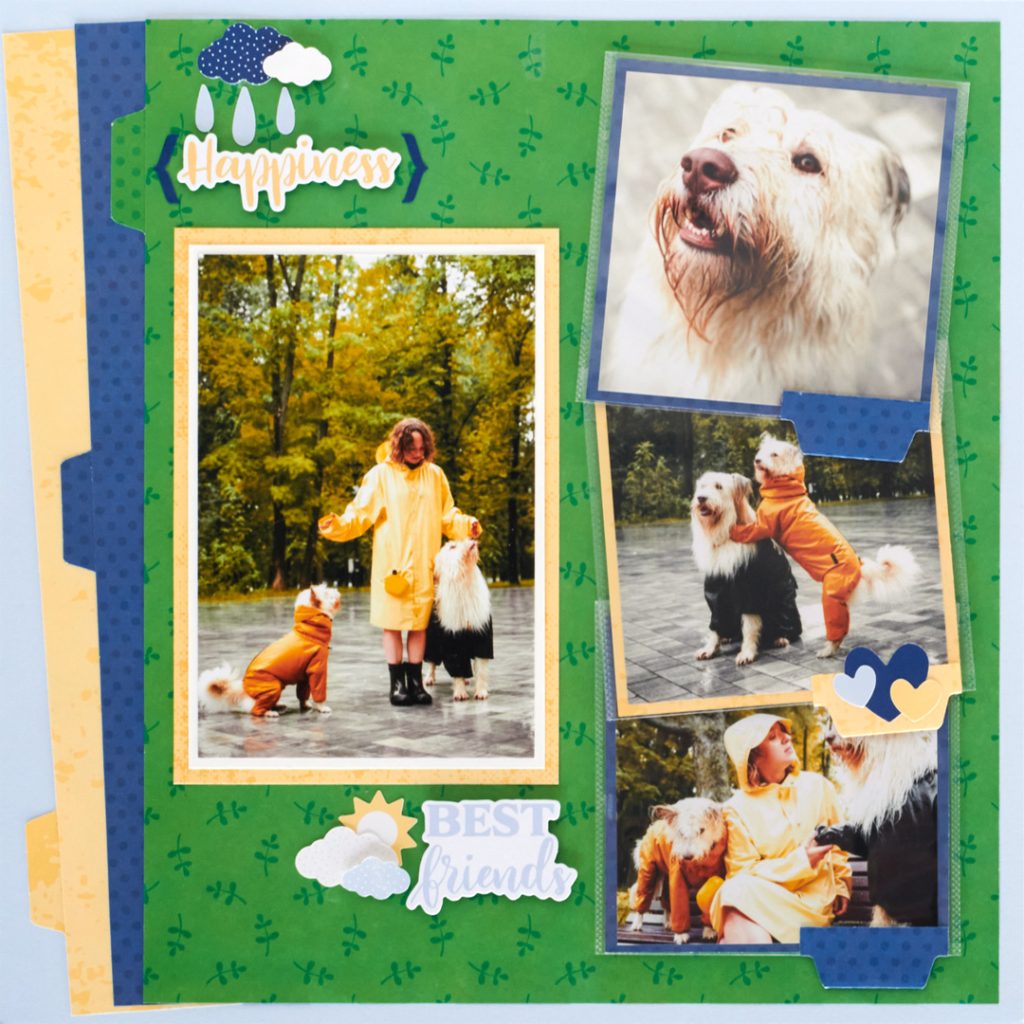
What better way to keep tabs on your precious memories than by adding them to a scrapbook?! Even better is creating scrapbook layouts as crafty and charming as the everyday layout showcased below using products from the year-round This Life collection and the Tab Punch! Tabs aren’t just for your filing cabinet — they’re a brilliant way to keep your memories organized by labeling the pages and for craft designs. Take a look below!
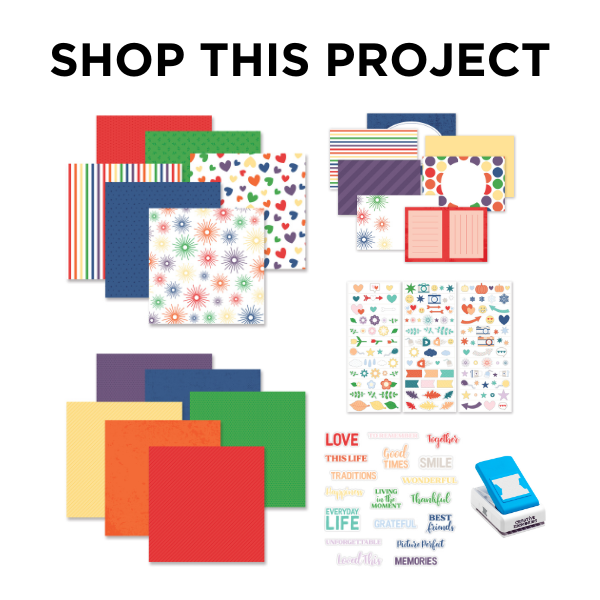
To create this layout you will need:
- This Life Paper Pack or (Shop Canada | Shop Australia)
- This Life Tone-on-Tone Paper Pack or (Shop Canada | Shop Australia)
- This Life Variety Mat Pack or (Shop Canada | Shop Australia)
- This Life Word Embellishments or (Shop Canada | Shop Australia)
- This Life Stickers or (Shop Canada | Shop Australia)
- Baby Blue & White Solid Cardstock or (Shop Canada | Shop Australia)
- Tab Punch or (Shop Canada | Shop Australia)
- 4×4 Peekaboo Pockets™ or (Shop Canada | Shop Australia)
- 12-inch Trimmer with Straight & Scoring Blades or (Shop Canada | Shop Australia)
- Micro-Tip Scissors or (Shop Canada | Shop Australia)
- Tape Runner or (Shop Canada | Shop Australia)
- Repositionable Tape Runner or (Shop Canada | Shop Australia)
- Foam Squares Variety Pack or (Shop Canada | Shop Australia)
- Black Dual-Tip Pen or (Shop Canada | Shop Australia)

Step 1: Use a piece of Baby Blue Solid Cardstock as the base for this layout.
Step 2: Cut a 2” x 11-1/2” strip with canary canvas tonal paper and another with blue dots tonal paper. Adhere on the left side of the layout at a slight angle as shown. Cut a 10” x 11-1/2” piece with greenery designer paper and adhere on the right side of the layout, leaving a 1/4” border on three sides. Using the Tab Punch, punch one tab each with canary, blue and kelly green paper scraps. Cut in half and adhere the halves behind the papers, as shown, like file folders.
Step 3: Mount a 4” x 6” photo on a 4-1/4” x 6-1/4” piece of White Solid Cardstock. Adhere on a 4-1/2” x 6-1/2” canary variety mat and mount on the layout.

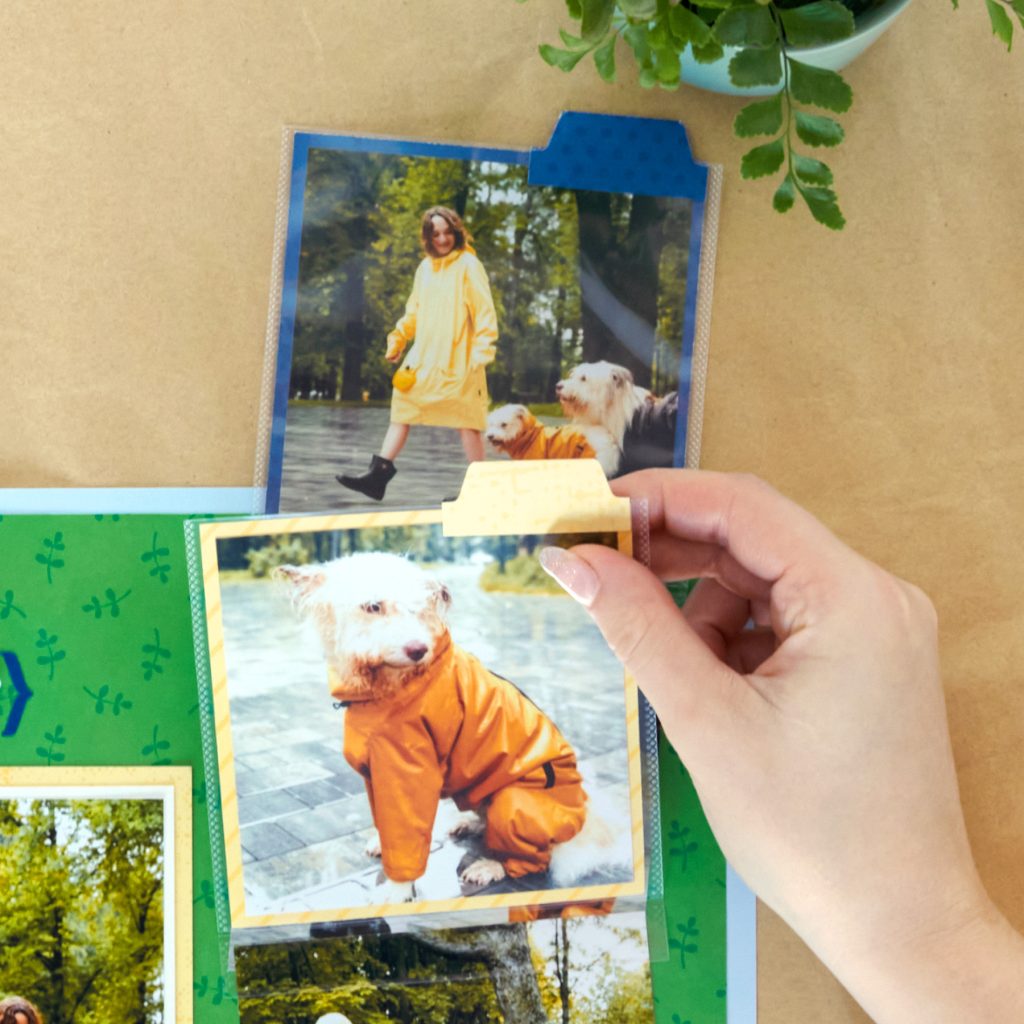
Step 4: Crop two photos to 4” x 4”. Cut a small 4” x 3” canary journal box from a variety mat. Mount all three on the right side of the layout, angling the photos. Crop six photos to 3-3/4” x 3-3/4”. Cut two 4” x 4” blue dot tonal pieces and one 4” x 4” canary canvas tonal piece. Adhere the photos on the front and back sides of the paper, making sure the photos on the back are upside down (this is so the photos are the correct orientation on both sides once in the Peekaboo Pockets™). Slide into 4×4 Peekaboo Pockets™. Using the Tab Punch, punch two blue and one canary tab. Score down the middles of each and fold. Apply adhesive to both edges and slip over the Peekaboo Pockets™ as shown. (Tip: Remove the adhesive backing and adhere the Peekaboo Pockets™ on your layout AFTER you slide the page protector on, or AFTER you slide your pages into the Top-Loading Single-Pocket Page.)
Step 5: To create the parentheses embellishments, flip the Tab Punch upside down to see what you’re doing. Feed a 1-1/2”-wide strip of blue paper into one side and punch the edge. Move the paper in slightly and punch again, giving you the parenthesis shape. Repeat.
Step 6: Adhere stickers and embellishments, popping some up with Foam Squares for dimension. Adhere parentheses embellishments around a title. Journal as desired.
So, now that you have seen how easy it is to make, it’s time to grab your 12-inch Trimmer and Tape Runner and get started on this everyday layout that fits any occasion!
P.S. Are YOU a member of the Virtual Crop Facebook Group? It’s your go-to place for MONTHLY Virtual Crops, MONTHLY Completed Album Challenges, WEEKLY LIVE STREAMING of Fast & Fun Projects with Noreen, LIVE QUARTERLY Secret Box Openings with project tutorials and so much more! We hope you’ll join our community of more than 38,000 fellow memory-keeping enthusiasts — you’ll feel right at home!
