February 27, 2024
Welcome The Season With This Spring Scrapbook Layout

Spring into scrapbooking with this Birds & Blossoms layout! It’ll be brilliant for showcasing memories of fresh garden walks, bird watching and family time in the park. Pro tip: Use the Fresh Flower Punch to add cute floral designs to your spread AND to create butterflies like the ones shown in this spring scrapbook layout. Happy spring scrapbooking!

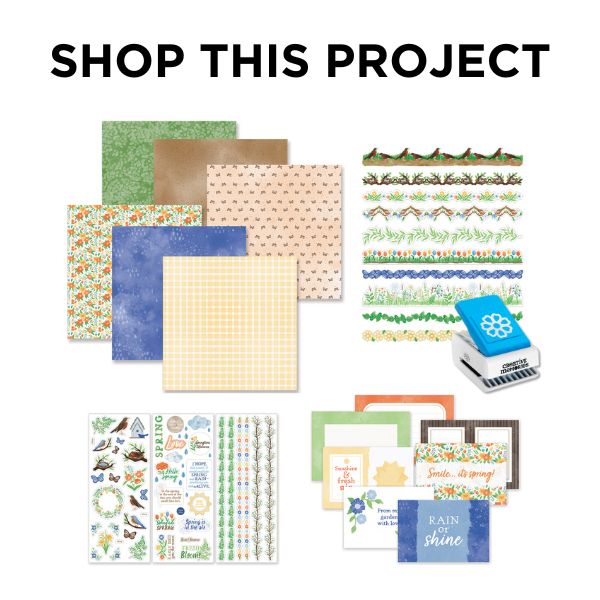
To create this layout you will need:
- Birds & Blossoms Paper Pack or (Shop Canada | Shop Australia)
- Birds & Blossoms Stickers or (Shop Canada | Shop Australia)
- Birds & Blossoms Variety Mat Pack or (Shop Canada | Shop Australia)
- Birds & Blossoms Laser Cut Borders or (Shop Canada | Shop Australia)
- Black Solid Cardstock or (Shop Canada | Shop Australia)
- Fresh Flower Punch or (Shop Canada | Shop Australia)
- 12-inch Trimmer or (Shop Canada | Shop Australia)
- 2-Way Corner Rounder or (Shop Canada | Shop Australia)
- Micro-Tip Scissors or (Shop Canada | Shop Australia)
- Foam Squares Variety Pack or (Shop Canada | Shop Australia)
- Foam Tape or (Shop Canada | Shop Australia)
- Tape Runner or (Shop Canada | Shop Australia)
- Repositionable Tape Runner or (Shop Canada | Shop Australia)
- Precision Point Adhesive Pen or (Shop Canada | Shop Australia)
- Brown Dual-Tip Pen or (Shop Canada | Shop Australia)

Step 1: Use the birdhouses paper as the base of the layout.
Step 2: Cut a piece of rain paper to measure 8? x 8?. Adhere to the upper-right corner of the layout.
Step 3: Cut a piece of spring floral paper to measure 4? x 4?. Adhere to the lower-left corner of the layout.
Step 4: Cut five pieces of the greenery paper to measure 3-3/4? x 3-3/4? for the photo mats. Adhere to the layout along the outer edges. Trim five photos to measure 3-1/2? x 3-1/2? and adhere to the mats.
Step 5: Adhere three large variety mats at varied angles on the rain paper, overlapping slightly.
Step 6: Adhere and layer the robins and floral laser cut borders along the bottom edge of the bottom mat. Cut excess off with scissors.
Step 7: Using the “Sunshine & fresh air” mat, cut out the sun with a scissors. Adhere to the layered mats.
Step 8: Adhere stickers to the layout as desired, using Foam Squares on some for added dimension.

Step 9: Create the butterflies —
- Using the Fresh Flower Punch, punch three pieces from different paper. Use scissors to cut away two petals from the top of the flower, and one petal from the bottom to create the butterfly bodies.
- From the same papers, cut pieces that measure 3/8? x 1?. Place into the 2-Way Corner Rounder not quite all the way, and punch to give a slight curve to the corners. Adhere to the body of the butterfly.
- Cut a 1/8? strip of Black Solid Cardstock with your 12-inch Trimmer. Cut the strip into 1/2? segments. Adhere on the back side of the body for the antennae. Using the Precision Point Adhesive Pen, adhere the inside petal pieces that were punched out from the Fresh Flower Punch to the ends of the cardstock strips.
- Adhere butterflies to the layout using Foam Squares.
Step 10: Journal as desired.
Spring is coming quick here in the U.S. and Canada — are you ready?! What events are you most excited to scrapbook? Do you like the butterflies Melissa created for this spring scrapbook layout?
P.S. Are YOU a member of the Virtual Crop Facebook Group? It’s your go-to place for MONTHLY Virtual Crops, MONTHLY Completed Album Challenges, WEEKLY LIVE STREAMING of Fast & Fun Projects with Noreen, LIVE QUARTERLY Secret Box Openings with project tutorials and so much more! We hope you’ll join our community of more than 38,000 fellow memory-keeping enthusiasts — you’ll feel right at home!?

Thanks for the Cute, Fresh Idea! Thanks for sharing!!
I have a Creative Memories 12-inch straight trimmer, and I need a new cutting blade for it. It is a two-sided cutting blade so you can cut in either direction. Can anyone help me get one?