July 2, 2024
A Red, White and Blue Independence Day Layout

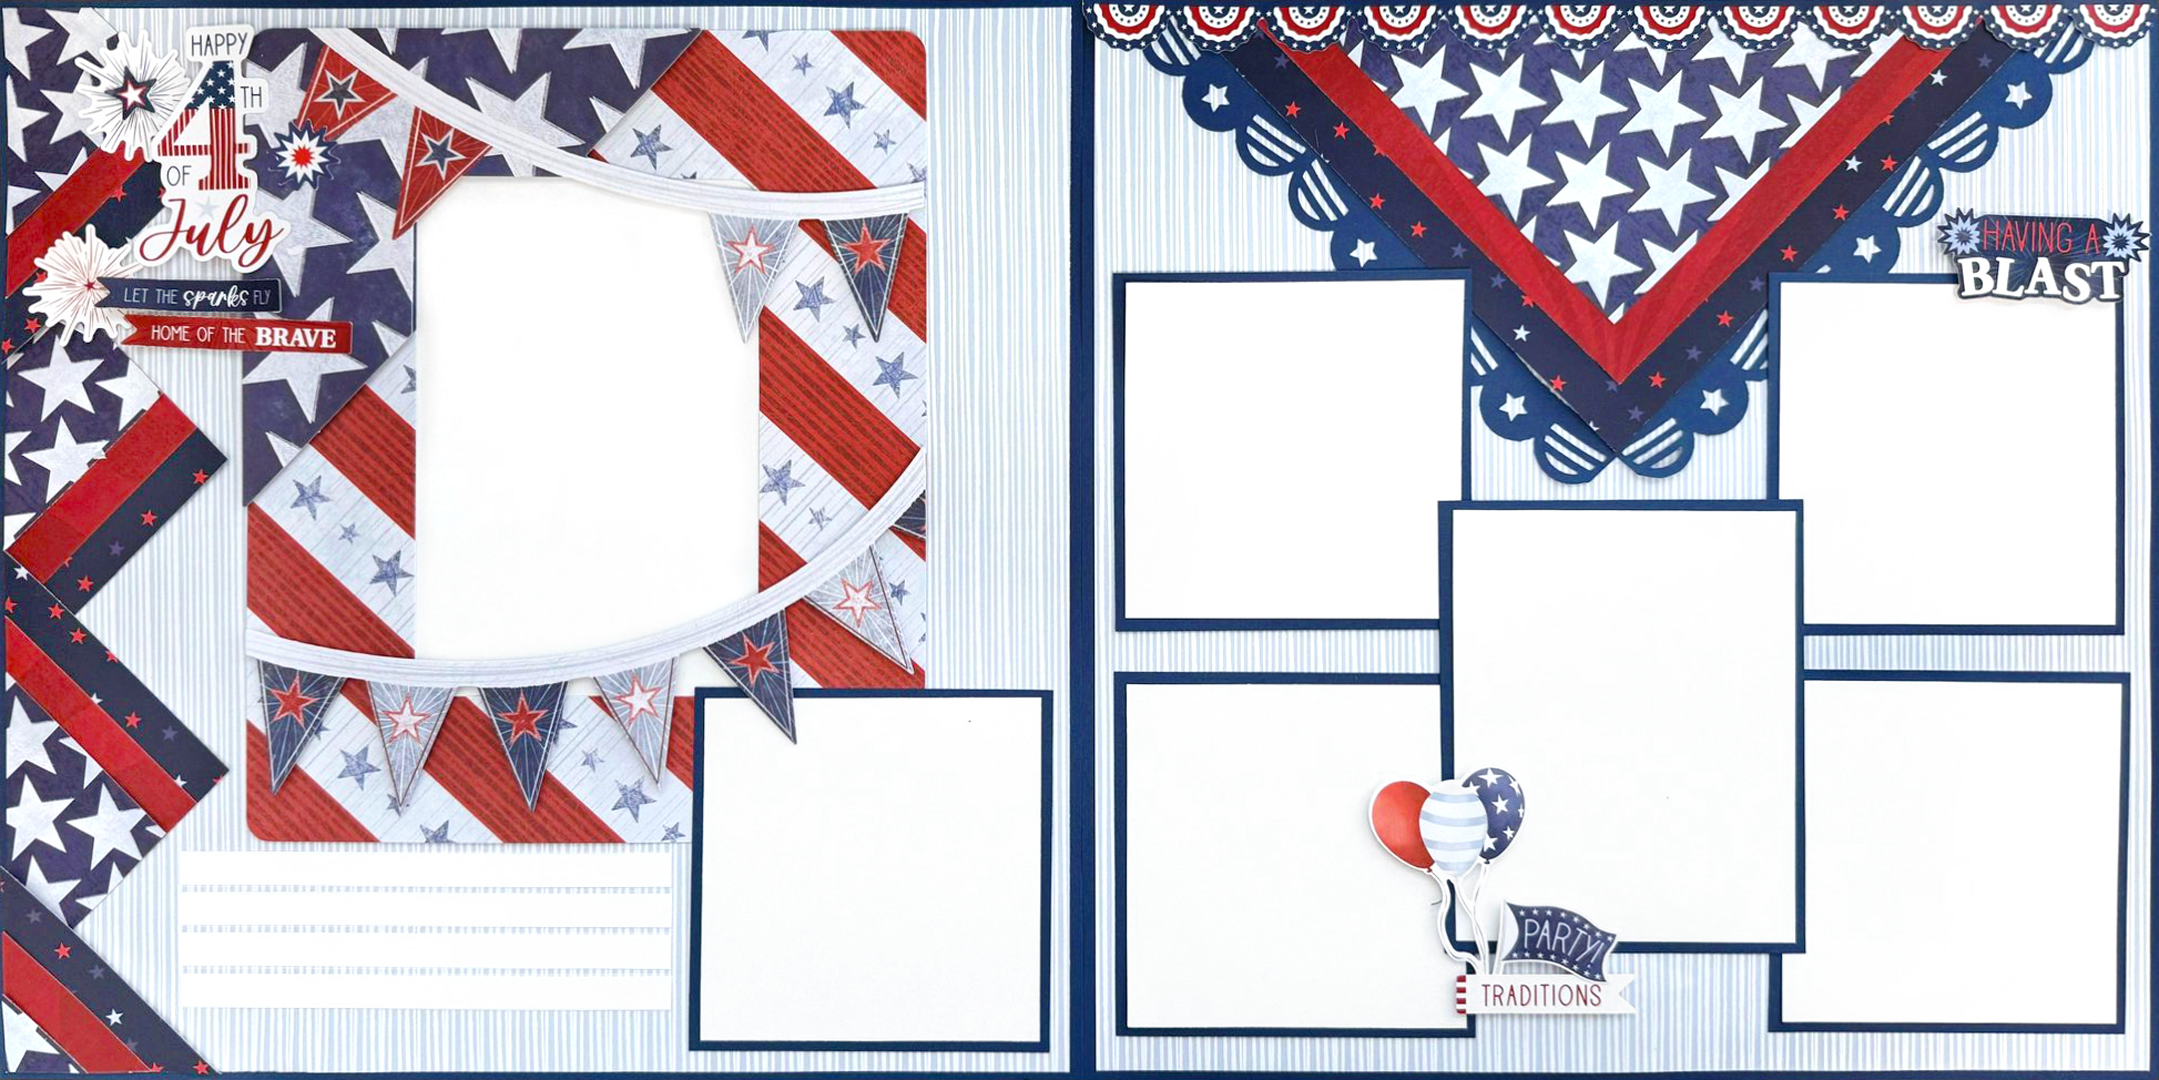
We’re just two days away from the U.S. Independence Day holiday! Between fireworks, cook-outs, time with family and more, you’ll have lots of photos to add to your scrapbooks! Show off your patriotic pride with this layout using materials from the Perfectly Patriotic collection.
To create this spread you will need:
- Perfectly Patriotic Paper Pack or (Shop Canada | Shop Australia)
- Perfectly Patriotic Stickers or (Shop Canada | Shop Australia)
- Perfectly Patriotic XL Layered Frame Embellishment or (Shop Canada | Shop Australia)
- Blue & White Solid Cardstock or (Shop Canada | Shop Australia)
- Write On! Stickers or (Shop Canada | Shop Australia)
- Flag Banner Border Punch or (Shop Canada | Shop Australia)
- 12-inch Trimmer or (Shop Canada | Shop Australia)
- All-Purpose Scissors or (Shop Canada | Shop Australia)
- Tape Runner or (Shop Canada | Shop Australia)
- Repositionable Tape Runner or (Shop Canada | Shop Australia)
- Foam Squares Variety Pack or (Shop Canada | Shop Australia)

Step 1: Cut out a 1?-wide frame from two pieces of Blue Solid Cardstock. Set aside the inside square pieces. Cut two sheets of the baby blue lined paper to measure 11-3/4? x 11-3/4? and add to the frame.
Step 2: Use the Flag Banner Border Punch to punch two borders from the square piece you set aside in Step 1. Cut five 4? x 4? mats and one 4? x 5? mat from the leftover pieces. Cut five 3-3/4? x 3-3/4? mats and one 3-3/4? x 4-3/4? mat from a piece of White Solid Cardstock. Make double mats by adhering the white mats on top of the blue mats.
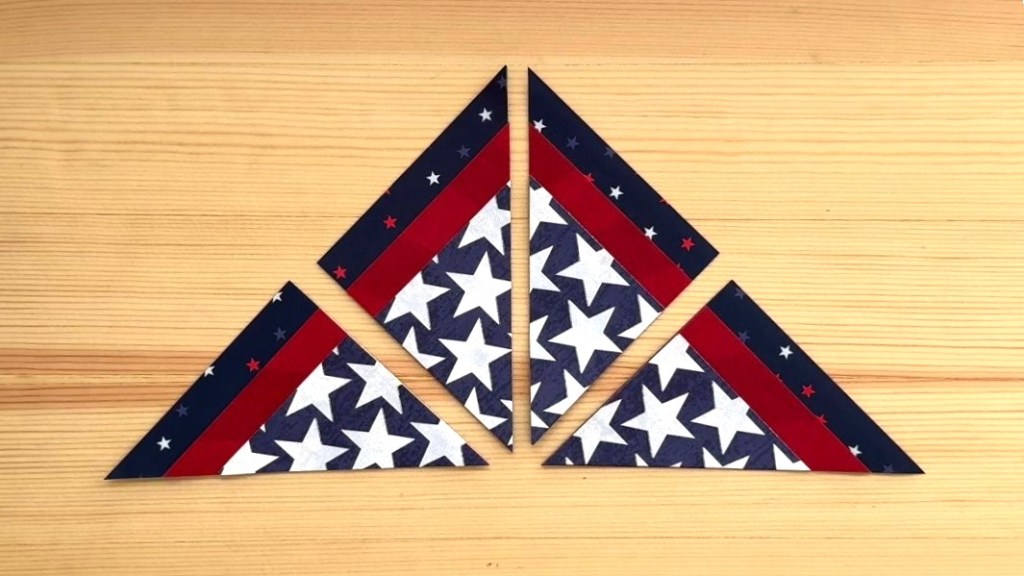
Step 3: Cut the mini stars paper to 7? x 7?, the red burst paper to 6? x 6? and the blue stars paper to 5? x 5?. Cut each piece diagonally in half and adhere on top of each other. Cut one of the triangle segments into four smaller triangles as shown.
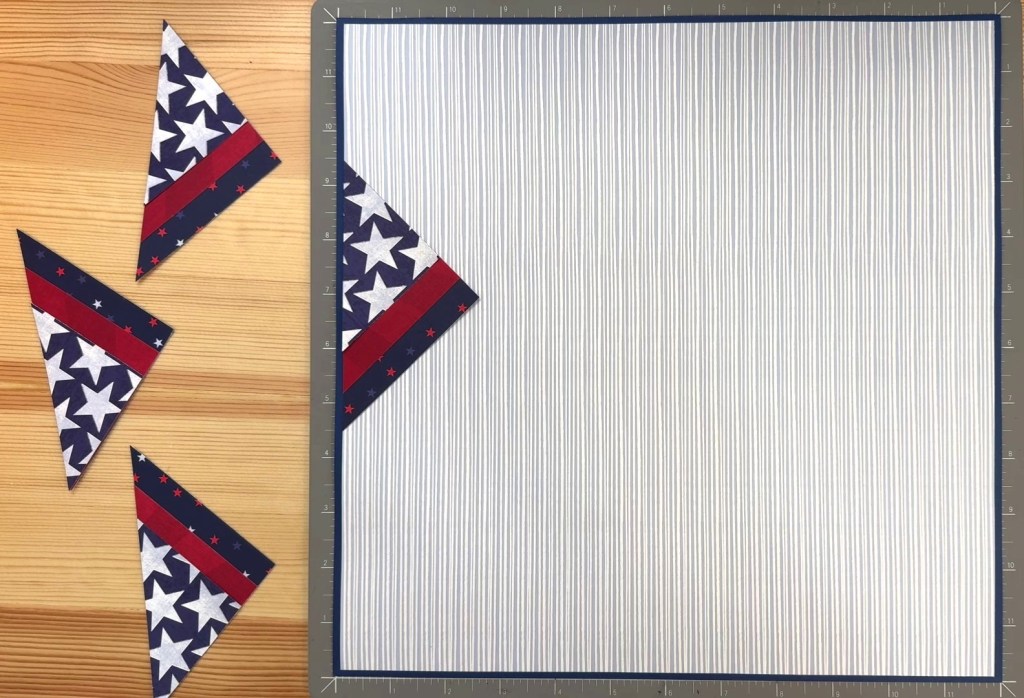

Step 4: Adhere the smaller triangle segments to the left side of the left base page, overlapping each other as shown. Trim the excess as you go. Adhere the Perfectly Patriotic XL Layered Frame Embellishment and a 4? x 4? photo mat.
Step 5: Adhere the larger triangle segment to the top middle of the right base page. Adhere the flag banner border along the triangle segment, tucking the border edge under the triangle segment. Trim the excess as you go.
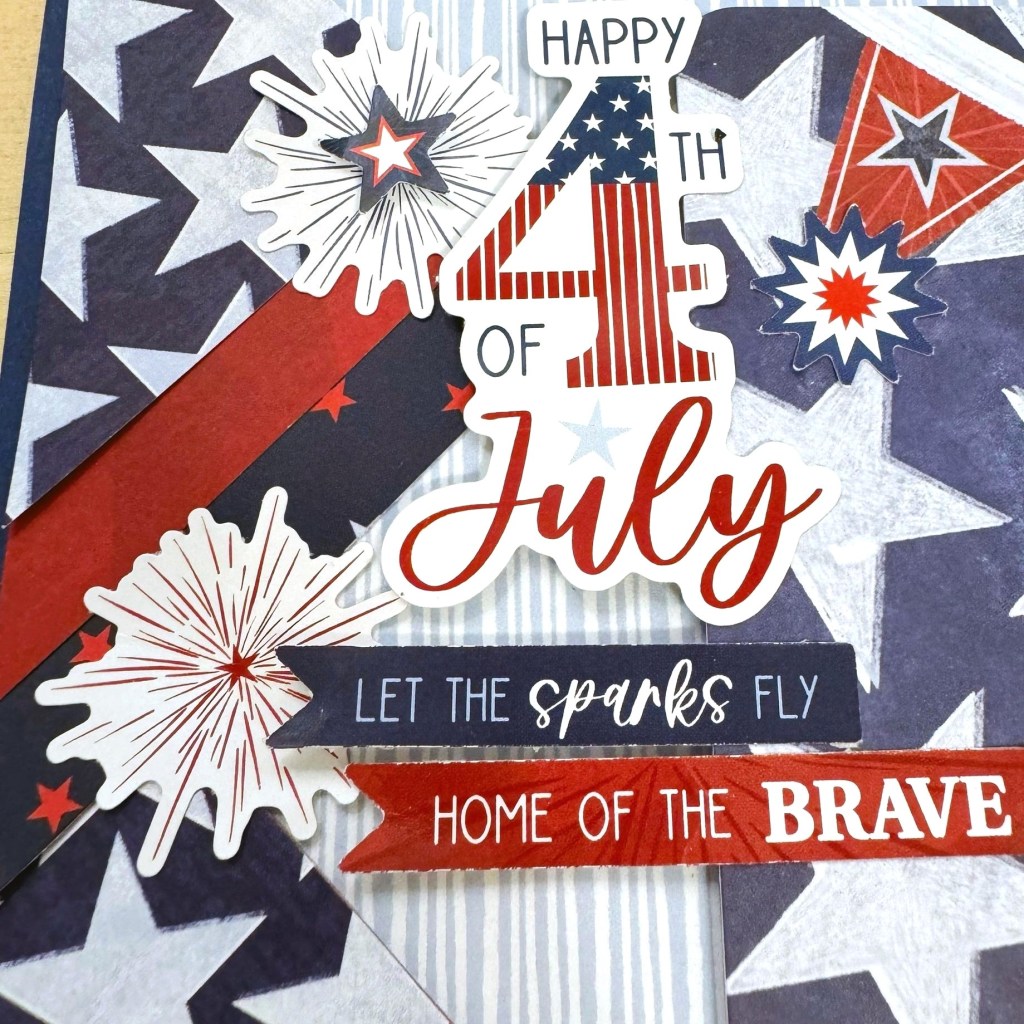
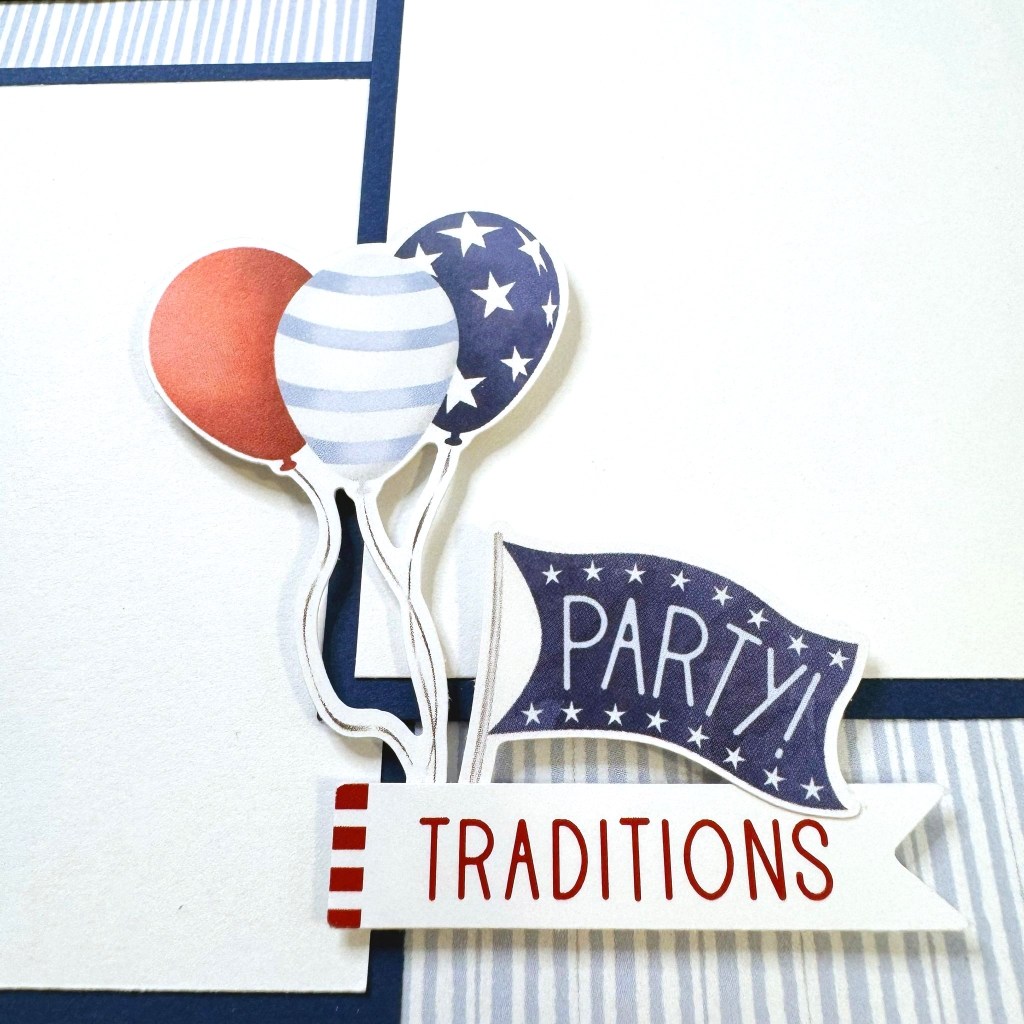
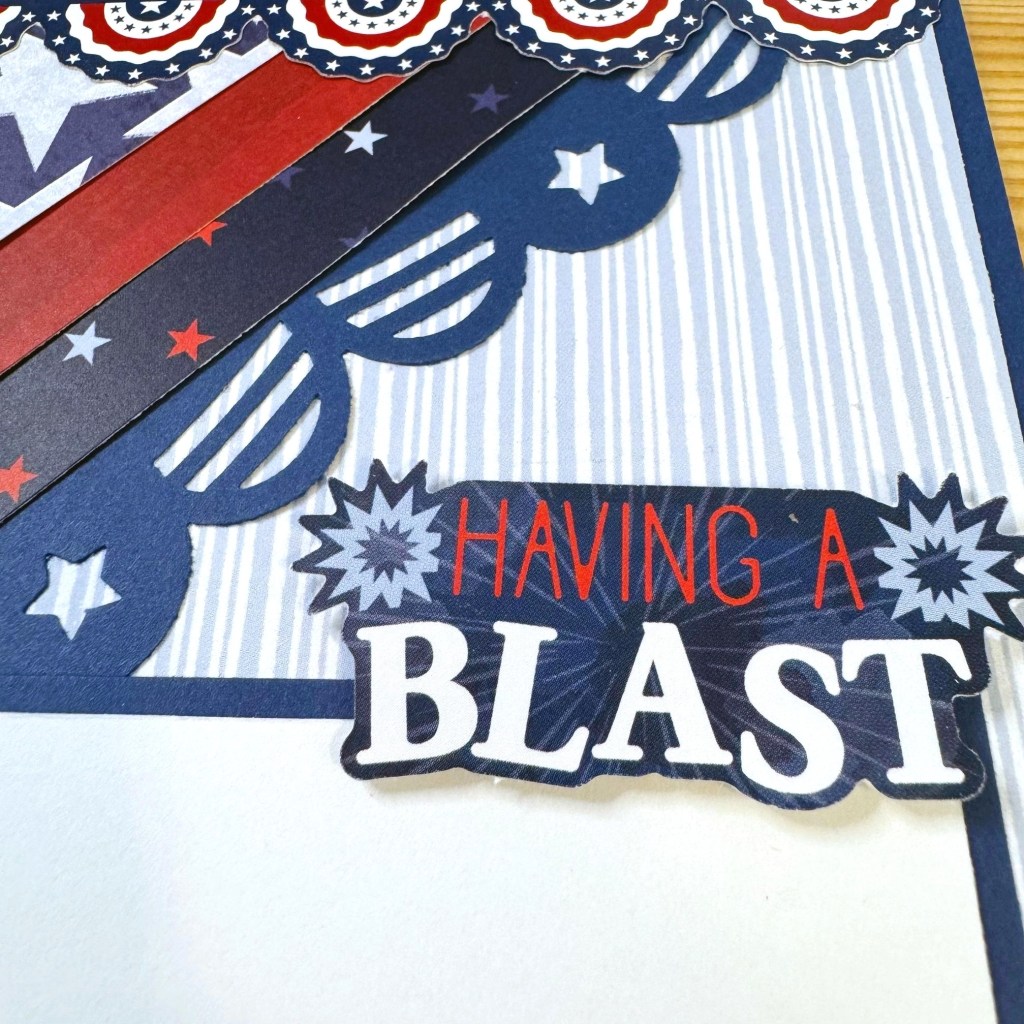
Step 6: Adhere the stickers and photo mats, using Foam Squares on some for added dimension.
What are your Fourth of July plans?
P.S. Are YOU a member of the Virtual Crop Facebook Group? It’s your go-to place for MONTHLY Virtual Crops, MONTHLY Completed Album Challenges, QUARTERLY Secret Box Openings with project tutorials and so much more! We hope you’ll join our community of more than 40,000 fellow memory-keeping enthusiasts — you’ll feel right at home!
